
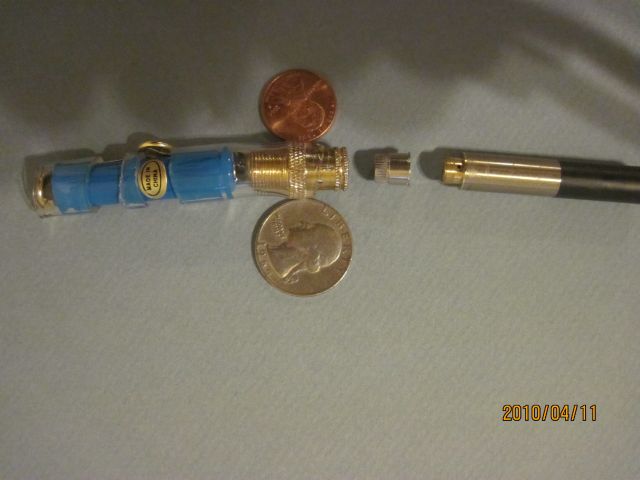
Minimal mod (5 parts, 10440)
This mod was designed to use the fewest parts and tools possible.
This mod is finicky at keeping proper positive battery contact.
Solderless. Use safety precautions and assemble at your own risk.
2 Tools needed:
knife
ruler with United States customary units
5 Parts needed:
(from Lowes)
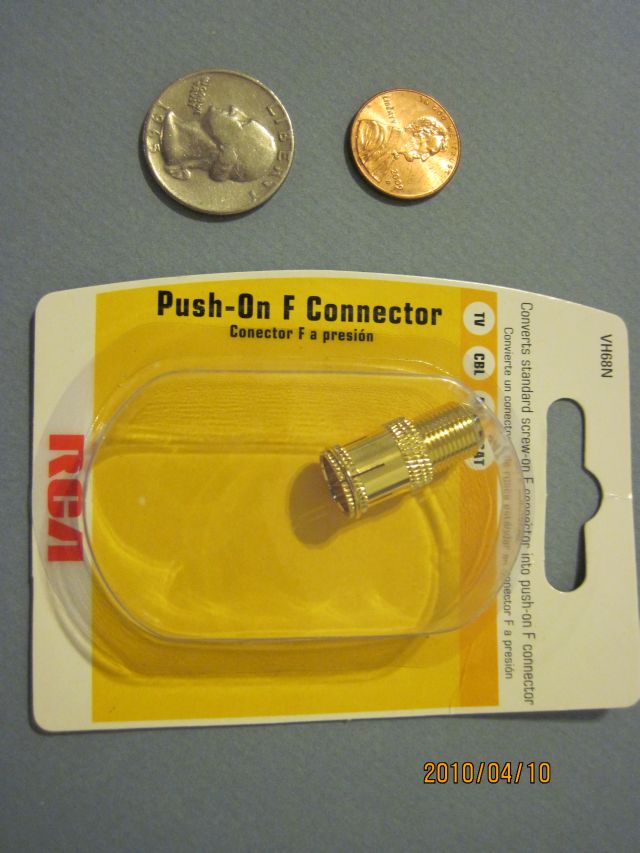
a. 1 Push-On F Connector
Not found on Lowes website. I found it near the telephone wire/jacks.
Amazon.com: RCA VH68 Push-On Connectors: Electronics
b. Plastic box of wire brads size 1/2 x 19
#532371
Shop The Hillman Group Wire Brads 19 x 1/2" at Lowes.com
(other lengths are too long/short or have too big of a head)

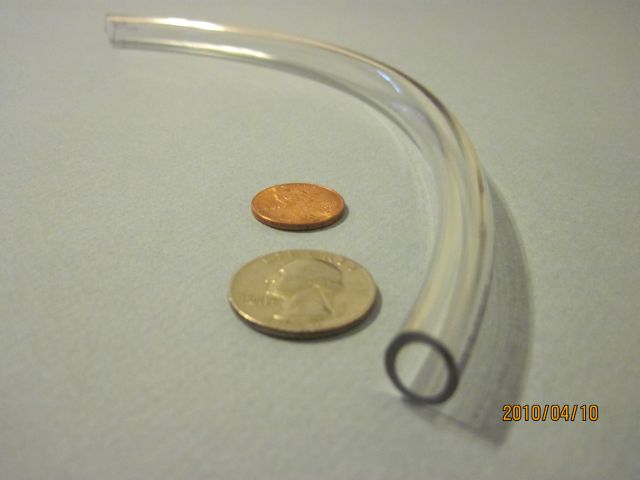
c. 1 foot 3/8 Inside Diameter clear vinyl tubing
#22273
$0.25 per foot near brass fittings and plumbing
(from Office Depot)
d. Package of 1 inch brass fasteners
Office Depot Round Head Fasteners 1 Brass Pack Of 100 by Office Depot
(Shorter fasteners are too short, I did not try longer ones)
(from madvapes.com)
e. 510 connector with hole (non-sealed)
510 Battery Connector, Assembled, Silver
This may also work for other connectors with hole besides 510.
Extra Parts to make it functional:
10440 Battery
510 atomizer & cartridge
Instructions:
01. Cut 1/2 inch piece of tubing. This secures the next piece we handle.
02. With your fingers, bend the outside end of the shorter leg of a fastener
over the top of the button in accordian fashion so that no section is wider
than the button. Do not let the leg stick out past the side of the
button. Push the accordian together as much as possible. This will
ensure good contact to the flat negative side of the battery. The
button by itself did not always make good contact.
03. Place flat negative end of battery onto the accordian leg.
04. Bend other leg in opposite direction so it is flush against the battery.
05. Push the 1/2 inch tubing piece around the fastener leg and battery
to secure the fastener in position so that the accordian end keeps
constant contact with the negative terminal side of the battery.
06. Cut 1/8 inch piece of tubing.
07. Push this piece of tubing around the other end of the battery and
push it over until it covers the top of the fastener leg.
08. Cut a 1.25 inch piece of tubing. This secures the next piece we handle.
09. Take a second fastener and flatten both legs to one side of the button.
10. Place the button of the second fastener so that it barely touches the
leg end of the first fastener (on top of the 1/8 inch tubing cover)
and flatten the legs flush against the battery toward the positive
side of the battery. Do not wrap the legs around the battery.
11. Push the 1.25 inch piece of tubing around the top positive side of
the battery and push it down so a little more than half the tubing is
sticking up to secure the second faster in position.
12. Squeeze the 1.25 inch piece of tubing so that you push the second
fastener end down about 1/16 inch so it can make better contact with
the F Connector we will attach next.
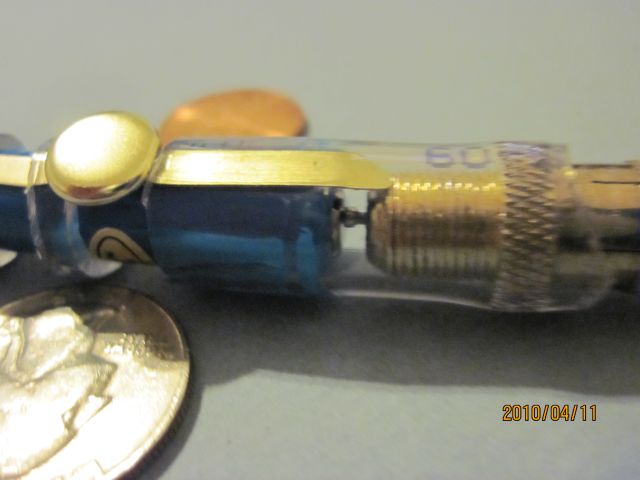
13. Insert one wire brad (nail) into bottom hole of F Connector and push
up as far as it goes (pointy end goes in first). Wire brad head will
stick out.
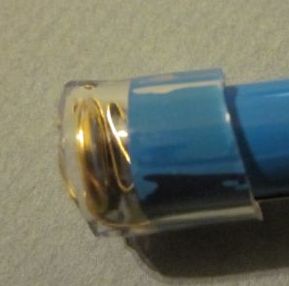
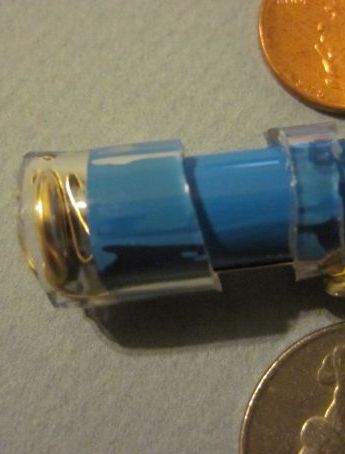
14. With pliers griped around the top ring edge, twist the F Connector
into the top open half tubing of the positive side of the battery
(wire brad first). The tubing should end up over the widest part of
the F Connector (tight fit) and the wire brad head should be touching
the positive end of the battery. Ensure the second fastener leg
touches the F Connector.
This will be the most probable spot of failure if the mod does not work.
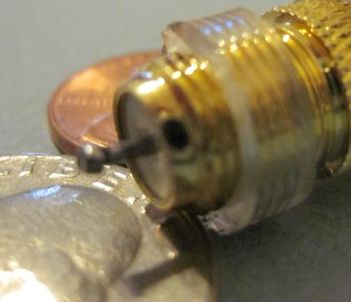
15. Attach atomizer/catomizer to 510 connecter and slide into F connector.
Note: The 510 connector is only used to make a good ground connection.
Note: The extra tubing piece in the middle of the battery is used as a "lock".
Push the tubing "lock" back so the thumb button can touch the other
fastener leg to vape. Push the tubing "lock" forward to prevent the
thumb button from touching the other fastener to "lock" it when not
in use to prevent accidental activation.
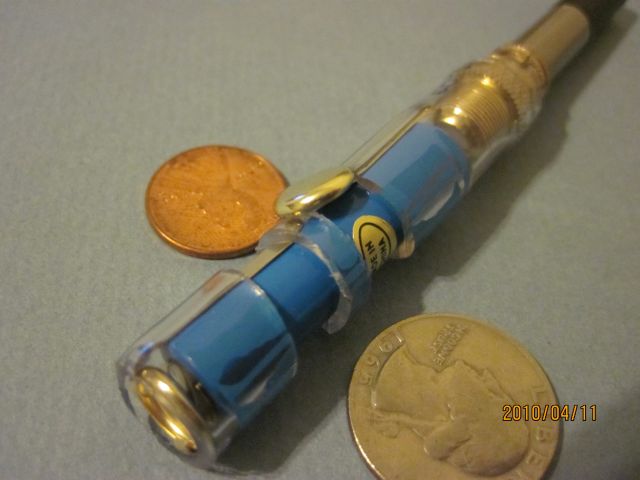
Mod completed! F Connector is mostly sealed for battery protection.
AFAIK it vapes okay, not enough experience or other PVs to compare it to yet.
This mod was designed to use the fewest parts and tools possible.
This mod is finicky at keeping proper positive battery contact.
Solderless. Use safety precautions and assemble at your own risk.
2 Tools needed:
knife
ruler with United States customary units
5 Parts needed:
(from Lowes)
a. 1 Push-On F Connector
Not found on Lowes website. I found it near the telephone wire/jacks.
Amazon.com: RCA VH68 Push-On Connectors: Electronics
b. Plastic box of wire brads size 1/2 x 19
#532371
Shop The Hillman Group Wire Brads 19 x 1/2" at Lowes.com
(other lengths are too long/short or have too big of a head)
c. 1 foot 3/8 Inside Diameter clear vinyl tubing
#22273
$0.25 per foot near brass fittings and plumbing
(from Office Depot)
d. Package of 1 inch brass fasteners
Office Depot Round Head Fasteners 1 Brass Pack Of 100 by Office Depot
(Shorter fasteners are too short, I did not try longer ones)
(from madvapes.com)
e. 510 connector with hole (non-sealed)
510 Battery Connector, Assembled, Silver
This may also work for other connectors with hole besides 510.
Extra Parts to make it functional:
10440 Battery
510 atomizer & cartridge
Instructions:
01. Cut 1/2 inch piece of tubing. This secures the next piece we handle.
02. With your fingers, bend the outside end of the shorter leg of a fastener
over the top of the button in accordian fashion so that no section is wider
than the button. Do not let the leg stick out past the side of the
button. Push the accordian together as much as possible. This will
ensure good contact to the flat negative side of the battery. The
button by itself did not always make good contact.
03. Place flat negative end of battery onto the accordian leg.
04. Bend other leg in opposite direction so it is flush against the battery.
05. Push the 1/2 inch tubing piece around the fastener leg and battery
to secure the fastener in position so that the accordian end keeps
constant contact with the negative terminal side of the battery.
06. Cut 1/8 inch piece of tubing.
07. Push this piece of tubing around the other end of the battery and
push it over until it covers the top of the fastener leg.
08. Cut a 1.25 inch piece of tubing. This secures the next piece we handle.
09. Take a second fastener and flatten both legs to one side of the button.
10. Place the button of the second fastener so that it barely touches the
leg end of the first fastener (on top of the 1/8 inch tubing cover)
and flatten the legs flush against the battery toward the positive
side of the battery. Do not wrap the legs around the battery.
11. Push the 1.25 inch piece of tubing around the top positive side of
the battery and push it down so a little more than half the tubing is
sticking up to secure the second faster in position.
12. Squeeze the 1.25 inch piece of tubing so that you push the second
fastener end down about 1/16 inch so it can make better contact with
the F Connector we will attach next.
13. Insert one wire brad (nail) into bottom hole of F Connector and push
up as far as it goes (pointy end goes in first). Wire brad head will
stick out.
14. With pliers griped around the top ring edge, twist the F Connector
into the top open half tubing of the positive side of the battery
(wire brad first). The tubing should end up over the widest part of
the F Connector (tight fit) and the wire brad head should be touching
the positive end of the battery. Ensure the second fastener leg
touches the F Connector.
This will be the most probable spot of failure if the mod does not work.
15. Attach atomizer/catomizer to 510 connecter and slide into F connector.
Note: The 510 connector is only used to make a good ground connection.
Note: The extra tubing piece in the middle of the battery is used as a "lock".
Push the tubing "lock" back so the thumb button can touch the other
fastener leg to vape. Push the tubing "lock" forward to prevent the
thumb button from touching the other fastener to "lock" it when not
in use to prevent accidental activation.
Mod completed! F Connector is mostly sealed for battery protection.
AFAIK it vapes okay, not enough experience or other PVs to compare it to yet.
