Venturi Dripping Atomizer
The Flavor-Chaser’s Dripper
The Venturi is a high end 22mm atty by a company out of Loma Linda, CA - Neovapetek. Jack is a very cool modder – great service. He offers a lifetime guarantee on everything he makes and is extremely relatable/responsive. Very refreshing to get an answer right away when you contact a vape company, and find the person who responds is excited about his product and cares about customer service! Good vibes right off the bat.

Preamble
So let’s talk about the atty. This review is written from the perspective of a sub-ohmer (not a cloud chaser per se, but a dense-vape-chaser if you will. To me, pronounced flavor is nice, but secondary to thick, rich, dense vapor – that is simply what satisfies me. That said, there are plenty of times I wish I could have the crisp, intense flavor you get from an atomizer running a 1.8 ohm coil with a tiny air hole and small chamber. The problem is, I won’t use an atty like that long before I find myself reaching for another; although I do love the flavor, I always end up going back to something I can throw a .4 ohm coil in, and open up the air to produce the burly vapor I crave. I’m definitely a rebuildable dripper aficionado; nothing else produces like a dripper.
Enter, stage left - something different… something that offers a nice middle ground. The Venturi atomizer manages to produce intense flavor with a full dripper experience without sublimating air flow or restricting build. You can get creative with your coils and go low in this atty - you’re going to get great airflow, and you’re going to “taste the rainbow.”

How does it do it? A rigorously reduced chamber by way of a chimney (think Kayfun), mated with an innovative air flow and a deep double-well resembling a Tobh or Odin Dripper. This atty merges these elements in a way we’ve not seen before… while managing to keep it attractive on the exterior.
Details
The Venturi has been meticulously designed with what the modder refers to as “Cyclops air hole placement.” The location of the air holes slightly below the coils contributes to the flavor production, while the chimney concentrates the flavor still more (as anyone who uses a Kayfun will understand).
The machining is faultless on all sections, and there was no need to do a preliminary cleaning as all parts arrived clean as a whistle. The threads are buttery smooth, and the materials all feel solid and durable.
Let’s Build it and Vape it
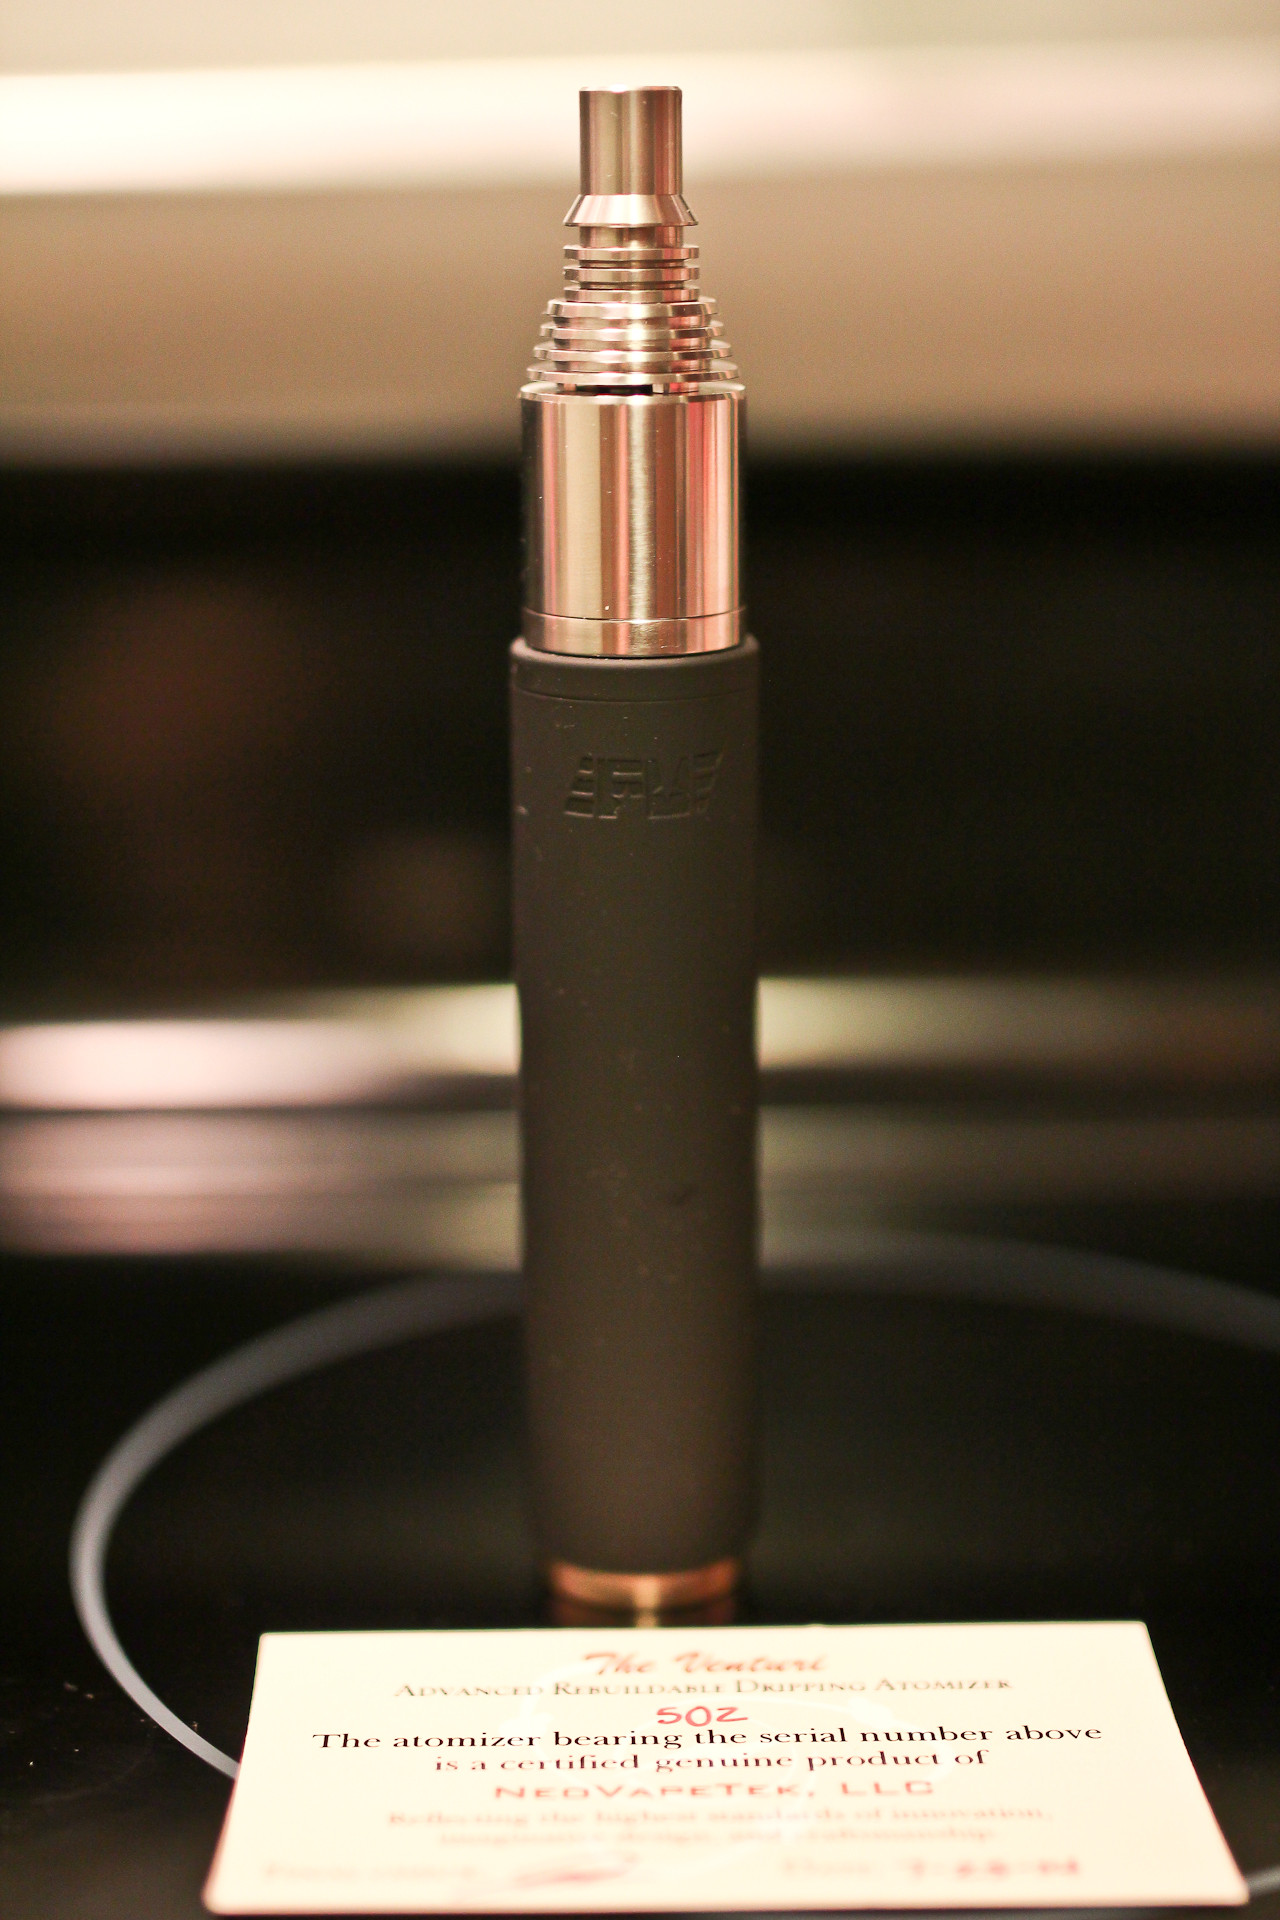
Wanted to mention: first thing I noticed about this product as I pulled the parts from the packaging is the attention to detail and workmanship. From the presentation box it comes in, to the note of authenticity and quality control, and finally, the machining and materials… you immediately know you have something of quality with this atty. Sturdy and well-built.

Also, very cool that it comes with three different top caps. I’ve been vaping each for a several days and can’t tell any substantive difference between them vape-wise; these appear to be just for aesthetics. Someone was paying attention to demand; today’s vaper wants looks as well as brains on their gear.

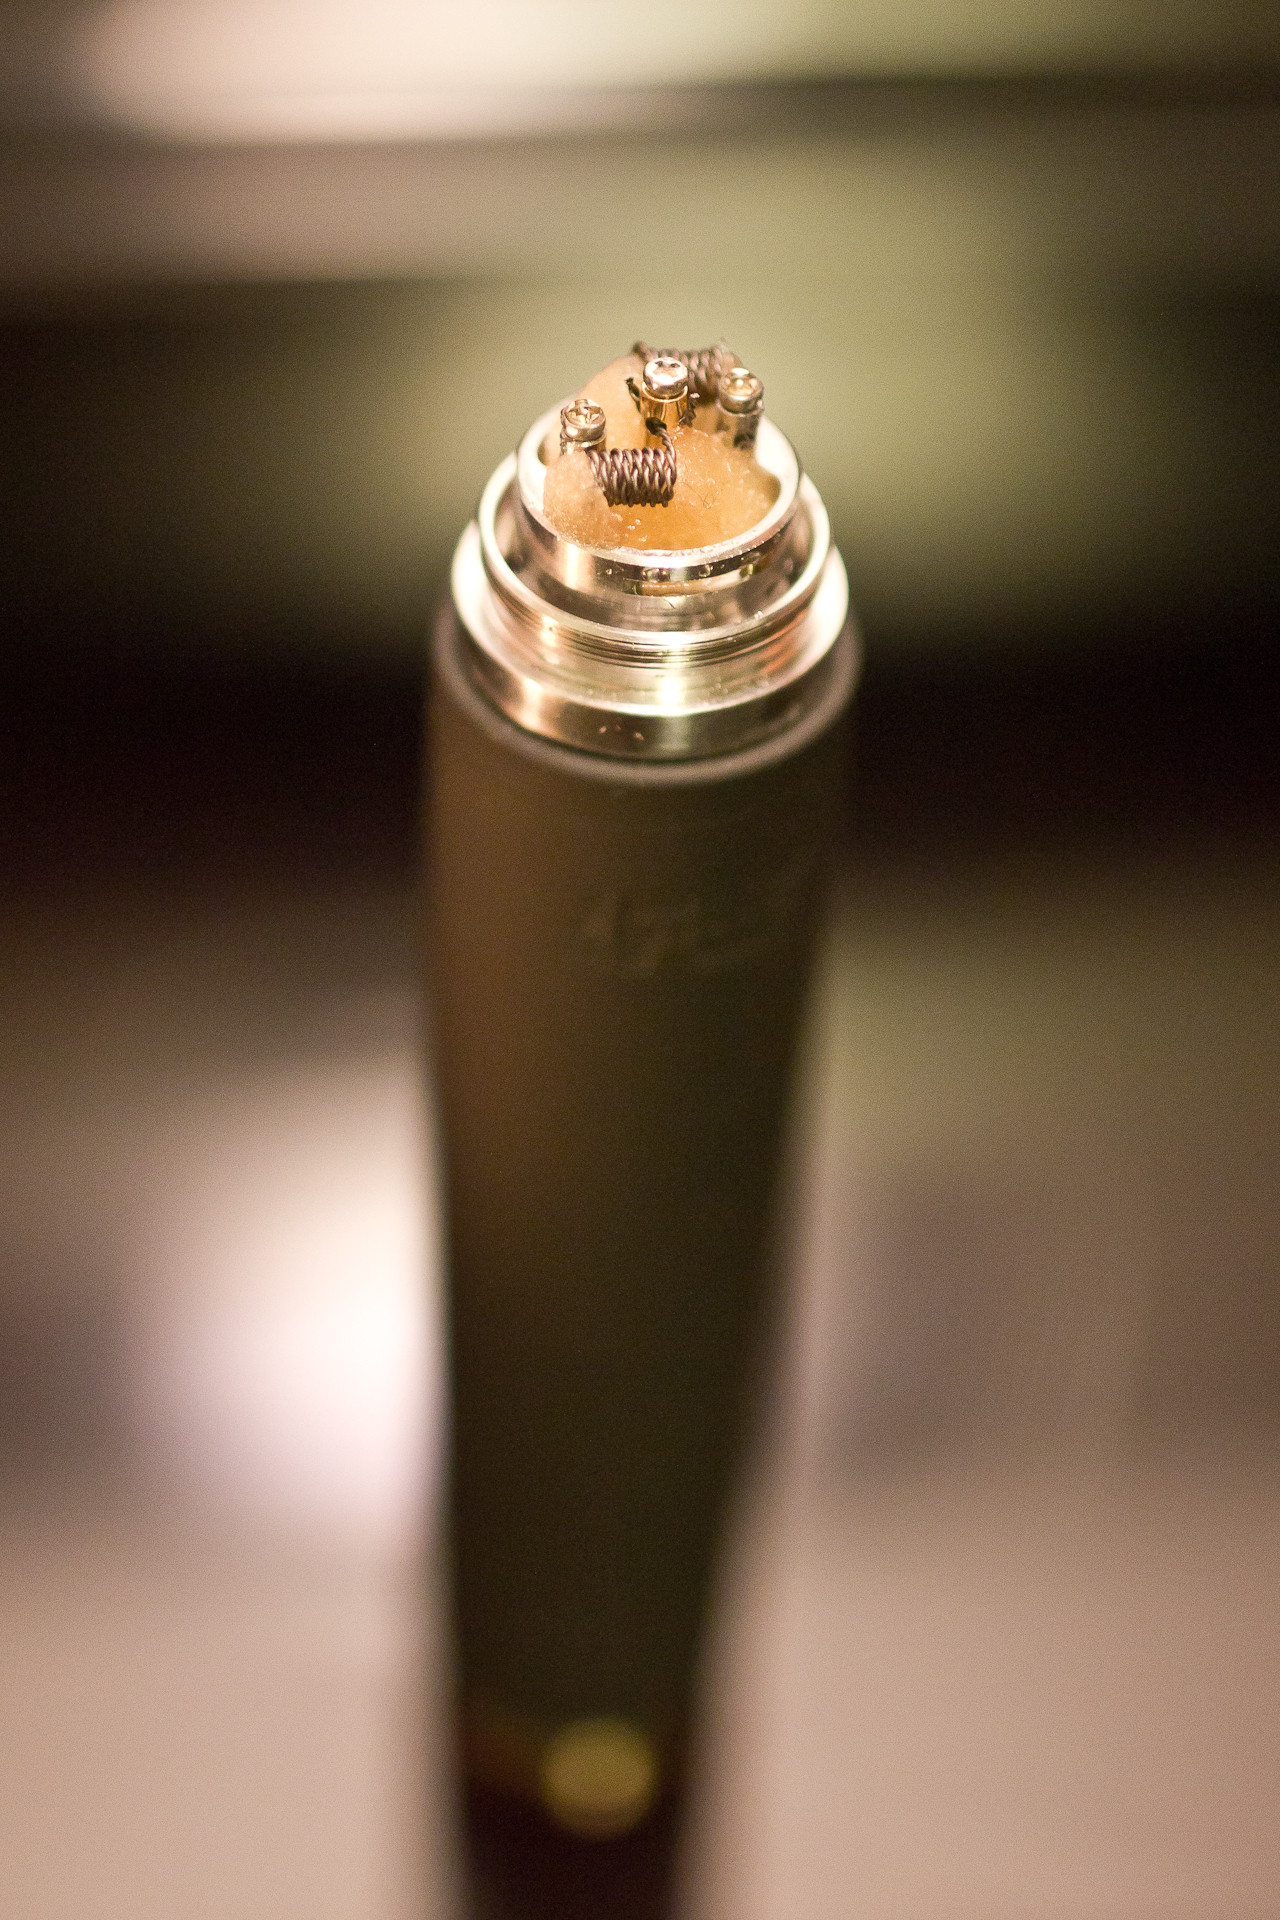
Now to the good stuff. I built out my Venturi with dual coils; the modder says you can go single, but I’m not seeing any way to shut off the airflow on one side. Two air slots on the base, and two on the chimney. So dual it is, and my build came out to .42 ohms.


Note: cool feature - the center post has two holes so you can attach both coils without having to strain for space. However, be prepared for a tiny bit of a struggle to angle the legs properly to get them in there, as the holes are not vertical to one another.

With the cotton in place, I was able to drip 20 drops into the Venturi’s sizable well.

Pop on the chimney piece (I left the air at full throttle), screw on top cap of choice, and she’s ready to go.
Note: all my drip tips fit nicely on this atty. The drip tip connects to the chimney top, so when you turn the drip tip, you adjust the airflow. This is both a good thing, and an annoyance if you forget and absent mindedly allow your drip tip to turn during use.
With alternate cap:

Vape Quality
Hard to find fault with this atomizer. The flavor is over-the-top good. I was experiencing nuances to my blood orange that I have never noticed before, and AIV’s 15 Foot Falls was by far at its best. The vapor production was not what I’d call stellar, but I have more experimentation to do to find the sweet spot. One thing I did was to push my coils down a little more into the well so they’d be as close as possible to the air slits. This improved the density and fullness of the vapor a bit. I will be trying twisted Kanthal and vertical coils as well – maybe even a quad. Lots of fun in this thing.
Final Thoughts
You’re not going to find an atty that delivers better flavor than the Venturi (hence why I nicknamed it “The Flavor-Chaser’s Dripper” (that was not from the modder). Also aesthetically, I am very happy with this atty. The price point of $135 starts looking extremely reasonable when you consider it comes with three attractive top caps.
Back to the vapor question... after a couple of weeks and four different builds, I'm still going with a description of adequate. I'll be searching for a build that really makes it sing, and will report back here when I find it. But bottom line, this is a dripper for those who value flavor over vapor production, and that said, it’s better than a Kayfun in my opinion because of the full throttle air option and the legitimate dripper design.
A couple of caveats: do not try to adjust the 510 pin. Although it has a movable flat head screw, loosening it to provide more length will result in leakage into the 510 cavity. You should fully tighten that screw before you begin to build, as the center post will turn in its seating a bit while you are tightening everything up top if the pin is not snug in place. Also – try to give yourself a little length in your coil legs so you can adjust the coils toward the outer edges and as well, push them down a bit into the well.
Aesthetics hounds will appreciate the sleek look of this atty on various high end mods, and enjoy playing with the cap combinations.


Overall Evaluation
Flavor Production 10/10
Vapor Production 7/10
Functionality 8/10
Innovation / Design 10/10
Machining & Threading 10/10
Materials and assembly 9/10
Aesthetics 8/10
The Flavor-Chaser’s Dripper
The Venturi is a high end 22mm atty by a company out of Loma Linda, CA - Neovapetek. Jack is a very cool modder – great service. He offers a lifetime guarantee on everything he makes and is extremely relatable/responsive. Very refreshing to get an answer right away when you contact a vape company, and find the person who responds is excited about his product and cares about customer service! Good vibes right off the bat.
Preamble
So let’s talk about the atty. This review is written from the perspective of a sub-ohmer (not a cloud chaser per se, but a dense-vape-chaser if you will. To me, pronounced flavor is nice, but secondary to thick, rich, dense vapor – that is simply what satisfies me. That said, there are plenty of times I wish I could have the crisp, intense flavor you get from an atomizer running a 1.8 ohm coil with a tiny air hole and small chamber. The problem is, I won’t use an atty like that long before I find myself reaching for another; although I do love the flavor, I always end up going back to something I can throw a .4 ohm coil in, and open up the air to produce the burly vapor I crave. I’m definitely a rebuildable dripper aficionado; nothing else produces like a dripper.
Enter, stage left - something different… something that offers a nice middle ground. The Venturi atomizer manages to produce intense flavor with a full dripper experience without sublimating air flow or restricting build. You can get creative with your coils and go low in this atty - you’re going to get great airflow, and you’re going to “taste the rainbow.”
How does it do it? A rigorously reduced chamber by way of a chimney (think Kayfun), mated with an innovative air flow and a deep double-well resembling a Tobh or Odin Dripper. This atty merges these elements in a way we’ve not seen before… while managing to keep it attractive on the exterior.
Details
The Venturi has been meticulously designed with what the modder refers to as “Cyclops air hole placement.” The location of the air holes slightly below the coils contributes to the flavor production, while the chimney concentrates the flavor still more (as anyone who uses a Kayfun will understand).
The machining is faultless on all sections, and there was no need to do a preliminary cleaning as all parts arrived clean as a whistle. The threads are buttery smooth, and the materials all feel solid and durable.
Let’s Build it and Vape it
Wanted to mention: first thing I noticed about this product as I pulled the parts from the packaging is the attention to detail and workmanship. From the presentation box it comes in, to the note of authenticity and quality control, and finally, the machining and materials… you immediately know you have something of quality with this atty. Sturdy and well-built.
Also, very cool that it comes with three different top caps. I’ve been vaping each for a several days and can’t tell any substantive difference between them vape-wise; these appear to be just for aesthetics. Someone was paying attention to demand; today’s vaper wants looks as well as brains on their gear.
Now to the good stuff. I built out my Venturi with dual coils; the modder says you can go single, but I’m not seeing any way to shut off the airflow on one side. Two air slots on the base, and two on the chimney. So dual it is, and my build came out to .42 ohms.
Note: cool feature - the center post has two holes so you can attach both coils without having to strain for space. However, be prepared for a tiny bit of a struggle to angle the legs properly to get them in there, as the holes are not vertical to one another.
With the cotton in place, I was able to drip 20 drops into the Venturi’s sizable well.
Pop on the chimney piece (I left the air at full throttle), screw on top cap of choice, and she’s ready to go.
Note: all my drip tips fit nicely on this atty. The drip tip connects to the chimney top, so when you turn the drip tip, you adjust the airflow. This is both a good thing, and an annoyance if you forget and absent mindedly allow your drip tip to turn during use.
With alternate cap:
Vape Quality
Hard to find fault with this atomizer. The flavor is over-the-top good. I was experiencing nuances to my blood orange that I have never noticed before, and AIV’s 15 Foot Falls was by far at its best. The vapor production was not what I’d call stellar, but I have more experimentation to do to find the sweet spot. One thing I did was to push my coils down a little more into the well so they’d be as close as possible to the air slits. This improved the density and fullness of the vapor a bit. I will be trying twisted Kanthal and vertical coils as well – maybe even a quad. Lots of fun in this thing.
Final Thoughts
You’re not going to find an atty that delivers better flavor than the Venturi (hence why I nicknamed it “The Flavor-Chaser’s Dripper” (that was not from the modder). Also aesthetically, I am very happy with this atty. The price point of $135 starts looking extremely reasonable when you consider it comes with three attractive top caps.
Back to the vapor question... after a couple of weeks and four different builds, I'm still going with a description of adequate. I'll be searching for a build that really makes it sing, and will report back here when I find it. But bottom line, this is a dripper for those who value flavor over vapor production, and that said, it’s better than a Kayfun in my opinion because of the full throttle air option and the legitimate dripper design.
A couple of caveats: do not try to adjust the 510 pin. Although it has a movable flat head screw, loosening it to provide more length will result in leakage into the 510 cavity. You should fully tighten that screw before you begin to build, as the center post will turn in its seating a bit while you are tightening everything up top if the pin is not snug in place. Also – try to give yourself a little length in your coil legs so you can adjust the coils toward the outer edges and as well, push them down a bit into the well.
Aesthetics hounds will appreciate the sleek look of this atty on various high end mods, and enjoy playing with the cap combinations.
Overall Evaluation
Flavor Production 10/10
Vapor Production 7/10
Functionality 8/10
Innovation / Design 10/10
Machining & Threading 10/10
Materials and assembly 9/10
Aesthetics 8/10
Last edited:

") Sounds like you got one of the 1.5's which came with shorter screws.
Sounds like you got one of the 1.5's which came with shorter screws.