
How cheap can you start vaping? I don't mean a ten-dollar disposable -- I mean a fully-functional PV that is as light on the wallet as possible.
This was the impetus behind my Low-Cost mod: to come up with a PV that can be used without straining the bank accounts of students, as well as those who have been hit hard by the economy. Smoking is a pricey pastime, and a PV that saves money is a powerful incentive to start vaping. Developing my LCM was so much fun, I couldn't resist sharing the process and the results with you.
Part One: Theory
I began with a set of criteria, viz.,
1.) Have the lowest initial starting cost. If you can buy an e-cig cheaper, there's no use to go to the effort to make one from scratch.
2.) Go from "zero to vape" with the lowest total cost possible -- no add-on costs or items needed before the first puff; i.e., the initial cost should be very close to the total cost.
3.) Wearing components are rebuildable rather than replaceable. Once it's made, there should be no further regular cash outlay to continue vaping.
4.) Uncompromising quality for the price. If it's weak, fragile, or shoddy, it's false economy. It should last as close to forever as possible.
5.) Use common components easily available online: no cheating by re-using something around the house, or building components from scratch that the average guy can't do on his own with basic tools.
I then made a list of preferences:
1.) I don't want it to look like a tobacco product.
2.) I do want it to be simple.
3.) I want to be able to use it all day without trouble.
4.) I want it to sit solidly on a desk.
5.) And I don't want voltage fade over time: no batteries or chargers to deal with, wear out, or buy. I'm a sedentary vaper, either in a lounger or at my desk, so being hardwired doesn't bother me.
If we reduce the PV to its most severe essentials, we have a moistened resistance heater, powered by an electric current, activated by a switch -- and that's all.
The first thing to determine is just how much voltage we'll need. Most atomizers are somewhere between two and three ohms, and we want to burn about six or seven watts for good vapor. Roughly, (taking the middle values,) two and a half ohms at six and a half watts pulls about four volts. Using Ohm's law, let's check the numbers at four volts for various atomizer ratings:
a 1.5 ohm atomizer at four volts draws 2.68 amps and 10.74 watts,
a two ohm atomizer at four volts draws two amps and eight watts,
a 2.5 ohm atomizer at four volts draws 1.59 amps and 6.37 watts, and
a three ohm atomizer at four volts draws 1.31 amps and 5.23 watts.
So, let's look at the the simplest electrical solution to get us four volts: plugging straight into the wall with a power resistor to choke the voltage down:

Obviously, this poses some problems. Although a 2.8 ohm atomizer is happily humming along at five and three-quarter watts, the necessary 81 ohm power resistor that dissipates 166 watts is ridiculously large and expensive:

More serious, though -- a short-circuit to mains voltage can kill you quite dead. What we need is a tapped isolation transformer, to separate the working voltage from the mains voltage, and reduce the output voltage to where we need it:

Alas, although isolation transformers were cheap and plentiful in the days of garage radio tinkering, the nearest equivalent today is a doorbell transformer:

It can get you down to eight volts, and then down to four by either putting a resistor, in series, of the same rating as the atomizer, or by cracking it open and re-tapping it. Although you can pick one up at a hardware store for $15-20, there's a cheaper, easier alternative: the good old fashioned wall-wart. It will give isolated, bridge-rectified DC voltage, in a self-contained and cheap package. We can thus simplify our schematic to just this:

The simplest PV, then, is nothing more than a wall-wart power supply that outputs four volts and two amps, wired through a switch directly to an atomizer.

And they're cheap! Amazon carries several versions, from $9-12 with free shipping. But is it the cheapest and best option? If you find the right bargain, it certainly can be. The main benefit is that it will push a constant four volts through any atomizer, without any other electrical wizardry necessary. (If you use a 4.2V version, even better: it will give you an extra three-quarters of a watt at the atomizer.) But you can save still more:

Twelve volt power supplies are much more common than the four volt versions, and can sometimes be had for even less money.

I found a 12V 3A power supply on Amazon that sold for five dollars and free shipping...

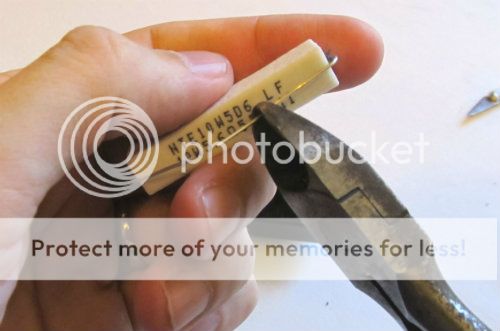
...but it will require a cermet power resistor, available on Ebay for a dollar and change through Radio Shack-- still, half the price of a four volt supply! (Dealing with a 12 volt input has a bonus of being compatible with automobile cigar lighters, as well, giving the possibility of driving while your LCM is plugged-in -- but that involves buying more stuff, so we'll leave that for now.)
The trade-off is that the voltage won't be a constant value for all atomizers, so your power resistor needs to be properly rated, to work acceptably with a range of atomizers. To get four volts at the atomizer, use a resistor that is double your preferred atomizer rating, with enough heat dissipation to handle the wattage. Since my atomizers will be within 2.5 - 3 ohms, there are a couple good options through good old Radio Shack. A 5.6 or 5.1 ohm, 10 watt resistor (that is, double the ohms of a 2.8 or 2.6 ohm atomizer) will give acceptable performance in the 2-3 ohm range. The resistor's power dissipation may be a touch over 10 watts, but the intermittent nature of vaping shouldn't make that an issue.
So, with the power requirements sorted, we'll assemble all the necessary hardware.
The necessary small print: although we aren't using exploding batteries or lethal voltages, use common sense. Voltages can zap you, soldering irons can burn you, and adhesives can stick your fingers together....but this isn't rocket science -- I know little more than the "electron pump" theory of circuits, and if I can do it, etc.
This was the impetus behind my Low-Cost mod: to come up with a PV that can be used without straining the bank accounts of students, as well as those who have been hit hard by the economy. Smoking is a pricey pastime, and a PV that saves money is a powerful incentive to start vaping. Developing my LCM was so much fun, I couldn't resist sharing the process and the results with you.
Part One: Theory
I began with a set of criteria, viz.,
1.) Have the lowest initial starting cost. If you can buy an e-cig cheaper, there's no use to go to the effort to make one from scratch.
2.) Go from "zero to vape" with the lowest total cost possible -- no add-on costs or items needed before the first puff; i.e., the initial cost should be very close to the total cost.
3.) Wearing components are rebuildable rather than replaceable. Once it's made, there should be no further regular cash outlay to continue vaping.
4.) Uncompromising quality for the price. If it's weak, fragile, or shoddy, it's false economy. It should last as close to forever as possible.
5.) Use common components easily available online: no cheating by re-using something around the house, or building components from scratch that the average guy can't do on his own with basic tools.
I then made a list of preferences:
1.) I don't want it to look like a tobacco product.
2.) I do want it to be simple.
3.) I want to be able to use it all day without trouble.
4.) I want it to sit solidly on a desk.
5.) And I don't want voltage fade over time: no batteries or chargers to deal with, wear out, or buy. I'm a sedentary vaper, either in a lounger or at my desk, so being hardwired doesn't bother me.
If we reduce the PV to its most severe essentials, we have a moistened resistance heater, powered by an electric current, activated by a switch -- and that's all.
The first thing to determine is just how much voltage we'll need. Most atomizers are somewhere between two and three ohms, and we want to burn about six or seven watts for good vapor. Roughly, (taking the middle values,) two and a half ohms at six and a half watts pulls about four volts. Using Ohm's law, let's check the numbers at four volts for various atomizer ratings:
a 1.5 ohm atomizer at four volts draws 2.68 amps and 10.74 watts,
a two ohm atomizer at four volts draws two amps and eight watts,
a 2.5 ohm atomizer at four volts draws 1.59 amps and 6.37 watts, and
a three ohm atomizer at four volts draws 1.31 amps and 5.23 watts.
So, let's look at the the simplest electrical solution to get us four volts: plugging straight into the wall with a power resistor to choke the voltage down:
Obviously, this poses some problems. Although a 2.8 ohm atomizer is happily humming along at five and three-quarter watts, the necessary 81 ohm power resistor that dissipates 166 watts is ridiculously large and expensive:
More serious, though -- a short-circuit to mains voltage can kill you quite dead. What we need is a tapped isolation transformer, to separate the working voltage from the mains voltage, and reduce the output voltage to where we need it:
Alas, although isolation transformers were cheap and plentiful in the days of garage radio tinkering, the nearest equivalent today is a doorbell transformer:
It can get you down to eight volts, and then down to four by either putting a resistor, in series, of the same rating as the atomizer, or by cracking it open and re-tapping it. Although you can pick one up at a hardware store for $15-20, there's a cheaper, easier alternative: the good old fashioned wall-wart. It will give isolated, bridge-rectified DC voltage, in a self-contained and cheap package. We can thus simplify our schematic to just this:
The simplest PV, then, is nothing more than a wall-wart power supply that outputs four volts and two amps, wired through a switch directly to an atomizer.
And they're cheap! Amazon carries several versions, from $9-12 with free shipping. But is it the cheapest and best option? If you find the right bargain, it certainly can be. The main benefit is that it will push a constant four volts through any atomizer, without any other electrical wizardry necessary. (If you use a 4.2V version, even better: it will give you an extra three-quarters of a watt at the atomizer.) But you can save still more:
Twelve volt power supplies are much more common than the four volt versions, and can sometimes be had for even less money.
I found a 12V 3A power supply on Amazon that sold for five dollars and free shipping...
...but it will require a cermet power resistor, available on Ebay for a dollar and change through Radio Shack-- still, half the price of a four volt supply! (Dealing with a 12 volt input has a bonus of being compatible with automobile cigar lighters, as well, giving the possibility of driving while your LCM is plugged-in -- but that involves buying more stuff, so we'll leave that for now.)
The trade-off is that the voltage won't be a constant value for all atomizers, so your power resistor needs to be properly rated, to work acceptably with a range of atomizers. To get four volts at the atomizer, use a resistor that is double your preferred atomizer rating, with enough heat dissipation to handle the wattage. Since my atomizers will be within 2.5 - 3 ohms, there are a couple good options through good old Radio Shack. A 5.6 or 5.1 ohm, 10 watt resistor (that is, double the ohms of a 2.8 or 2.6 ohm atomizer) will give acceptable performance in the 2-3 ohm range. The resistor's power dissipation may be a touch over 10 watts, but the intermittent nature of vaping shouldn't make that an issue.
So, with the power requirements sorted, we'll assemble all the necessary hardware.
The necessary small print: although we aren't using exploding batteries or lethal voltages, use common sense. Voltages can zap you, soldering irons can burn you, and adhesives can stick your fingers together....but this isn't rocket science -- I know little more than the "electron pump" theory of circuits, and if I can do it, etc.


")

