Sigelei #19 Tips, tricks, and DON'Ts

Status
Not open for further replies.

Oktyabr

Ultra Member
ECF Veteran
Verified Member
Apr 12, 2009
1,209
1,811
Next to the ocean, WA
oktyabr.wordpress.com
Hi!

I'm starting this thread because our beloved sigelei mech thread is growing like an out of control brush fire... posts are buried, posts that should be about a specific model are mashed up with other ones, etc. New posters don't bother to read all 150+ pages so the same questions are getting asked over and over again. Feel free to contribute to this one, if you like!
 

Oktyabr

Ultra Member
ECF Veteran
Verified Member
Apr 12, 2009
1,209
1,811
Next to the ocean, WA
oktyabr.wordpress.com
I've had my #19 for a week or so now and love it. It was a pain to modify, compared to the #8 which I also have, but once tinkered with again hits like a BEAST. I'm not sure about the "right" way to measure voltage drop across a mod outside of using one of those inline meters which I don't have yet. I know the specific battery and atty makes a big difference in measuring "true" voltage drop but all I have is a cheap multi-meter. That said both my #19 and #8 show exactly the same voltage (to two decimal places) when checked at the 510 connection as the battery does when it is out of the mod. This can't be all bad, right?

Anyway... the first thing I did was get rid of the top magnet. This wiggled out pretty easily from the delrin with a pair of pliers. I pulled the brass screw that was found underneath it and replaced it with a new one I found at my local hardware store by simply letting it cut it's own threads into the delrin. Works perfect! I might need to grind it down just a *bit* more to make it so the #19 can be used with an 18350 and "no gap" in the telescoping section. I run it mostly in 18650 mode now and of course that's fine too.

Here is a photo:


Oktyabr

Ultra Member
ECF Veteran
Verified Member
Apr 12, 2009
1,209
1,811
Next to the ocean, WA
oktyabr.wordpress.com
Next up was the spring in the switch. I'd still love to find a brass/copper "hot spring" to try here but I've found that even the steel spring that it comes with can be tweaked to work better. I actually used a spring I found at my local hardware store that is *identical* to the stock one, except it is perhaps 1/4 of an inch longer. I think this would work with the stock one too, in a pinch.

I took a pair of needle nose pliers and stretched the top most coils, furthest from the bottom, in effect making the top half of the spring slightly wider. It takes physical effort now to insert the spring inside the button assembly... not much but it's now large enough that at least part of the spring is *always* in solid contact with the locking ring and thus the rest of the button assembly. This worked great and got rid of the occasional "hot button" and misfires I was having. The only problem I ran into is that if I used the lock sometimes the very top most coil would then get trapped between the lock and the delrin, preventing the lock from screwing all the way back in again. A little more work with the pliers and I fixed that too. The spring is now sort of egg shaped, a bit wider in the mid section than at either end. I smeared a dab of Ox-Gard on the inside face of the locking ring as well:


Oktyabr

Ultra Member
ECF Veteran
Verified Member
Apr 12, 2009
1,209
1,811
Next to the ocean, WA
oktyabr.wordpress.com
DON'T try and use heat to remove that bottom magnet *without* removing the brass post from the delrin!!!!

Yeah, I know... Common sense, right? Well... let's just say my delrin suffered a mishap in the name of science ;)

I actually tried to wiggle it out with pliers, as I had seen on the tube and read about from others. My magnet would NOT budge. Ok... so just a touch of heat, right? Whipped out the old bic lighter and gave it a quick pass or two under the magnet. The delrin melted like a snow flake hitting hot steel! 8-o

I've managed to rebuild some of the melted delrin with a hot glue gun, and it worked(!!!), but intend to go parts shopping at my local hardware store for at least a grommet or nylon washer that can go between the bottom of the battery and the delrin firing pin well.

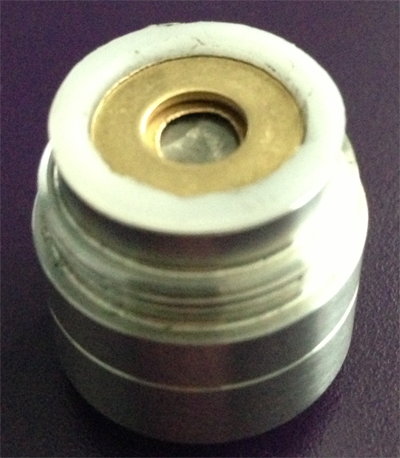
Next I tackled the magnet again (since I'd already heated it) with a bigger, better pair of pliers. Rather than coming all the way out the top most half of the magnet split from the bottom part still inside it's cozy, brass hidey hole like a kid taking apart an Oreo cookie leaving me with a magnet that was almost flush with the brass. :facepalm:

I tried not one but THREE titanium drill bits (it destroyed them all), I tried a hammer and a cold chisel, I eventually even tried pitching it against a concrete wall out of frustration!!! Finally I figured it out ;)

TIP: To remove the bottom magnet (this will ruin it so consider yourself warned), while holding just the BRASS piece (no delrin!!) in a pair of pliers I heated the magnet with a butane hobby torch until it was just starting to glow a bit in the center... then I quickly stuck it under a faucet of cold water. It made a *POP* sound and the magnet had actually popped out of the brass fitting, on one side, making it easy to remove it the rest of the way once it had cooled. I cleaned up the socket it had sat in with some light sand paper followed by a quick alcohol rinse (to remove any glue) and viola!
 
Last edited:

Oktyabr

Ultra Member
ECF Veteran
Verified Member
Apr 12, 2009
1,209
1,811
Next to the ocean, WA
oktyabr.wordpress.com
OK! On to the interesting part...

So, I finally got the bottom magnet out and the brass holder for it cleaned up and ready to go. What next? I know others have drilled and tapped this brass part so it can accept a short brass screw/bolt to make it all brass to battery connection. I planned on doing this, after making the appropriate trip the hardware store (again! One of the clerks teases me about how much I am in there with "Hey man... all you need now is a name tag (like the employees wear)" ;)

BUT it was late last night I got it prepped and I thought, what the heck... let me try something else first. I dug out a brass nut that *just* fits inside the cup where the magnet used to live. I double checked the clearance when the button was pushed and everything. A perfect fit. Then I dug through my box of "junk I buy but never use" and found a tube of "Conductive Wire Glue" from Radioshack. A dab of this in the bottom of the cup to keep the brass nut in place and I let it dry over night. NICE! This particular "glue" contains aluminum oxide as a conductive agent and a very thin layer of it, to keep the nut in place, doesn't seem to have hindered connectivity at all, as far as I can tell. VERY strong too! I'll probably pass on buying a new drill bit, tap set and brass bolt for the time being because this solution vapes THAT well. Should still be easy to bust out of there if I decide to really roll up my sleeves for what has now become "option B".

I might still try and fill the inside of the nut with some silver solder I have but I doubt I'll be able to detect much improvement by how it vapes!

Don't let the ugly delrin repair scare you. It's not pretty but it works. ;)


Oktyabr

Ultra Member
ECF Veteran
Verified Member
Apr 12, 2009
1,209
1,811
Next to the ocean, WA
oktyabr.wordpress.com
Still haven't been able to source *any* piece of plastic that might thread in place of that delrin bit, with a sealed end I could drill a hole in for the brass button shaft. Picked up quite the assortment of nylon washers and such and one rubber plug I thought might work but in the end redid my hot glue job, more carefully this time, and trimmed it down to size with an xacto knife.

Not factory... which bugs me, but at least it works :)
 

mrfixit

Senior Member
ECF Veteran
Verified Member
Oct 28, 2012
216
117
60
Akron, Ohio
Great job with posting descriptions of what you encountered while doing all this. I love tinkering with things and I understand completely the frustration and disappointment when something goes wrong in process. People get upset when they get these devices and it turns out not to work perfect. Think about this though they are called mods meaning you may have to modify it to your liking. Overall I think the manufacturers are getting better at quality control only time will tell on the front. I am currently waiting to receive my #19 I pre ordered from exhale vapors and supposedly I'll be getting an improved version of it? I'll definitely let you know if it is and I'm sure I'll have to do something to it. Thanks to you though I now have some ideas on how to get it done.
 

NGAHaze

Infinity Member
Supporting Member
ECF Veteran
Verified Member
Dec 13, 2010
4,326
19,839
Georgia
I was looking at a piece of 1/2'' pex that seemed like it might have enough room to countersink the brass connector into however a lip would still be needed in order to keep it above the cap and provide isolation. Perhaps a nylon washer could be attached to that to provide the lip. This wouldn't thread into the cap like the delrin does but is that really necessary since the spring will provide tension? Maybe I've overlooked something there but it's at least something to think about right? :)

Ideally I'd like to have a spare delrin insert because frankly, I see that as a potential weakness in the long term, well either a backup piece or some other method of achieving the same effect. I'm assuming the delrin is threaded there to take off some of stress that the spring is creating but that could still become a problem down the road potentially. I just don't trust plastic to hold up. If that piece were metal with just the interior lined with delrin (or whatever would make a good isolator) I'd feel better about it.

Oh well, just rambling ... :vapor:
 

Oktyabr

Ultra Member
ECF Veteran
Verified Member
Apr 12, 2009
1,209
1,811
Next to the ocean, WA
oktyabr.wordpress.com
If that piece were metal with just the interior lined with delrin (or whatever would make a good isolator) I'd feel better about it.

Yeah, I've been thinking in this direction too. Actually the only part that needs to be delrin, or non-conductive anyway, is just an o-ring between the battery and the switch to keep the battery from grounding out. The rest of the switch could be solid metal and it wouldn't make a bit of difference.

Of course I've looked at pex, all the copper and brass plumbing, rubber, even the pvc isle... but nothing jumps off the shelf like "Oi!!! Try me!" :unsure:

Could try a different bolt in place of that plunger too but this off the wall threading they use makes it difficult.
 

NGAHaze

Infinity Member
Supporting Member
ECF Veteran
Verified Member
Dec 13, 2010
4,326
19,839
Georgia
I wish I had a mini lathe. If I did, I'd just take a piece of 3/4'' and 1/2'' pex, combine them (insert and affix 1/2'' into the 3/4'') and then cut down to size as needed. Once sized appropriately, I think you could use the switch to cut the threads on the pex, if it even needed to be threaded.
 

Oktyabr

Ultra Member
ECF Veteran
Verified Member
Apr 12, 2009
1,209
1,811
Next to the ocean, WA
oktyabr.wordpress.com
I wish I had a mini lathe. If I did, I'd just take a piece of 3/4'' and 1/2'' pex, combine them (insert and affix 1/2'' into the 3/4'') and then cut down to size as needed. Once sized appropriately, I think you could use the switch to cut the threads on the pex, if it even needed to be threaded.

Sounds like we need to start scouring the web for a cheap mini lathe capable of tooling plastic :D
 

Br4ndon

Full Member
Jan 18, 2013
19
10
Denver
Hi!

I'm starting this thread because our beloved Sigelei mech thread is growing like an out of control brush fire... posts are buried, posts that should be about a specific model are mashed up with other ones, etc. New posters don't bother to read all 150+ pages so the same questions are getting asked over and over again. Feel free to contribute to this one, if you like!

Thanks you SOO much for starting this thread.

My head was spinning from all of the information in the other Sigelei post.
 

Oktyabr

Ultra Member
ECF Veteran
Verified Member
Apr 12, 2009
1,209
1,811
Next to the ocean, WA
oktyabr.wordpress.com

slatronic

Full Member
Apr 8, 2013
26
30
Georgia
As far as mini lathes go there are a few. Harbor Freight sells a small one. Sherline also has a nice mini lathe. I have one at work that we use for small parts and its actually what I used to work on my #19. There is also Taig tools. They also have a nice micro lathe. I think these all cost around $500-$600. Not sure if that fits in most peoples budgets. You can usually find a 20% off coupon for Harbor Freight which would be a nice savings. The Sherline and the Taig are made in USA. They are definitely not pick up and start making parts though. Definitely a bit of a learning curve but a great skill none the less. Threading is the other question. You may need some attachments for that. Also if you get really adventurous you can CNC them and make some really cool parts.

http://www.harborfreight.com/7-inch-x-10-inch-precision-mini-lathe-93212.html

Sherline 4000/4100 Lathes

Taig Tools - Desktop Milling Machines and Lathes.
 

Br4ndon

Full Member
Jan 18, 2013
19
10
Denver
I shattered the top off of my switch magnet while trying to unscrew the brass from the button.

So I had to grind down the magnet to at least be flush with the brass:

Untitled-1.png


And, now use a couple of brass washers to make contact:

Untitled-2.png


I don't get many misfires, but the spring is still to resistant, and wears on my pinky finger.

I might try to boil the switch base, and try to twist on the delfrin... but I am afraid I might ruin it.

As a back up to the Delfrin... how about coating the switch housing and top with this stuff?

Plastidip_Liquid_Electrical_Tape_Aerosol_Spray_Black2.jpg


More info here
 

Oktyabr

Ultra Member
ECF Veteran
Verified Member
Apr 12, 2009
1,209
1,811
Next to the ocean, WA
oktyabr.wordpress.com
Nice!

I'm curious how you got those washers to stay in there?

Look back at my "Tip" post if you want to know how I got my sheared off magnet out of there. ;)

Really the only important part of that delrin is the very top most ring of it. This keeps the bottom of the battery from making contact with metal and completing the circuit. The secondary function is to keep that delrin cup from spinning if the switch spins which can cause the spring to spin, which in turn can make that delrin cup spin in or out of the threads. That lip keeps it from spinning further in towards the bottom of the switch.

Of course the lower "cup" part helps to stabilize the firing pin too, by keeping it centered, but that could be made of metal or whatever as well, as long as it does it's job.

Really a metal washer could replace the bottom of that delrin cup, if there were a way to attach it. You could use a nylon/plastic washer or sorts at the top to keep the bottom of the battery from grounding out, again... if there is a way to attach it. I'm sure someone more clever than me will eventually find a way to replace that delrin cup altogether! But I'm still working on it myself until that time comes ;)
 
Status
Not open for further replies.

Users who are viewing this thread