Upgrade Vapor Flask clone to real dna 40 need help

Status
Not open for further replies.

Fearlessleader

Senior Member
ECF Veteran
Verified Member
Sep 11, 2014
296
179
61
Portland TN USA
300456-36fbfc31fa320856c44104be785daf0c.jpg

My vapor flask 510 connector backed out and shorted the positive post wire to the battery positive connection and even after putting a fat daddy vapes 510 connector in it always would show no atty. So I ordered a real dna 40 for it. I am adding a picture it looks like it has some sort of a balancing board as the VF V3 clone has 2 18650's will I need to reuse that board with the new real dna 40. also the usb charger had a white charger sensing wire that the real chip don't seem to need
 

Phone Guy

Vaping Master
ECF Veteran
Verified Member
Sep 25, 2013
3,202
5,826
Arlington, Texas - USA
300456-36fbfc31fa320856c44104be785daf0c.jpg

My vapor flask 510 connector backed out and shorted the positive post wire to the battery positive connection and even after putting a fat daddy vapes 510 connector in it always would show no atty. So I ordered a real dna 40 for it. I am adding a picture it looks like it has some sort of a balancing board as the VF V3 clone has 2 18650's will I need to reuse that board with the new real dna 40. also the usb charger had a white charger sensing wire that the real chip don't seem to need
That's a tiny picture. A little hard to see what's going on there. :(
 

Fearlessleader

Senior Member
ECF Veteran
Verified Member
Sep 11, 2014
296
179
61
Portland TN USA
That's a tiny picture. A little hard to see what's going on there. :(

full


Here is a bigger version this has the 2 positive connections and the case ground and the chip ground going to it this from the inside of the VF v3 from 3fvaper its the upgraded version with the adjustable 510 copper. what happen was the 510 connector they used had a small allen screw that was to hold the deralin that held the center positive pin when i tighten the atty down it pushed the derlin done so far the positive solder point shorted against the battery positive solder joint and would fire with out hitting the fire button so it back feed positive power directly to the center pin from then on it would read no atty so I bought a real dna 40 to replace the clone chip. I think this is some sort of a balancing board since the VF V3 have 2 18650 in parallel it also used a 3 wire usb charger that had a charging sensor wire.

So now I am wondering if the new dna authentic should still use the extra board or if i should just solder the 2 positive bat outputs to the main board and just use the 2 wires from the charger

here is the pin out for the clone chip that was used in this version of the VF v3 from 3fvaper
Dna40-clone-pinout.jpg


here is the real chip pin outs
data sheet pdfhttp://www.evolvapor.com/datasheet/dna40.pdf
dna40.pdf
 

Fearlessleader

Senior Member
ECF Veteran
Verified Member
Sep 11, 2014
296
179
61
Portland TN USA
So I was wondering how i should wire the new dna 40 if i should just eliminate this balance board or that what i think it is or if someone could tell me how to run 2 18560s on the dna 40 parallel
I wanter to just buy this clone to replace it but i cant find this model chip clone they are all out of stock
 

drmarble

Super Member
ECF Veteran
Verified Member
Feb 8, 2014
550
1,254
Oklahoma City, OK, USA
That board looks like it is actually protecting the parallel batteries. Maybe it keeps them from exploding if one is put in backwards. I expect that you can include it when you replace the dna board. It may be providing some protection. I don't know what those chips are and what they do.
You can also leave it out. The real dna chip only wants voltage and high available amperage at the inputs. It knows nothing about parallel batteries. Many folks run them with parallel cells and no protection. They should use fuses between the cells.
I think you are good either way. Others probably have better advice.
 

Fearlessleader

Senior Member
ECF Veteran
Verified Member
Sep 11, 2014
296
179
61
Portland TN USA
That board looks like it is actually protecting the parallel batteries. Maybe it keeps them from exploding if one is put in backwards. I expect that you can include it when you replace the dna board. It may be providing some protection. I don't know what those chips are and what they do.
You can also leave it out. The real dna chip only wants voltage and high available amperage at the inputs. It knows nothing about parallel batteries. Many folks run them with parallel cells and no protection. They should use fuses between the cells.
I think you are good either way. Others probably have better advice.

I will connect the chip to 2 batteries and test the voltage and the dna 40 should have around 4.2 volts if this is extra protection then it cant hurt as long as they have the proper output voltage. it just looked like a balancing board of some type but as far as I know only YIHI has a balancing charger board but that is for series batts not for parallel batts I found that odd I just dont want to cook my real dna 40 board that cost me as much as the whole clone
 

Spiceman1967

Senior Member
ECF Veteran
Verified Member
May 30, 2014
221
612
Lompoc, CA, USA

Fearlessleader

Senior Member
ECF Veteran
Verified Member
Sep 11, 2014
296
179
61
Portland TN USA
Well I don't think I need wire after all As I am computer geek. I just reused wire from some dead high end power supplies I had here.I upgraded all the 20 ga wires to 18 ga that the dna 40 calls for and for my switch wiring I have some oxygen free 22 ga speaker wire I just need to pick up some 22ga solder for doing those connections. Now I do see it calls for 2o ga for the usb charger but my usb charger has a 3rd wire not used buy the real dna 40. I was wanting to upgrade that to the 1 amp charger board because the cheezy clone board is is like 450 to 500 MAH and that is crazy to charge 5000 MAH of batteries with but the thing that looks hard is there is a small sled that held the original clone charger.
P1070425.JPG
I know the 3rd wire is a sensor wire that the real DNA 40 don't use. I wondering if anybody else ran into this issue and how you handled it. I wonder what the chances are I can pull this usb charger out and fit the 1 amp one in
 

Fearlessleader

Senior Member
ECF Veteran
Verified Member
Sep 11, 2014
296
179
61
Portland TN USA
I also did remove the strange little board that the input power went to before the main board as again the real DNA 40 don't use it either as you can see in the pic's it had some strange stuff going on with the clone chip

to
P1070429.JPG

Well I just found out that the Fat daddy Vapes 510 are too long and hit on top of the positive Battery connection. this is the KANGXIN version clone from 3fvaper seems i need to get a short version :-(
 
Last edited:

Fearlessleader

Senior Member
ECF Veteran
Verified Member
Sep 11, 2014
296
179
61
Portland TN USA
Is your flask the waidea with the hex screws on the top plate?
no it the KANGXIN upgraded version from 3fvapor but it does have the hex screws too a 22mm top covers 2 of my screws unless i push it way to the outside hanging over the side it seems i have to use a 15.5 mm top and that has a space all the way around the indent of the top plate it like a hana but the indent is maybe 18mm or 19 mm. a 22 mm covers the whole indented area but cover the 2 hex screws too :-(
 
Last edited:

Phone Guy

Vaping Master
ECF Veteran
Verified Member
Sep 25, 2013
3,202
5,826
Arlington, Texas - USA
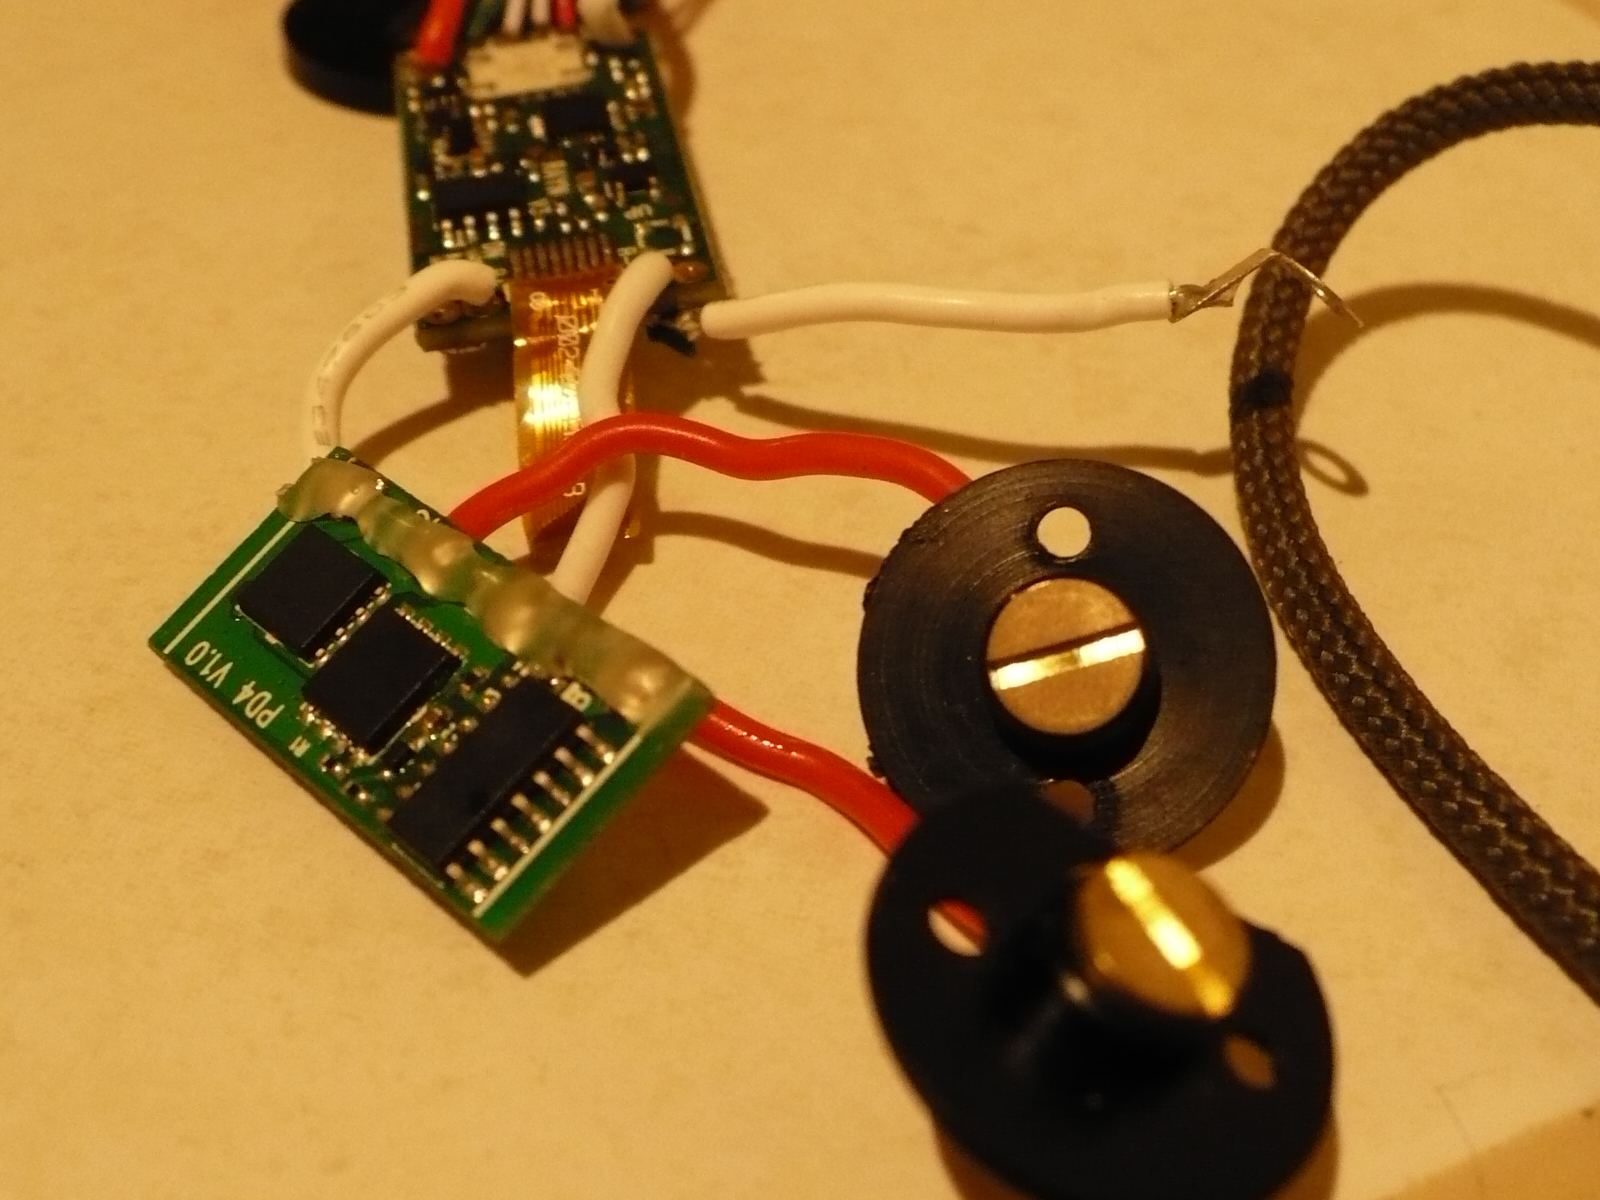
The reason I asked, I did a DNA40 upgrade to my waidea and a spring loaded 510. (I linked to my post in the other thread earlier in this thread)

I've done 2 Flasks so far, an infinite and a waidea. The waidea usb charger is on the bottom center behind some kind of grommet, which I'm told can come right out but I had no clue how to get to the usb charger to upgrade it. The infinite had a complete sled that when removed had the usb charger on the very bottom of the sled that comes out of the flask making it easy to replace (the infinite had a 1amp usb charger already so there was no need) I do not know what the waidea usb charger is rated at, but it's been speculated 500ma :(

I have no knowledge of the kangxin.

I will also say, again on my waidea, the fdv v4 shorty spring loaded core threads right into the single air slot 510 connector on the waidea with no real problems except that the retention "nut" on the fdv v4 is press fit and crimped on and mine came loose so I had to solder (think plumbing sweat copper pipe) it back together.

But again my information is solely based on my knowledge of the 2 Flasks I own which are the infinite made and waidea made. (sorry)

Keep us posted with your process and success ;)
 

Fearlessleader

Senior Member
ECF Veteran
Verified Member
Sep 11, 2014
296
179
61
Portland TN USA
Well it took some doing but last nite I got my 510 connecter working with full spring movement and no contact with the positive battery connection. I ended up using a FDV 510 v4 regular with a 22mm washer. the washer has to sit offset do the 2 hex screws closest to the atty but with this model kangxin that's about he best you can do.

What I had to do if you refer to the FDV connectors pics in my thread you see the that the FDV v4 has a center pin that stick out of the bottom of it it about 1.5 mm to 2 mm. I used my dremel tool and ground it down flush also when I soldered it I had a 45 degree bend in the wire so it laid flush at a right angle. I notched my shrink wrap to make a hood to cover the solder point so it was not exposed and I used some thin insulator plastic that was covering the positive batt solder point and put a dab of hot glue right on that point and pressed that thin plastic over the positive solder point on the batt BTW (it was there originally I just reused it but it had no stickiness left)

I will post pics later I just got up

I still at a boggle with the usb charger and I have to order the 1 amp charger to see if I can modify the usb sled to hold it and line up. With the holidays it going to be a bit for it to arrive and I mostly charge my VF by removing the Batts since it so slow to charge at 500 Mah so if I can't put it in oh well it won't have 1 some of the first model came without the usb charger port anyway
 
  • Like
Reactions: Phone Guy

Fearlessleader

Senior Member
ECF Veteran
Verified Member
Sep 11, 2014
296
179
61
Portland TN USA
Ok here are the pic's I said I would post been a few days. sorry for the delay
P1070434.JPG

As you can see here it don't look to bad with the offset but the top screws make it necessary
P1070435.JPG

P1070437.JPG

You can see the offset easy here
P1070440.JPG

Here I am going to put a bit of epoxy as the hole for the 510 was big and I don't want this to shift over time
P1070441.JPG

ok the last 2 you can now see I have the positive wire in place with my nice little shrink tub hood I made to cover the solder point
P1070444.JPG

Here was the stock film they had in the to cover the positive bat solder point this will get a small spot of hot glue to hold it in place
So in the end I had to scrap the first FDV 510 in the first pic I showed you this is the V4 short with the positive solder point ground flush. Now it gets the full throw and seems fine the extras like the little shrink tube hood and the film are for extra protection think of it as double condom LOL
 
Last edited:
Status
Not open for further replies.

Users who are viewing this thread