Mike n Tibs DNA Mods!

Status
Not open for further replies.

KTMRider

Vaping Master
ECF Veteran
Verified Member
Jul 5, 2014
4,538
18,078
NJ
I got a print from Shapeways and they omitted the up/down button. And the fire button is solid so it doesn't work. I've been trying to get this resolved and they're moving like molasses. Less than 1 email per day if at all. At least Sculpteo was very quick with responses and their prints seem cleaner.

2015-08-25%2013.04.06_zps9ed7ulmo.jpg
 

awsum140

Resting In Peace
ECF Veteran
Verified Member
Jun 12, 2012
9,855
46,386
Sitting down, facing forward.
KTM, I can't say I'm a fan of Shapeways. I tried one part from them and it was way out of tolerance. Granted, it was metal and not plastic, but even the metal was "questionable". It's the first time I've ever seen bronze colored stainless steel.
 
Last edited:

KTMRider

Vaping Master
ECF Veteran
Verified Member
Jul 5, 2014
4,538
18,078
NJ

vapealone

Senior Member
Jun 16, 2015
275
411
Repost from here in case someone is interested:
The s’lab200 is finally up and running.

GsQBbvD.jpg

JT3bPvc.jpg
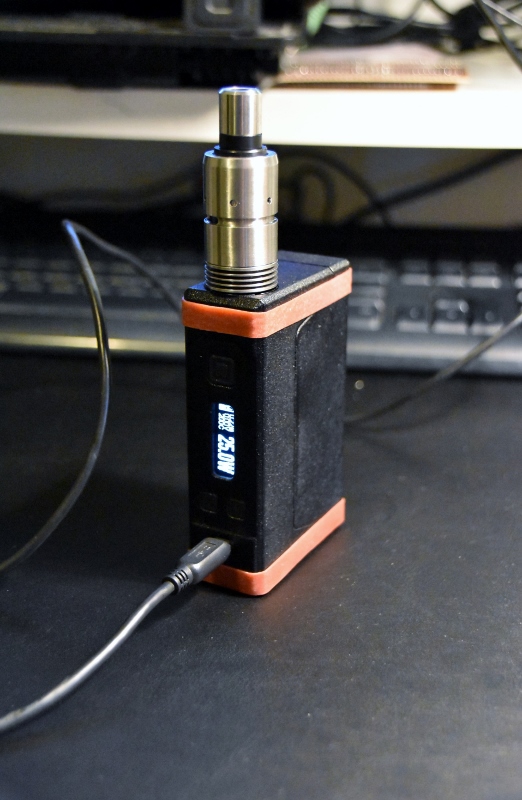
Please bear in mind that the red rubber bands are not part of the design but interim measurements only. I managed to dead short the battery that I have temporarily brought back to life until the new battery arrives on Monday. But it needs full time attention (used/charged only when tethered and monitored on device Monitor) and occasional tinkering, hence the doggy quick access solution.

The design:
This is basically a faux reference box on light steroids.

RFSyA4O.jpg
The result is an average brick measuring 98.85 x 61.5 x 28.15 mm (3.91” x 2.427” x 1.112”) which is slightly beefier and deeper but reasonably lower than my IPV4 (107.2 x 57.44 x26.55 mm, 4.212” x 2.225” x 1.04“)

And it easily houses a Turnigy Nano 3s 1500mah providing 16.65Wh.

Besides, it is light and the buttons are fun to use. They are easy, clicky and responsive. Love ‘em.
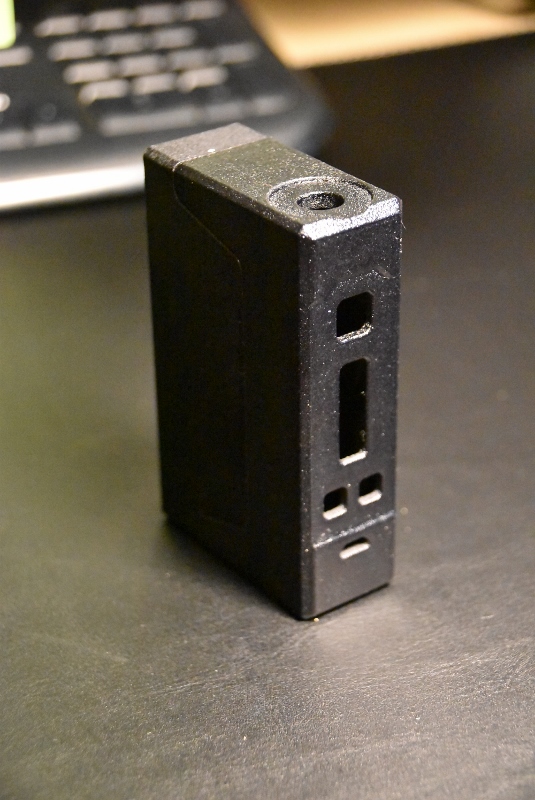
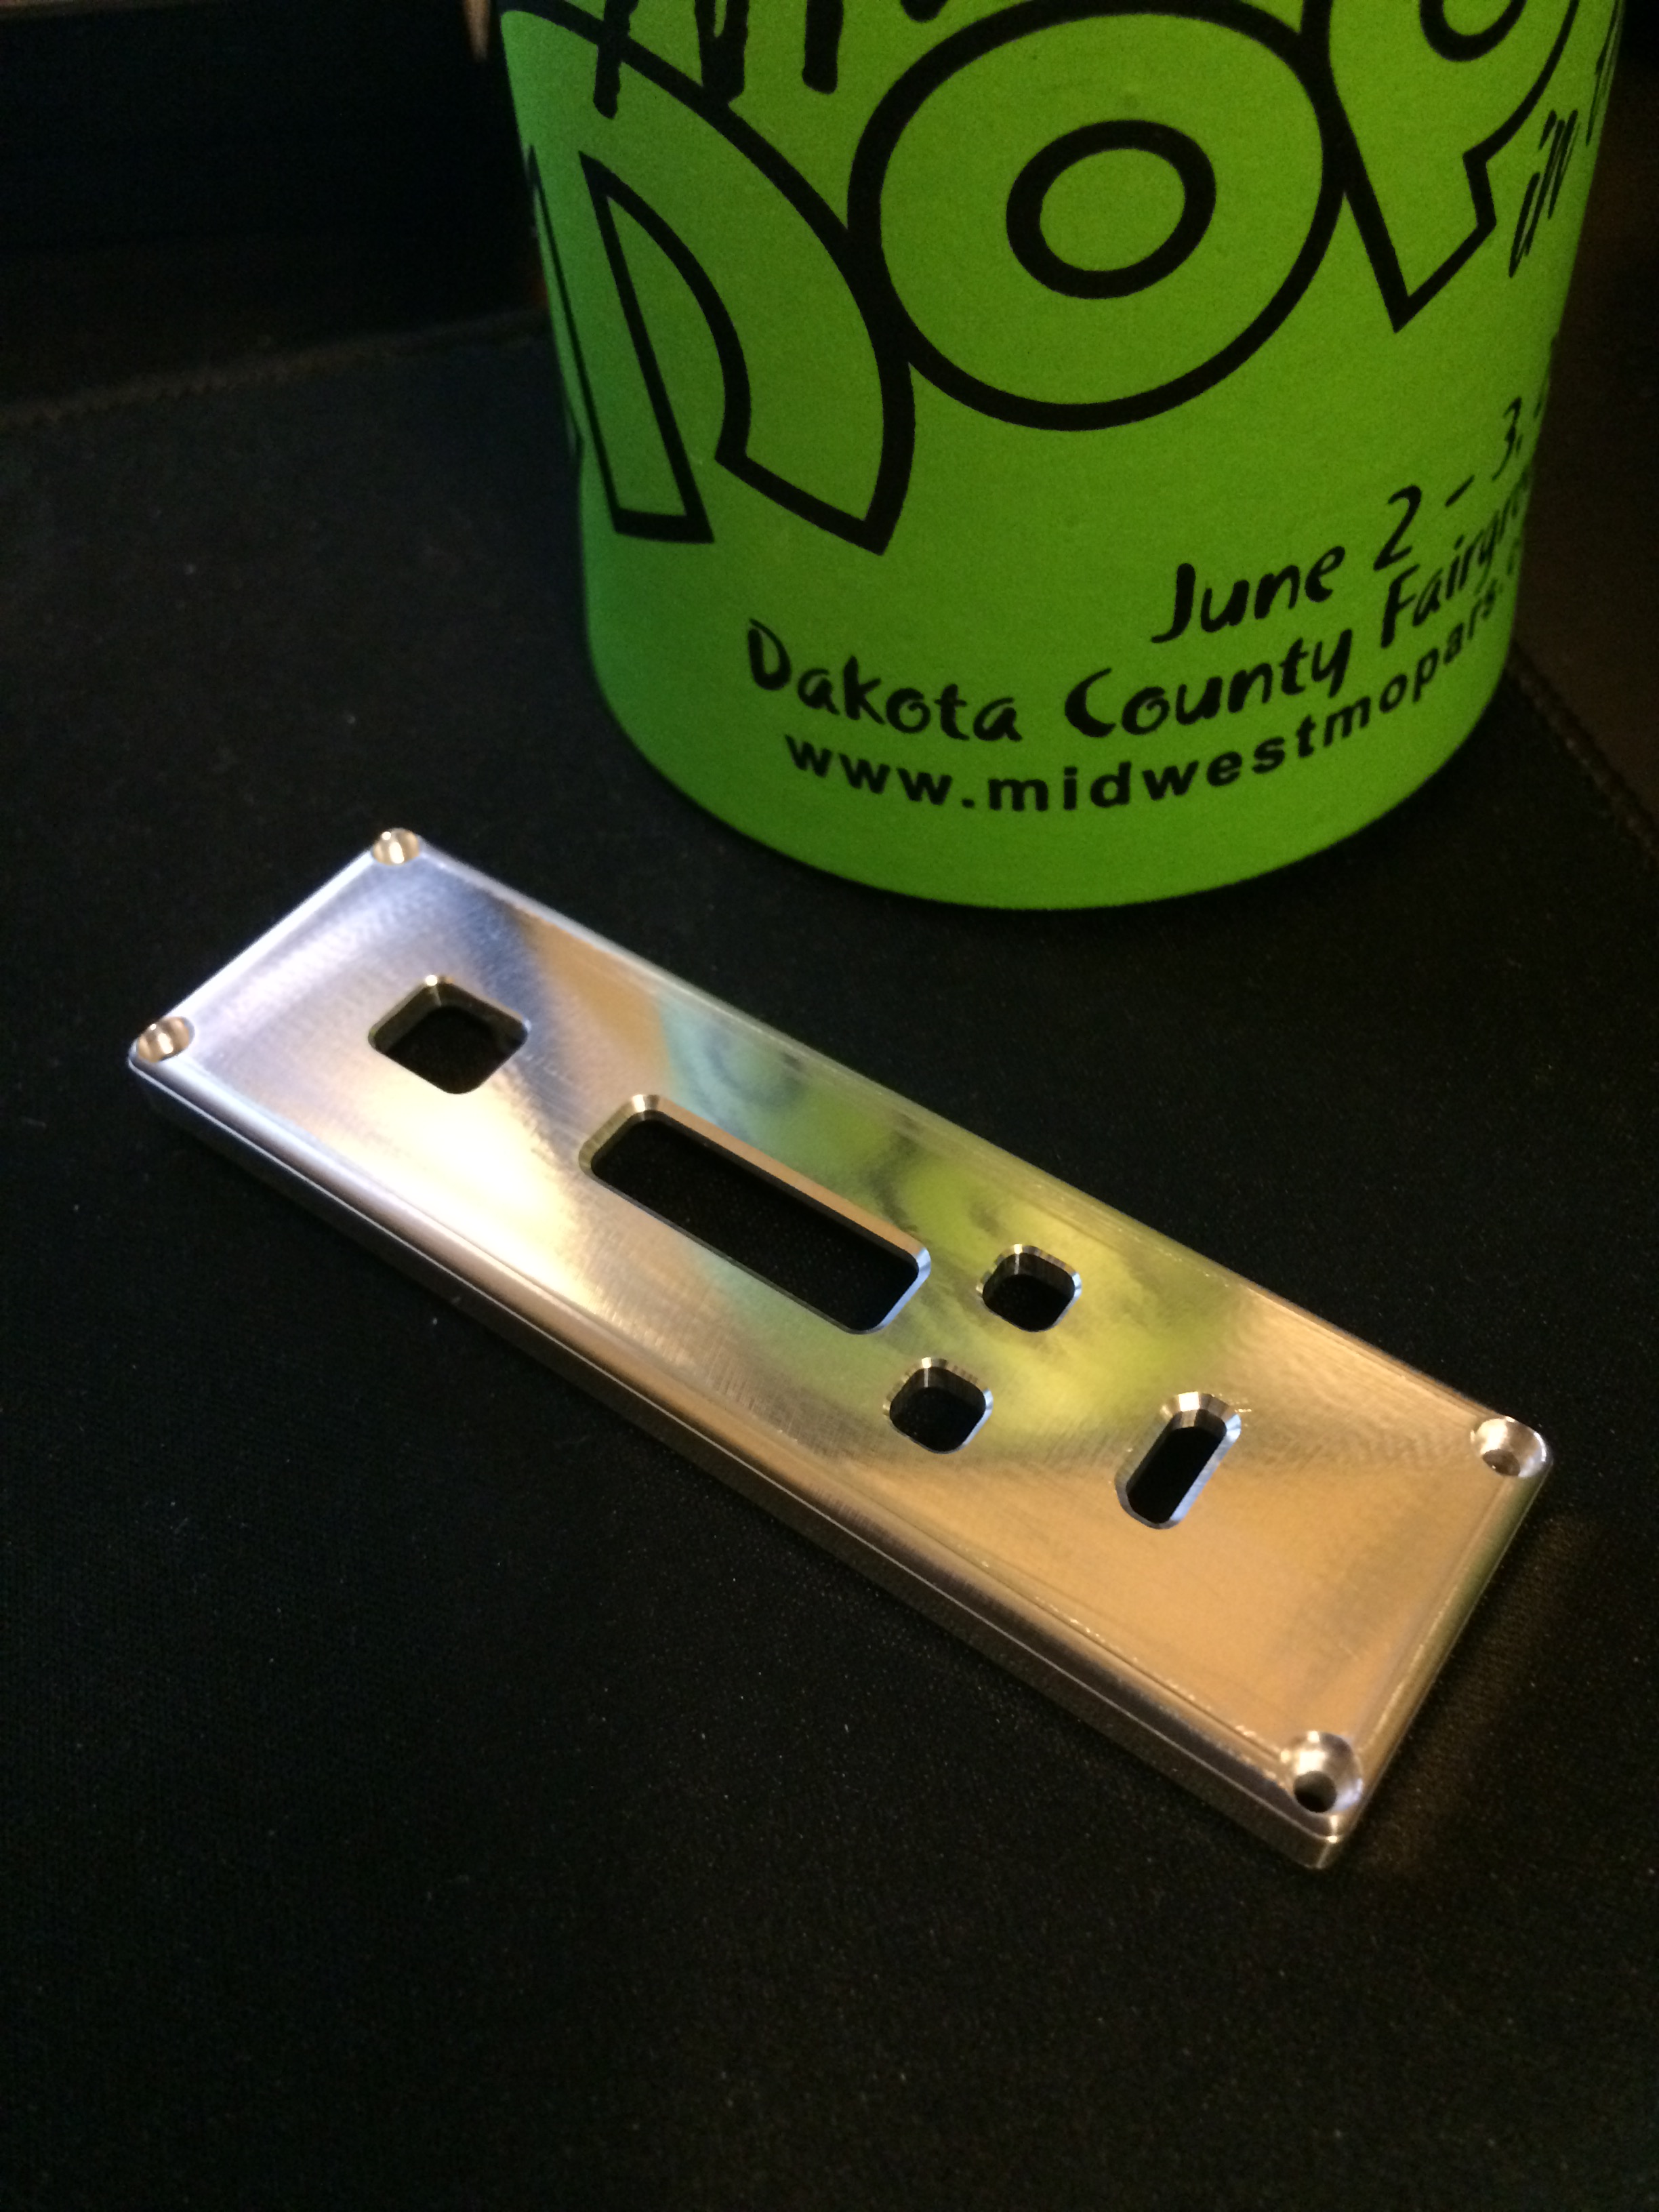


The print:

This is my very first 3D printout I have seen/hold thus I can’t provide comprehensive evaluation but tell you that I have found the overall print quality good and precise. However, the buttons needed quite a bit of filing as they simply didn’t go in. The usb connector opening also required some light filing but I was easy on it and let it reasonably tight fit.
But this is it, nothing really to write home about.

The build:

In general it was a rather easy build save for installing the board. But considering my skills it could be just me.
Anyway, the thing is that there is (was) a counter supporting angle holding the board from the top where there is no screw support from the bottom. The idea is good but I have found it hard to rotate even the naked board (w/o screen, wires etc) in because of the usb connector and it’s tight-fit opening on the case. With wires on and screen attached it seemed impossible to me for it would have needed more skills than I possess and/or more force on the case and/or on the screen ribbon I was willing to apply. So I have simply cut it off with a hot knife leaving the three standoffs and screws to hold the board.

Besides, I have ended up soldering the output wires with board already installed as they limited me maneuvering the board in too.

I have fixed the 510 connector last. The hole diameter allows for self taping the connector in so I decided to benefit from it.
I have attached an old, doggy atomizer to the connector and lightly drove it in just enough to put the terminal ring and the locknut on. Then with a plier I have started to undo the connector letting the nut rotate with it until the nut got stuck firmly and blocked any more movement. Then I just maintained this achieved tension between the nut and the case by holding the nut in place with a needle nose plier and drove the connector back in.
The result: I have needed quite a big plier and considerable torque to undo the atomizer or more properly the amorf remainder of the late atomizer from the connector which stayed rock solid and moved none.

To sum up:
I am a happy camper.
 
Last edited:

Phone Guy

Vaping Master
ECF Veteran
Verified Member
Sep 25, 2013
3,202
5,826
Arlington, Texas - USA
Recently received my order from sculpteo, thanks to @Cotay for the design and an enormous amount of personal support! I'm waiting to dye this piece a dark grey (fingers crossed) which I think will look amazing. Holds a 1400mah battery, is slightly bigger than my Vaporflask which I love. I just haven't had the time needed to dedicate to the project (properly) yet.

I have never ordered from shapeways, but @Cotay explained in his experience, sculpteo was a superior print. This is the white raw finish, and honestly it seems perfect. It's a bit gritty, but I'm guessing that will smooth out once it's clear coated/sealed. But even if NOT it's still a nice feeling print.

The BRD on the right came from @Steamer861 (TY) and it also came from sculpteo, and with the exception of having the sand the buttons (radius and backing) to get a proper fit, it also had no problems... So while I can't compare, thus far sculpteo seems to be a winner IMHO.


IyNHCkE.jpeg
 

awsum140

Resting In Peace
ECF Veteran
Verified Member
Jun 12, 2012
9,855
46,386
Sitting down, facing forward.
My 1590G/DN200 is coming along albeit slowly. I finished installing the support rails for the chip sled this afternoon. The problem is waiting a day after each piece is placed for the JB weld to harden. One of my basic criteria is no holes through the case other than display, buttons and 510 connector so that means a lot of small parts and JB to hold them, securely, in place.

Tomorrow I'll do the final layout on the case and get the holes drilled. I experimented with a 1/8" end mill and it makes just the right sized opening for the micro USB connector. After that it'll be lining up the board with the buttons and getting that position onto the sled and then the sled onto the rails. I'm leaving off any wiring until the physical assembly is set.
 

jonniemac

Senior Member
ECF Veteran
Verified Member
Dec 24, 2012
278
1,026
57
Rosemount, MN
jmgcoder.imgur.com
Do you do that by hand or is it full CNC controlled?

It's full CNC. CAD and CAM are done in Autodesk Fusion360 and then taken to the mill on a usb thumb drive. Mill runs the Tormach version of LinuxCNC called PathPilot.
 

TruckerMSA

Ultra Member
ECF Veteran
Verified Member
Mar 11, 2014
1,024
2,898
Elizabethtown, Kentucky, United States
It's full CNC. CAD and CAM are done in Autodesk Fusion360 and then taken to the mill on a usb thumb drive. Mill runs the Tormach version of LinuxCNC called PathPilot.
Hmmm, I may have to get with you sometime in the future to help me convert and setup my proxxon Mill to CNC [emoji12]
ImageUploadedByTapatalk1440964169.390105.jpg


Sent from The Truck O Shop
 

jonniemac

Senior Member
ECF Veteran
Verified Member
Dec 24, 2012
278
1,026
57
Rosemount, MN
jmgcoder.imgur.com
Hmmm, I may have to get with you sometime in the future to help me convert and setup my proxxon Mill to CNC [emoji12] View attachment 485514

That's way out of my depth, my machine (Tormach PCNC770) came fully CNC equipped right out of the crate.
 
  • Like
Reactions: SlickWilly

Phone Guy

Vaping Master
ECF Veteran
Verified Member
Sep 25, 2013
3,202
5,826
Arlington, Texas - USA
Well I built the second DNA200 mod. This one is a reference mod... 3D printed case from Evolv files (from sculpteo), battery, 510 and chip from Evolv too. So impressed with the size.

This one actually belongs to one of my son's. And he loves it.

PDZNT2j.jpeg

4zv0GTG.jpeg


Just a bit taller than a vs rDNA. Fantastic sized mod!
 
Last edited:

SlickWilly

Tinkerer
ECF Veteran
Verified Member
Feb 18, 2013
1,275
20,835
NY
Well I built the second DNA200 mod. This one is a reference mod... 3D printed case from Evolv files (from sculpteo), battery, 510 and chip from Evolv too. So impressed with the size.

This one actually belongs to one of my son's. And he loves it.

PDZNT2j.jpeg

4zv0GTG.jpeg


Just a bit taller than a vs rDNA. Fantastic sized mod!

Is that a one to one scale to the beta boxes? I've been wanting one the same size as the beta for on the go, really been enjoying the 1590A over the G box although run time is shorter. My only big complaint is when I'm reclining I'll lay a mod on my chest, when I go to pick it up I have to fumble to find the face of the mod because it's so square. That was something I didn't take into consideration, I was sure a slim square box was going to be just the ticket, just goes to show no matter how much you think it through in your head there's nothing like having it in your hand.
 

Phone Guy

Vaping Master
ECF Veteran
Verified Member
Sep 25, 2013
3,202
5,826
Arlington, Texas - USA
Is that a one to one scale to the beta boxes? I've been wanting one the same size as the beta for on the go, really been enjoying the 1590A over the G box although run time is shorter. My only big complaint is when I'm reclining I'll lay a mod on my chest, when I go to pick it up I have to fumble to find the face of the mod because it's so square. That was something I didn't take into consideration, I was sure a slim square box was going to be just the ticket, just goes to show no matter how much you think it through in your head there's nothing like having it in your hand.
I would assume it is, yes absolutely... The files were downloaded directly from Evolv then uploaded to sculpteo for printing... The fully max battery is from Evolv too.

I got the box printed during sculpteo's 25% off sale a few weeks ago (coupon WHITE15) for like $30? (front, back, and 3 buttons), that was for white, raw finish, economy printing. The print required NO FILING OR SANDING at all. But it was a challenge to thread in the 510.

The white Evolv box is for my oldest son (who has been cig free for over a year - yay! ) he Vapes around 15w< 400f usually. Not sure how long the 10wh lipo will last him, but based on a single 18650 (which is about the same wh) he easily gets more than 1 day on his rDNA40, so he should get 1 to 2 days from the DNA200 900mah 3s at 9.9wh? (I'm guessing, I'll let you know in a few days)

The size is awesome. It's essentially the same size as the rDNA40 except taller.
 

awsum140

Resting In Peace
ECF Veteran
Verified Member
Jun 12, 2012
9,855
46,386
Sitting down, facing forward.
I managed two screw-ups with the 1590G, what I get for working without even a sketch. I managed to install the sled support rails too close to the side of the box and that left the USB connector projecting about 2mm and would have made the buttons a real bear to get sized properly. So this morning I clamped it in the vice and went to work with an end mill to mill out the rails and the JB Weld that held them in place as well as the cleats for the top support rail and that JB Weld. It took less time than I expected and the rails are now installed in the right spot, with enough clearance for everything and for the battery.

The other screw-up will test my wire routing abilities. When I marked up the PDF I offset the display cutout 2mm as everyone has suggested. Taped it on, transferred centers for everything and drilled and machined everything out. Problem is I offset the display in the wrong direction, toward the fire button not away from it. That's what I get for doing that while I was distracted, duhhhh.

I'm hoping to assemble it on Wednesday. I still need to re-make and re-install cleats for the top sled rail, JB them in place and let the JB harden properly. I'll do that tomorrow morning so Wednesday looks like a real possibility.
 
Status
Not open for further replies.

Users who are viewing this thread