Diyflavorshack contest - halloween fun- take a peek dont be scared

Status
Not open for further replies.

carrielsal

Vaping Master
ECF Veteran
Verified Member
Oct 27, 2013
5,979
8,573
Mary's Sugar Cookies
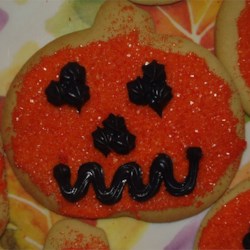
47299.jpg


INGREDIENTS:
1 cup butter, softened
1 1/2 cups sifted confectioners' sugar
1 egg
1 teaspoon vanilla extract
1/2 teaspoon almond extract
2 1/2 cups all-purpose flour
1 teaspoon baking soda
1 teaspoon cream of tartar
1/4 cup granulated sugar for decoration
DIRECTIONS:
1. In a large bowl, cream together the butter and confectioners' sugar until smooth. Beat in the egg and stir in the vanilla and almond extract. Combine the flour, baking soda and cream of tartar; blend into the creamed mixture. Cover and chill for at least two hours.
2. Preheat the oven to 375 degrees F (190 degrees C). Divide the dough into two parts. On a lightly floured surface, roll each piece of the dough out to 3/16 inch in thickness. Cut into desired shapes with cookie cutters. Place cookies 1 1/2 inches apart onto greased cookie sheets. Sprinkle cookies with plain or colored granulated sugar.
3. Bake for 8 minutes in the preheated oven, until lightly browned. Allow cookies to cool on baking sheet for 5 minutes before removing to a wire rack to cool completely.
 

liblue1

ECF Guru
ECF Veteran
Verified Member
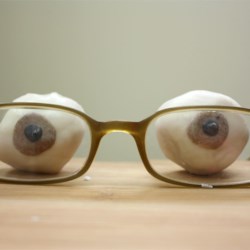
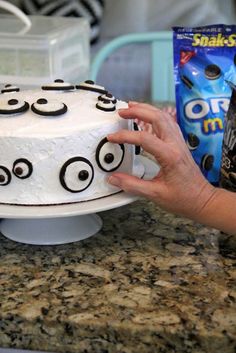
OREO Eyeball DIY treats
OREO-eyeballs.jpg

OREO chocolate sandwich cookies – no need for Double Stuff, just regular will do.
Blue and Green gel decorating icing
Red gel food coloring
Black/brown M&Ms or Reeses pieces
Small paintbrush – a little bigger than a toothpick, but not much.
1.Carefully remove one of the chocolate cookies from the OREO.
2.Add a glob of gel icing.
3.Place 1 M&M in the center of the icing.
4.Put a small dab of red food coloring in a bowl or on a plate, like a painter’s palette. Using a teeny tiny paint brush, carefully paint red vein lines on the white frosting of the OREO.
 

carrielsal

Vaping Master
ECF Veteran
Verified Member
Oct 27, 2013
5,979
8,573
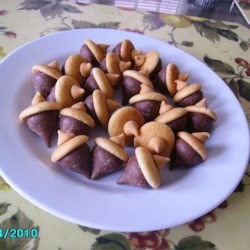
Acorn Candy Cookies

532810.jpg


INGREDIENTS:
1 tablespoon prepared chocolate frosting
24 milk chocolate candy kisses (such as
Hershey's Kisses®), unwrapped
24 mini vanilla wafer cookies (such as
Nilla®)
24 butterscotch chips
DIRECTIONS:
1. Smear a small amount of frosting onto the flat bottom of a candy kiss. Press onto the flat bottom of the vanilla wafer. Smear a little more frosting onto the flat bottom of a butterscotch chip, and press onto the rounded top of the cookie. Repeat with remaining ingredients. Set aside to dry, about 30 minutes.
 

Reddhott

Resting In Peace
ECF Veteran
Mar 19, 2011
37,734
152,758
cartoon land,usa
CL-Werewolf-1-4001253023810.jpg


Werewolf Cake
Portion size
16 to 24
Ingredients1 Chocolate Cake Recipe1 Creamy Chocolate Butter Icing1 dab brown paste food colouring2 chocolate-covered cashews or chocolate-covered almonds2 candy-covered chocolate piecesAssorted licorice candies, and licorice string

Chocolate Cake recipe

Creamy Chocolate Butter Icing recipe


Place chocolate cake on board or tray. Using serrated knife and pattern as guide, cut out head.

Make 1/2-inch (1 cm) deep cut along dotted line of Piece A. Holding knife blade horizontally, cut 1/2 inch (1 cm) off top of Piece B for neck.

Following dotted line, cut triangle from Piece C for forehead; set aside.

Set aside Piece D for upper lip.

Holding knife blade horizontally, cut Piece E in half. Set aside 1 of the halves for lower lip.

Remove 1-3/4 cups (425 mL) of the chocolate icing to small bowl. Add brown food colouring to remaining icing to tint darker brown.

Spread 1 cup (250 mL) of the lighter chocolate icing over top and sides of cake to mask and seal in crumbs. Attach upper lip, lower lip and forehead; mask with lighter chocolate icing. Chill until firm, about 30 minutes.

Spread remaining lighter chocolate icing over ears and neck.

Using piping bag fitted with star tip, pipe darker chocolate icing over forehead, lips and remainder of face to make hair.

Attach cashews for nose, candy pieces for eyes, licorice candies for teeth and licorice strings for forehead, ears and mouth.
 

Reddhott

Resting In Peace
ECF Veteran
Mar 19, 2011
37,734
152,758
cartoon land,usa
Chocolate Coffin Cake

chocolate-coffin-cake5801350913155.jpg


Ingredients4 cups (1 L) mint chocolate chip or vanilla ice creamSilver dragéefruit leatherChocolate cake:1-1/2 cups (375 mL) butter, softened2-1/4 cups (550 mL) granulated sugar3 eggs1-1/4 tsp (6 mL) vanilla3 cups (750 mL) all-purpose flour3/4 cup (175 mL) cocoa powder1-1/2 tsp (7 mL) baking powder1-1/2 tsp (7 mL) baking soda1/4 tsp (1 mL) salt2-1/4 cups (550 mL) buttermilkChocolate icing:3/4 cup (175 mL) butter, softened1-1/2 cups (375 mL) icing sugar3 tbsp (45 mL) whipping cream3 oz (85 g) unsweetened chocolate, chopped, melted and cooled1 tsp (5 mL) vanilla
Grease sides of 13- x 9-inch (3.5 L) metal cake pan; line bottom with parchment paper. Set aside.

Chocolate cake: In large bowl, beat butter with sugar until light. Beat in eggs, 1 at a time; beat in vanilla. In separate bowl, sift together flour, cocoa, baking powder, baking soda and salt ; sift again to blend completely. Stir into butter mixture alternately with buttermilk, making 3 additions of dry ingredients and 2 of buttermilk. Scrape into prepared pan; smooth top.

Bake in centre of 350?F (180?C) oven until cake tester inserted in centre comes out clean, about 50 minutes. Let cool in pan on rack for 10 minutes. Remove from pan; let cool completely on rack. (Make-ahead: Wrap in plastic wrap and store at room temperature for 24 hours.)

Chocolate icing: In bowl, beat butter until fluffy. Alternately beat in sugar and cream, making 3 additions of sugar and 2 of cream. Stir in chocolate and vanilla, leaving streaks to resemble wood. (Make-ahead: Cover and refrigerate for up to 24 hours; let come to room temperature and beat until smooth.)

Let ice cream soften in refrigerator for 10 to 20 minutes. Place cake, top side down, on cutting board. Trim off corners to resemble coffin. Trace same shape onto heavy cardboard and cut out; wrap tightly with foil.

Cut cake in half horizontally. Place bottom layer on cake board or dark tray. Using palette knife, spread with ice cream; cover and freeze until firm, about 4 hours.

Working quickly, spread sides of bottom layer with icing. Position skeleton on top. Place large piece of cake trimming beside skeleton to prop open lid. Cover and freeze until firm, about 2 hours.

Meanwhile, place top of cake on prepared foil-covered cardboard; place on baking sheet. Spread top and sides with icing. Arrange silver drag? around edge; cut cross out of fruit leather and position in centre. Lightly cover and refrigerate until firm, about 2 hours.

Place coffin lid on cake. Crumble cake trimmings and scatter over platter for dirt. (Make-ahead: Cover and freeze for up to 24 hours.) To serve, remove coffin lid; set skeleton aside and cut cake.


Reddhott

Resting In Peace
ECF Veteran
Mar 19, 2011
37,734
152,758
cartoon land,usa
1926780_10205561933914186_1136331851087526955_n.jpg


Ingredients
Yogurt Covered Pretzels
Different Colored Melting Chocolate
Little Candies for the Eyes
.
Directions
Put colored melting chocolates into their own zip loc baggies (or icing bags). Place baggies upright into a bath of hot water until all of the chocolate has melted. Place all of the pretzels on wax paper lined cookie sheets. Snip a tiny corner off of one of the baggies of chocolate. Fill in the eyes of the pretzel ghosts - only fill 5 or so at a time so the chocolate doesn't set up before you've been able to place the eyes. Repeat with the other chocolate colors.
 

carrielsal

Vaping Master
ECF Veteran
Verified Member
Oct 27, 2013
5,979
8,573
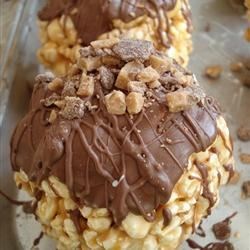
Rocky Road Popcorn Balls

260105.jpg


INGREDIENTS:
3 cups miniature marshmallows
1/4 cup butter
8 cups freshly popped popcorn
1/2 cup dry-roasted unsalted peanuts
1/2 cup miniature chocolate chips
DIRECTIONS:
1. Place the marshmallows and butter into a large pot over medium-low heat, and melt them together, stirring often. Cook until blended and smooth, about 5 minutes, and remove from heat.
2. Stir in the popcorn and peanuts, and stir gently to thoroughly coat them with the marshmallow mixture. Stir in the chocolate chips.
3. With greased hands, shape the mixture into 3 inch balls, and wrap each ball in plastic wrap.
 

carrielsal

Vaping Master
ECF Veteran
Verified Member
Oct 27, 2013
5,979
8,573
Spooky Halloween Eyeballs

498847.jpg


INGREDIENTS:
1 1/2 cups creamy peanut butter
1/2 cup butter, softened
2 1/2 cups confectioners' sugar, sifted
1 tablespoon vanilla extract
12 ounces white chocolate, chopped
2 tablespoons shortening
2 drops blue food coloring
1/2 cup miniature semisweet chocolate
chips
red food coloring (optional)
DIRECTIONS:
1. Beat the peanut butter and butter with an electric mixer in a large bowl until smooth. Beat in the sugar and vanilla. Cover and refrigerate for 30 minutes. Roll chilled dough into small, eyeball-sized balls and place on 2 baking sheets lined with wax paper. Refrigerate for another 30 minutes.
2. Melt the white chocolate and shortening in a microwave-safe glass or ceramic bowl in 30-second intervals, stirring after each melting, for 1 to 3 minutes (depending on your microwave). Do not overheat or chocolate will scorch. Dip each eyeball into the white chocolate and transfer to the waxed paper until the chocolate has set. You can chill them in the refrigerator.
3. Stir a few drops of blue food coloring into the remaining melted white chocolate. Make a round "iris" on the top of the cooled eyeball and press a mini chocolate chip in the center for a "pupil." For an extra spooky bloodshot eyeballs take a toothpick dipped in red food coloring and make squiggly lines on the eye.
 

bellastarr

ECF Guru
ECF Veteran
Verified Member
Jul 4, 2014
14,524
27,945
USA
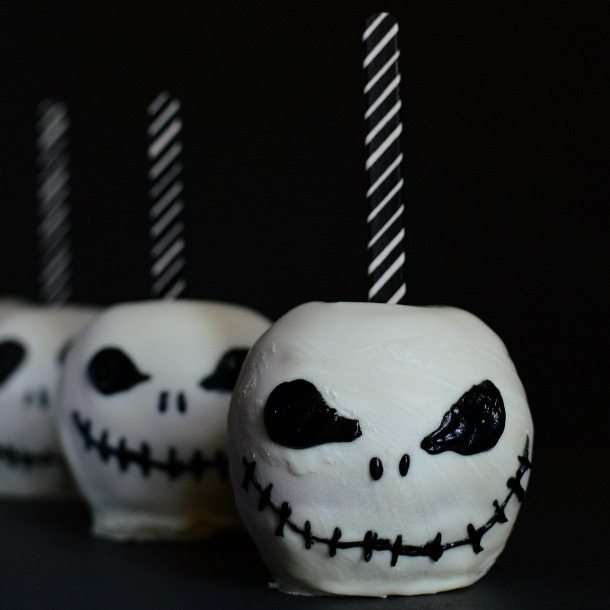
jack-skellington-apples-square.jpg


Jack Skellington Chocolate Covered Apples


Ingredients

  • 4 Apples
  • 2 Cups White Chocolate Morsels
  • 1 Tablespoon Coconut Oil
  • Black Icing
  • 4 Popsicle Sticks
  • Black & White Washi Tape (optional)
  • Fine Tip Paint Brush

Instructions

  1. Cover popsicle sticks with washi tape.
  2. Wash and dry apples. Remove stems and insert sticks.
  3. Melt white chocolate and coconut oil in microwave. Stir every 20-30 seconds. Heat until smooth.(You’ll want to use a dish or cup that is not much wider than your apples and deep enough to fully submerge the apple.)
  4. Let melted chocolate cool for 2-3 minutes.
  5. Dip and allow the excess to drip off.
  6. Transfer to plate covered with wax paper. Immediately transfer apples to refrigerator. (To prevent chocolate puddles at base, spin apples after refrigerating for 2-3 minutes. This will remove the excess chocolate at bottom.)
  7. Once chocolate has fully cooled (5-10 minutes) dip in melted chocolate one more time, repeating process.
  8. After second chocolate coating has fully cooled, begin painting the Jack Skellington face.
  9. Use a fine tip brush for painting.

Notes

*Chocolate Covered Apples are a messy treat. The chocolate will break apart while eating. You have been warned*
 

bellastarr

ECF Guru
ECF Veteran
Verified Member
Jul 4, 2014
14,524
27,945
USA
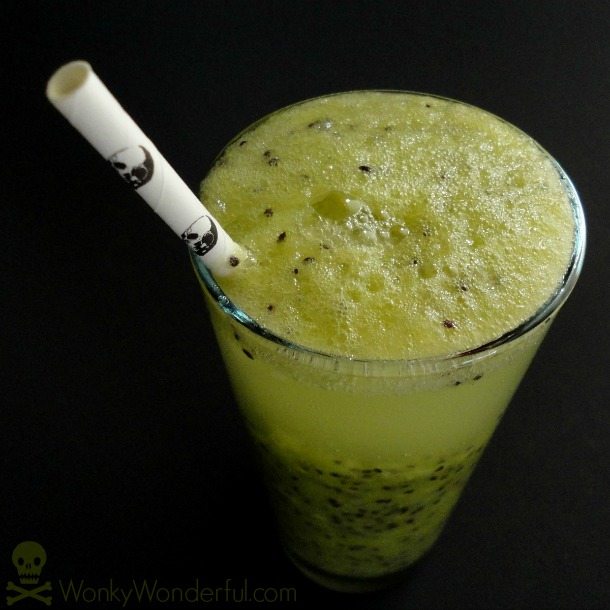
Halloween-Kiwi-Drink-Recipe-22.jpg


Kiwi Spritzer - Witches' Brew


Ingredients

  • 4 Refrigerated Kiwi Fruit
  • 2-4 Tb Ultrafine Sugar
  • 1 (8.5 oz) Bottle of Seltzer Water

Instructions

  1. Remove the hairy skin from kiwi.
  2. Puree kiwi in blender or food processor until no chunks remain. (about 1 cup of kiwi puree)
  3. Add sugar 1 Tb at a time, mix then taste in between each addition until the mixture tastes sweet enough. (amount of sugar needed depends on the sweetness of the kiwi)
  4. Fill the glasses 3/4 full of kiwi puree.
  5. Top off the glasses with spritzer water.
  6. Serve while belting out your best Witch Cackle!

Notes

This yields 1 large drink or 2 small servings.
 

Reddhott

Resting In Peace
ECF Veteran
Mar 19, 2011
37,734
152,758
cartoon land,usa
Dagger Through the Heart Cake

zzgoth36362.jpg


Portion size
8-12
Ingredients1 cup (250 mL) butter, softened1-1/2 cups (375 mL) granulated sugar2 eggs1 tsp (5 mL) vanilla2 cups (500 mL) all-purpose flour1/2 cup (125 mL) cocoa powder1 tsp (5 mL) baking powder1 tsp (5 mL) baking soda1/4 tsp (1 mL) salt1-1/2 cups (375 mL) buttermilk1/3 cup (75 mL) seedless raspberry jam1 Cookie Dagger RecipeRaspberry Sauce:1 pkg (300 g) frozen raspberries, thawed1/4 cup (60 mL) granulated sugar1/4 cup (60 mL) seedless raspberry jam1 tbsp (15 mL) lemon juiceChocolate Glaze:6 oz (170 g) semisweet chocolate, chopped3 tbsp (45 mL) butter4 tsp (18 mL) liquid honey3 tbsp (45 mL) frozen raspberry cocktail concentrate, thawed
Grease two 8-inch (1.2 L) heart-shaped metal cake pans; line bottoms with waxed paper. Set aside.

In large bowl, beat butter with sugar until fluffy. Beat in eggs, 1 at a time; beat in vanilla. In separate bowl, sift together flour, cocoa powder, baking powder, baking soda and salt. Using wooden spoon, stir into butter mixture alternately with buttermilk, making 3 additions of dry ingredients and 2 of buttermilk. Scrape into prepared pans; smooth tops.

Bake in centre of 350°F (180°C) oven until cake tester inserted in centre comes out clean, 30 to 35 minutes. Let cool in pans on racks for 20 minutes. Turn out onto racks and peel off paper. Let cool completely. (Make-ahead: Wrap layers separately in plastic wrap and refrigerate for up to 1 day or overwrap with heavy-duty foil and freeze for up to 2 weeks.)

Raspberry Sauce: Meanwhile, in food processor or blender, pur?raspberries, sugar, jam and lemon juice until smooth; strain through fine sieve. (Make-ahead: Cover and refrigerate for up to 1 week.)

Chocolate Glaze: In heatproof bowl set over saucepan of hot (not boiling) water, melt together chocolate, butter and honey, stirring occasionally. Whisk in raspberry concentrate. Let cool.

Place 1 cake layer on cake plate; slide strips of waxed paper under cake to protect plate. Spread with jam. Place second layer over top. Drizzle chocolate glaze over cake; spread evenly over top and side.

Push Cookie Dagger into centre of cake. Drizzle some of the raspberry sauce around base. Serve cake with remaining sauce.
 

Reddhott

Resting In Peace
ECF Veteran
Mar 19, 2011
37,734
152,758
cartoon land,usa
Jar of Souls

souls_2-small1-1600x640.jpg


What You’ll Need

Small Mason jars

Blue or green gelatin dessert powder

Heatproof mixing bowl or large measuring cup

Spoon

Baking pan

Gummy worms

Scissors or knife

Construction paper in purple or blue

Marker or silver paint pen

Double-sided tape

Sporks or forks

Ice (optional)

Helpful Tip
Feel free to add a few small gummy fish to your jars, or make a small gelatin “fish bowl” as a complementary centerpiece for your table.

For a healthy alternative to artificially flavored gelatin dessert powder, use a pale fruit juice such as apple juice or lemonade in place of water and thicken it with unflavored gelatin. A few drops of blue or green food coloring give it the necessary seawater color.

For a small extra touch, pipe wavy lines of whipped cream or whipped topping “seafoam” on top of the colorful treats.
How To Make It
1Wash, rinse and dry a small Mason jar. Tip: Straight-sided, wide-mouthed jelly jars work best, because they're the easiest to fill and the easiest for the kids to empty.
2Open boxes of green or blue gelatin dessert powder – or a mixture of both – and shake them into a heatproof mixing bowl or large measuring cup. A standard-size package of gelatin makes 2 cups of wobbly dessert, enough to fill two 1-cup jars or four ½-cup jars, so determine how many jars you’ll need ahead of time and purchase as many boxes as you need.
3Pour 1 cup of boiling water for every box of gelatin into the bowl and stir it until the powder dissolves completely. Add an equal quantity of cold water and stir again. If you're in a hurry, use 2 cups of ice in place of each cup of cold water. When the gel begins to thicken, after 5 or 6 minutes, remove any unmelted ice.
4Fill each jar about 2/3 full with the gelatin and place it in a rectangular cake pan or other baking pan. When the jars are all filled, the pan makes it easier to transfer them to your fridge. You'll have gelatin left over, at this stage. Set it aside in a warm place, because you need it later.
5Refrigerate the jars of gelatin for roughly 20 minutes, until the dessert begins to set but is still quite soft. If you used the ice-cube technique, cut that time in half.
6Cut the gummy worms into varying lengths with a knife or clean scissors while the gelatin begins to set. This is optional, but gives the worms – for lack of a better term – a more “lifelike” appearance. The movie's poor unfortunate souls moved around and reacted to Ursula's threatening song, and the gummies look more real at varying heights in the jar.
7Remove the pan of Mason jars from your refrigerator, and slide several gummy “souls” into each jar. The gelatin should be thick enough to hold them upright, but not set enough to make it difficult for you to slide them in.
8Soften your leftover gelatin by melting it in your microwave or over a pot of boiling water. Divide it evenly between the jars to make a smooth, even surface and conceal any fingermarks.
9Return the jars to your refrigerator until they set completely. Keep them cold until party time.
10Let guests know just what kind of treat this is with a custom label for each Mason lid. Trace the tops of your lids on purple or blue construction paper and write “Poor Unfortunate Souls” on each circle with a marker or silver paint pen. Cut out the labels and tape one to the top of each lid.
11Offer each guest their very own themed utensil to gobble up those yummy ‘souls.’ Cut out a simple tag made of construction or Kraft paper, with the words ‘Dinglehopper’ written in silver paint pen, and tape it to a spork or fork. Make sure you make enough for every jar. Write the name of each guest on the back of the label so it becomes a favor at the end of the party.
 

Reddhott

Resting In Peace
ECF Veteran
Mar 19, 2011
37,734
152,758
cartoon land,usa
Edible Eyeballs

edible-eyeballs-craft-photo-420x420-clittlefield-146.jpg


What You’ll Need

1/2 cup softened cream cheese

22 chocolate sandwich cookies

1/2 cup chocolate chips

2 cups white chocolate chips

Ring-shaped gummies

Cookie sheet

Waxed paper

Mixing bowl

Microwaveable measuring cup or small, deep bowl

Tablespoon

Toothpicks
How To Make It
1Line the cookie sheet with waxed paper and set it aside.
2Crush the sandwich cookies into fine crumbs. You can do this in a food processor, or seal them in a plastic bag and crush them with a rolling pin.
3Combine the cookie crumbs and softened cream cheese in a mixing bowl and stir until the ingredients are well combined.
4With clean hands, roll half tablespoonfuls of the cookie mixture into balls (about 1 1/4-inch in diameter) and place them on the waxed paper. Use your thumb to make a shallow nickel-size depression in the top of each ball.
5Chill the cookie balls until firm (about 1 hour).
6Select a ring-shaped gummy to use as an iris for each eyeball. Stretch the centers to enlarge the holes a bit and insert a chocolate chip, tip down, in each one. Set the irises aside for now.
7Pour the white chocolate chips into the measuring cup or bowl and melt them in the microwave according to the directions on the package.
8Insert a toothpick into one of the chilled cookie balls. Dip the ball into the melted white chocolate and then set it on the tray, using a second toothpick to hold it in place while you pull the first one out. Immediately set one of the irises atop the candy-coated ball and gently press it into the depression. Repeat this step with the rest of the cookie balls.
9Allow the white chocolate coating to cool and harden before serving the eyeballs. You can speed up the process by chilling them on the tray for a few minutes. Store leftover eyeballs in an airtight container in the refrigerator.
 

Reddhott

Resting In Peace
ECF Veteran
Mar 19, 2011
37,734
152,758
cartoon land,usa
Octopus Cupcakes

octopus-cupcakes-halloween-recipe-photo-420x420-clittlefield-0042.jpg


What You’ll Need

Batch of cupcakes

Buttercream frosting

Round lollipops

Gummy worms

Kitchen scissors

Toothpick

Mini chocolate chips

Helpful Tip
Cutting should be done by an adult.
How To Make It
1Frost the cupcakes.
2For each octopus, insert the stick of a lollipop into the center of a cupcake so that the candy rests just above the frosting (if the stick is too long, trim it first).
3Use the kitchen scissors to snip two gummy worms in half to create four equal lengths. Then carefully snip each piece in half lengthwise to end up with eight legs.
4Press the tops of the legs into the frosting around the lollipop and arrange the ends so that they curve and dangle over the edge of the cupcake.
5For eyes, use the tip of a toothpick to place two small blobs of frosting at the base of the lollipop and then press in two mini chocolate chips, tips down.
 

bellastarr

ECF Guru
ECF Veteran
Verified Member
Jul 4, 2014
14,524
27,945
USA
oogie-boogie-cupcakes-recipe-photo-420x420-clittlefield-001.jpg


Oogie Boogie Cupcakes


Ingredients

  • Batch of chocolate cupcakes
  • Cupcake frosting tinted "monster" green
  • Plastic decorating bag for piping frosting
  • Kitchen scissors
  • Black licorice
  • Toothpick

Cooking Instructions
  1. Frost the cupcakes with a thin layer of icing.
  2. Place a half marshmallow on the center of each frosted cupcake.
  3. Cut off the tip of the plastic decorating bag so that the opening is about 3/4-inch wide. Then fill the bag with green frosting (not too full or the frosting will come out the top when you squeeze it).
  4. Working with one cupcake at a time, pipe frosting around the base of the marshmallow and then up and over it, moving toward the center and ending with a large peak.
  5. Smooth the surface of the frosting with a butter knife, periodically dipping the tip of the knife in water so the icing will be easier to spread. Don't worry about making it perfectly smooth -- it will look even more like Oogie Boogie with a few lumps and "wrinkles."
  6. Snip a pair of narrow licorice eyes and a wide licorice mouth for each cupcake. Use the tip of a toothpick to gently press the candy pieces into the frosting face, angling the eyes a bit to resemble Oogie Boogie's.
 

carrielsal

Vaping Master
ECF Veteran
Verified Member
Oct 27, 2013
5,979
8,573
Green Goblin Cocktail

picSx69Mt.jpg


1 ounce vodka
1 ounce coconut rum
1 ounce peach schnapps
1 ounce dekuyper sour apple liqueur
1 ounce prepared sweet-and-sour mix
ginger ale, to top (optional)

Directions:

1
Pour all ingredients into a cocktail shaker half-filled with ice cubes. Shake well and pour over ice cubes in an old-fashioned glass. Serve with a lime wedge.
 

Reddhott

Resting In Peace
ECF Veteran
Mar 19, 2011
37,734
152,758
cartoon land,usa
ty Dawn for the contest!
i sooo loved all the recipes!!!
gonna have to try some!!

will leave u with one more lol


Frightful Forest Eyes

forest-eyes-cupcakes-halloween-recipe-photo-420x420-clittlefield-0028.jpg


PREP TIME
20 min
COOK TIME
30 min
TOTAL TIME
50 min
What You’ll Need
•
Batch of baked cupcakes
•
Buttercream frosting tinted black
•
Yellow fruit chew candies
•
Black jellybeans
•
Wax paper
•
Rolling pin
•
Small round fondant cutter (about 1 1/2 inches wide)
•
Kitchen knife
How To Make It
1Frost the cupcakes.
2For each pair of eyes, place a fruit chew candy between two pieces of waxed paper and roll it flat to a thickness of 1/4 inch or so. If the candy is too hard to roll, you can soften it by heating it in a microwave oven for 3 to 4 seconds. Use the fondant cutter to cut out a circle from the rolled candy and then slice the circle in half.
3Gently press a black jellybean onto the center of each candy semi circle. If it doesn't stick in place, use a dab of leftover frosting to hold it.
4Center each eye atop a cupcake. Then arrange the cupcakes in pairs on a serving dish or tray.
 
Status
Not open for further replies.

Users who are viewing this thread