Making an Atomizer Coil 101 (Actual Working Methods Only)

Status
Not open for further replies.

Vaporer

Ultra Member
ECF Veteran
Jun 23, 2009
1,767
22
Away..
IMHO a thread like this has been a long time needed for those wanting to replace, repair or make a new atomizer coil.
There is a ton of good information on the forum, but it many and most times is buried in a thread where the subject isn't in the thread topic line. Some threads are huge and it is hard to read through the whole thread just to see if what you are looking for might be there. If you find good information in another thread, please include a link to it. Include the post # please.

This thread should address ONLY coil making. Materials, methods, links to material/tool sources and concerns. It's fine to state "this is how I made a new atty coil for my Model "X". Different models have different coil lengths, diameters, resistance values, nichrome wire sizes, core or wicking materials, tools used and such.

Experimental projects should have thier own thread and a link placed to them is welcomed. Let's keep this thread on what actually works.
Be considerate if/when criticizing. Many here will be at the bare basic level and some rebuild thiers regularly.

Remember this, Just because your method may work doesn't make it the "right or only way", it just means that it works. There is usually room for improvement or difference somewhere. Even if it is in the technique you use, some are easier for others due to available tools and skill levels.

PLEASE, do not ask "how do I get my Model "X" apart to replace it?" There are threads that address this and if you can't find one, START ONE, please. If you have a working method for atomizer disassembly and reassembly, Start a new thread on it! I don't think that is asking to much. Once you have attached new wires to the coil and its ready to install or show a pic indicating how you connected it to the existing wires of the atomizer it should be considered complete. Expect questions to be asked for clairification.

If this thread is of interest to you and you want to follow it, click "Thread Tools" at the top of the page, "Subscribe to this Thread" and select "Instant Email Notification". You will receive an email everytime a new post occurs and it will have a clickable link in the email.

If this method is followed this thread can be a wealth of "on topic" information, easy to find, and work as a hub to all of the the great information that already exists.
 

Vaporer

Ultra Member
ECF Veteran
Jun 23, 2009
1,767
22
Away..
The reason to start this thread came from this:
http://www.e-cigarette-forum.com/forum/atomizer-mods/48436-new-atomizer-coil-shape-2.html

Might as well start out tools and supplies.

Silver Solder (lead free) 96/4 Radio Shack - Lead-Free Solder (0.5 Oz.) - RadioShack.com

Soldering Iron - 35watt works well.

Silica "fire wick", get Option 3 or 4. As of 8-1-2010. If you choose anything else it will be fiberglass , much lower working temperature. This may change so be sure it's silica. McMaster-Carr
Some use the rope from hardware store woodstove door kits. Silica is rated for 2300*.

Nichrome wire: 36ga (27ohm per ft) $2 for 10' free shipping from:
Jacobs Online Nichrome Wire

Soldering paste with Zinc Chloride works well for nichrome wire.
I use Ruby Flux found at my local hardware store.


Assorted sewing needles 1mm or smaller for forming the coil.

Learning to solder - http://www.e-cigarette-forum.com/forum/modders-forum/22122-how-solder-video.html
 
Last edited by a moderator:

rbonie

Super Member
ECF Veteran
Aug 6, 2009
434
12
Jackson,Ms (da DEEP Sout!)
I'll post my method in a day or so here.
Please feel free to get this going.
Vaporer;
I just want to thank you personally and for all us struggling mad scientist on the forum for all the work and EXCELLENT help you've put in.
You have kept me off analogs more times than I care to think about.

Thank you from the bottom of my heart. ( or..the heart of my bottom, whichever comes first hehehe ):shock:

RcB
TheOldMan
 
Last edited:

Vaporer

Ultra Member
ECF Veteran
Jun 23, 2009
1,767
22
Away..
Ok....lets start making an atomizer coil.

First thing you need to do is determine what value of ohms you want.
You need to know the ohms per foot of the gage of nichrome wire you are using.
I prefer to use 36ga which is 27 ohms per foot. (Most factory wire is thinner 38ga.)
At 27 ohms per foot, 1" of wire is 2.25ohms per inch.( 27/12=2.25)
1/2" would be 1.125 ohms (2.25/2=1.25), 1/4" would be .56 ohms (1.25/2=.56)
and lastly 1/8" would be .28 ohms (.56/2=.28)
This math will work with any gage wire if you know the ohms per foot.

Let's do an example. I want a 3.2-3.4ohm coil. A normal factory ohm value.
1" = 2.25 ohms
1/2" = 1.25 ohms
Total = 3.5 ohms
1 1/2" is very close to what I want, but it will end up much lower when completed !
It will be about 3ohms. Not critical and you may like the extra heat. The lower
the ohms the higher the current draw and more heat produced (watts).
Power = Watts (heat) and here is a free online calculator to do the work for you to
test examples. Simply enter the voltage and resistance(ohms) and the rest is calculated for you.
Online Conversion - Ohm's Law Calculator

I measure the length of wire I want for the total ohms and then add 1/4".
The extra 1/4" is for the U hook I put on each end, about a 1/16" "U". The smaller the
better, but you have to be able to squeeze it closed. Tweezers work well here.
I do the same with the lead wires and squeeze all 4 closed making a good
physical connection. (Described below.)
This extra length brings it back to the original ohms desired after soldering.
Anywhere the solder covers the nichrome wire the resistance of the nichrome wire
doesn't count. The solder is much lower resistance and electricity follows the path of
least resistance first.

I usually wind all the nichrome on the 1mm wire form, carbon fiber rod or sewing
needle. (No wick yet.) It can be done if the core wire is stiff , very thin and the
wick tied on each end.
Next hold one end of the coil, on the form, and finish tiding up the end of
the coil wire. Flip it and do the same to the other end. Now we have a nice coil on the
form.
You can use your finger nails to slide it tight, to get evenly spaced
windings and then stretch it if needed to the length you want.
The coil wraps cannot touch or overlap each other.

Next use a pair of good tweezers to make the 1/16" "U" bend on each end. Don't
worry if they aren't lined up.
Now hang the lead wires with the same 1/16" "U" bend on one end and squeeze both
"U'"s so the wire cannot fall off. This makes a good physical connection and if the
solder softens from heat the wires will stay attached until it cools.

Apply a small dab of Zinc Chloride paste to both crimped U's.
Clean the soldering iron tip with a damp sponge or wet towel, touch it to the tin of flux
and then solder the coil end connections. Heat the wires for 2-3 seconds and feed a very small amount of silver solder where the iron and wires meet. The solder should flow over both "U"'s.
Let it cool 10 seconds, don't blow it. Do the same to the other coil end.
The lead wires may not be lined up parallel still, but that's ok. A light twist will allow
them to be inserted into the ceramic cup holes after the wick is in place.

Slide the coil off the form. Using a very small sewing needle with about 1 foot
of fine thread on it, feed it through the coil.
Pull it far enough through so you can now put it right back through the coil
on the same side it just came out leaving about a 3" thread loop.
Next takes a little practice to determine how much wick is needed. I take a
length about 3", any extra can be trimmed off later.
The longer the better as it actually saves in wasting wicking material. This
becomes evident later.
Twist the wick length tight spinning it between your thumb and 1st finger.
You can now easily see if it's to large to be pulled through the coil. The
strand from the unbraided rope will need some of the wick removed as you can
see. It will also be folded over when pulled through the coil so it will be close
to 1/2 of what looks right when twisted tight.
When you have removed and twisted what looks like will fit through the coil,
if folded over, you are ready to try and pull it through the coil.
Put the wick in the thread loop, holding the coil between the thumb and 1st
finger and gently start pulling the thread.
The wick will fold as it enters the 1st coil loop. If it slides through very
easily it will need to be thicker. This is a trial and error thing that comes with practice.
You can pull the wick back out and add more and try again. I like to feel it
"pop or click" passing through the 1st loop. The rest will pull pretty easily
until you have pulled it through the coil and you have about 1/4" wick loop
sticking out of the coil.
Now you can remove the thread and are ready to install!

Feed your leads down through the cup, putting the coil in position, and tuck
the 1/4" wick loop in the bottom of the ceramic cup. This will help soak up any
excess juice during use preventing flooding.
The other end of the coil now has 2 free wick ends coming out of it. Trim
one end off about 1/4" from the coil and trim the other to about 1 - 1/2"
long. Tuck the 1/4" one in the cup.
The longer wick should be placed under the metal mesh of the bridge between
the mesh and the metal bridge itself. This allow the mesh to feed the wick
from the cart so it doesn't dry out easily.
If you removed all the mesh for the rebuild, just lay the long wick end on
the metal bridge and place the bridge mesh on it squeezing it between them.
The bridge mesh is normally rolled a little around the metal bridge to hold
it in place.
If you did not remove the mesh for the rebuild, loosen one side of the
bridge mesh and tuck the wick in between and trim any excess off.

Squeeze the mesh edge back around the metal bridge. Finger pressure is all that's normally
required as you do not want to crush the porous foam metal. Crushing an edge
isn't critical as long as the wide flat area is ok.

Finish the wires and lastly check the coil for position. It can be moved
some if needed to center it over the feed holes. If the coil is sitting to
high, it can be carefully pushed down. I use a small thin flat plastic tool
for this from a Mc D's coffee stirrers.
Always check with a meter to make sure you don't have a short somewhere prior to
testing, rinse with water, shake it out and dry prior to using. A hair dryer can speed things up.

A little practice is all that's needed. Each one gets better and so do you at doing it.
Enjoy!
 

Vaporer

Ultra Member
ECF Veteran
Jun 23, 2009
1,767
22
Away..
Ok, I had to include what to do with the long piece of wick to reinstall. I've seen many come apart and the "feed wick" was gone, broken, not noticed or destroyed on disassembly, whatever reason.
That needed to be clairified as to where the "feed wick" of the coil goes or it runs dryer, hotter, less vapor and doesn't last as long. It wasn't on many earlier model attys.

rbonie,
You are more than welcome. You mentioned cartomizers and they appear to have a round coil. I'd start off making any replacement round, single core form, till the airflow path can be identified. An oval may be partially out of the airflow and over heat on one side, taste burnt, fail quickly and so on. Work first on replacing what the original is. Better if possible.
Then study it and experiment!

Now I can work on some pics to show what I tried to describe!
 

Vaporer

Ultra Member
ECF Veteran
Jun 23, 2009
1,767
22
Away..
crazyhorse originally posted (AFAIK) a program I used for yrs and never though about posting since I hadn't used it for so long. It is loaded with info on nichrome wire, the gages and what resistance each gage is per foot. If you decide to make coils heavier duty or considering an odd size wire you found, this program will give you the info needed to use in the online calculator I listed at the begining of the thread.
Nichrome Wire Resistance Program & more
http://www.wiretron.com/wtsetup.exe
Calculator
Online Conversion - Ohm's Law Calculator

A great find crazyhorse. :thumbs:
 

rbonie

Super Member
ECF Veteran
Aug 6, 2009
434
12
Jackson,Ms (da DEEP Sout!)
rbonie,
You are more than welcome. You mentioned cartomizers and they appear to have a round coil. I'd start off making any replacement round, single core form, till the airflow path can be identified. An oval may be partially out of the airflow and over heat on one side, taste burnt, fail quickly and so on. Work first on replacing what the original is. Better if possible.
Then study it and experiment!

Now I can work on some pics to show what I tried to describe!
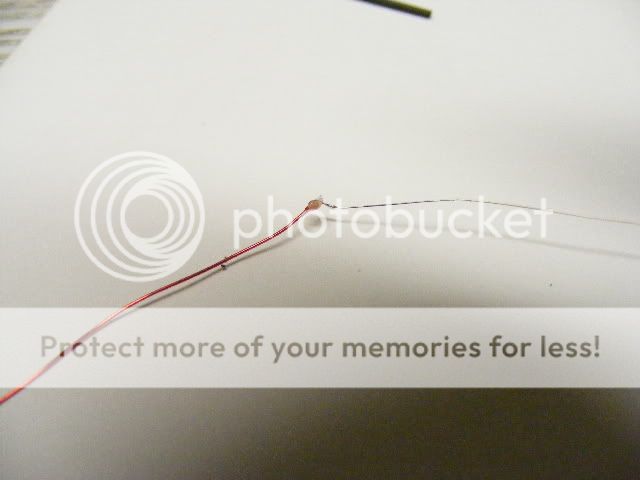
Here is my 2nd,(3rd/4th ect) try. Whachu tink?? Gonna thread wicking in but wanted u to look at it first.:rolleyes:
 

Vaporer

Ultra Member
ECF Veteran
Jun 23, 2009
1,767
22
Away..
Looking good!
The cartomizer is making a nice rigid holder. The red wire looks larger than in other attys I've stripped, but as long as you can wrap it, as the original was, without distorting the coil you should be fine.
When feeding the wick thru, if the coils do compress and touch each other, you can always use something thin to space them back apart.
You may or may not need to hold the coil itself between the themb and forefinger when feeding the wick through. doing that will help hold the coils in position, at least on a free coil.

Carry on and good job!
 

crazyhorse

Super Member
ECF Veteran
Apr 17, 2009
575
6
Baja Alabama
Tools that I find very useful are the "helping hands" soldering stand (articulating arms with alligator clip hands) and a variety of hemostats, loose alligator clips, small needle nose vise grips and things of the sort. I also couldn't do this kind of work without something called an Optivisor. Eyewear as used by jewelers and gem cutters.

I tape my wick to the forms with tiny strips of electrical tape and then wrap the coil. The way I figure it, the wire won't be too tight around the wick once the form(s) are pulled. I'd rather take a good ... whipping than try to thread a needle to use for pulling wick. I also am preferring to hook and solder the copper leads to the nichrome wire before wrapping. The leads make for nice handles and they're a lot easier for me to solder when I'm less restricted. This also makes it much easier to have very short nichrome tails.

I'm thinking I won't find Ruby Flux or anything similar unless and until I make it to Pensacola during the time a welding supply is open for business. It just isn't happening at even the most cluttered up old timey hardware stores in my area. Until I find some, I'll keep using phosphoric acid as flux. It sucks in solder like a truck stop ho and I've learned it washes out quite easily with water.

Harbor Freight sells the 96/4 solder for cheap. You get a big ol tubed coil of the ¾ mm stuff for $2.99.

Dumb question about the style of using and stuffing a bunch of wick in and around the cup and bridge: This is a question only because I'm too lazy to check it out for myself but wouldn't juice soaked wicking be slightly conductive? And if so, would that not provide a route to ground or a short?
 

rbonie

Super Member
ECF Veteran
Aug 6, 2009
434
12
Jackson,Ms (da DEEP Sout!)
Looking good!
The cartomizer is making a nice rigid holder. The red wire looks larger than in other attys I've stripped, but as long as you can wrap it, as the original was, without distorting the coil you should be fine.
When feeding the wick thru, if the coils do compress and touch each other, you can always use something thin to space them back apart.
You may or may not need to hold the coil itself between the themb and forefinger when feeding the wick through. doing that will help hold the coils in position, at least on a free coil.

Carry on and good job!
what size wire do you use? Not getting any fire out of this.. Think the ohms to high. U check Ohms across connector or just the coil?Red wire is 24g single
PS using 5 v 18500 bat in nicostick
 
Last edited:

Vaporer

Ultra Member
ECF Veteran
Jun 23, 2009
1,767
22
Away..
Crazyhorse, the eliquid isn't conductive. Even if it were slightly, electricity follows the path of least resistance, so it will go through the coil 1st.

rbonie,
The only concern I had with the red wire was its stiffness being so large in dia.
The larger the wire, the more current it can handle. Think of it as a water pipe.
The bigger the dia the more water flows through.
If you arent getting any heat the most common reason is a bad solder joint to the nichrome wire. rosin core solder just doesnt do it well. That's why I suggested Ruby Flux or any soldering paste that has Zinc Chloride. crazyhorse found phosphoric acid works well, but if you don't have it handy , standard paste is cheaper and more readily available. Nichrome wire needs abt 35watts and flux or it just doesn't take well.

To check your work, measure across the coil first so you can see what ohms to expect if all your solder joints are good. Now with one meter lead on the outside of the connector, put the other lead on the closest joint. It should read 0 until you go across the coil then you should start reading the coil too. If you are getting no heat and the problem is in the atty, at one point you wont get a reading. An "open joint/connection". It may look good, but it can have resin, oxidized metal in the joint and the solder isn't really touching the wire. A dab of flux on a joint like this and reheat will usually fix it.

If your coil measures for instance, 3.2 ohms. Then the outer connector of the atty to the center connector should be the same or very close.
make sure your battery is charged and not at the cutoff point. 2.75v for most.
The battery may read 3.1v, but when connected, the load pulls the voltage down to cutoff and a cold atty coil.
 

rbonie

Super Member
ECF Veteran
Aug 6, 2009
434
12
Jackson,Ms (da DEEP Sout!)
Crazyhorse, the eliquid isn't conductive. Even if it were slightly, electricity follows the path of least resistance, so it will go through the coil 1st.

rbonie,
The only concern I had with the red wire was its stiffness being so large in dia.
The larger the wire, the more current it can handle. Think of it as a water pipe.
The bigger the dia the more water flows through.
If you arent getting any heat the most common reason is a bad solder joint to the nichrome wire. rosin core solder just doesnt do it well. That's why I suggested Ruby Flux or any soldering paste that has Zinc Chloride. crazyhorse found phosphoric acid works well, but if you don't have it handy , standard paste is cheaper and more readily available. Nichrome wire needs abt 35watts and flux or it just doesn't take well.

To check your work, measure across the coil first so you can see what ohms to expect if all your solder joints are good. Now with one meter lead on the outside of the connector, put the other lead on the closest joint. It should read 0 until you go across the coil then you should start reading the coil too. If you are getting no heat and the problem is in the atty, at one point you wont get a reading. An "open joint/connection". It may look good, but it can have resin, oxidized metal in the joint and the solder isn't really touching the wire. A dab of flux on a joint like this and reheat will usually fix it.

If your coil measures for instance, 3.2 ohms. Then the outer connector of the atty to the center connector should be the same or very close.
make sure your battery is charged and not at the cutoff point. 2.75v for most.
The battery may read 3.1v, but when connected, the load pulls the voltage down to cutoff and a cold atty coil.
TANX will check all that tomorrow. Thought thick upright wire might have kyboshed it.. did see a bad solder joint tho.. Well s'a good first try.. Will keep going till I get it right:rolleyes:

PS using paste flux from rat shack w/zinc chloride int it/ and silver solder so should be ok
 
Last edited:

Vaporer

Ultra Member
ECF Veteran
Jun 23, 2009
1,767
22
Away..
Picture time!
After reading crazyhorses's post, I decided to try soldering the nichrome to the new leads 1st. That's a winner when you need new leads.

Here is what the "loop & hook" look like. Almost squeezed closed. I finished closing after the pic.
1loophook.jpg


Flux paste added to the joint.
2flux.jpg


Soldered! Notice how the solder is "flowed" to the nichrome wire. Many times it will curl to it and thats will be a bad joint. Usually not enough heat or flux.
3soldered.jpg


Here is the coil wrapped on a 1mm carbon fiber rod. It was handy. Sewing needles work just as well.
4coilwrap.jpg


Thread is ready to pull the wick in. The thread doesn't need to be doubled. I forgot to pull the loose end on through before I shot the pic. 1 loop is fine.
5wickready.jpg


Wicks in and trimmed on one side. Close fit on a 510 so I trimmed the loop pulled thru off.
Now is a good time to even up your coils if they distorted some. Gently.
6wickin.jpg


Its in and ready to slide the tube back on. I left the one end untrimmed(right). It was very tight going through and some space is needed for the capilarry action. If it runs to dry or feeds slow, I can pop the tube off and slide it out of the coil. If you look to the left on the wick, thats the long strand tucked under the mesh. Keeps the wick wet when ever the cup resupplies itself.
7attydone.jpg


Here are some useful tools. Good flat faced tweezers, a 3rd hand (very handy) and the other one is a pin vice. It has a drill type "chuck end", a collet that can hold abt anything
from 1/16" down to a drill thats the size of a hair. I have a cheap head band magnifier that helps a bunch too.
8tools.jpg


Hope these pics help explain the begining.
 

Sun Vaporer

Moved On
ECF Veteran
Jan 2, 2009
10,146
27
Florida
Vaporer--A ture masterpiece that will make its way to the Library!! Many have tried and a few have said they have done it, but nobody has actually showed a step by step. And you are correct, now we need specific model type directions.


This thread is one for the ages and a work in progress.

Our hats should go off to Vaporer for all of his contributions here.


Thanks,


Sun
 

rbonie

Super Member
ECF Veteran
Aug 6, 2009
434
12
Jackson,Ms (da DEEP Sout!)
Picture time!
After reading crazyhorses's post, I decided to try soldering the nichrome to the new leads 1st. That's a winner when you need new leads.

Here is what the "loop & hook" look like. Almost squeezed closed. I finished closing after the pic.


Flux paste added to the joint.


Soldered! Notice how the solder is "flowed" to the nichrome wire. Many times it will curl to it and thats will be a bad joint. Usually not enough heat or flux.

Here is the coil wrapped on a 1mm carbon fiber rod. It was handy. Sewing needles work just as well.


Thread is ready to pull the wick in. The thread doesn't need to be doubled. I forgot to pull the loose end on through before I shot the pic. 1 loop is fine.


Wicks in and trimmed on one side. Close fit on a 510 so I trimmed the loop pulled thru off.
Now is a good time to even up your coils if they distorted some. Gently.
6wickin.jpg


Its in and ready to slide the tube back on. I left the one end untrimmed(right). It was very tight going through and some space is needed for the capilarry action. If it runs to dry or feeds slow, I can pop the tube off and slide it out of the coil. If you look to the left on the wick, thats the long strand tucked under the mesh. Keeps the wick wet when ever the cup resupplies itself.


Here are some useful tools. Good flat faced tweezers, a 3rd hand (very handy) and the other one is a pin vice. It has a drill type "chuck end", a collet that can hold abt anything
from 1/16" down to a drill thats the size of a hair. I have a cheap head band magnifier that helps a bunch too.


Hope these pics help explain the begining.
GREAT PICS!!!! Thanks what did you use , a microscope????
 

Vaporer

Ultra Member
ECF Veteran
Jun 23, 2009
1,767
22
Away..
Thanks everyone, I'm really trying to show how it is done in a way people at all skill levels understand. If you have a question, please ask and I'll address it. When you have worked building and designing micro rc models and modding its circuitry for 25+ yrs, it's easy to miss things that I "just do".
I needed a camera long before PV's that would get a closeup of an electronic part on a circuit board to show people and the part might be the size of 1 grain of coarse pepper.
I found a Fuji that had a super macro feature. Woot. It does pretty well. When shooting that close the "depth of field" is shallow so one place is in focus and something 1/4" closer or farther away is blurry. So, you take 10-30 pics to get the one you really want in focus. Just glad its digital!

I'll post the "needle" method this evening. It is easier for some and works well. You can easily make 2 coils at the same time too!
 
Status
Not open for further replies.

Users who are viewing this thread