
Whew.... thought it might mean Like Mild Kink
You are using an out of date browser. It may not display this or other websites correctly.
You should upgrade or use an alternative browser.
You should upgrade or use an alternative browser.
- Status
- Not open for further replies.
Whew.... thought it might mean Like Mild Kink
We try not to get tooo bent around these parts.
 G'luck.
LMK = Look at My Knickers!
Lick my... never mind...


Well my first attempt at rebuilding yielded the exact resistance I was shooting for. 26g kanthal wrapped around a 3.25mm crocheting hook. Came out at .9 ohms. That was until, I ennealed and wicked the sucker! The res went up to 1.2 after that. No complaints though. The vape is still tastier and more dense than the factory coils.
Well my first attempt at rebuilding yielded the exact resistance I was shooting for. 26g kanthal wrapped around a 3.25mm crocheting hook. Came out at .9 ohms. That was until, I ennealed and wicked the sucker! The res went up to 1.2 after that. No complaints though. The vape is still tastier and more dense than the factory coils.
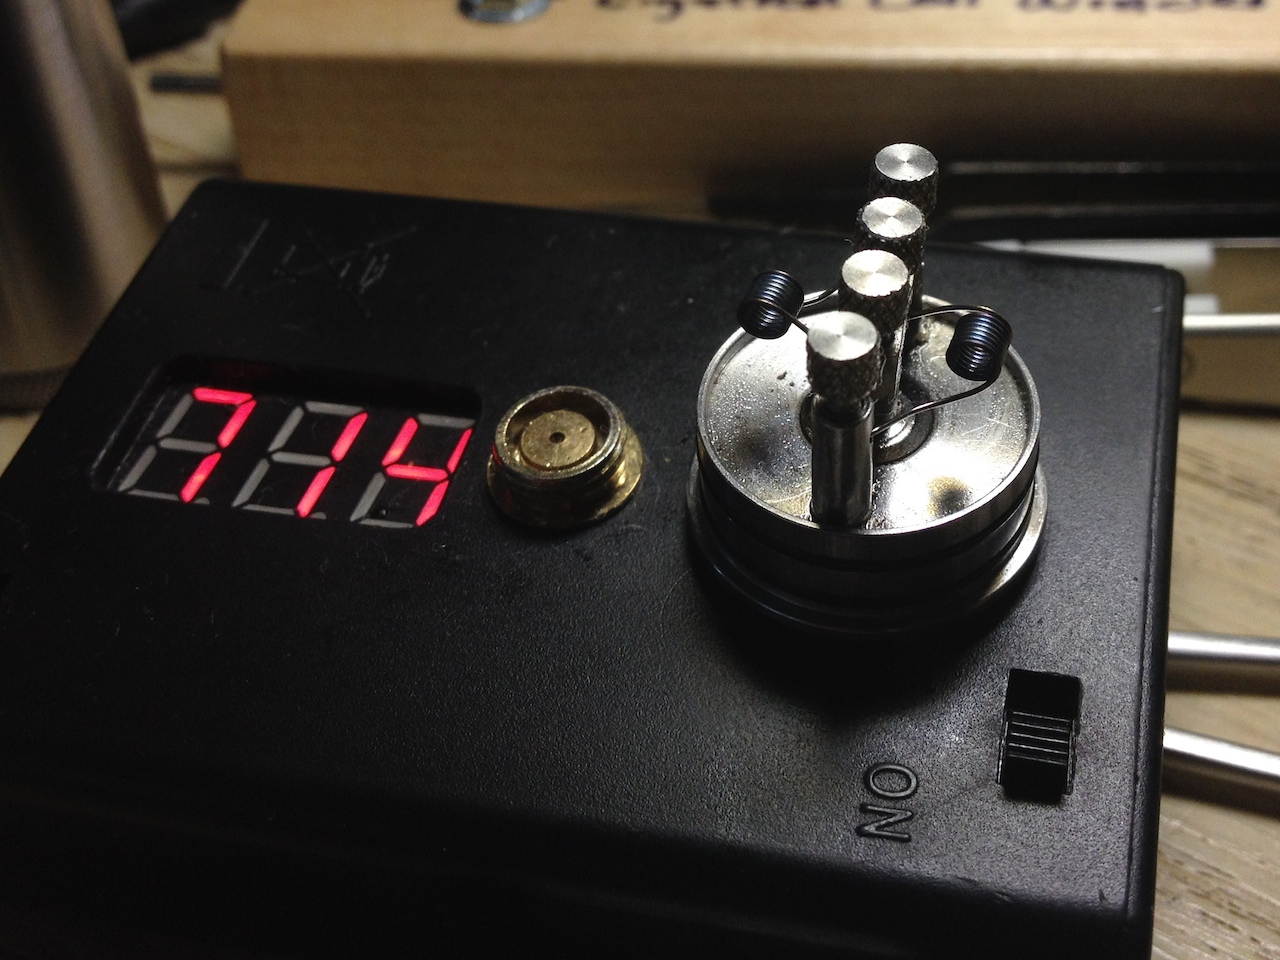
26AWG, 6/5, 3.25mm i.d., LL=9t.m.c. = .892Ω
Gotta assume a 6-wrap on that (see above link). Not unusual to see res go higher when you first wind. Usually some gaps or spread somewhere accounting for the diff. Which is no biggie at low power. Add some and this will add up in operation. So gettin 'em tight for pulsing is your challenge now. If you're just wrapping your fist one intentioned the do spread and expand.
I'd suggest a screwdriver over a c-hook. You want to .... up the starting turn as tightly as possible or the first few are a mess. Also, search heard on this thread for de-winding or dewinding for help on stripping off end-turns. This helps leave a tight formation.
Good luck D.
I figured out the issue with the res fluctuation. It was going all over the place, like up to 2.8 for a second. I figured the one of the screws was loose. Not sure if it was pos or neg, but I tightened it up and now I'm sittin pretty at 0.9 again. Home sweet home 
I figured out the issue with the res fluctuation. It was going all over the place, like up to 2.8 for a second. I figured the one of the screws was loose. Not sure if it was pos or neg, but I tightened it up and now I'm sittin pretty at 0.9 again. Home sweet home
That'll do it…and that's a very similar result to unoxidized hot gaps. That is what electron jumps yield and why strain's a valuable tool. Glad you're diggin' the vape. Man everybody oughtta build.
G'luck.Well this thread has really just died. Where is Cig and why did we allow him to just go like that. I sort of hoped he was kidding and we would see him back. I relied on this thread and do not want it to die. Anybody else heard from him?
He is posting chanel. I've given him a few nudges. Dunno.
As to this thread, it saw a 50% increase in traffic the 1st 3 mos of this year. Then the bottomless pit since the mysterious resurgence of the twisted pair and arrival of the Subtank (not that these are the cause mind you).
I think now that the hazards of oxidizing and "micro bad" have been recently challenged and convincingly debunked some may actually start looking for threads that talk about how to complete a proper coil. <shrug> We'll just have to see how well that truthful message gets out. A lot depends on folks who've benefitted from this compendium helpfully pointing newbies back to this thread. One of the few places that comprehensively approaches how the vape actually works.
My hope has always been that this might be a quiet corner where the brave (people seriously needing to quit) would come and serve as useful examples of how some basic electrical knowledge would help them succeed. I tried to walk as many of you through as I could. I'd also dreamed that hundreds of you would start similar threads with countless links back to the data here that created those successes…rather than reinventing the wheel each time. Not everyone is as well adapted to the prospect of repeating themselves as much as I've remained.
It would help if a million people quickly got to a reliable vape and joined us.There needs to be a place on ECF where the focus is on learning to build on a stable metric. Just sayin'.
Good luck all.
Last edited:
Lifted from the thread post 426 ReadyXWick - Round 2 | Page 22 | E-Cigarette Forum, some thoughts on winding basics.
If they're spreading at all rudy, you're still shy of the tight fit we're lookin' for. What I refer to as closest proximity. Stands to reason that the more firm the pressure on the iron, the better the press. Same principle. As close as nature allows is exactly that.
Then…when you pulse you get very quick oxidation. Very even insulation. That's the goal. That's what turns a shorting contact coil into a proper complete circuit much less likely to produce hot turns or leads…in operation. TRUE…good symmetry will give you a working result. But that stability changes the minute we apply a working power level (resistance goes up in operation). More than the 3.5-3.7V that we use to pulse the coil.
The higher the power we intend to use the better the insulation must be. Strain in the wire keeps the wind tight. Gives every pulse we apply the best chance of layin' down alumina in a consistent way. There's where the payoff is. And what is that benefit? We've reduced the amount of wasted energy that would otherwise bypass the circuit.
All winds work. But that's not what we're talkin' about here. It's how good an insulation we put down for the power we want to apply.
I pitch tension winding because it's been used forever. From the first time we wound wire into hoops for chain. For us this ancient tech has an electrical benefit. And it's extremely easy to do. But a blunt needle may not be firm enough to let you strain the wire if it's a thicker gauge.
Don't forget it's about leverage and using the edge of the spool as a rest for the bit. This is key. It's what let's you multiply the force by letting you pull against the wire using the light strength of both forearms. Rather than just wrists or fingers. These we want more relaxed to sense the pressure we're applying to the spool, the bit and the wire. Shake out your hands if you get tight.
In your case for 3mm, a used 3/32" drill bit will do ya just fine. Start with a few loose wraps until you see them tighten. Then practice adding just a little more pull. The result you will eventually see in your vape with a significant cool down of the vapor. In fact, more of it as due to the even distribution of heat across the coil (rather than lost to air). As I note often, the tell for too much strain is when the heat goes up for the same wind.
If you've used just enough and just a tad more than needed to get 'em to stick together as in my above you're going to be golden.
You can also use strain to make open winds that are rigid and stable on a screw using the same pin vise. While it won't produce the concentrated power of a tensioned micro if well oxidized will resist warping much better.
Good luck rudy.
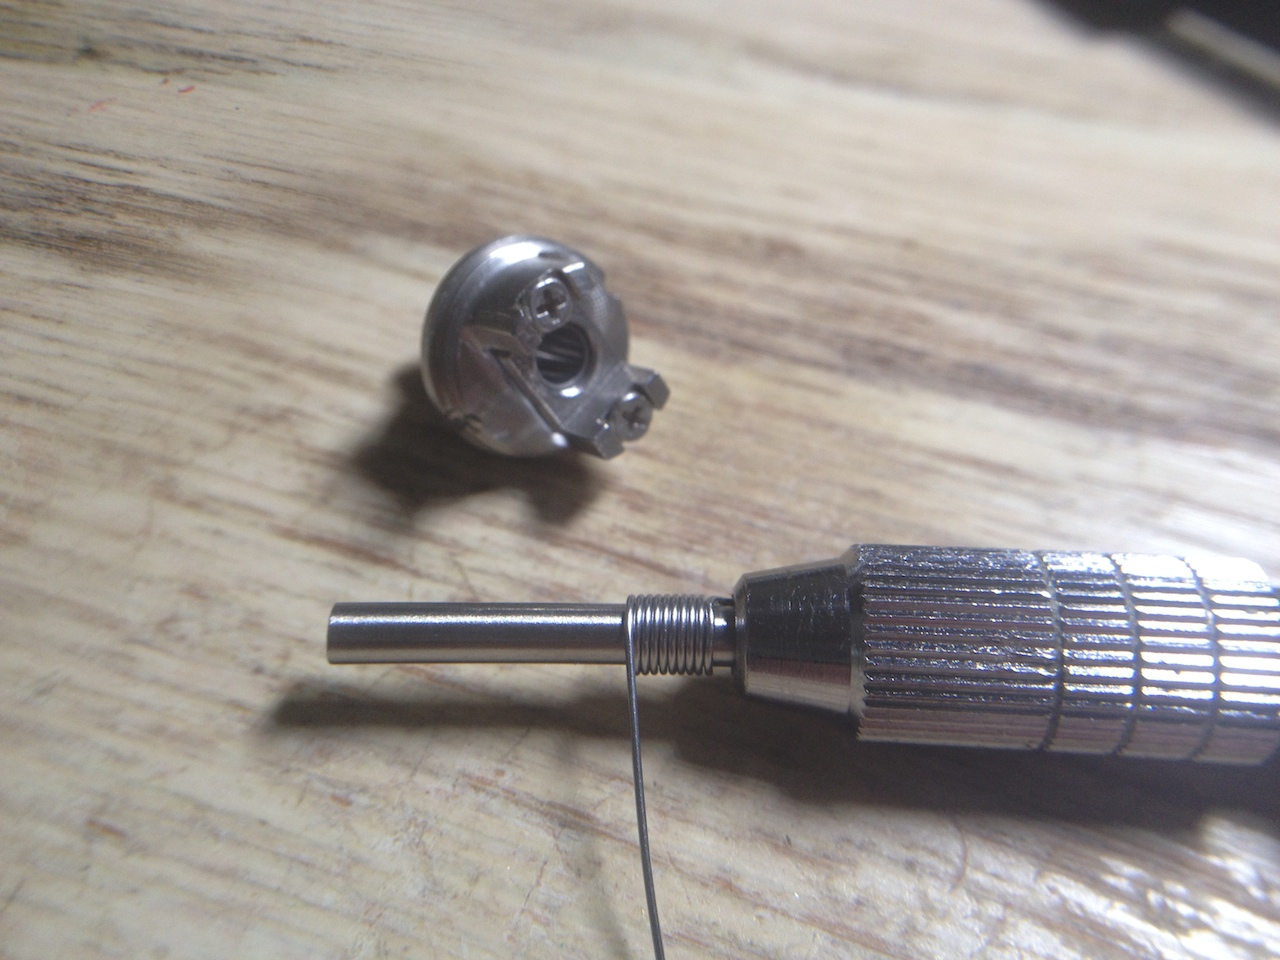
I have never explored the coiler/jig world. I have just always used my crude method. I broke off a tip from a 16 gauge leur needle and put it in a pin vice. I put a permanent mark on my pin vice with a sharpie, I then just loosen it up slightly, put in the wire at the mark, tighten it back down and wind directly from the spool applying tension by pulling on the spool as I wind with the pin vice. I count the wraps by counting how many time the little black mark comes around then cut, loosen the vice, slide off, all done. They don't come out perfect I'm sure but to eye they come out good and I have had no issues with hot legs etc.
If they're spreading at all rudy, you're still shy of the tight fit we're lookin' for. What I refer to as closest proximity. Stands to reason that the more firm the pressure on the iron, the better the press. Same principle. As close as nature allows is exactly that.
Then…when you pulse you get very quick oxidation. Very even insulation. That's the goal. That's what turns a shorting contact coil into a proper complete circuit much less likely to produce hot turns or leads…in operation. TRUE…good symmetry will give you a working result. But that stability changes the minute we apply a working power level (resistance goes up in operation). More than the 3.5-3.7V that we use to pulse the coil.
The higher the power we intend to use the better the insulation must be. Strain in the wire keeps the wind tight. Gives every pulse we apply the best chance of layin' down alumina in a consistent way. There's where the payoff is. And what is that benefit? We've reduced the amount of wasted energy that would otherwise bypass the circuit.
All winds work. But that's not what we're talkin' about here. It's how good an insulation we put down for the power we want to apply.
I pitch tension winding because it's been used forever. From the first time we wound wire into hoops for chain. For us this ancient tech has an electrical benefit. And it's extremely easy to do. But a blunt needle may not be firm enough to let you strain the wire if it's a thicker gauge.
Don't forget it's about leverage and using the edge of the spool as a rest for the bit. This is key. It's what let's you multiply the force by letting you pull against the wire using the light strength of both forearms. Rather than just wrists or fingers. These we want more relaxed to sense the pressure we're applying to the spool, the bit and the wire. Shake out your hands if you get tight.
In your case for 3mm, a used 3/32" drill bit will do ya just fine. Start with a few loose wraps until you see them tighten. Then practice adding just a little more pull. The result you will eventually see in your vape with a significant cool down of the vapor. In fact, more of it as due to the even distribution of heat across the coil (rather than lost to air). As I note often, the tell for too much strain is when the heat goes up for the same wind.
If you've used just enough and just a tad more than needed to get 'em to stick together as in my above you're going to be golden.
You can also use strain to make open winds that are rigid and stable on a screw using the same pin vise. While it won't produce the concentrated power of a tensioned micro if well oxidized will resist warping much better.
Good luck rudy.
Last edited:
Does anyone know if the new version of the STM's rba deck can be purchased yet? I've looked but have yet to see
It at any online vendor.
Only place I know for sure has 'em at the moment is vaperoyalty...Kanger SubTank RBA Mini Plus Head V2 if you're hard up for one have at it.
Good luck.
Dealing with Triangle Vape for some time on odds and ends. Some great prices on incidentals and low end startup gear. Have two of my fav Pinoy devices. Outstanding deal on some remaining colors for the Smok BT50 (my fav low end box). But some interesting values on a few of the recommended batt's here…
LG 18650HE4 2500mah 20A/35A NMC - Triangle Vape LLC
Samsung INR18650-25R 2500mah 20A NCA - Triangle Vape LLC
Sony US18650VTC4 2100mah 30A - Triangle Vape LLC
Run their Sony's and LG's. Good punch, initial reads and consistent recharge results. Across multiple chargers. Cases included on purchased pairs (nice touch).
Recently noticed the Opus BT-C3100 4 Bay Charger, a formidable recharger batt analyzer (discharger/refresher) is stocked. The 3100 was superseded by this version (v2) which addressed firmware overheating issues. It is equiv to the 3400 I believe except for a light on/off switch feature. An outstanding price for this. ordered it, good thing…put it through it's paces and a very nice device to complement my array of top end chargers.
Folks know I seldom refer but reliable good service here.
Good luck all.
Last edited:
Surprised this is still live and a good deal if you can get it Kangertech Subox with Kanger Subtank Mini Starter Kit (-10% with coupon "SUBOXDEAL") with free shipping.
Density tensioned micro winds for the OCC and RBA available here…FREE.
Good luck all!
Density tensioned micro winds for the OCC and RBA available here…FREE.
Good luck all!
Duped for ref here from the thread Kangertech SUBTANK Mini, Post 761 on account of you Subtank users readin' up on tension.
Interesting post. If I read ya right you're talking about the RDA top cap itself. Yeah, real PIA. Have to fish it out with a forceps. There's bound to be a bit of variation in the cap opening diameter for the stem. But the chimney stem itself tends to pick up some crusting of caramelized juice on its very tip and a bit up the stem. This can present just enough drag to unscrew the top cap as you remove the base from the atomizer. Unfortunately tightening the cap too much can make it hard to get off.
Every other fill or so I take a cue tip to the stem tip and just around it to remove any visible deposits. And I try to remember to make sure the cap is snug on this particular RBA head. This has made this surprise infrequent.
While you're at it after the stem wipe remove most of the cotton off the cue tip and run it up the stem. You might be surprised how much of those deposits are accumulating in the stem. They can affect both taste and draw.
Good luck all.
p.s. While you're at it, invert the base and blow out the RBA from the 510 connection into a tissue, etc. Some moisture can collect at the bottom of the core and this will restore proper airflow. Make sure the base is dry itself before reassembly.[/QUOTE]
hey all. This thread is sooo big, I don't have the time to read through it. But I need to replace the rda. Everytime I go to fill my tank, and unscrew the bottom the top cap of the rda stays inside on the tank (no matter how tight I screw it on) Question is the new style rba plus combatable with the old? I can't find it in stock anywhere. Or should I just get the original and just mod the old style again, for better juice flow.
Interesting post. If I read ya right you're talking about the RDA top cap itself. Yeah, real PIA. Have to fish it out with a forceps. There's bound to be a bit of variation in the cap opening diameter for the stem. But the chimney stem itself tends to pick up some crusting of caramelized juice on its very tip and a bit up the stem. This can present just enough drag to unscrew the top cap as you remove the base from the atomizer. Unfortunately tightening the cap too much can make it hard to get off.
Every other fill or so I take a cue tip to the stem tip and just around it to remove any visible deposits. And I try to remember to make sure the cap is snug on this particular RBA head. This has made this surprise infrequent.
While you're at it after the stem wipe remove most of the cotton off the cue tip and run it up the stem. You might be surprised how much of those deposits are accumulating in the stem. They can affect both taste and draw.
Good luck all.
p.s. While you're at it, invert the base and blow out the RBA from the 510 connection into a tissue, etc. Some moisture can collect at the bottom of the core and this will restore proper airflow. Make sure the base is dry itself before reassembly.[/QUOTE]
Sum up on "Chunky" Wicking for the Subtank
These days it's always as much KGD as I can stuff in the coil. Original ST juice channels are quite adequate for that (even if airflow a limit). The RBA feeds need a little coaxing with a fine metal file. This will max out the juice flow potential. May be too much for the power level you like. Or, you may prefer a more diffuse vape (less flow, more power, higher aspect wind). Scale back a bit but at least you're getting enough flow to be sure. In the wayback, original answers from me and cig on wicking…
...Moderately moisten the wick before closing up. Give it a soft tug covering the airflow before firing. This should be enough to ensure saturation. It will of course have the drier texture of a fresh cotton install but it will break in and stabilize. So give it a bit for conclusions.
More on the post...KangerTech SUBTANK Mini | Post 2779
Good luck all.
You're an awesome guy Mac, still churnin' out those answers
Lifted from Post 1265, Tensioned Micro Coils. The next step. for clarification to new readers on this thread.
What a micro coil complete circuit is and does...
Niiice. Thanks for the visuals gt. I hand wind using a variety of pin vise tools for the precise control it gives. But more frequently I'll resort to my RYOBI for fat wire. Hope the hands hold up. But good to know I have that to fall back on.
Just as important as the rigidity of form accomplished by this method of winding or shaping is electrical function. Given enough strain (elongation) you get the wire as tight as two objects can come together. That helps ensure gapless uniform oxidation (in practical terms). As I mentioned to you earlier, just enough and there's a zone of electrical flow stability you get to when you apply the early stages of oxidation at low voltage. In other words, when you get the adequate deposition of alumina insulation to avert breakdown voltage for the power level to be applied. Then…you have a complete and very stable circuit.
The best of all worlds — the most compact thermally efficient geometry brought by the proper protection from shorting. That's what a properly completed tensioned microcoil achieves.
Good luck.
What does tension bring us?
Bare wire doesn't perform the same or give off the same texture attributes in the vape as well oxidized wire. A well oxidized Kanthal coil results in a more saturated cooler output. Just what does that imply in terms of the difference in wire performance?
Coilers can't get winds tight enough as tension winding does to ensure (Kanthal) oxidation. It also takes a lot more pulsing to get uniform contact (or at very high heat which may reduce wire efficiency). The result can't taste the same any more than the product of a ceramic coated pan vs. a bare metal aluminum or stainless imparting different characteristics with its surface.
All winds work. All wire heats up. Given closely comparable builds and temperature goals one may start to discern the subtle sometimes formidable differences in the characteristics of both wire, wind and process.
I urge folks to consider tension winding as simple to do and the results predictable. It's dirt cheap because it can be done on an ordinary screw driver but a pin vise is easier and economical (<5$).
Coilers can make fairly consistent open (spaced) coils. To get reliable insulation of contact coils you need strain. So I'd say don't close off your horizons and give yourself the opportunity to compare both methods. Once you encounter the wire's stress sweet spot and improved output (density, for watts input), dial up the temp you want with your res target and you'll be hooked on efficiency.
Good luck all and enjoy the vape.
- Status
- Not open for further replies.
Similar threads
- Replies
- 6
- Views
- 1K
- Replies
- 1
- Views
- 685
- Replies
- 3
- Views
- 984
- Locked
- Replies
- 6
- Views
- 3K
- Replies
- 1
- Views
- 578
Users who are viewing this thread
Total: 2 (members: 0, guests: 2)