
PVC mod (16340/RCR123, solderless)
So many mods require drilling or a dremel. I think I am like most
people and do not have all the required tools to prevent drilling
through my hand with small parts nor do I have a dremel or lathe.
After many attempts at a few different designs and a LOT of small
parts, I have come up with this fairly easy do it yourself mod.
This mod is finicky at keeping proper positive battery contact.
Use safety precautions and assemble at your own risk.
4 Tools needed:
pliers
knife
1/2 inch pvc/pipe cutter (or hacksaw)
ruler with United States customary units
9 Parts needed:
(from Lowes)
a. 1 push-on F Connector
#302832
Not found on Lowes website. It is in the electrical isle near telephone wire/jacks.
Amazon.com: RCA VH68 Push-On Connectors: Electronics
b. Plastic box of wire brads size 1/2 x 19
#532371
Shop The Hillman Group Wire Brads 19 x 1/2" at Lowes.com
(other lengths are too long/short or have too big of a head)

c. 1 foot 3/8 Inside Diameter clear vinyl tubing
#22273
$0.25 per foot near brass fittings and plumbing
d. 1 foot 5/16 Inside Diameter clear vinyl tubing
#22272
$0.20 per foot near brass fittings and plumbing
(pvc schedule 40, lowes item # and reference pics shown)
(lowes does not list small pvc items on website)
e. 1/2 inch round cap (slip)
#23937
1/2" Cap Slip PVC Fittings Schedule 40
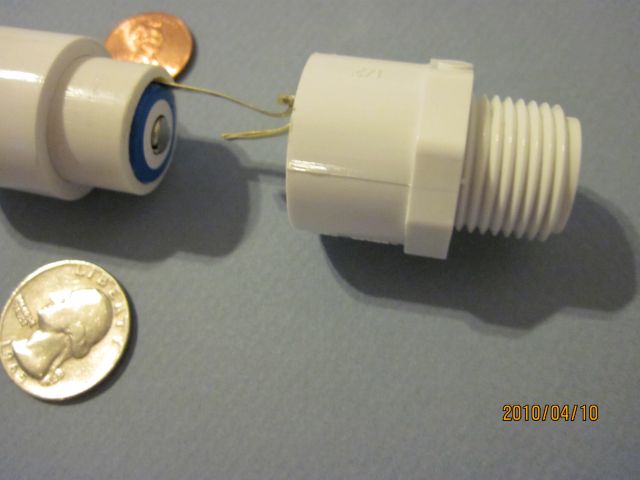
f. 1/2 inch threaded/slip adapter
#23855
1/2" Male Adapter Mipt x Slip PVC Fitting Schedule 40
g. 1/2 inch x 5 feet pvc pipe
#23967
Shop Charlotte Pipe 1/2" x 5' Schedule 40 Plain End Pipe at Lowes.com
(from madvapes.com)
h. 510 connector with hole (non-sealed)
510 Battery Connector, Assembled, Silver
This may also work for other connectors with hole besides 510.
(from Office Depot)
i. Package of 1.5 inch brass fasteners (1 inch is too short)
Office Depot Brass Fasteners 1 12 Length Pack Of 60 by Office Depot
Extra Parts to make it functional:
RCR132 Battery
510 atomizer & cartridge
Instructions:
01. Cut 1/8 inch piece of the small tubing (5/16).
02. Push this piece over the threaded part of the F Connector.
This smaller tubing around the threads prevents the ground wire
from making continuous contact. This tubing does not need to be
pushed as far as it can go. The bigger tubing may be used but
may slip down if not wedged on.
03. Cut 1/8 inch piece of the big tubing (3/8).
04. Push this piece over the top of the F Connector below the top
ring and ridge line. This will be a very tight fit. Leave ring on.
05. Insert one wire brad (nail) into bottom hole of F Connector and
push it until it stops. Pointy end goes in first. Wire brad head
will stick out.
06. Cut one inch length of 1/2 inch pvc pipe.
07. Push the pvc cap onto one end of this one inch length you just cut.
08. Pull apart legs of two 1.5 inch brass fasteners.
09. Grip the longer end of one fastener leg about 1/8 inch with pliers
and bend over towards the top of the "button" into a U shape.
10. Do the same for the longer end of the second fastener.

11. Position both fasteners so the buttons are facing opposite directions.
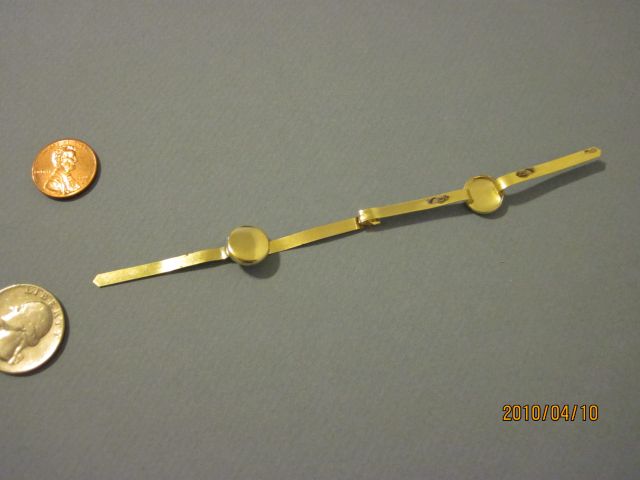
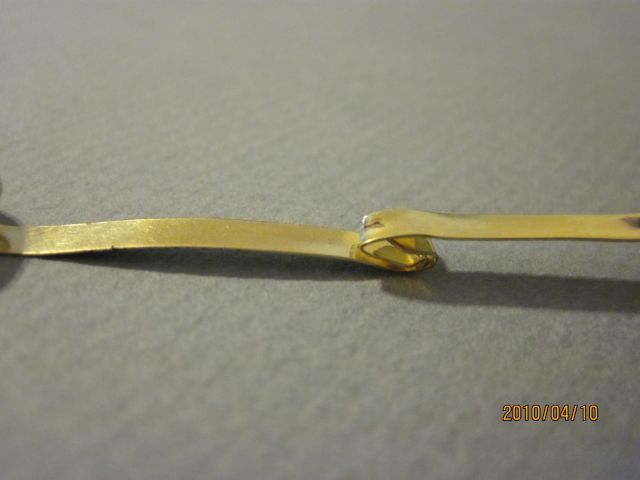
12. Insert the two bent ends into each other and clamp tight with pliers
so they end up hooked together.
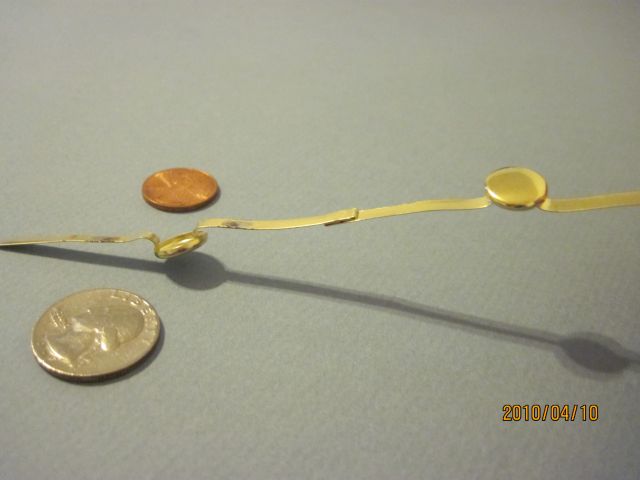
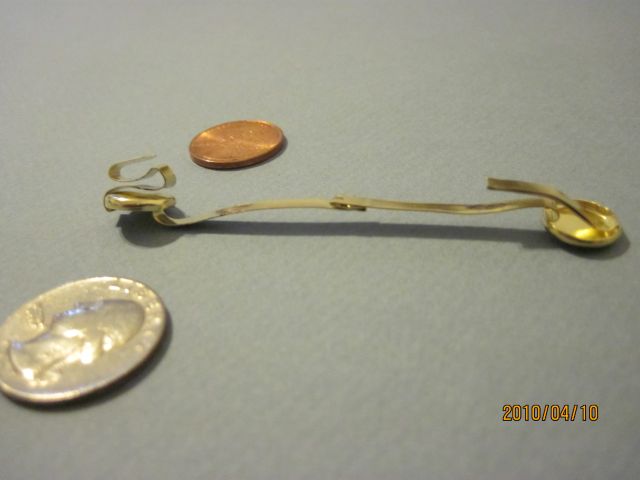
13. With your fingers, bend the outside end of one leg over the top of
the nearest button in accordian fashion so that no section is wider
than the button. Do not let the leg stick out past the side of the
button. Push the accordian together as much as possible. This will
ensure good contact to the flat negative side of the battery. The
button by itself did not always make good contact.
14. Leave about 1/2 inch of the opposite end leg (on the other fastener) by
breaking the rest of it off by bending it back and forth with pliers.
Bend the remaining attached 1/2 inch in half. This will be used as
a switch to make contact with the edge of the F Connector.
15 Place flat negative side of battery onto accordian leg and push the
other leg up flush against the battery.
16. Place the accordian leg side with battery into the pvc pipe with cap
and push all the way down.
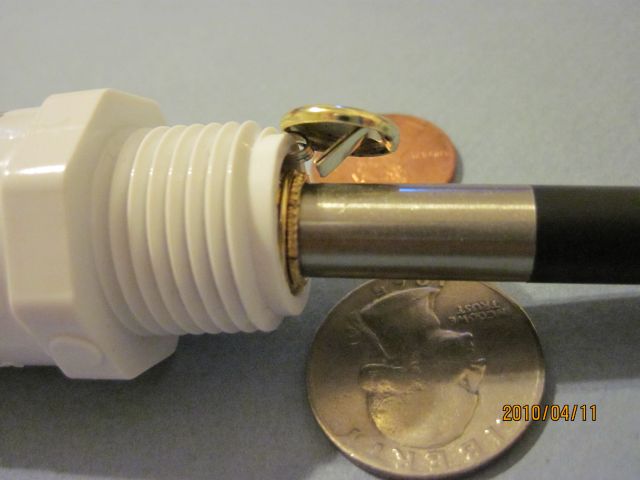
17. Slide open button through middle of pvc adapter, big side first.
18. Push pvc adapter tight onto pvc pipe.The button should stick out the
top of the adapter completely. If it does not, you should be able to
pull the button up a little at this point.
19. Slide F Connector into threaded end of pvc adapter hole all the way
down, wire brad head first. It probably will not go down far enough to be
flush but get it as close as you can. You want the wire brad to be
touching the positive terminal of the battery.
This will be the most probable spot of failure if the mod does not work.
20. Adjust the button and 1/4 inch leg piece so that the leg piece touches
the F Connector edge when you push down on the button with your thumb.
Important note: It should not touch when you are not pushing on it!
21. Attach atomizer/catridger to 510 connecter and slide into F connector.
Note: The 510 connector is only used to make a good ground connection.
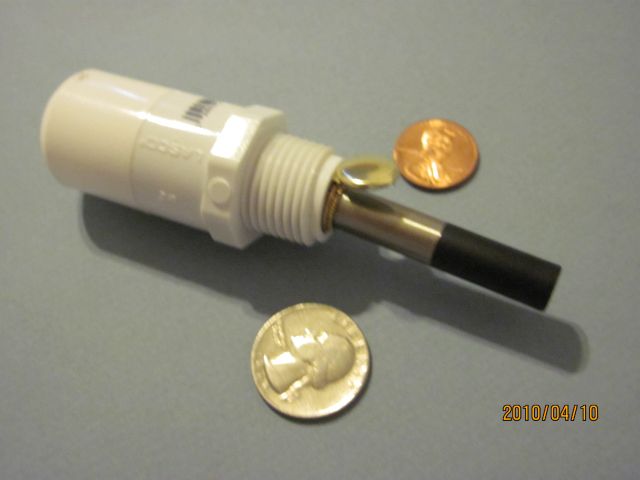
Mod completed! F Connector is mostly sealed for battery protection.
Ensure the button does not remain in constant contact with the F Connector.
Remove the atomizer when not in use to prevent accidental activation.
AFAIK it vapes okay, not enough experience or other PVs to compare it to yet.
I think a 3.7 volt 16340 protected battery may vape better than the
3.0 volt R123 LiFePO4 I used.
So many mods require drilling or a dremel. I think I am like most
people and do not have all the required tools to prevent drilling
through my hand with small parts nor do I have a dremel or lathe.
After many attempts at a few different designs and a LOT of small
parts, I have come up with this fairly easy do it yourself mod.
This mod is finicky at keeping proper positive battery contact.
Use safety precautions and assemble at your own risk.
4 Tools needed:
pliers
knife
1/2 inch pvc/pipe cutter (or hacksaw)
ruler with United States customary units
9 Parts needed:
(from Lowes)
a. 1 push-on F Connector
#302832
Not found on Lowes website. It is in the electrical isle near telephone wire/jacks.
Amazon.com: RCA VH68 Push-On Connectors: Electronics
b. Plastic box of wire brads size 1/2 x 19
#532371
Shop The Hillman Group Wire Brads 19 x 1/2" at Lowes.com
(other lengths are too long/short or have too big of a head)
c. 1 foot 3/8 Inside Diameter clear vinyl tubing
#22273
$0.25 per foot near brass fittings and plumbing
d. 1 foot 5/16 Inside Diameter clear vinyl tubing
#22272
$0.20 per foot near brass fittings and plumbing
(pvc schedule 40, lowes item # and reference pics shown)
(lowes does not list small pvc items on website)
e. 1/2 inch round cap (slip)
#23937
1/2" Cap Slip PVC Fittings Schedule 40
f. 1/2 inch threaded/slip adapter
#23855
1/2" Male Adapter Mipt x Slip PVC Fitting Schedule 40
g. 1/2 inch x 5 feet pvc pipe
#23967
Shop Charlotte Pipe 1/2" x 5' Schedule 40 Plain End Pipe at Lowes.com
(from madvapes.com)
h. 510 connector with hole (non-sealed)
510 Battery Connector, Assembled, Silver
This may also work for other connectors with hole besides 510.
(from Office Depot)
i. Package of 1.5 inch brass fasteners (1 inch is too short)
Office Depot Brass Fasteners 1 12 Length Pack Of 60 by Office Depot
Extra Parts to make it functional:
RCR132 Battery
510 atomizer & cartridge
Instructions:
01. Cut 1/8 inch piece of the small tubing (5/16).
02. Push this piece over the threaded part of the F Connector.
This smaller tubing around the threads prevents the ground wire
from making continuous contact. This tubing does not need to be
pushed as far as it can go. The bigger tubing may be used but
may slip down if not wedged on.
03. Cut 1/8 inch piece of the big tubing (3/8).
04. Push this piece over the top of the F Connector below the top
ring and ridge line. This will be a very tight fit. Leave ring on.
05. Insert one wire brad (nail) into bottom hole of F Connector and
push it until it stops. Pointy end goes in first. Wire brad head
will stick out.
06. Cut one inch length of 1/2 inch pvc pipe.
07. Push the pvc cap onto one end of this one inch length you just cut.
08. Pull apart legs of two 1.5 inch brass fasteners.
09. Grip the longer end of one fastener leg about 1/8 inch with pliers
and bend over towards the top of the "button" into a U shape.
10. Do the same for the longer end of the second fastener.
11. Position both fasteners so the buttons are facing opposite directions.
12. Insert the two bent ends into each other and clamp tight with pliers
so they end up hooked together.
13. With your fingers, bend the outside end of one leg over the top of
the nearest button in accordian fashion so that no section is wider
than the button. Do not let the leg stick out past the side of the
button. Push the accordian together as much as possible. This will
ensure good contact to the flat negative side of the battery. The
button by itself did not always make good contact.
14. Leave about 1/2 inch of the opposite end leg (on the other fastener) by
breaking the rest of it off by bending it back and forth with pliers.
Bend the remaining attached 1/2 inch in half. This will be used as
a switch to make contact with the edge of the F Connector.
15 Place flat negative side of battery onto accordian leg and push the
other leg up flush against the battery.
16. Place the accordian leg side with battery into the pvc pipe with cap
and push all the way down.
17. Slide open button through middle of pvc adapter, big side first.
18. Push pvc adapter tight onto pvc pipe.The button should stick out the
top of the adapter completely. If it does not, you should be able to
pull the button up a little at this point.
19. Slide F Connector into threaded end of pvc adapter hole all the way
down, wire brad head first. It probably will not go down far enough to be
flush but get it as close as you can. You want the wire brad to be
touching the positive terminal of the battery.
This will be the most probable spot of failure if the mod does not work.
20. Adjust the button and 1/4 inch leg piece so that the leg piece touches
the F Connector edge when you push down on the button with your thumb.
Important note: It should not touch when you are not pushing on it!
21. Attach atomizer/catridger to 510 connecter and slide into F connector.
Note: The 510 connector is only used to make a good ground connection.
Mod completed! F Connector is mostly sealed for battery protection.
Ensure the button does not remain in constant contact with the F Connector.
Remove the atomizer when not in use to prevent accidental activation.
AFAIK it vapes okay, not enough experience or other PVs to compare it to yet.
I think a 3.7 volt 16340 protected battery may vape better than the
3.0 volt R123 LiFePO4 I used.
")
