
First of all, English is not my native language so my apologize for any typos or grammar errors.
This type of coil requires a great amount of power so I guess it wont work (won't deliver the best flavor) on standard ego batteries or similar. I found it best on 11-15 watts. So if your mod can't supply such watts, don't build this coil. Also, this tutorial requires you to mod your coil assembly, so you won't able to build a standard horizontal coil anymore.
Recently I purchased a nautilus mini and amazed with it. The flavor is just amazing. It's just like sky and earth compared to my evod, mini protank 2 and 3, even with my kayfun. Since then, I started to build my evod coil with many different style, especially bvc to match with the nautilus, well, at least close to. but I didn't get any good result. It always end with dry hits, gurgling, and weird taste. Not even close to nautilus's flavor.
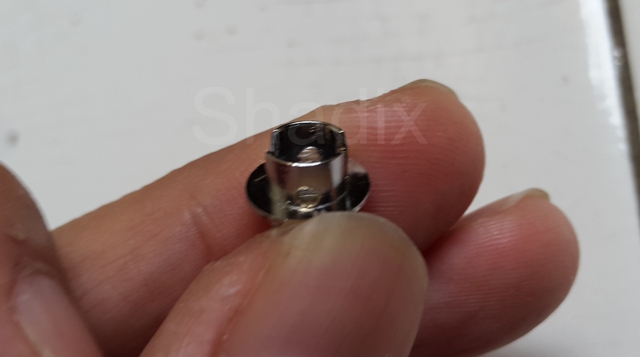
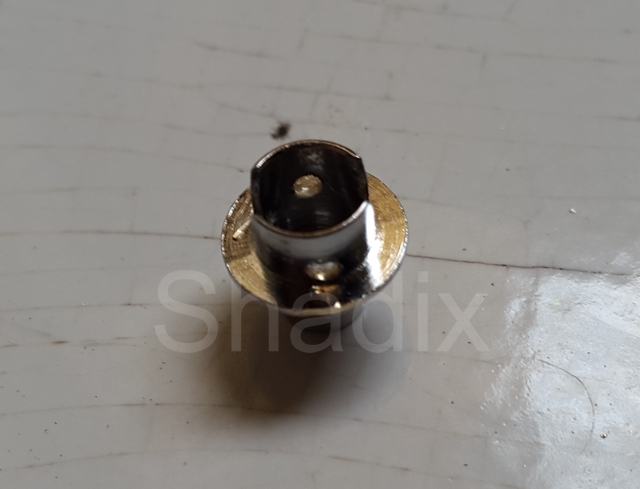
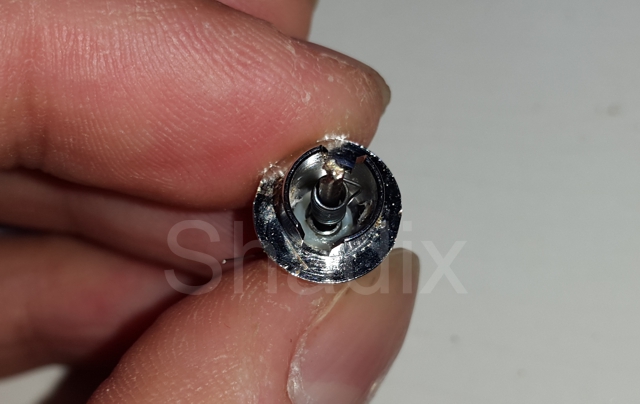
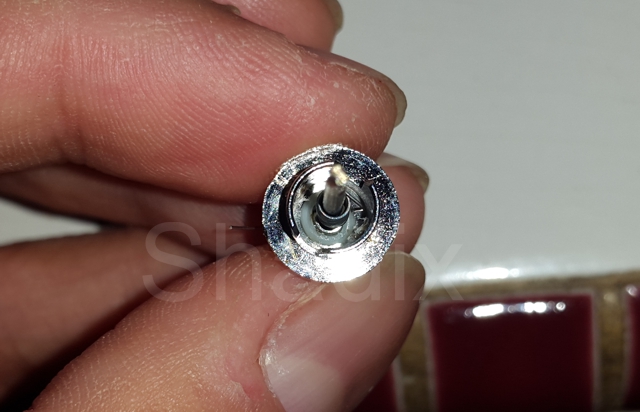
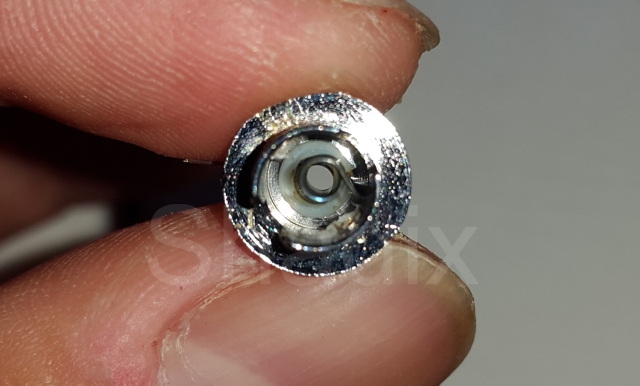
After some observation, I found the cotton were unable to deliver the juice fast enough to all section of the coil. The nautilus has four holes, so it can supply juice from four direction. So I drilled two 1.5 mm holes on between the the evod's coil gaps. Assuming the gaps are on 12 and 6 o'clock position, without the two additional holes, the cotton on 9 and 3 o'clock position will always run out of juice.
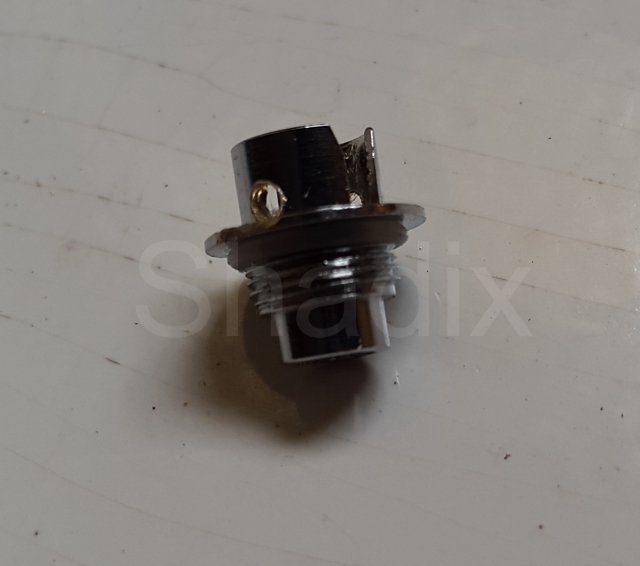
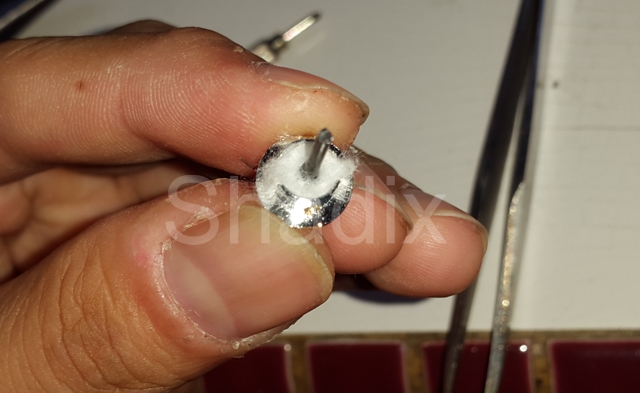
After you drill the 2 holes, wash it with soap. Wash your hand also. With soap! This is important when you are dealing with cotton later. Cotton are absorbment, it will absorb anything including oil or sweat in your finger. This will make your juice tastes like ..... Believe me.
So let's make the coil. I do 14 wraps on 2mm screwdriver, best if you use drill bit because od its lenght. I'dont have 2mm drill bit so I just use screwdriver instead. It will make around 2 ohm coil. Owh almost forgot, use AWG 30 khantal. Awg 32 resistance is too high and awg 28's diameter is just too big, it will destroy the insulator.
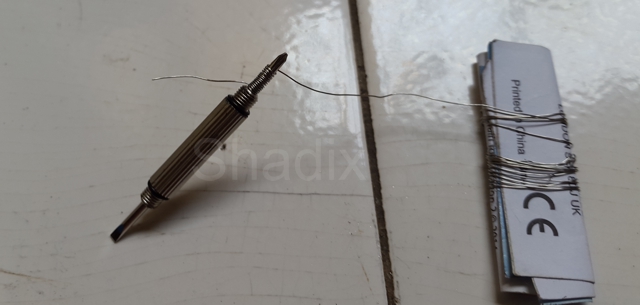
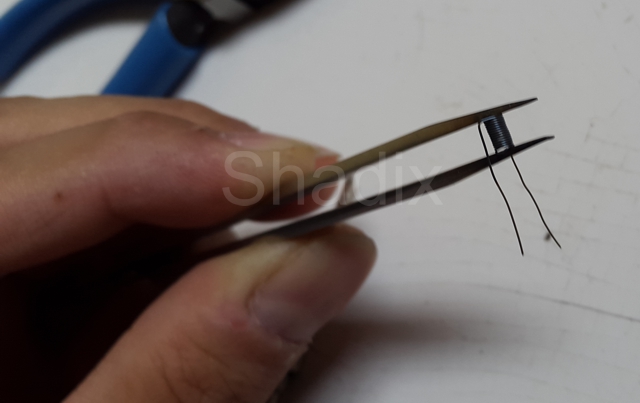
Twist the end of the wires just like on the picture below. The bottom wire will be the positive and the top wire will be the negative.

Take the coil, and torch it. Don't tweez the coil just yet. Just torch it. This will ensure all surface of the coil get oxidised. Sometimes if you torch the coil while you tweezing it, several area/loops of the coil will touch each other preventing oxidation.

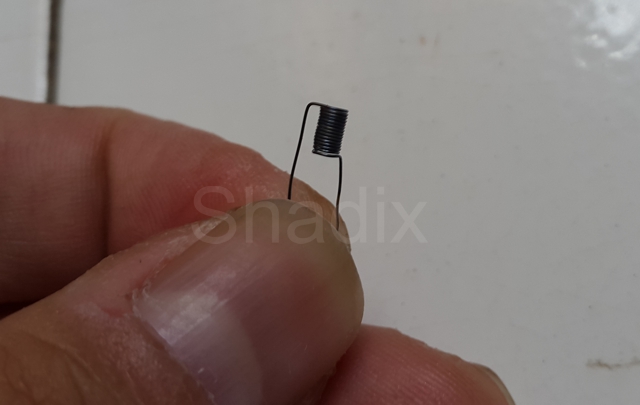
Take your coil and tweezer, tweez it and torch it so you have a nice packed coil like one on the picture.
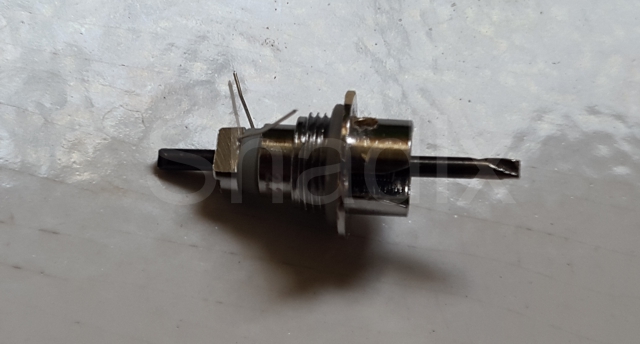
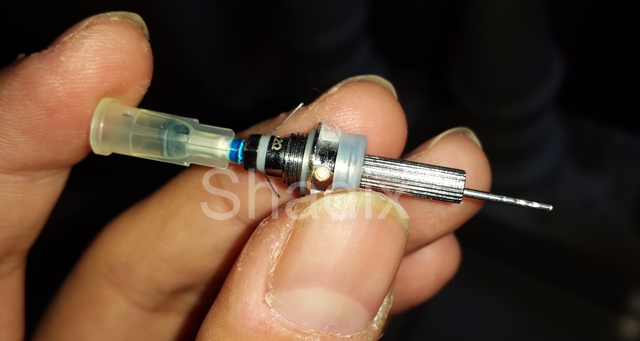
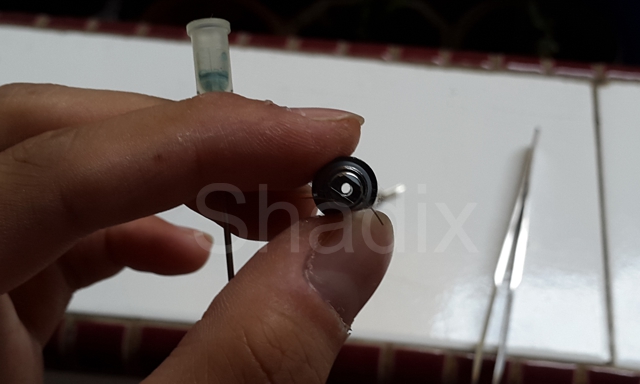
Put the coil in the coil assembly. Position the coil in the center and make sure the bottom of the coil is just above(1 or 2mm above the base insulator). Use the drill bit to ajust the coil position. In the picture below I use 1.5mm broken drill bit(duh) as a guide.
While the drill bit still inside the coil, put cotton piece by piece, little by little. Don't put a lage amount of cotton at once. Take your time. Don't pack it too tight nor too loose. Also, MAKE SURE you put cotton in between the coil and the negative wire.

Keep putting the cotton until it covered the coil. Put the chimney back. Fill your tank. Take few primer puff and let it sit for 2 minutes to ensure the cotton is all saturated. You're done.. Enjoy.
This type of coil requires a great amount of power so I guess it wont work (won't deliver the best flavor) on standard ego batteries or similar. I found it best on 11-15 watts. So if your mod can't supply such watts, don't build this coil. Also, this tutorial requires you to mod your coil assembly, so you won't able to build a standard horizontal coil anymore.
Recently I purchased a nautilus mini and amazed with it. The flavor is just amazing. It's just like sky and earth compared to my evod, mini protank 2 and 3, even with my kayfun. Since then, I started to build my evod coil with many different style, especially bvc to match with the nautilus, well, at least close to. but I didn't get any good result. It always end with dry hits, gurgling, and weird taste. Not even close to nautilus's flavor.
After some observation, I found the cotton were unable to deliver the juice fast enough to all section of the coil. The nautilus has four holes, so it can supply juice from four direction. So I drilled two 1.5 mm holes on between the the evod's coil gaps. Assuming the gaps are on 12 and 6 o'clock position, without the two additional holes, the cotton on 9 and 3 o'clock position will always run out of juice.
After you drill the 2 holes, wash it with soap. Wash your hand also. With soap! This is important when you are dealing with cotton later. Cotton are absorbment, it will absorb anything including oil or sweat in your finger. This will make your juice tastes like ..... Believe me.
So let's make the coil. I do 14 wraps on 2mm screwdriver, best if you use drill bit because od its lenght. I'dont have 2mm drill bit so I just use screwdriver instead. It will make around 2 ohm coil. Owh almost forgot, use AWG 30 khantal. Awg 32 resistance is too high and awg 28's diameter is just too big, it will destroy the insulator.
Twist the end of the wires just like on the picture below. The bottom wire will be the positive and the top wire will be the negative.
Take the coil, and torch it. Don't tweez the coil just yet. Just torch it. This will ensure all surface of the coil get oxidised. Sometimes if you torch the coil while you tweezing it, several area/loops of the coil will touch each other preventing oxidation.
Take your coil and tweezer, tweez it and torch it so you have a nice packed coil like one on the picture.
Put the coil in the coil assembly. Position the coil in the center and make sure the bottom of the coil is just above(1 or 2mm above the base insulator). Use the drill bit to ajust the coil position. In the picture below I use 1.5mm broken drill bit(duh) as a guide.
Keep putting the cotton until it covered the coil. Put the chimney back. Fill your tank. Take few primer puff and let it sit for 2 minutes to ensure the cotton is all saturated. You're done.. Enjoy.

")