
Christmas came early today, finally received the Flash-e-Vapor V2 made by Artur Schwarze from Germany.
Here it is on the Provari with the Flashi Beauty ring.
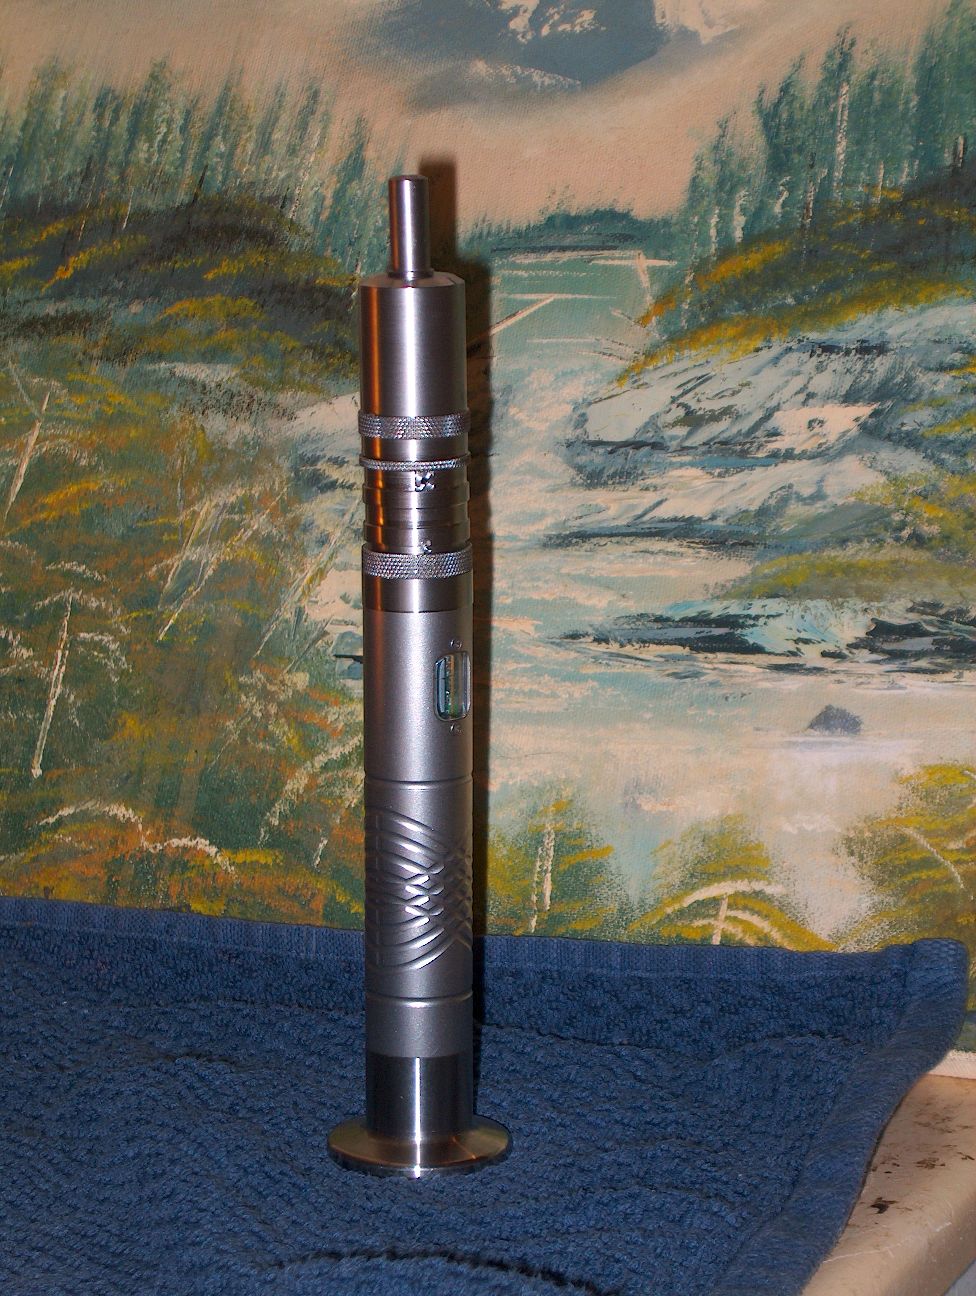
Must say that the build fit and engineering that went into the Flashi is spectacular. Every thing fits like a glove and is an ideal match for my Provari.
The build platform is large and very easy to mount. This tank is basically a dripper with dual wicking system that feeds the juice into the dripping chamber. It reminds me a lot of the Tailfun GS but only bigger and all Stainless Steel.
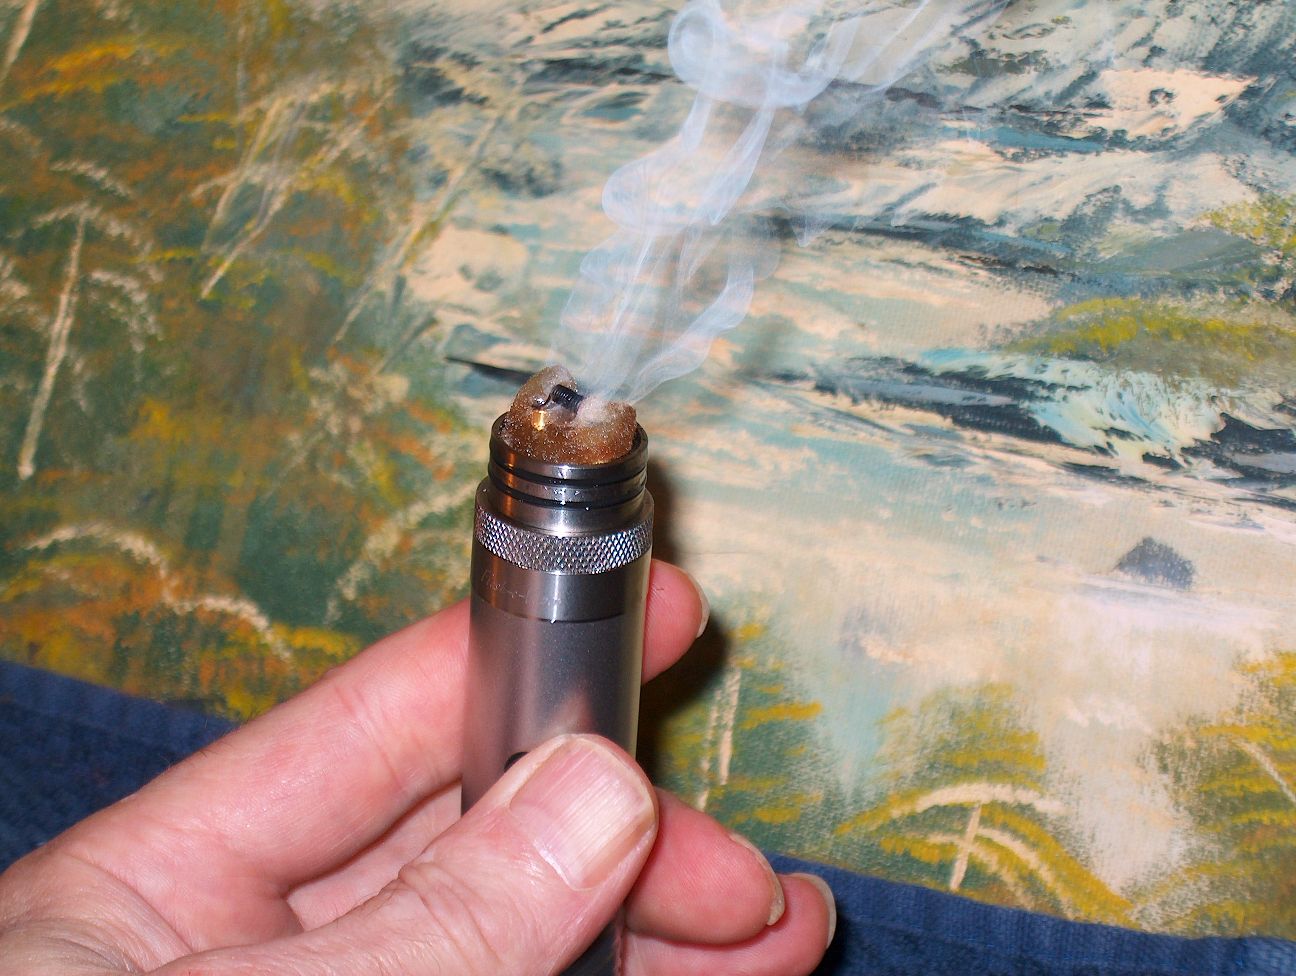
The vape is simply fantastic. I just threw in a simple 1.4 ohm micro coil with cotton wick through the coil and wrapped around the dripping chamber. The flashi vapes as well as my Aqua that has a dual coil .5 ohm vertical build. The beauty of it is you can pop the whole tank off and rebuild or rewick it with the tank full of juice. Filling is a breeze, just unscrew the tank while it's upside down, fill it up and screw it back in. Easiest fill job I have had with any tank.
The top cap of the dripping chamber has two large wicking holes that you put silica wrapped with a small strip of SS mesh through. Then when placed onto the build platform the ends push down on to the coil wick. Then you screw your filled tank onto the dripping cap. So basically one has two separate wick systems in this rba. One wick system to wick the juice from the tank to the dripping chamber, and the second wick that goes through the coil and absorbs the juice from the tank above. Sounds complicated, but it is quite simple and easy to build and install.
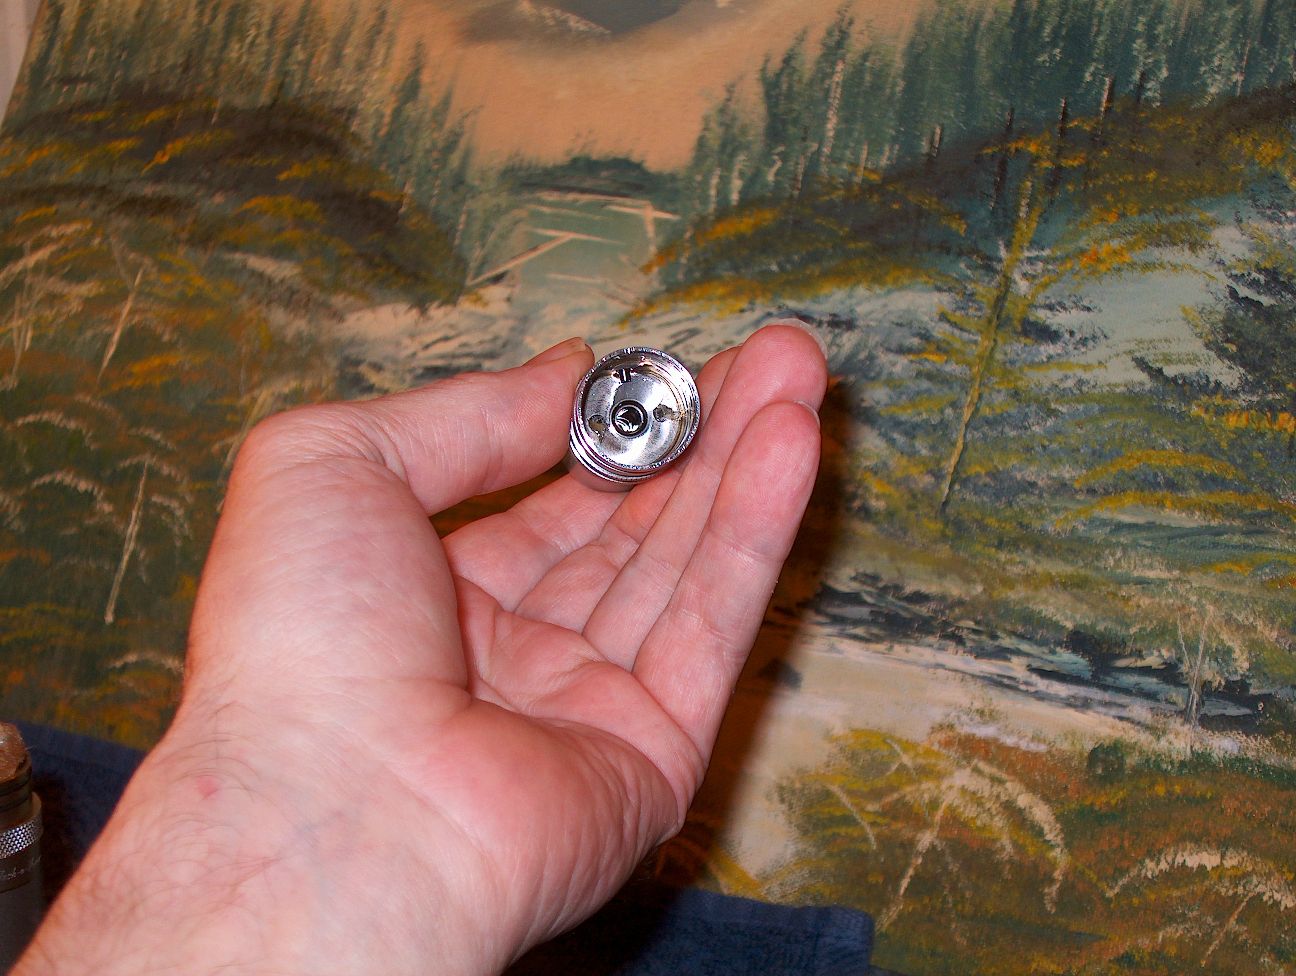
Below is a pic of the under side of the dripping chamber, you can see the two wicks on either side of the center stem hole.
The next pic is of the coil deck. You can see part of one post. I just used cotton through the coil and wrapped the tails around the diameter of the base up over the terminal posts and tucked the ends beneath the coil. The thought was to soak up any extra juice that gets to the bottom deck. The two wicks that come from the tank rest on top of the wick that covers the posts.
The air intake is adjustable. The flashi comes with three screws that are drill at three different diameters so you just insert the one for your ideal draw. If needed, one could always drill one of the screws out to a larger size, or vape without a screw at all and have a super airy draw. You can see the air screw in the first two pics. The top pic shows it from the outside, the second pic you can see it protruding through the drip chamber cap. Also available for the flashi is a regular dripping cap and stem, also a tank extension and stem that adds an extra 3.5 ml to the 5.5 ml tank giving it a 9 ml capacity.
When I had correspondence with Artur, he said I was the first person in the U.S. to be appointed the flashi. And I am one happy vaper, with a great rba. Well worth the price and the wait. All day at work the main thought going through my head was DAMN!!! That's a Great Vape!!! DAMN!!! lmao.
Here it is on the Provari with the Flashi Beauty ring.
Must say that the build fit and engineering that went into the Flashi is spectacular. Every thing fits like a glove and is an ideal match for my Provari.
The build platform is large and very easy to mount. This tank is basically a dripper with dual wicking system that feeds the juice into the dripping chamber. It reminds me a lot of the Tailfun GS but only bigger and all Stainless Steel.
The vape is simply fantastic. I just threw in a simple 1.4 ohm micro coil with cotton wick through the coil and wrapped around the dripping chamber. The flashi vapes as well as my Aqua that has a dual coil .5 ohm vertical build. The beauty of it is you can pop the whole tank off and rebuild or rewick it with the tank full of juice. Filling is a breeze, just unscrew the tank while it's upside down, fill it up and screw it back in. Easiest fill job I have had with any tank.
The top cap of the dripping chamber has two large wicking holes that you put silica wrapped with a small strip of SS mesh through. Then when placed onto the build platform the ends push down on to the coil wick. Then you screw your filled tank onto the dripping cap. So basically one has two separate wick systems in this rba. One wick system to wick the juice from the tank to the dripping chamber, and the second wick that goes through the coil and absorbs the juice from the tank above. Sounds complicated, but it is quite simple and easy to build and install.
Below is a pic of the under side of the dripping chamber, you can see the two wicks on either side of the center stem hole.
The next pic is of the coil deck. You can see part of one post. I just used cotton through the coil and wrapped the tails around the diameter of the base up over the terminal posts and tucked the ends beneath the coil. The thought was to soak up any extra juice that gets to the bottom deck. The two wicks that come from the tank rest on top of the wick that covers the posts.
The air intake is adjustable. The flashi comes with three screws that are drill at three different diameters so you just insert the one for your ideal draw. If needed, one could always drill one of the screws out to a larger size, or vape without a screw at all and have a super airy draw. You can see the air screw in the first two pics. The top pic shows it from the outside, the second pic you can see it protruding through the drip chamber cap. Also available for the flashi is a regular dripping cap and stem, also a tank extension and stem that adds an extra 3.5 ml to the 5.5 ml tank giving it a 9 ml capacity.
When I had correspondence with Artur, he said I was the first person in the U.S. to be appointed the flashi. And I am one happy vaper, with a great rba. Well worth the price and the wait. All day at work the main thought going through my head was DAMN!!! That's a Great Vape!!! DAMN!!! lmao.


 .....oh and hot glued in
