Well, now that I can start my own threads, I thought I would post the progress reports on my ePipe:
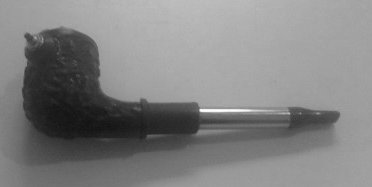
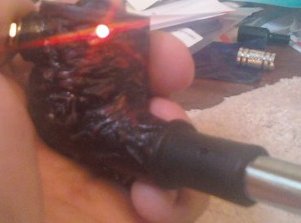
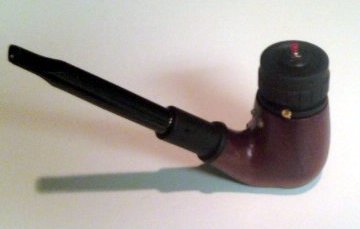
I'm mostly finished with the second prototype, here's the mockup mechanical assembly:
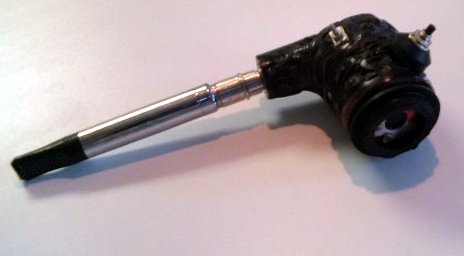
The switches and battery case are all standins for the planned versions, which will be roughly the same size but less clunky (the safety switch will be a black rocker the same size as that mini-toggle, the main button will stop at the top of where the washer does now, and the battery case will be black plastic rather than red aluminum).
The rubber grommet will be pretty much the same, and a flat black metal disk will cover that (total height 1/4-3/8", versus the full inch of the first prototype). It's hard to tell from the cheap cell phone pictures, but this pipe is a much higher quality than the other, being made from briar and having a more complex texture to the exterior. It has a straight stem, which is easier to work with for prototyping purposes, but I'll probably switch back to bent stems or offer an option, as bent stem pipes feel more natural to me.
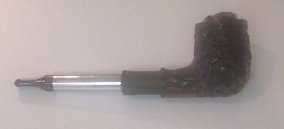
Also still fiddling with switch position, non pipe smokers will probably find the side position fine, but some of them may prefer it to be towards the back under the thumb rather than on the side under the index finger, and there's also the issue of left vs. right-handed users (not as much of a concern with the top switch). When I have a plastic battery pack casing, I'll see if I can compress things enough to make room under the metal disk for the button (which will be only 8mm for the main casing).
Being able to fit this into a standard pipe is pretty difficult, there are some jumbo pipes it would be far easier to manage it in, but I want something that looks to first glance like an ordinary pipe without standing out for size or materials. I'm very tempted to switch to protected 16340 cells, simply because it's making room for a protection PCB that makes the 18350 so damned hard to wedge in there vertically. I'm trying to find a source for a protected 18350, or at least the bits that make 18500's and 18650's protected, without ripping them out of functional cells.
--Dave
Well, since I can't start my own threads, I guess I'll have to hijack yours, sorry.
Here's my prototype e-Pipe 1 week ago:
That's a CR123 under that black heatshrink, with a connector for the power at the end of the green heatshrink. the red and black wires lead to an RCA connector, which goes through a nasty hacked-together adapter to the 801 atomizer. After that picture I connected a switch, and it actually worked great, although I don't have any pictures.
Then I tore everything out, bored the bowl of the pipe wider, built a new battery pack around an 18350, shortened the stem end, and built a proper RCA-801 adapter (I also have a 901 adapter) and added lights and a safety switch. Here's what it looks like now:
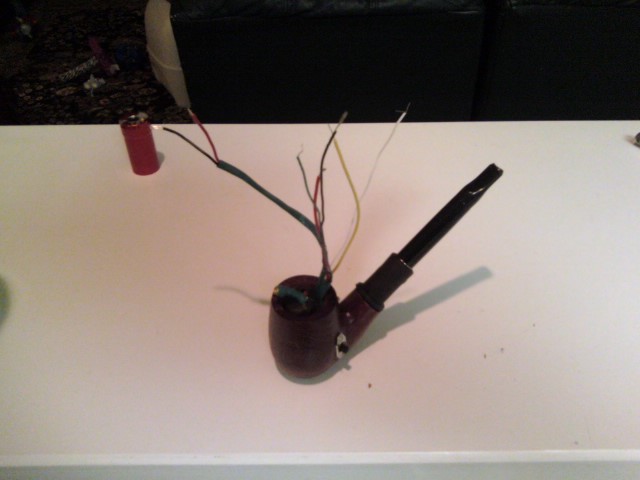
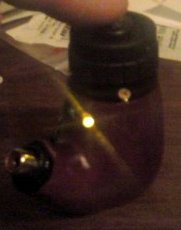
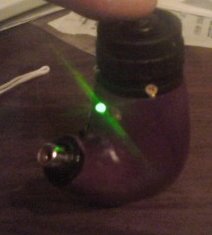
Pretty much the same state of assembly, but with a lot more features and more wires. The battery pack is an 18350 with PCB added. You can't see the LED's from this angle (they face towards the user, the yellow one will light when you are vaping and the green one when you hit the button but the safety switch has been turned off. The little red can in the upper left corner is my next-generation battery pack, you can see the small gold-plated coax fitting if you squint (the bigger black patch is left over from an experiment that didn't pan out.
Materials wise, it's about $20, it took about $500 in tools to go from prototype 1 (which only needed a Dremel and hand drill. plus a little soldering and a butane torch) to 1A (which required a drill press with cross-adjustable vice, an ESD soldering station, and some really hard to find drill bits).
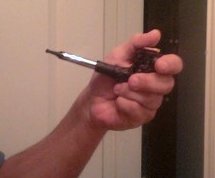
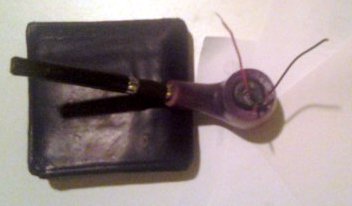
Well, here's the finished prototype:
That top cap is the .... end of a dead flashlight, it's way too thick because my wiring method was designed to be easy to change on the fly while I worked things out, and there's a lot of excess wire and heatshrink that has nowhere else to go.
Notice the amber LED, that tells you it's operational (actually sending power to the RCA fitting:
If the safety switch is engaged, triggering the button lights a green LED and no power goes to the RCA fitting:
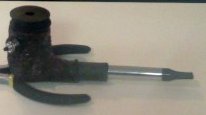
And here's the basis of the next model:
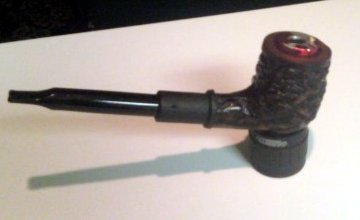
I won't need to run wires outside the bowl except for the battery fitting (I'm going to use strips of ribbon cable from an old black IDE cable, now that all my drives are SATA, I have a bunch laying around). The top will be capped off with a rubber pad and a large brass washer, I'll be putting the switch on the side under the index finger instead of under the thumb. The combination will let me reduce my form factor for the cap to around 1/4 of an inch (rather than the full inch it is now).
The battery pack you see there is a keychain pill bottle with the fob portion removed, this one is red because that's what I had lying around, future versions will be silver (cheaper and better looking), black if I can find a paint that will stick reliably. I'll use a single LED for status, red for safe mode and green or amber for operational. I don't like the way the safety switch I used looks, so much so I didn't even take a picture from an angle that would show it. I'll keep the switch in the design, but come up with something much more polished. Functionally the prototype is great, I vaped all day (2ml worth or so) and used only half the battery capacity. I'll need to make a custom charger, as making the battery removable independently complicated assembly too much, I don't want a potentially unprotected cell feeding this, and it loses the idiot-proof functionality of the connector.
Even as an ugly hacked-together prototype, this would do better on the "would you want to take this through airport security" test than the sonic screwdriver, pipe bomb, and battery case mods that are the standard these days. The new model will be much sleeker and polished, and it will keep the significant features; safety switch, indicator light, large 1200mAh battery, and a safety vent for the cell that points the positive end down). If the battery goes into thermal runaway and started venting, a little plug of hot glue will get popped out and release the pressure (otherwise, what I've got there isn't a battery pack as much as a small incendiary grenade, even with a protection PCB).
I'm mostly finished with the second prototype, here's the mockup mechanical assembly:
The switches and battery case are all standins for the planned versions, which will be roughly the same size but less clunky (the safety switch will be a black rocker the same size as that mini-toggle, the main button will stop at the top of where the washer does now, and the battery case will be black plastic rather than red aluminum).
The rubber grommet will be pretty much the same, and a flat black metal disk will cover that (total height 1/4-3/8", versus the full inch of the first prototype). It's hard to tell from the cheap cell phone pictures, but this pipe is a much higher quality than the other, being made from briar and having a more complex texture to the exterior. It has a straight stem, which is easier to work with for prototyping purposes, but I'll probably switch back to bent stems or offer an option, as bent stem pipes feel more natural to me.
Also still fiddling with switch position, non pipe smokers will probably find the side position fine, but some of them may prefer it to be towards the back under the thumb rather than on the side under the index finger, and there's also the issue of left vs. right-handed users (not as much of a concern with the top switch). When I have a plastic battery pack casing, I'll see if I can compress things enough to make room under the metal disk for the button (which will be only 8mm for the main casing).
Being able to fit this into a standard pipe is pretty difficult, there are some jumbo pipes it would be far easier to manage it in, but I want something that looks to first glance like an ordinary pipe without standing out for size or materials. I'm very tempted to switch to protected 16340 cells, simply because it's making room for a protection PCB that makes the 18350 so damned hard to wedge in there vertically. I'm trying to find a source for a protected 18350, or at least the bits that make 18500's and 18650's protected, without ripping them out of functional cells.
--Dave