
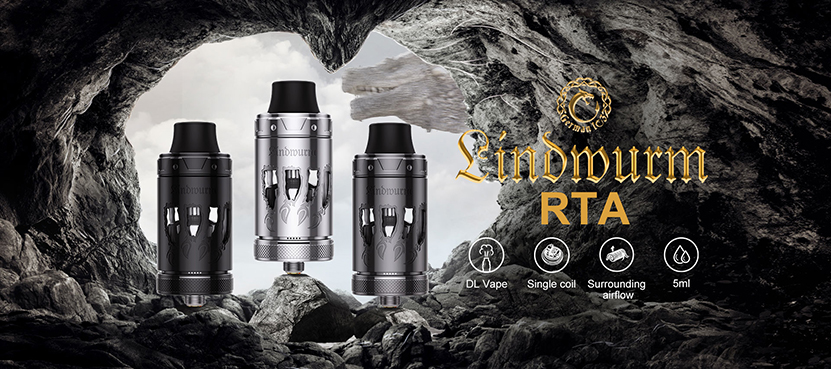
I’m here today to take a look at the Vapefly Lindwurm rta that was sent to me by Sourcemore in order to provide a fair and honest review. Some of you may already have these but for those that don’t perhaps I can shed some light on this tank and help you decide if you would like to try one. The Lindwurm rta has a base diameter of 25.5mm and has laser engraving on it to simulate claw marks. It has a 5ml capacity which is decent and has six interchangeable airflow pins. Besides that it has both bottom and side airflow controls. At first this seemed a little confusing to me but hopefully I can explain it well enough so you can understand it. The build deck is a single coil setup which I prefer. It includes a tapered 810 drip tip which is also a favorite of mine. I have high hopes for this one. Let’s take a look at some promotional material and I’ll give my thoughts on it.

WHAT’S IN THE BOX?
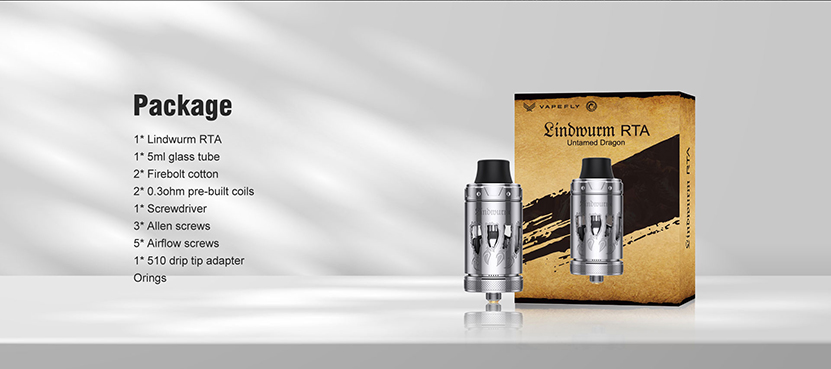
1* Vapefly Lindwurm RTA
1* 5ml Glass Tube
2* Firebolt Cotton
2* 0.3Ω Pre-built Coils
1* 510 Drip Tip Adapter
1* Screwdriver
3* Allen Screws
5* Airflow Screws
1* O-rings
SPECIFICATIONS:
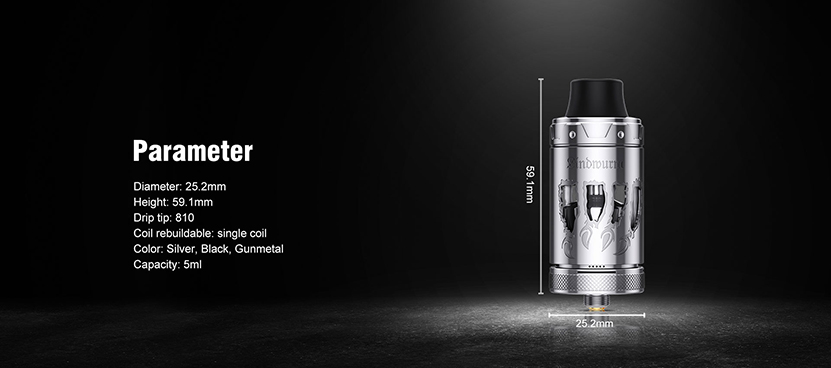
Diameter: Φ25.5mm
Filling: Top filling
Capacity: 5ml
Airflow: Bottom & side airflow
Coil Deck: Single coil deck
Airflow Pin: 0.9mm, 1.2mm, 1.4mm, 1.8mm, 2.1mm, 2.5mm
Drip Tip: 810
Color: Silver, Black, Gunmetal
FEATURES:
1. Vapefly Lindwurm RTA Tank Atomizer
2. Laser engraving & corrosion processings
3. 25.5mm diameter, 810 drip tip
4. Top filling system, 5ml capacity
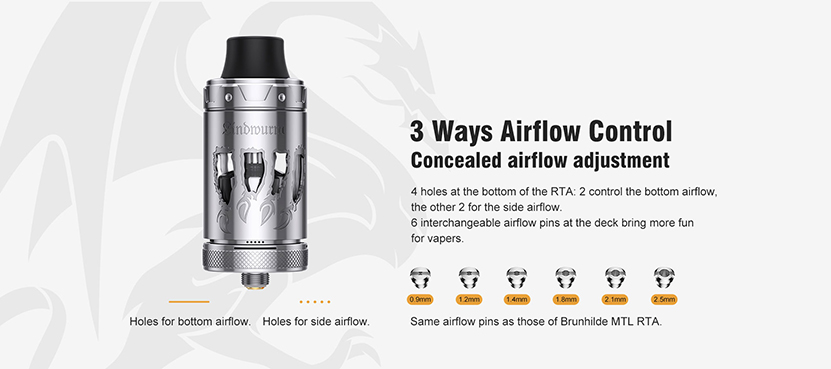
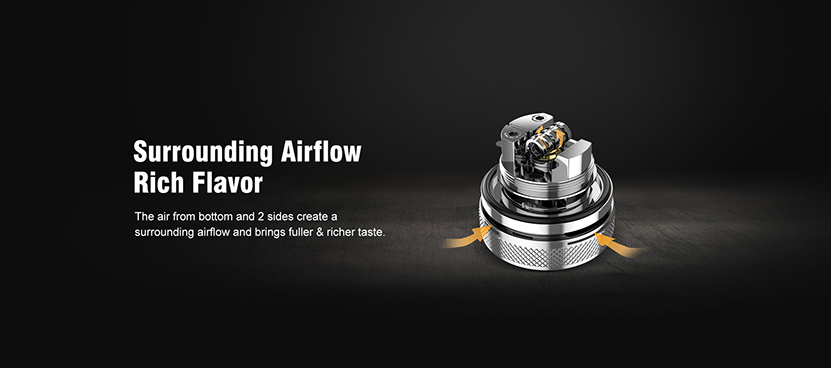
5. Precise bottom & side airflow
6. Concealed airflow adjustment
7. Designed with single coil deck
8. Excellent DL vaping experience
9. 6 interchangeable airflow pins as those of Brunhilde MTL RTA


INITIAL THOUGHTS:
The packaging for the Lindwurm is much like other products from Vapefly. The coloring on the box gives the effect of a torn parchment with the name of the company and device in very nice font on the front. Also below the Lindwurm name is “Untamed Dragon”. I am assuming that this is referring to the Lindwurm name which is a dragon without wings.
The back of the box has the Lindwurm name again as well as a list of features. It also lets you know that the tank was designed by the German 103 team and Vapefly. Also on the back is a list of social media contacts for Vapefly, an authenticity code, and company information.


Once opened, there is the tank with spare glass in a foam insert. Underneath that insert is located the accessories for the tank as well as a user manual and some other important information like the sheet that shows you how to adjust the airflow since this one is a little complicated compared to your average rta.
Included is of course extra o rings and seals, two 3mm coils with two cotton threads, multi tool, allen wrench, 510 drip tip adapter, and five spare airflow insert pins of different sizes. Also included is a card that explains how to adjust the airflow control depending if you want bottom, side, or both airflows used.

As always the first thing I do is break down the tank for cleaning before using it. The Lindwurm breaks down completely which makes it easy. The outer metal sleeve that protects the glass tank section has the Lindwurm name engraved on it as well as what appears to look like scratch marks around and under the four odd shaped openings that allow you to see the liquid level. The down side to this cover is that you can’t see if you’ve actually filled the tank to the top of the glass. However, what you can do and I have been doing when filling is while the top cap is already off for filling then go ahead and lift the metal sleeve up and off the tank and you can then see the full glass for filling. If that’s too much trouble then you can just fill until you are past the top of the viewing windows.
You can see the notches in the top cap below. It is in fact a bayonet style fill cap that just requires a ¼ turn to open or close. There is a white gasket underneath the top cap to help with sealing from leaking as well as a gasket with two slots cut into it in the top of the tank for filling. It’s supposed to help prevent leaking while filling but I personally don’t like these types of fill gaskets. It makes it nearly impossible to use a glass dropper for filling without making a mess.
Near the top of the tank is an o ring that holds and seals the glass but there is also a second o ring on the top that helps to hold the metal sleeve in place. However, you can still turn the sleeve once it is installed if you are trying to align it with the mod or something.


I’m not sure if I mentioned this yet or not but the Lindwurm is a single coil rta. The build deck is very easy to build on. There are two allen head screws that are used to secure the coil in place. One post has a hold in it that you insert the leg through and the other is slotted so once you have the first one in place then you can just slide the other leg in from the side if you want. The two included coils are a little beefy for this tank in my opinion and had to bend the legs as I pushed the legs into place. It is a 3.0mm coil rated at .3 ohms. The mod I used it on showed up as .29 which is totally acceptable.


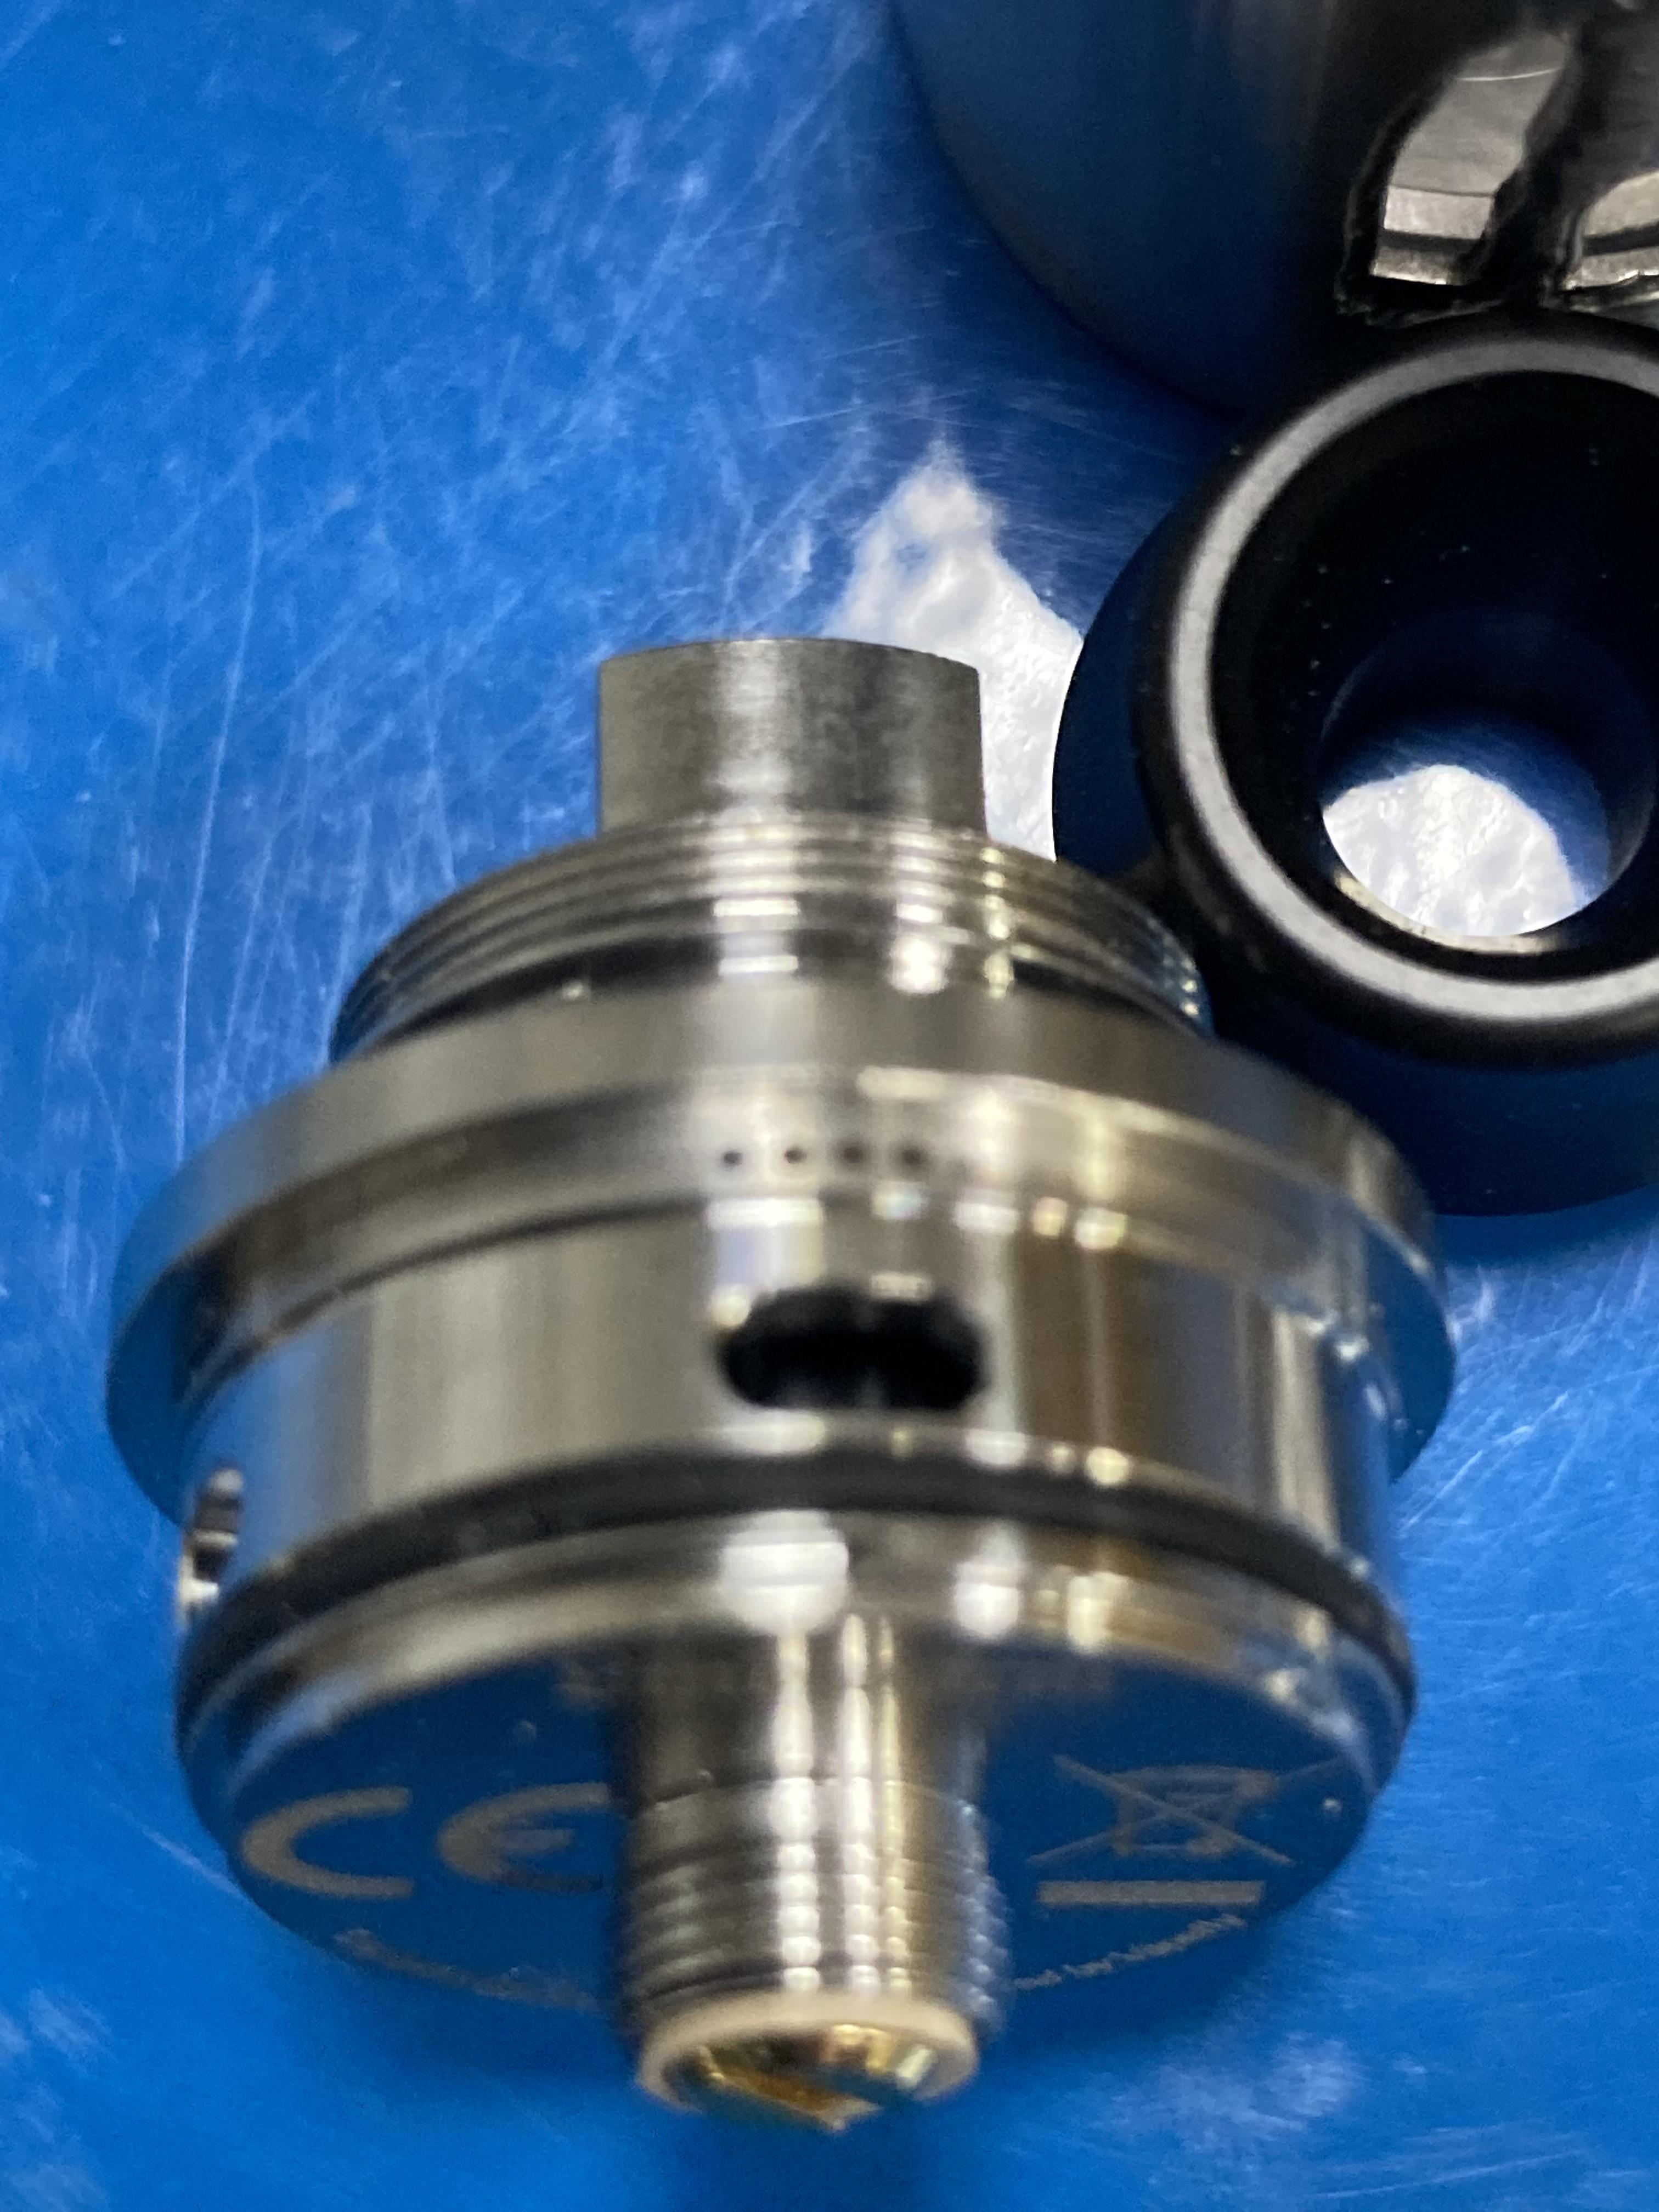
There is bottom and side airflow on this tank. In the first picture above you can see the single hole under the posts that brings airflow from that side and there are 3 holes on the opposite side to provide airflow from that side also in the second picture. In the center is the replaceable airflow insert. Besides the one that comes pre-installed, there are five options included. It’s really nice how they put them all on a card and labeled them instead of just throwing them in a bag. They are pretty small and can be hard to hold onto. A regular straight screwdriver is easier to use with them than the included multi tool.

At first I found the airflow adjustment a little complicated and difficult to understand. However, a card is included that explains how to adjust the airflow. Let me start by showing you that.

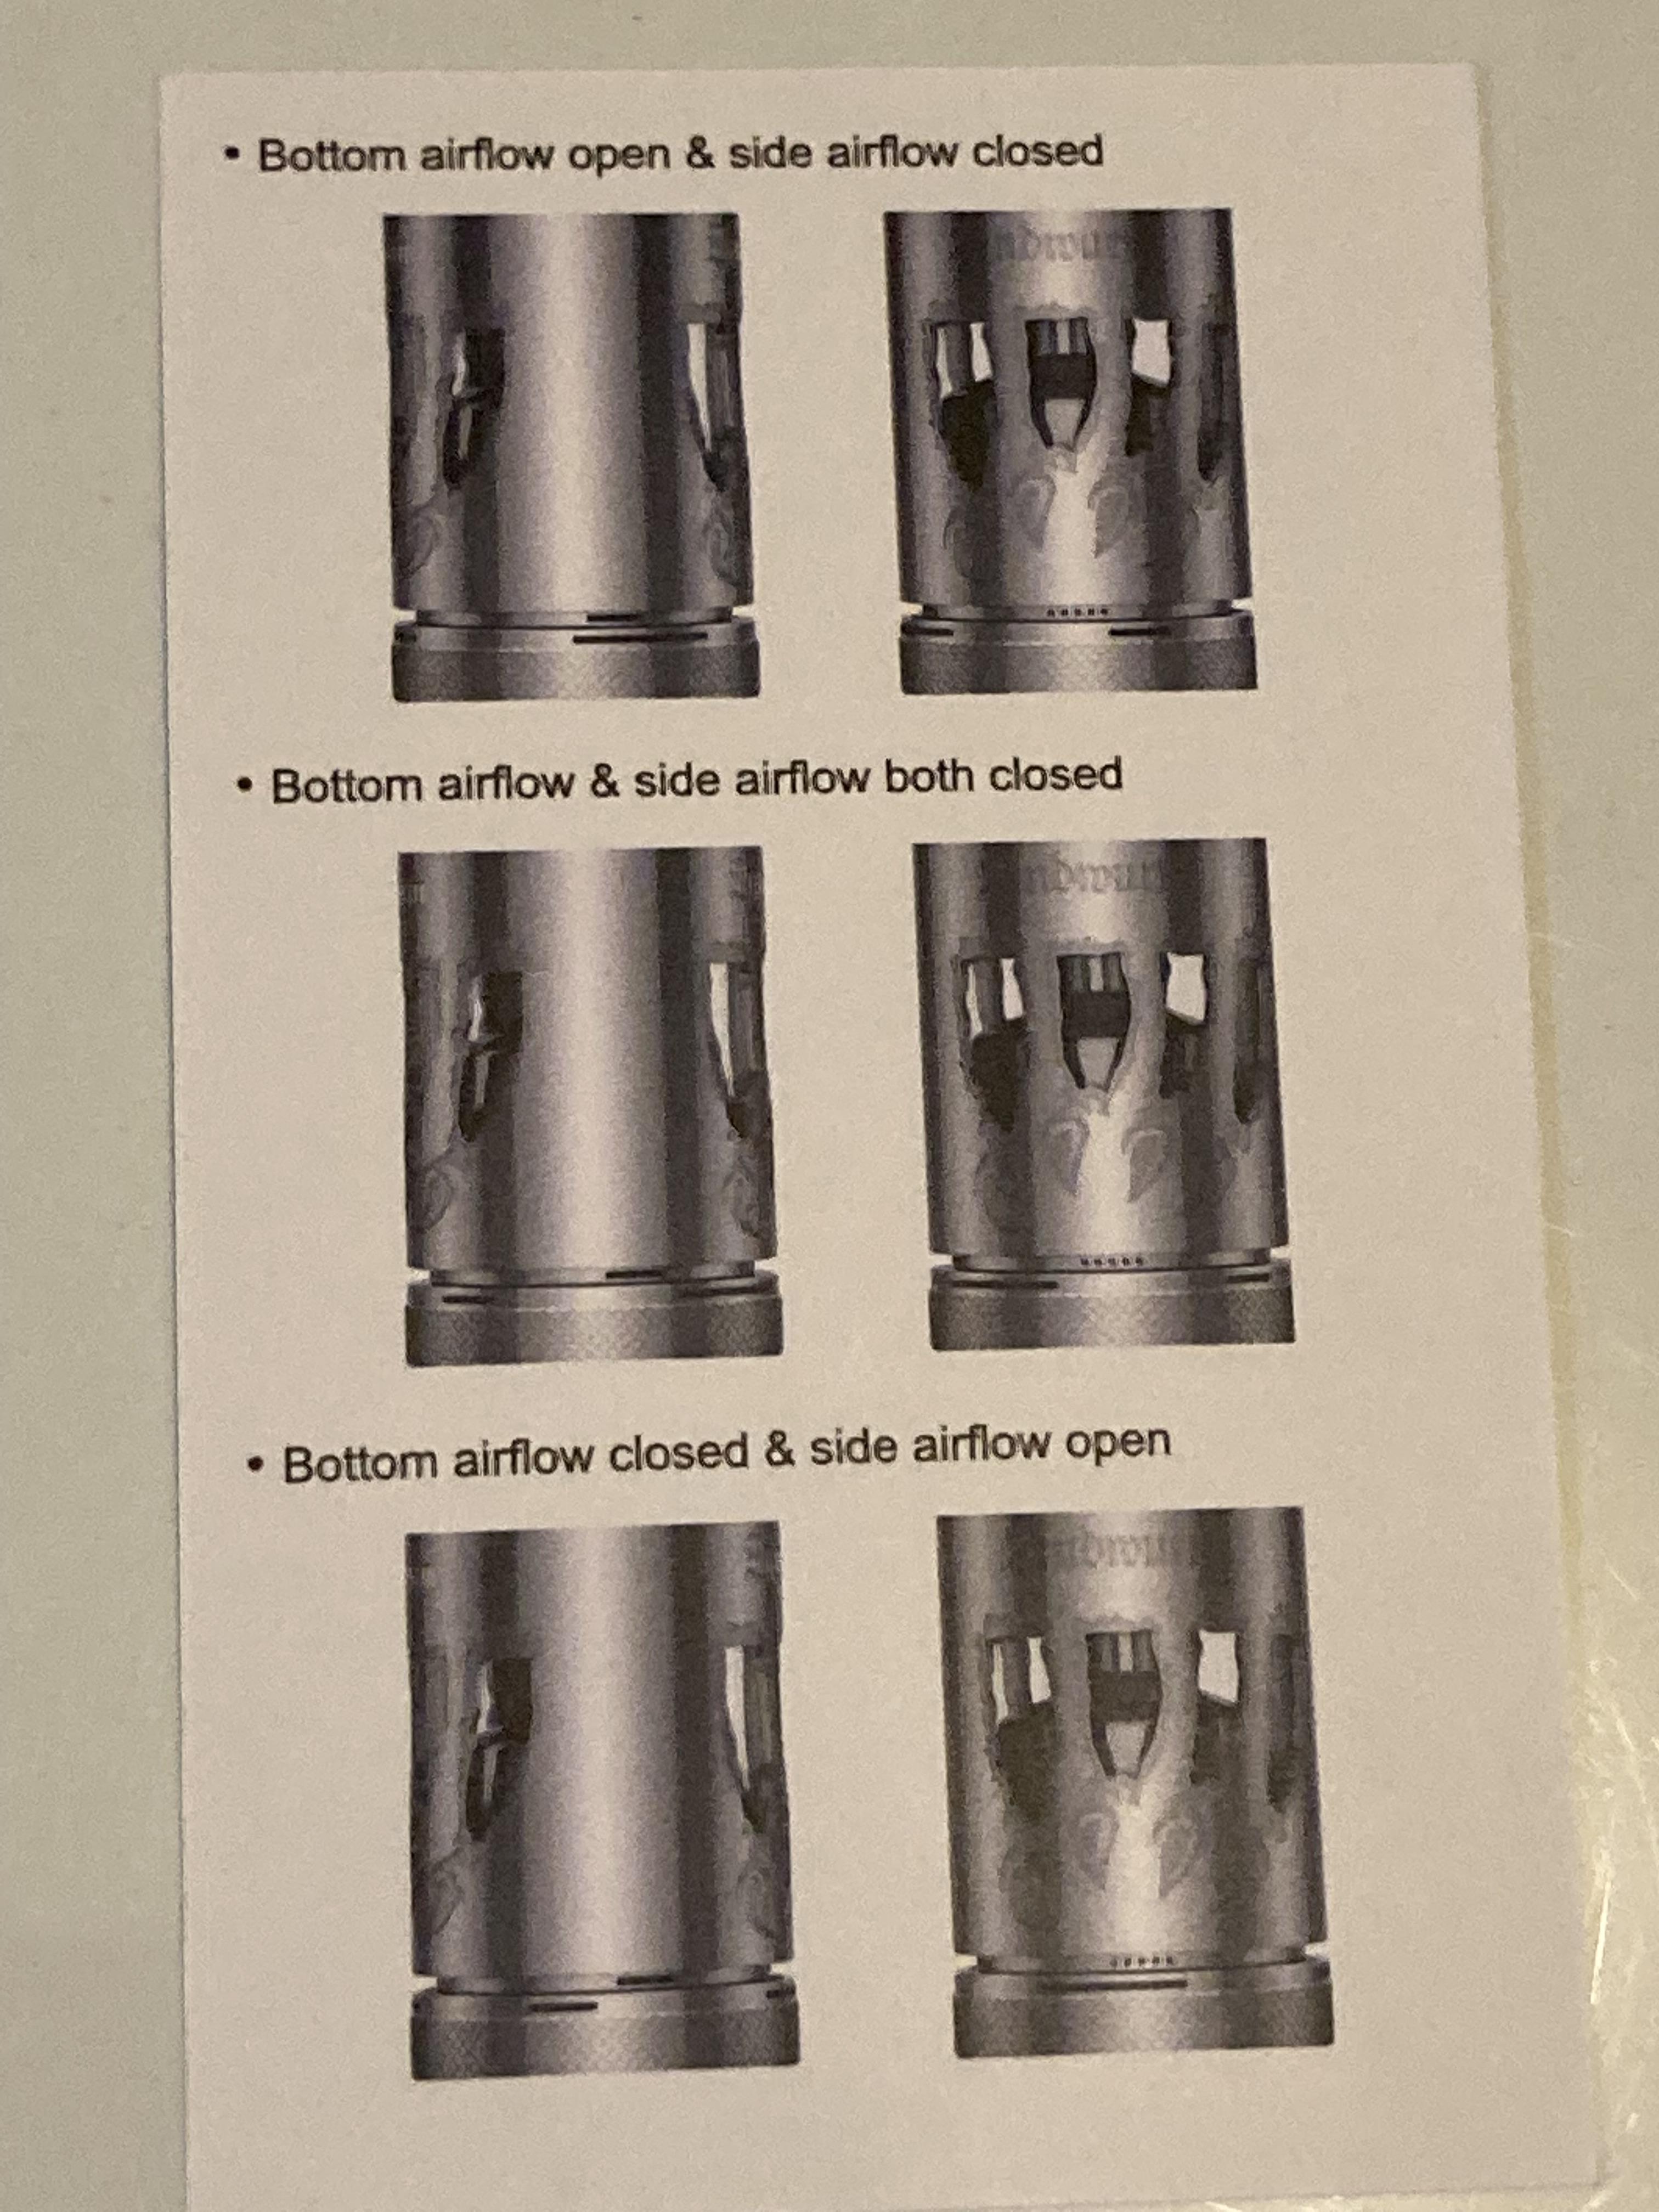
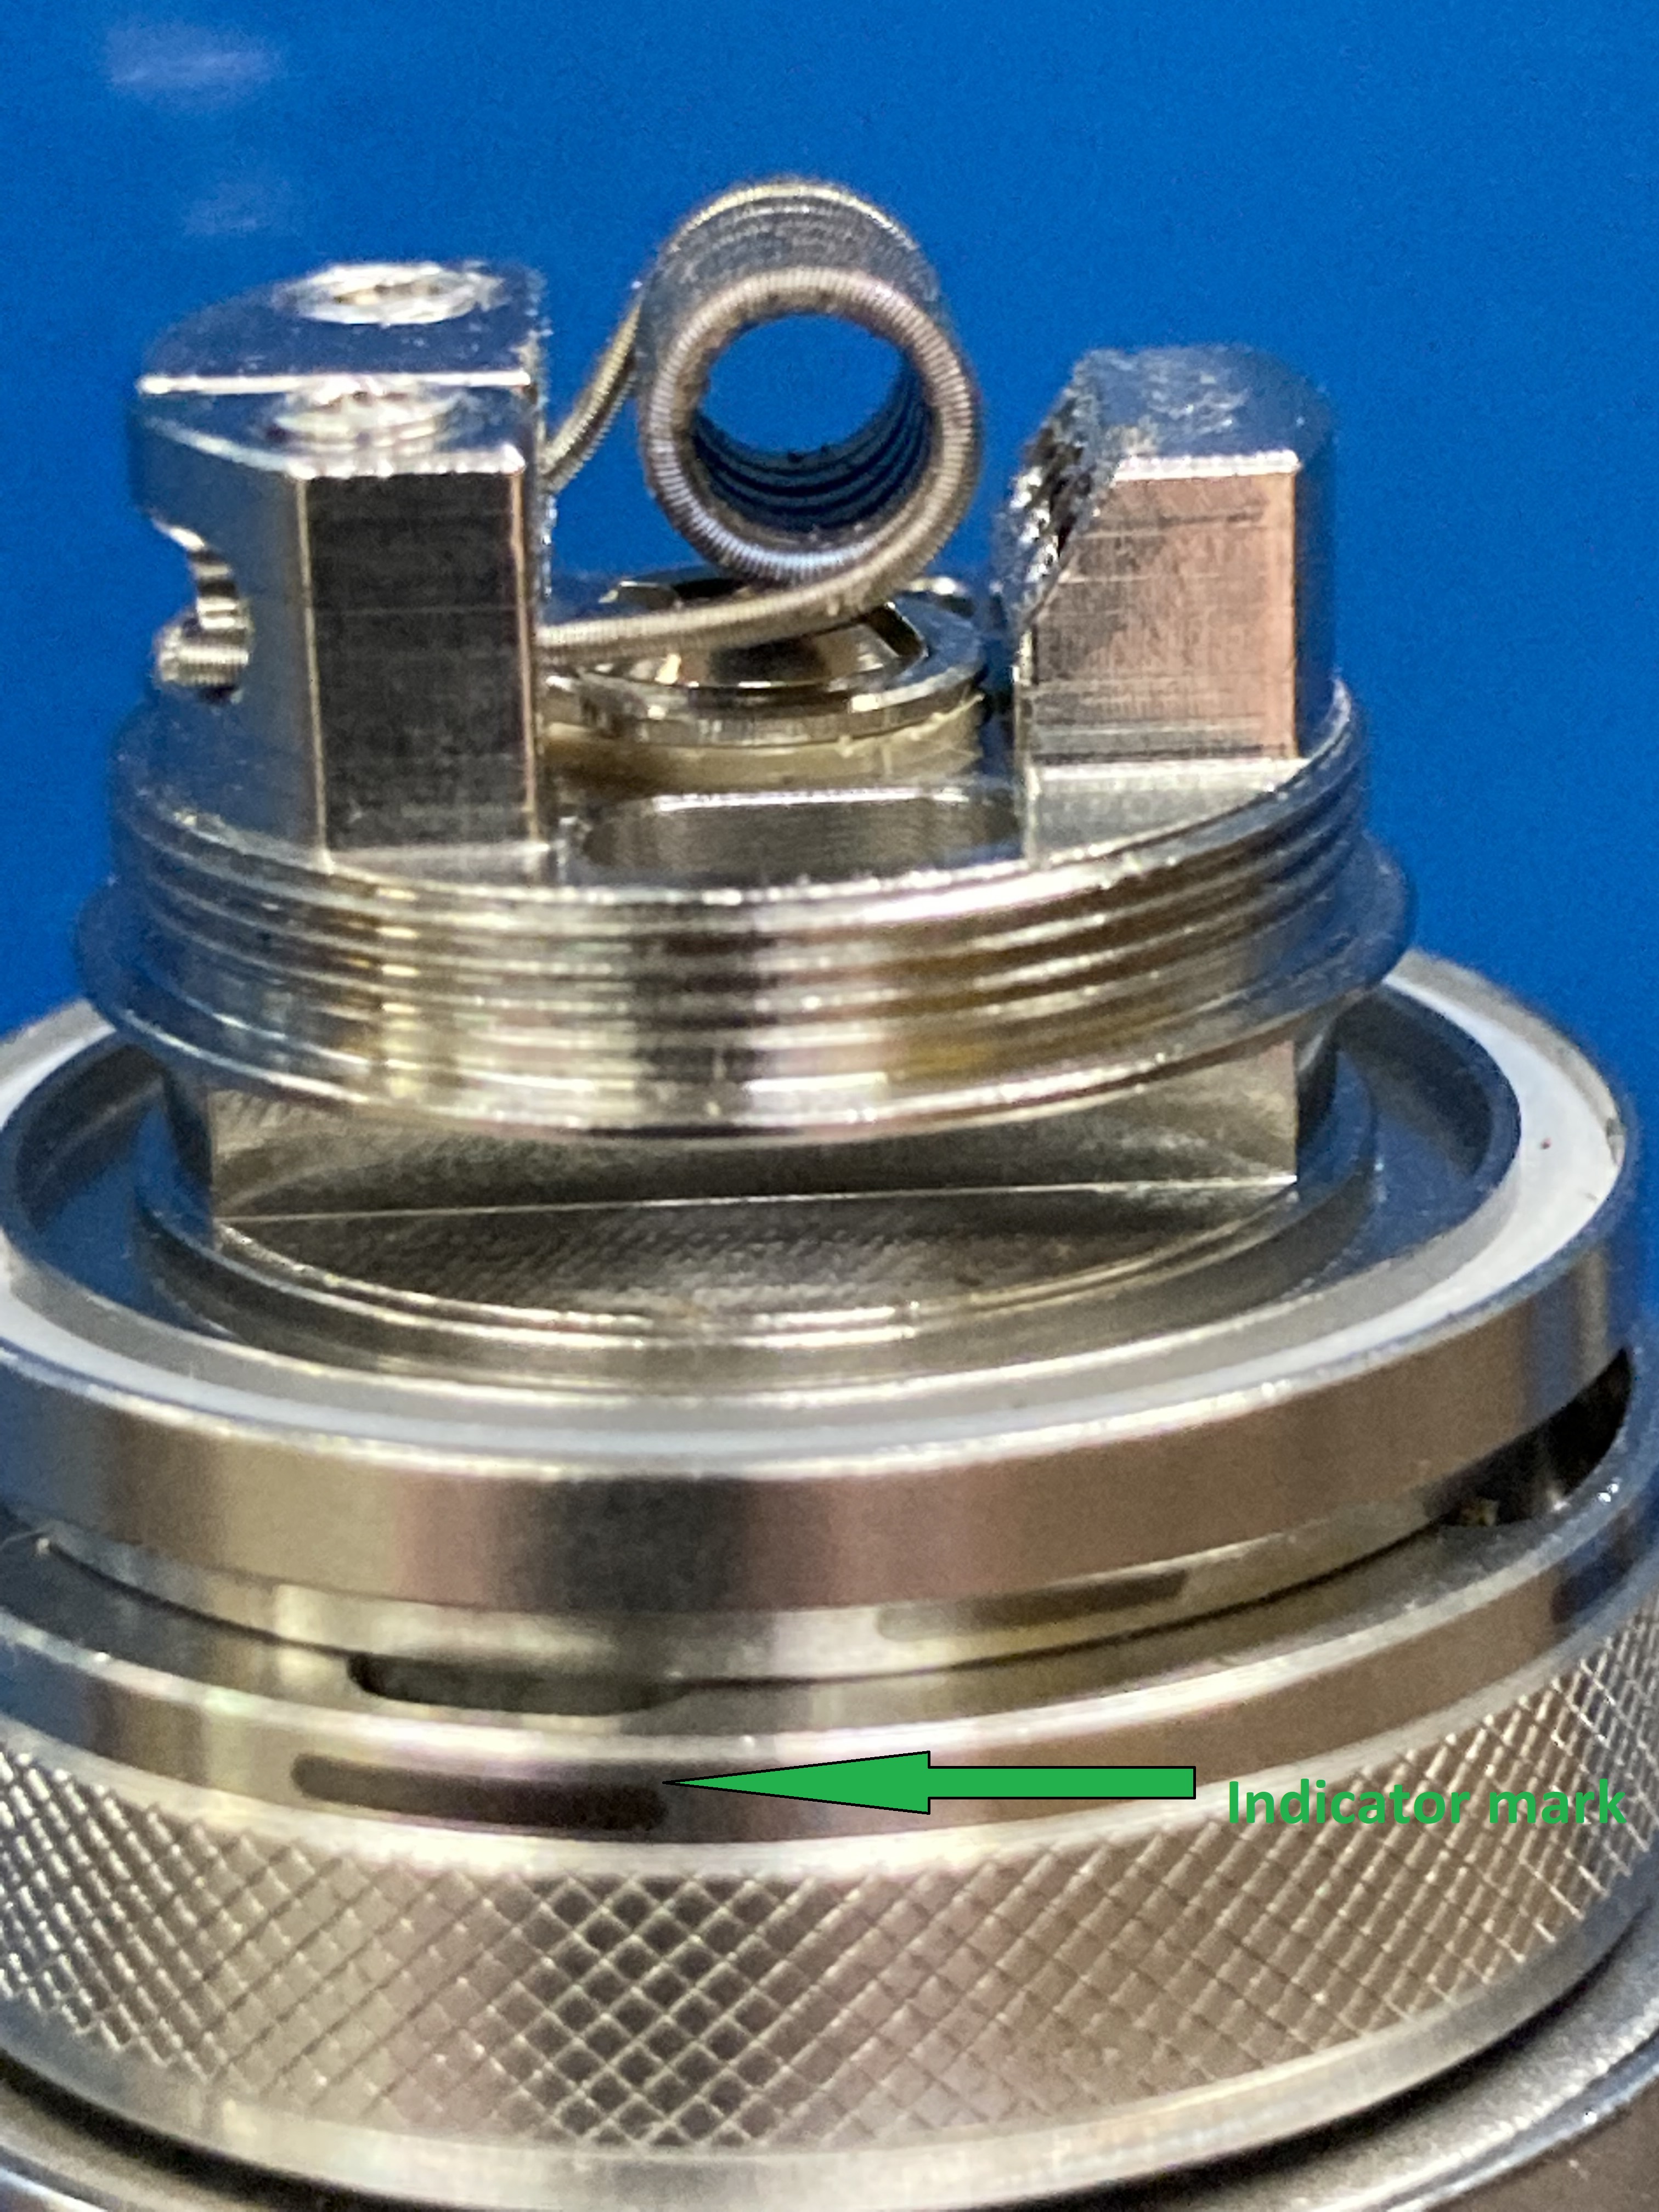
There are indicators on the airflow ring and above it. The wide slot is for the bottom airflow and the dots are for the side airflow. So depending on where you move the airflow control ring with the lines on it then you can get a wide variation of either both side and bottom airflow, only one or the other, or a combination of both. Honestly I think this is a little unnecessarily complicated but the adjustment along with the different airflow inserts for the deck really gives just about any variation of airflow that a user might want. I apologize for the poor image quality below. I wanted to show the dots but just couldn’t get my camera to focus properly. It was the best one out of the shots I took.
FINAL THOUGHTS:
I initially tried the Lindwurm with the 2.1mm airflow insert in the deck and used one of the included coils. I was initially confused by the airflow adjustment and thought I had it with both side and bottom airflows wide open but I didn’t. I checked the instruction card and adjusted it as instructed and found that there was more airflow with this setting. However, I found it to be fairly restrictive direct lung and I wasn’t getting very good flavor. I then pulled out the included coil and put in a .4 ohm coil of my own that I use frequently and wicked it with some Upland Silver cotton that tends to produce very good flavor and excellent wicking. The flavor production was better but honestly still not great. I had set the wattage on 32 with both side and bottom airflow open while using the 2.5mm insert on the deck and it is really a pleasant RDL and airflow seems smooth but feel like the flavor could be better. After having previously used the Brunhilde and Brunhilde MTL tanks I was expecting better flavor production from this tank. Is it bad? No, but it’s not as good as the other Vapefly tanks I’ve tried.
So, would I recommend this tank for you? Maybe would be an honest answer. I tried it with two different liquids that I am very familiar with and felt the flavor should have been better. However, the Lindwurm does have decent flavor and produces plenty of vapor. It gives the user a lot of different airflow options between the six airflow pins and the side and bottom airflow adjustments so maybe you would have a better experience than I did with your particular setup.
I’d like to thank Sourcemore and Joyi for sending the Vapefly Lindwurm RTA for this review. I have a coupon code for you if you would like to try one yourself. A big thanks to the readers! I truly appreciate you taking the time to read my reviews.
Code for $23.59 = VLIR
Vapefly Lindwurm RTA Tank Φ25.5mm 5ml (sourcemore.com)
WHAT’S IN THE BOX?
1* Vapefly Lindwurm RTA
1* 5ml Glass Tube
2* Firebolt Cotton
2* 0.3Ω Pre-built Coils
1* 510 Drip Tip Adapter
1* Screwdriver
3* Allen Screws
5* Airflow Screws
1* O-rings
SPECIFICATIONS:
Diameter: Φ25.5mm
Filling: Top filling
Capacity: 5ml
Airflow: Bottom & side airflow
Coil Deck: Single coil deck
Airflow Pin: 0.9mm, 1.2mm, 1.4mm, 1.8mm, 2.1mm, 2.5mm
Drip Tip: 810
Color: Silver, Black, Gunmetal
FEATURES:
1. Vapefly Lindwurm RTA Tank Atomizer
2. Laser engraving & corrosion processings
3. 25.5mm diameter, 810 drip tip
4. Top filling system, 5ml capacity
5. Precise bottom & side airflow
6. Concealed airflow adjustment
7. Designed with single coil deck
8. Excellent DL vaping experience
9. 6 interchangeable airflow pins as those of Brunhilde MTL RTA
INITIAL THOUGHTS:
The packaging for the Lindwurm is much like other products from Vapefly. The coloring on the box gives the effect of a torn parchment with the name of the company and device in very nice font on the front. Also below the Lindwurm name is “Untamed Dragon”. I am assuming that this is referring to the Lindwurm name which is a dragon without wings.
The back of the box has the Lindwurm name again as well as a list of features. It also lets you know that the tank was designed by the German 103 team and Vapefly. Also on the back is a list of social media contacts for Vapefly, an authenticity code, and company information.
Once opened, there is the tank with spare glass in a foam insert. Underneath that insert is located the accessories for the tank as well as a user manual and some other important information like the sheet that shows you how to adjust the airflow since this one is a little complicated compared to your average rta.
Included is of course extra o rings and seals, two 3mm coils with two cotton threads, multi tool, allen wrench, 510 drip tip adapter, and five spare airflow insert pins of different sizes. Also included is a card that explains how to adjust the airflow control depending if you want bottom, side, or both airflows used.
As always the first thing I do is break down the tank for cleaning before using it. The Lindwurm breaks down completely which makes it easy. The outer metal sleeve that protects the glass tank section has the Lindwurm name engraved on it as well as what appears to look like scratch marks around and under the four odd shaped openings that allow you to see the liquid level. The down side to this cover is that you can’t see if you’ve actually filled the tank to the top of the glass. However, what you can do and I have been doing when filling is while the top cap is already off for filling then go ahead and lift the metal sleeve up and off the tank and you can then see the full glass for filling. If that’s too much trouble then you can just fill until you are past the top of the viewing windows.
You can see the notches in the top cap below. It is in fact a bayonet style fill cap that just requires a ¼ turn to open or close. There is a white gasket underneath the top cap to help with sealing from leaking as well as a gasket with two slots cut into it in the top of the tank for filling. It’s supposed to help prevent leaking while filling but I personally don’t like these types of fill gaskets. It makes it nearly impossible to use a glass dropper for filling without making a mess.
Near the top of the tank is an o ring that holds and seals the glass but there is also a second o ring on the top that helps to hold the metal sleeve in place. However, you can still turn the sleeve once it is installed if you are trying to align it with the mod or something.
I’m not sure if I mentioned this yet or not but the Lindwurm is a single coil rta. The build deck is very easy to build on. There are two allen head screws that are used to secure the coil in place. One post has a hold in it that you insert the leg through and the other is slotted so once you have the first one in place then you can just slide the other leg in from the side if you want. The two included coils are a little beefy for this tank in my opinion and had to bend the legs as I pushed the legs into place. It is a 3.0mm coil rated at .3 ohms. The mod I used it on showed up as .29 which is totally acceptable.
There is bottom and side airflow on this tank. In the first picture above you can see the single hole under the posts that brings airflow from that side and there are 3 holes on the opposite side to provide airflow from that side also in the second picture. In the center is the replaceable airflow insert. Besides the one that comes pre-installed, there are five options included. It’s really nice how they put them all on a card and labeled them instead of just throwing them in a bag. They are pretty small and can be hard to hold onto. A regular straight screwdriver is easier to use with them than the included multi tool.
At first I found the airflow adjustment a little complicated and difficult to understand. However, a card is included that explains how to adjust the airflow. Let me start by showing you that.
There are indicators on the airflow ring and above it. The wide slot is for the bottom airflow and the dots are for the side airflow. So depending on where you move the airflow control ring with the lines on it then you can get a wide variation of either both side and bottom airflow, only one or the other, or a combination of both. Honestly I think this is a little unnecessarily complicated but the adjustment along with the different airflow inserts for the deck really gives just about any variation of airflow that a user might want. I apologize for the poor image quality below. I wanted to show the dots but just couldn’t get my camera to focus properly. It was the best one out of the shots I took.
FINAL THOUGHTS:
I initially tried the Lindwurm with the 2.1mm airflow insert in the deck and used one of the included coils. I was initially confused by the airflow adjustment and thought I had it with both side and bottom airflows wide open but I didn’t. I checked the instruction card and adjusted it as instructed and found that there was more airflow with this setting. However, I found it to be fairly restrictive direct lung and I wasn’t getting very good flavor. I then pulled out the included coil and put in a .4 ohm coil of my own that I use frequently and wicked it with some Upland Silver cotton that tends to produce very good flavor and excellent wicking. The flavor production was better but honestly still not great. I had set the wattage on 32 with both side and bottom airflow open while using the 2.5mm insert on the deck and it is really a pleasant RDL and airflow seems smooth but feel like the flavor could be better. After having previously used the Brunhilde and Brunhilde MTL tanks I was expecting better flavor production from this tank. Is it bad? No, but it’s not as good as the other Vapefly tanks I’ve tried.
So, would I recommend this tank for you? Maybe would be an honest answer. I tried it with two different liquids that I am very familiar with and felt the flavor should have been better. However, the Lindwurm does have decent flavor and produces plenty of vapor. It gives the user a lot of different airflow options between the six airflow pins and the side and bottom airflow adjustments so maybe you would have a better experience than I did with your particular setup.
I’d like to thank Sourcemore and Joyi for sending the Vapefly Lindwurm RTA for this review. I have a coupon code for you if you would like to try one yourself. A big thanks to the readers! I truly appreciate you taking the time to read my reviews.
Code for $23.59 = VLIR
Vapefly Lindwurm RTA Tank Φ25.5mm 5ml (sourcemore.com)

