INITIAL THOUGHTS:
The packaging of the Nano 2 is simplistic with a slide off cover that has a picture of the device on the front. Inside is the device with one pod installed but it has a plastic film on the bottom to keep the user from firing the pod without filling it first. Also inside is a second pod, USB-C charging cable, user manual, and a lanyard chain. I don’t like lanyards and don’t use them but some people may find it useful. To me the Nano 2 is small enough to fit in just about any pocket so for me there is no need for a lanyard.
On each side of the mod is a smooth colored panel that has a textured appearance underneath and depending on how the light hits it, then its appearance changes a little. I received what I would call a light blue colored one. On one side is the word DRAG in silver letters and on the other side is the VOOPOO name. The side panels aren’t really fingerprint magnets but do show a little smudging.
On the front side of the device is the airflow control slide at the top. On mine the slide is very stiff and will not move accidentally when stored in a pocket. Below that are three indicator lights which show the battery level and also will indicate one of three available output levels. Near the bottom is the fire button which besides firing the device, also turns it on and off as well as allows the user to change between the three output levels.
On the bottom of the unit is the USB-C charging port which allows a 5v/ 1A charging rate. Given that charging rate, the battery should fully charge in approximately 45-50 minutes. Also on the bottom of the unit are the words Gene Chip etched in the bottom plate. Unfortunately with the port on the bottom, the unit cannot be stood up while charging.
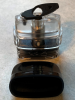
On the top of the unit is the port where the 2ml pod is inserted. There are two spring loaded gold plated contacts and the airflow sensor since the Nano 2 can be button fired or used in auto draw. There aren’t any magnets on this one. The pod simply snaps into place and holds very well. Also on the top is a slot where the included lanyard chain can be attached.
The operation of the Nano 2 is very simplistic.
-
Press the fire button five times to turn the device on or off
-
Press the fire button three times to enter the output adjustment mode
-
Once in that mode, press the button to cycle through the three settings which are indicated by different color lights
-
High=White, Medium=Green, Low=Blue
-
After making your selection, the lights will go out after three seconds
Besides the lights indicating the output level, they also indicate the battery level by the number of lights that are lit when you fire the device. The following are the battery indication levels.
-
Three lights= 66-100%
-
Two lights= 33-66%
-
One light= <33%
The lights also give the user the following indications: