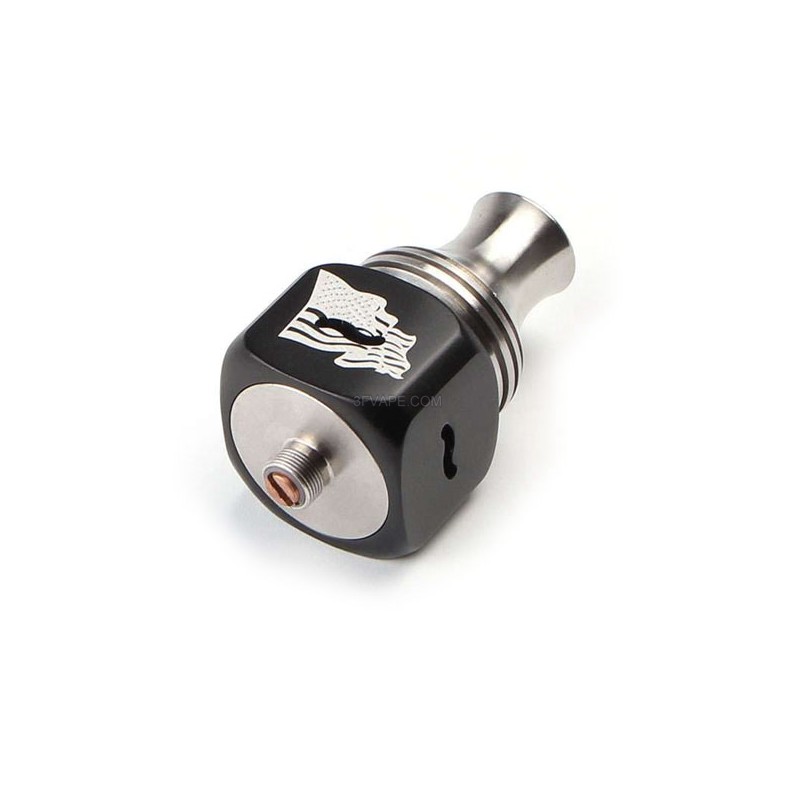
RDA Tugboat v3 RDA by Flawless

Status
Not open for further replies.

Uncletattoowhat

Ultra Member
ECF Veteran
Verified Member
Apr 21, 2014
1,116
1,294
Poquoson, VA
Tugboat V3 by Flawless

v31__55074.1450480275.600.600.jpg


v32__01914.1450480275.600.600.jpg


THE TUGBOAT V3 IS HERE!!!
* Top and Side AFC
* 2 Post design with Hex Screws
* 3 Piece Design
* Serialized
* Peek Insulators
* Adjustable 510

I saw this pop up on the rda Round Table thread, but wanted to see if anyone has picked one up yet. It's showing available for purchase on the flawless website, but don't see any information anywhere else.

I have been addicted to my Aeolus v2 Pro for months now, but I am just so over building on 3 post decks. I had a Velocity rda for a short period of time and while building on it was a breeze, I hated the muted flavor and the airflow configuration. Build after build, I never got it to work like the hype led it up to be.

This looks RDA like it takes all the features I've been looking for and combines them and possibly will be perfect for my vape style. I wanted to see if anyone else has picked one up recently and has some feedback. I would just go ahead and pick one up, but the $90 price tag is a little high for me.
 

sonicbomb

Vaping Master
ECF Veteran
Verified Member
Feb 17, 2015
8,361
23,808
1187 Hundertwasser
The v2 is one of my favorite RDAs, this version seems to be quite radically different in design. I have not seen any reviews for it yet, so I would interested to know how it pans out. The Flawless shop is selling the V3 for exactly the same price as the V2 which seems a little odd.

I have seen V3s listed on a few Chinese sites that bear no resemblance to the authentic whatsoever.
PVqvFKH.jpg
 

Uncletattoowhat

Ultra Member
ECF Veteran
Verified Member
Apr 21, 2014
1,116
1,294
Poquoson, VA
The v2 is one of my favorite RDAs, this version seems to be quite radically different in design. I have not seen any reviews for it yet, so I would interested to know how it pans out. The Flawless shop is selling the V3 for exactly the same price as the V2 which seems a little odd.

I have seen V3s listed on a few Chinese sites that bear no resemblance to the authentic whatsoever.
I noticed that as well. I've been wanting a 2 post top airflow atty for a while now. Hell, if I can rearrange my "after christmas budget" I may just go ahead and buy one...and have it shipped to my friend's house... :D
 
  • Like
Reactions: sonicbomb

Rurcon Enze

Unresolved Status
Dec 23, 2015
0
0
28
  • Deleted by Unforeseen
  • Reason: Unregistered Supplier

Ryanmcg1

Senior Member
ECF Veteran
Oct 7, 2014
116
67
Garyville, La
I feel like the placement of your coils in this with that tall ... inner ring will make you build like you do in the VS Vortice. It's hard to tell but it looks like it can't be removed but I hope it is removable and able to be used without it like a Derringer can and still have somewhat of a juice well. That would give you more room for you coils and Wicking. Time will tell when people start getting them in hand, maybe the internet pictures and lack of pictures are just making me see otherwise. I like the beefier deck of the Dinghy and wish they could have just made that with the two post.
 

Uncletattoowhat

Ultra Member
ECF Veteran
Verified Member
Apr 21, 2014
1,116
1,294
Poquoson, VA
AHas it shown up yet or any tracking update when it's supposed to arrive?
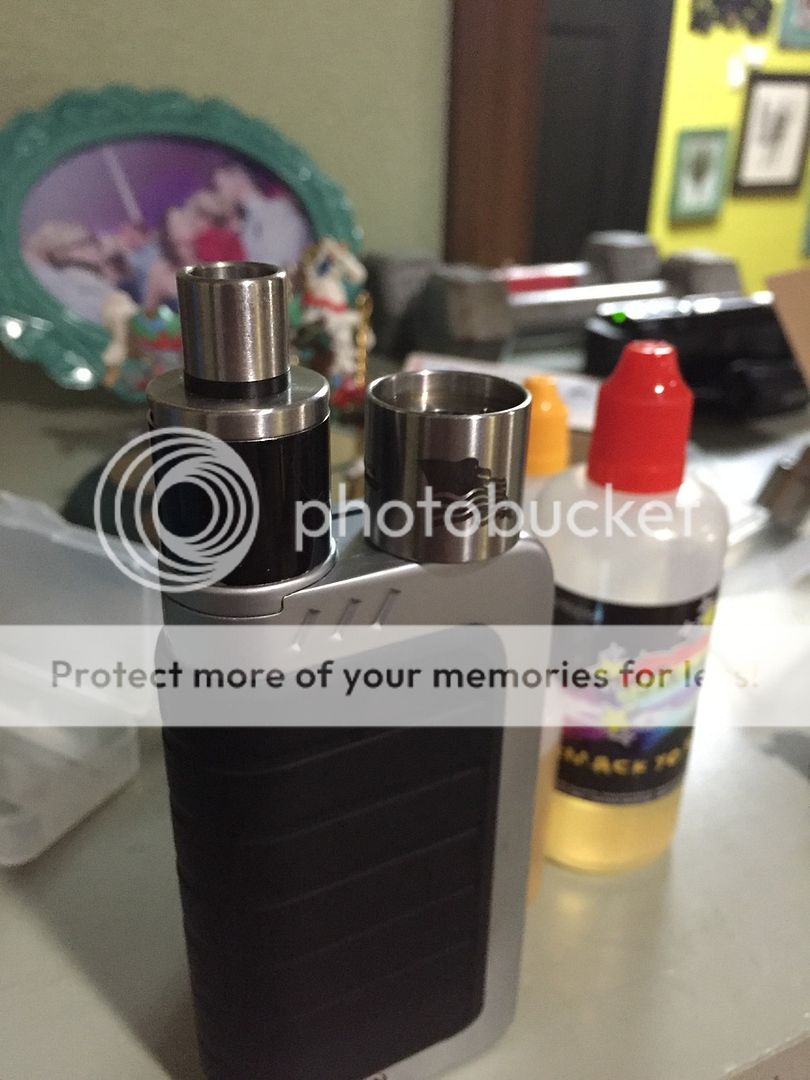
It actually just showed up today in the mail. Never got a tracking number which was disappointing. But here's some pics and a little preliminary review for the 10 min I've had it built:

99A1D89E-9E37-40B5-9A1E-FABE08A243DB.jpg

13E65752-131B-4461-A343-5AB4150AD812.jpg

866F869C-368E-4788-941F-7E9D9DE56A74.jpg

36A2C76A-48A4-4D40-95EA-39957ABDA4D9.jpg

FCE0402C-8F01-432C-B9F7-9BDBF771E53D.jpg


First thoughts, I forgot to wash the machine oil out of it before installing and wicking the build (fused 26n80/36n80 Claptons, 2.7mm id) so the taste is off. Right now I'm running the top airflow only which is weird because the airholes for top airflow in the barrel are in line with the side airflow. I've got some messing with it to get the airflow where i want it. I would rebuild it and take a wrap off to make it a little easier to wick next time. I had to build and wick it then push the coils down in the barrel a little bit to get it closer to the side airflow.

Definitely has some potential, and I will be using it primarily to get it all worked out. I just had some family surprise visit from out of state or I'd be sitting here rebuilding all night to get it right :D
 

Ryanmcg1

Senior Member
ECF Veteran
Oct 7, 2014
116
67
Garyville, La
Thanks for the quick pics and thoughts. It does look to be a pain to build on and hard to wick. Wish they still had the domed topcap of the V2 and airflow adjustment. I do like that drip tip and at the least will get one of them for my V2. I think I would drill out those 2 holes for the top airflow to make it look like side airflow hole.
 

Uncletattoowhat

Ultra Member
ECF Veteran
Verified Member
Apr 21, 2014
1,116
1,294
Poquoson, VA
Use the Tugboat V2 barrel on the V3 deck so you can close the side airflow off and use only the V3 top cap/top airflow on it. Thrn you can have the top airflow lined up with your coils and no side airflow.
Funny I had thought of doing just that. Then i realized I'd have to buy another authentic tugboat lol.
 
  • Like
Reactions: muzichead

Uncletattoowhat

Ultra Member
ECF Veteran
Verified Member
Apr 21, 2014
1,116
1,294
Poquoson, VA
Thanks for the quick pics and thoughts. It does look to be a pain to build on and hard to wick. Wish they still had the domed topcap of the V2 and airflow adjustment. I do like that drip tip and at the least will get one of them for my V2. I think I would drill out those 2 holes for the top airflow to make it look like side airflow hole.
I've thought of drilling out new holes in the empty spots of the top ring so I can close off the side airflow all together. Still not sure what I want to do.

Update:
After another tear down wash and rebuild, this RDA is just not worth it. Hell, I accidentally broke the o-ring on the topcap when cleaning it, and there's not a freaking spare for it included. There's one for the barrel and one post screw. It's so damn flimsy. Luckily I found one that worked in my spares bag, but I'm not happy about it.

A few things that would make me like it would be to make the outside juice well barrel removable similar to the derringer and to give the stupid top airflow holes more options.

I really disliked building and wicking on it as well. I'm still up in the air what I want to do with it. I don't want to give up to it so quickly and easily as this is the most I've spent for an atty (thank god I got it on sale).

In the scheme of things, I knew when I bought it without any other reviews and no real hype behind it, that I should have just gotten a damn narda or hobo v3.1.
 
  • Like
Reactions: SLIPPY_EEL

Ryanmcg1

Senior Member
ECF Veteran
Oct 7, 2014
116
67
Garyville, La
Oh damn that suck, that is a good idea to drill out the holes to close the side airflow. I do like top airflow but prefer side airflow so I would just close off the top and use it that way. Is there a way to punch out that top ring and rotate it and press fit it back to where you would prefer it? I've been wanting to get a Hobo V3.1 or Petri for a while.
 
  • Like
Reactions: Subohmer82

Uncletattoowhat

Ultra Member
ECF Veteran
Verified Member
Apr 21, 2014
1,116
1,294
Poquoson, VA
Oh damn that suck, that is a good idea to drill out the holes to close the side airflow. I do like top airflow but prefer side airflow so I would just close off the top and use it that way. Is there a way to punch out that top ring and rotate it and press fit it back to where you would prefer it? I've been wanting to get a Hobo V3.1 or Petri for a while.
Unfortunately the sleeve is all one piece. To cut off the top airflow all you'd have to do is rotate the topcap.
 

XspidermanX

Senior Member
Dec 27, 2015
125
164
32
Unfortunately the sleeve is all one piece. To cut off the top airflow all you'd have to do is rotate the topcap.
DIY......Put tape over the outside of the barrel covering both airflow slots, make sure it's sealed tight. Take a fingrr tip or Qtip and apply whatever type of JB weld to it, then stuff the into both airflow slots on the Inside of thr barrel. Make sure its sealed up and even. Let dry. Top airflow only, vape on! Haha
 

Uncletattoowhat

Ultra Member
ECF Veteran
Verified Member
Apr 21, 2014
1,116
1,294
Poquoson, VA
DIY......Put tape over the outside of the barrel covering both airflow slots, make sure it's sealed tight. Take a fingrr tip or Qtip and apply whatever type of JB weld to it, then stuff the into both airflow slots on the Inside of thr barrel. Make sure its sealed up and even. Let dry. Top airflow only, vape on! Haha
Good idea, just don't want to do too much heavy modification to such an expensive (to me) piece. If I try it for a while and don't like it I could resell it before I did all that.
 
Status
Not open for further replies.

Users who are viewing this thread