
I’m very excited to be back today with yet another review. This will be my first ever review for Dovpo. I was fortunate enough for Dovpo to send me the Abyss mod kit for the purpose of providing a fair and honest review. I did not know what they were sending until I received it. They were very generous and also sent some accessories for it. I already have an Abyss that I purchased about a month or so ago and have been enjoying using it so was very happy to see the Abyss and accessories that were sent. I will do my best to cover as many features as I can and give my opinion on the mod and accessories.


WHAT’S IN THE BOX?
1* Abyss AIO Device
1* 21700 Battery Conversion Plate
1* nautilus Coil Adapter Bridge
1* Accessory Bag
1* 21700 Battery Cover
1* USB-C Cable
1* Battery Usage Warning Card
1* User Manual

Below is what I received from Dovpo for the review. Besides the ABYSS AIO kit, I received a glass pack that included three different color tank sections, an Ether rba, and a bridge pack that included four types of bridges along with a cap to use with the GTX/PNP Bridge.

SPECIFICATIONS:
Dimension
83*53*25mm
Battery
Single High-Amp 18650 Battery(not included)
Wattage Output Range
5-60W
Voltage Output Range
0.8-8.0V
Resistance Range
VW: 0.08-3.5ohm, TC: 0.10-3.5ohm
Temperature Range
200°-600°F / 100°-315°C
Modes
VW/Bypass/TC Mode
Material
Aluminum Alloy & Stainless Steel Construction
Screen
OLED display screen
Airflow
Adjustable airflow system
Charging
USB-C port
Color
Classic, Storm, Onyx, Mars, Amethyst, Nato, Tidal
FEATURES:
· 1. Powered by single 18650 battery or 21700 battery
· 2. 5-60W wattage output range
· 3. VW/TC/Bypass mode
· 4. Intuitive firing button, OLED display screen
· 5. Two adjustment buttons, adjustable airflow system
· 6. Refillable tank with side filling system
· 7. USB type-c charging
· 8. Different bridges make it compatible with Caliburn G, EUC, PnP/GTX, Nord Coils
· 9. Compatible with all Billet Box Bridges
· 10. Multiple protections: Short Circuit/Low Voltage/Temperature/10S Overtime/Reverse Battery Protection


INITIAL THOUGHTS:
The packaging of the DOVPO ABYSS AIO kit is very nice indeed. After sliding the outer cover off, the cover of the box lifts up to expose the mod and the tank along with user manual and included literature. There is a pull tab which makes removing the top foam easier to expose the charging cable, Nautilus bridge adapter, and drip tip adapter with a short drip tip installed, a 21700 adapter, and a cover that snaps over the 21700 battery. Like I mentioned earlier, I already had an ABYSS so am somewhat familiar with the operation and set up. However, I do not consider myself an expert on billet box type devices.


So far I had tried the Ether rba and a Vaporesso GTX coil in the one that I purchased so decided to set up this one with the included Nautilus bridge and a Nautilus .7 ohm 2S coil that I happened to have. There aren’t any coils included in the kit so if you are going to order one and don’t have any Nautilus coils and didn’t order the Ether rba then you should add a package of coils so you can try it when received. I don’t own a billet box but from what I understand it’s basically the same type of unit where you have a bare empty tank and can insert whichever bridge or rba that you choose.
Before you start to assemble the ABYSS, you need to decide whether you want to use an 18650 or 21700 battery. Depending on which one you choose, there are different top caps that fit each one. Also, if you decide to use a 21700, the battery tube must be removed. I decided to try a 21700 on this one since I had not tried that before.
Below is a picture of the ABYSS broken down and ready to assemble with the battery tube removed.

Before starting to assemble, I went ahead and took the Nautilus bridge out of the box, screwed it together and threaded a Nautilus coil into it. Then it simply seats into the bottom with a push.


After that the tank portion and the top cap can be installed. It’s nice that the fill port cap is also metal on the outside and matches the finish of the mod. Next, I inserted the 21700 with the positive terminal down and sat the tank onto the mod so that I could install the top cap. The top cap has to be inserted on the battery end first and sits in a groove and you rotate the top cap until it is centered over the opening in the top of the cap. At least that’s how it’s supposed to work. What happened to me was I was putting it together on a kitchen counter with hardwood flooring below and didn’t have a good handle on the tank when I went to rotate the top cap and launched it onto the floor and the glass section of the tank shattered. Thank goodness that DOVPO sent the glass pack so I was able to clean it up and install one of the spare glass sections. It might have been nice if a spare glass section had been included in the kit. One tip is to push down a little on the tank while rotating the top cap so that what happened to me doesn’t happen to you.
Once everything is in place then thread the included 510 adapter with tip into the top of the cap and into the tank. This holds the tank in place as well as being the tip adapter. When tightening, be sure to locate the fill port facing out so that it’s easy to fill and refill.

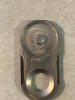
Below is the tank assembled, the top cap with the negative marking on the underside of the cap, and of course the mod.

Below shows the 21700 battery installed and the tank sitting on the mod waiting for the top cap to be installed.

This next image shows the top cap installed over the battery and locked into place ready to rotate and hold the tank in place.

This one shows the cap rotated over the tank and ready to install the 510 adapter and lock the tank in place. At this point the tank is still loose enough to rotate despite the spring loaded pin that the tank is sitting on. Since the 18650 battery tube was removed you can see the battery wrap but don’t worry. We are going to protect that battery.

Here you see the unit assembled with the snap on battery cover and ready for the adapter to be installed.

And finally, the tip adapter is installed. The included tip can be pulled off once the adapter is threaded in and you can use the 510 tip of your choice.

Ok, I know that might seem like a lot but I wanted to try to go into detail on the assembly process for those that might not be familiar with this type of device. It really goes together rather quickly. Just don’t fumble the tank like I did and break the glass.
Now let’s take a look at the operation of the ABYSS and what features it offers. The fire button is held in place by a cover with three screws on one side. I did not receive any for the review but there are different button kits available that the user can easily install if they don’t like the oval button that comes installed. The airflow control is built into the mod and not into the tank. There is a small round lever that protrudes from the front to make it easier to adjust the airflow. The airflow control on the one I received for review was very tight and initially struggled to move it. I put a couple drops of VG on it and worked it back and forth and it loosened up some. On the front below the airflow control is the USB-C charging port. There isn’t any branding on the device which I personally like.
The screen of the ABYSS and the + and – buttons are on the bottom of the unit. The display shows the battery level indicator, Voltage, Resistance, and Set Wattage. The button sequence for the ABYSS is as follows:
- Press the fire button five times to turn the device on or off
- Press the fire button three times to lock or unlock the fire button and the display will show a message
- Press the + and – buttons to lock the adjustment buttons
- While the adjustment buttons are locked, press the + button three times to put it in stealth mode
- When not locked, press the fire button and the – button to switch between the modes which are Wattage, Voltage, TC Ni, TC Ti, TC SS
- While in TC mode, press the fire button and + button and then you can adjust the wattage set in TC mode
I didn’t feel like it was necessary to take a picture of every screen message but below are a few so you can see what the display looks like. With the whole thing being black it’s a little hard to see the + and – buttons on the left side of the screen. I think it might have been nice to make them stainless so they can be seen easier.


There are many accessories available for the ABYSS. Besides the Nautilus bridge there are four other bridges that I know of that will allow you to use different coils. DOVPO was nice enough to send me the bridge pack which contains all four. However, the bridges can be purchased separately. I purchased just the GTX bridge when I bought the one I had previously. The four bridges will allow you to use Caliburn G, EUC, Nord, or GTX/PNP coils. Included also in the bridge adapter pack is a new cap required for using the GTX/PNP bridge adapter.

If you don’t want to use factory coils there is also an rba available called the ETHER. It allows you to build and install your own coils and wicks and works very well in my opinion. I’ve been running the ETHER in my other ABYSS for a while and really like it. It is fairly easy to build on. Besides the rba itself, included in the Ether package is the following.
4* Swappable Airflow Pin (3mm, 2mm, 1mm, 0.8mm)
3* Integrated MTL Drip Tip with 2 Additional Sleeves


The other accessory item that I received with my review sample is the glass pack which contains a clear, black tinted, and ultem color tank sections. The tank sections are just held in place with o rings.

FINAL THOUGHTS:
It has been an absolute pleasure testing the DOVPO ABYSS. It is a very solid well-built device. Whether you want to use the Nautilus coils in it, one of the other four bridge adapter/coil options or even build your own coils with the ETHER rba kit, there’s an option for just about anyone. I personally am well stocked on GTX, PNP, and have some Nautilus coils so it is a good fit for me. Also having the ETHER rba that is easy to build and performs well with your choice of airflow insert from the ones included. I know that there are a lot of accessory items available but you don’t necessarily need them all but instead can pick and choose depending on what you like to use. Besides all of the accessories I have mentioned, there is one other available but I did not receive it for the review. It is an SBS (side by side) kit. What it does is turns the Abyss into a side by side device that you can use any 510 threaded tank on the ABYSS.
The Abyss is a little bit heavy but not bad. I have to admit that it took me a little while to get used to the button placement on it but am very well used to it now and it’s second nature. Just out of curiosity, I put each of the two Abyss mods on a scale to compare the weight difference between setting up with an 18650 or 21700. It makes sense now but the 21700 set up is actually a little lighter since you remove the battery tube. The first picture is the one I purchased and is set up with an 18650 battery. The second picture is the review sample set up with the 21700. The 21700 set up is actually a little over 13 grams lighter. I could actually tell the difference in the two just by holding them.


I would like to thank DOVPO and Neil for sending the DOVPO X SUICIDE MODS ABYSS AIO kit for this review and hope to cooperate further with DOVPO in the future. As always, a great big thank you to you the readers. Below is a link to the DOVPO site. I would suggest taking a look and watching the video on the ABYSS. It’s a little long but good information if you are interested in getting one of these awesome kits for yourself.
Abyss AIO 60w Kit by Dovpo X Suicide Mods – DOVPO Official

WHAT’S IN THE BOX?
1* Abyss AIO Device
1* 21700 Battery Conversion Plate
1* nautilus Coil Adapter Bridge
1* Accessory Bag
1* 21700 Battery Cover
1* USB-C Cable
1* Battery Usage Warning Card
1* User Manual
Below is what I received from Dovpo for the review. Besides the ABYSS AIO kit, I received a glass pack that included three different color tank sections, an Ether rba, and a bridge pack that included four types of bridges along with a cap to use with the GTX/PNP Bridge.
SPECIFICATIONS:
Dimension
83*53*25mm
Battery
Single High-Amp 18650 Battery(not included)
Wattage Output Range
5-60W
Voltage Output Range
0.8-8.0V
Resistance Range
VW: 0.08-3.5ohm, TC: 0.10-3.5ohm
Temperature Range
200°-600°F / 100°-315°C
Modes
VW/Bypass/TC Mode
Material
Aluminum Alloy & Stainless Steel Construction
Screen
OLED display screen
Airflow
Adjustable airflow system
Charging
USB-C port
Color
Classic, Storm, Onyx, Mars, Amethyst, Nato, Tidal
FEATURES:
· 1. Powered by single 18650 battery or 21700 battery
· 2. 5-60W wattage output range
· 3. VW/TC/Bypass mode
· 4. Intuitive firing button, OLED display screen
· 5. Two adjustment buttons, adjustable airflow system
· 6. Refillable tank with side filling system
· 7. USB type-c charging
· 8. Different bridges make it compatible with Caliburn G, EUC, PnP/GTX, Nord Coils
· 9. Compatible with all Billet Box Bridges
· 10. Multiple protections: Short Circuit/Low Voltage/Temperature/10S Overtime/Reverse Battery Protection
INITIAL THOUGHTS:
The packaging of the DOVPO ABYSS AIO kit is very nice indeed. After sliding the outer cover off, the cover of the box lifts up to expose the mod and the tank along with user manual and included literature. There is a pull tab which makes removing the top foam easier to expose the charging cable, Nautilus bridge adapter, and drip tip adapter with a short drip tip installed, a 21700 adapter, and a cover that snaps over the 21700 battery. Like I mentioned earlier, I already had an ABYSS so am somewhat familiar with the operation and set up. However, I do not consider myself an expert on billet box type devices.
So far I had tried the Ether rba and a Vaporesso GTX coil in the one that I purchased so decided to set up this one with the included Nautilus bridge and a Nautilus .7 ohm 2S coil that I happened to have. There aren’t any coils included in the kit so if you are going to order one and don’t have any Nautilus coils and didn’t order the Ether rba then you should add a package of coils so you can try it when received. I don’t own a billet box but from what I understand it’s basically the same type of unit where you have a bare empty tank and can insert whichever bridge or rba that you choose.
Before you start to assemble the ABYSS, you need to decide whether you want to use an 18650 or 21700 battery. Depending on which one you choose, there are different top caps that fit each one. Also, if you decide to use a 21700, the battery tube must be removed. I decided to try a 21700 on this one since I had not tried that before.
Below is a picture of the ABYSS broken down and ready to assemble with the battery tube removed.
Before starting to assemble, I went ahead and took the Nautilus bridge out of the box, screwed it together and threaded a Nautilus coil into it. Then it simply seats into the bottom with a push.
After that the tank portion and the top cap can be installed. It’s nice that the fill port cap is also metal on the outside and matches the finish of the mod. Next, I inserted the 21700 with the positive terminal down and sat the tank onto the mod so that I could install the top cap. The top cap has to be inserted on the battery end first and sits in a groove and you rotate the top cap until it is centered over the opening in the top of the cap. At least that’s how it’s supposed to work. What happened to me was I was putting it together on a kitchen counter with hardwood flooring below and didn’t have a good handle on the tank when I went to rotate the top cap and launched it onto the floor and the glass section of the tank shattered. Thank goodness that DOVPO sent the glass pack so I was able to clean it up and install one of the spare glass sections. It might have been nice if a spare glass section had been included in the kit. One tip is to push down a little on the tank while rotating the top cap so that what happened to me doesn’t happen to you.
Once everything is in place then thread the included 510 adapter with tip into the top of the cap and into the tank. This holds the tank in place as well as being the tip adapter. When tightening, be sure to locate the fill port facing out so that it’s easy to fill and refill.
Below is the tank assembled, the top cap with the negative marking on the underside of the cap, and of course the mod.
Below shows the 21700 battery installed and the tank sitting on the mod waiting for the top cap to be installed.
This next image shows the top cap installed over the battery and locked into place ready to rotate and hold the tank in place.
This one shows the cap rotated over the tank and ready to install the 510 adapter and lock the tank in place. At this point the tank is still loose enough to rotate despite the spring loaded pin that the tank is sitting on. Since the 18650 battery tube was removed you can see the battery wrap but don’t worry. We are going to protect that battery.
Here you see the unit assembled with the snap on battery cover and ready for the adapter to be installed.
And finally, the tip adapter is installed. The included tip can be pulled off once the adapter is threaded in and you can use the 510 tip of your choice.
Ok, I know that might seem like a lot but I wanted to try to go into detail on the assembly process for those that might not be familiar with this type of device. It really goes together rather quickly. Just don’t fumble the tank like I did and break the glass.
Now let’s take a look at the operation of the ABYSS and what features it offers. The fire button is held in place by a cover with three screws on one side. I did not receive any for the review but there are different button kits available that the user can easily install if they don’t like the oval button that comes installed. The airflow control is built into the mod and not into the tank. There is a small round lever that protrudes from the front to make it easier to adjust the airflow. The airflow control on the one I received for review was very tight and initially struggled to move it. I put a couple drops of VG on it and worked it back and forth and it loosened up some. On the front below the airflow control is the USB-C charging port. There isn’t any branding on the device which I personally like.
The screen of the ABYSS and the + and – buttons are on the bottom of the unit. The display shows the battery level indicator, Voltage, Resistance, and Set Wattage. The button sequence for the ABYSS is as follows:
- Press the fire button five times to turn the device on or off
- Press the fire button three times to lock or unlock the fire button and the display will show a message
- Press the + and – buttons to lock the adjustment buttons
- While the adjustment buttons are locked, press the + button three times to put it in stealth mode
- When not locked, press the fire button and the – button to switch between the modes which are Wattage, Voltage, TC Ni, TC Ti, TC SS
- While in TC mode, press the fire button and + button and then you can adjust the wattage set in TC mode
I didn’t feel like it was necessary to take a picture of every screen message but below are a few so you can see what the display looks like. With the whole thing being black it’s a little hard to see the + and – buttons on the left side of the screen. I think it might have been nice to make them stainless so they can be seen easier.
There are many accessories available for the ABYSS. Besides the Nautilus bridge there are four other bridges that I know of that will allow you to use different coils. DOVPO was nice enough to send me the bridge pack which contains all four. However, the bridges can be purchased separately. I purchased just the GTX bridge when I bought the one I had previously. The four bridges will allow you to use Caliburn G, EUC, Nord, or GTX/PNP coils. Included also in the bridge adapter pack is a new cap required for using the GTX/PNP bridge adapter.
If you don’t want to use factory coils there is also an rba available called the ETHER. It allows you to build and install your own coils and wicks and works very well in my opinion. I’ve been running the ETHER in my other ABYSS for a while and really like it. It is fairly easy to build on. Besides the rba itself, included in the Ether package is the following.
4* Swappable Airflow Pin (3mm, 2mm, 1mm, 0.8mm)
3* Integrated MTL Drip Tip with 2 Additional Sleeves
The other accessory item that I received with my review sample is the glass pack which contains a clear, black tinted, and ultem color tank sections. The tank sections are just held in place with o rings.
FINAL THOUGHTS:
It has been an absolute pleasure testing the DOVPO ABYSS. It is a very solid well-built device. Whether you want to use the Nautilus coils in it, one of the other four bridge adapter/coil options or even build your own coils with the ETHER rba kit, there’s an option for just about anyone. I personally am well stocked on GTX, PNP, and have some Nautilus coils so it is a good fit for me. Also having the ETHER rba that is easy to build and performs well with your choice of airflow insert from the ones included. I know that there are a lot of accessory items available but you don’t necessarily need them all but instead can pick and choose depending on what you like to use. Besides all of the accessories I have mentioned, there is one other available but I did not receive it for the review. It is an SBS (side by side) kit. What it does is turns the Abyss into a side by side device that you can use any 510 threaded tank on the ABYSS.
The Abyss is a little bit heavy but not bad. I have to admit that it took me a little while to get used to the button placement on it but am very well used to it now and it’s second nature. Just out of curiosity, I put each of the two Abyss mods on a scale to compare the weight difference between setting up with an 18650 or 21700. It makes sense now but the 21700 set up is actually a little lighter since you remove the battery tube. The first picture is the one I purchased and is set up with an 18650 battery. The second picture is the review sample set up with the 21700. The 21700 set up is actually a little over 13 grams lighter. I could actually tell the difference in the two just by holding them.
I would like to thank DOVPO and Neil for sending the DOVPO X SUICIDE MODS ABYSS AIO kit for this review and hope to cooperate further with DOVPO in the future. As always, a great big thank you to you the readers. Below is a link to the DOVPO site. I would suggest taking a look and watching the video on the ABYSS. It’s a little long but good information if you are interested in getting one of these awesome kits for yourself.
Abyss AIO 60w Kit by Dovpo X Suicide Mods – DOVPO Official
Attachments
Last edited:
