My first build and it doesn't look good

Status
Not open for further replies.

nocigsnomore

Super Member
ECF Veteran
Verified Member
Aug 18, 2014
489
430
Land of Oz
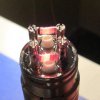
Great taste in the beginning, but now it's getting worse and worse, and one of the coils looks like:

coil3.jpg

What did I do wrong? The other coil hasn't got the black discoloring.

Now it's so bad I can't use it as it is anymore.
 
Last edited:

nocigsnomore

Super Member
ECF Veteran
Verified Member
Aug 18, 2014
489
430
Land of Oz
Thanks, but I see now that I have stretched the coils. The diameter is smaller towards the end of the coil. Flat wire is more difficult than round wire I guess.

Addition: Might have happened with the tweezers. I didn't pull at the coils. Inserted them with the drill bit in place while fastening it.
 
Last edited:

csayce

Senior Member
ECF Veteran
Verified Member
Round wire really is the best to use if your just starting out building coils heat the wire first before you coil it as that will make it a lot easier to coil best tip get yourself a set of ceramic tweezers if you've not got some already as you can mould the coils better whilst you heat them up in place with out shorting which would happened if you used a set of metal tweezers when dry burning the coils with the ceramic tweezers pinch the coil together to close the gaps up in the coil.


Sent from the depths and the darkest part of the Internet.
 

nocigsnomore

Super Member
ECF Veteran
Verified Member
Aug 18, 2014
489
430
Land of Oz
Get some round wire and forget about the flat wire for now.

1.25 Ohm on the Kayfun Lite + with 28g round wire works great. :)

Round wire really is the best to use if your just starting out building coils heat the wire first before you coil it as that will make it a lot easier to coil best tip get yourself a set of ceramic tweezers if you've not got some already as you can mould the coils better whilst you heat them up in place with out shorting which would happened if you used a set of metal tweezers when dry burning the coils with the ceramic tweezers pinch the coil together to close the gaps up in the coil.

I made a coil for the Kayfun Lite using metal tweezers. Didn't notice any shortening. Would I have noticed it? It's easier with round wire yes. :) Didn't know there was such a thing like ceramic tweezers. Guess I have to go on Ebay for buying. Got a burner. Will use that on the next coil.

Addition: Remember now that luckily I didn't fire when I used the metallic tweezers.
 
Last edited:

csayce

Senior Member
ECF Veteran
Verified Member
With ceramic tweezers you can fire the coil whilst holding the coil or moving it with out shorting just be carful they can be damaged easily if you drop them or if you get them glowing hot they are easy to chip parts of if you go for the needle nose tweezers which all mine are a top tip if you should snap a bit of the tip of and hence they no longer match tip for tip then it's easy to make them match up again simply close the tweezers and with a pair of wire snips cut the tip of the longest side and now they match up again just be gentle don't go at them like a bull in a china shop I have both the straight needle nose and the bent or angled needle nose ceramic tweezers and they have lasted me months and only cost a few quid from FT. Best of luck with your coil building.

Happy vaping and.... Vape strong.


Sent from the depths and the darkest part of the Internet.
 

nocigsnomore

Super Member
ECF Veteran
Verified Member
Aug 18, 2014
489
430
Land of Oz
Thank you for the advice. :)

My 2nd build on the Caterpillar II, and I see now that the posts are not aligned. Is that common, or should I worry? It's working fine. Never waped with a low Ohm like that before. It's awesome. :)

goldpillar.jpg

Here is one from the above. It's one of them that is bent.

goldpillar2.jpg
 
Last edited:
Status
Not open for further replies.

Users who are viewing this thread