Salutations my fellow vaperinos from all around the globe.
Sunday morning here and it's time to review another product from my friends over at Freemax.
Today i will look at the baby sister of the Maxus Solo,do not despair the performance is the same,just called it baby sister because it is a tad smaller and only uses 18650 batteries.
If you're familiar with my reviews i do like to ease my way in by starting with some pictures that will give you a nice overall view of the device and it's capabilities.
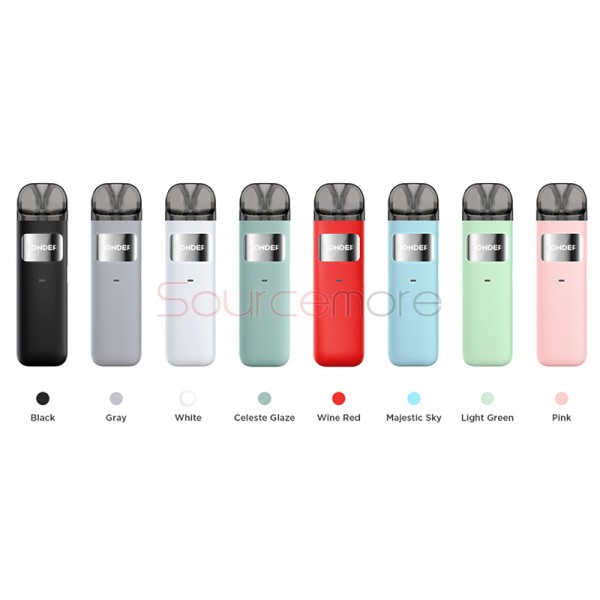
Colors:
Contents in the box:
Specs:
Features:
FM CHIP 2.0:
Top fill:
Coils:
Marvos X Mod
Size: 100.7×32.7×26.2mm (Including pod)
Battery: 1X 18650 (not included)
Display: 0.96in OLED colour screen – change screen colours too
Output: 5-100W (0.7-4.2V)
User modes: Variable Wattage, Smart, VPC, Bypass
Type C USB charging – 2A charge rate
Resistance range: 0.1-3ohm
LED body lights with different colours and display options
Locking switch
Adjustable airflow for pod
FM chip 2.0
Unboxing and first impressions:
Removed the wrap from the box and slid it open,yep everything there neatly packaged.
No need to go out shopping for nothing,it comes with everything you need to start vaping (assuming you have a 18650 battery at home).
Took everything out of the box and made sure everything was there,let us look at the mod/pod combo...hmm.
Gotta say i am not a fan of pod like devices,normally they make beautiful,gorgeous mods but on top they just slap an ugly plastic tank and it just messes up the whole look.
Lucky for me this is not the case,this looks like a proper tank and it goes well with the mod, kudos to Freemax for taking the time to make sure the mod and tank match in looks AND quality.
The mod/combo doesn't feel cheap,good and solid feel when holding it and when it come up to my ''grip'' test it didn't disappoint.
My patented,worldwide renown grip test is pretty straightforward,grip the device and squeeze it hard.
By doing this it gives me an idea of how well made the device is,i squeeze and pay good attention to any weird noises that may pop up...in this case happy to report i heard nothing.
No clicks,clacks,snips,snaps,clickity clacks or snippity snaps...nothing.
I got big hands so the Marvos X did seem a bit small in my hands but nevertheless it didn't feel odd when holding it.
I appreciate the fact that where the leather (pleather?¿) patch is,i got the green version), it didn't feel ''spongy'',just nice and firm.
Vaping time:
Knew the menu and LCD options of the Marvos X would require ample time to play around with so decided to prime the coil and let it sit for awhile soaking up the sweet nectar of the gods.
After a thorough wash and rinse of the pod i inserted the coil (0.15ohm MS-D mesh coil), insertion itself couldn't be simpler,no turns or twists or special markings you gotta follow,just push in and you're all set.
Let us power it up,insertion of the 18650 is pretty simple.
Just remove the leather covered panel which is well held up in place with some strong magnets and insert the battery,personally i prefer the slide in method but this also works.
Menu operation is quite simple:
Hold bot + and - together to lock the wattage
Little switch on the bottom with locks the mod altogether,similar to the lock on the Aegis but this is smaller and positioned in a different place
Three quick clicks of the fire button and voila!! you're in the menu,from here you can choose any of the 4 output modes (Power,Smart,VPC and Bypass) and fiddle around with the LCD options if you're into that.
Ok so like 25 minutes have gone by and I've played around with the menu long enough,need me some inhaling,time to rock'n'roll baby!!
Place pod on the Marvos X (no 510 thou,bit sad to be honest) and the ohm reading is exactly as stated on the coil,0.15 ohms.
0.15 ohm coil is rated at 60-80 watts so time to break the coil in,start low at 30 watts and keep going up.
Even thou this coil goes up to 80 watts i settled on a measly 48 watts with half the airflow closed down,that right there was my sweet spot.
We all vape differently so this might be a tad low for you,but at 48 watts is where i reached vaping Nirvana.
Used this coil for 5 days straight and not one problem or hiccup,decided to try out the 0.25 ohm coil (rated for 30-50 watts).
This coil also delivered in taste,flavor,hit and cloud production but then again what else can you expect from Freemax,when it comes to coils they do know their business and always deliver.
Wish it was a mod that could hold a 21700 battery,if you use the 0.25 ohm battery It's all ol but with the 0.15 ohm coil you will need to replace the 18650 battery quite often.
Not a deal breaker but a 21700 battery option would have been better.
One minor issue i encountered and not sure if it's an issue with the chip or its supposed to do this.
When firing the mod the change screen changes you see a graphic icon going in a circle,like a snake going around in circles,in the center of that you see the time the fire button is pressed.
Well after letting go of the fire button that screen ''freezes'' for about 3 seconds and then goes back to you regular screen where all the info is detailed.
Again not sure if this is designed to do so it is something wrong with the chip,not saying its a bad thing but it kinda bothered me.
Screen wise nothing to complain about,it's bright and it shows all the info you need but... well the ohms that are in the top right of the screen is hard to read,even with glasses and depending on the theme color you chose it might be impossible to read properly.
Then again it could an issue with my eye sight and my reading glasses,if that is the case then i need to get my eyes checked again.
Final comment is reserved for the LCD's.
These are a thing of beauty,once i looked around in the LCD menu and saw ''Tetris'' mode i knew i had to use this.
Tetris and Waterfall mode are my favorites,granted i don't use the LCD feature that much but they look beautiful and will light you up like when you see a Christmas tree.
Granted this is a feature that some might not use but at least if you're like me it is something you will be tempter to use even if it is sporadically.
I love using the LCDs of the Marvos X when driving at night or just in my room when I'm watching a movie or tv series.
Pros:
Solid,durable and well made mod+pod combo
Coils are excellent keeping in line with what Freemax has us use to
LCD lights look bright and beautiful
Able to lock the mod with just a slide lock
Cons:
Would have preferred if this mod could take a 21700 battery
On a personal note and this is a big con but just for me.
Due to my geographical location (Spain) it is an impossibility to acquire Freemax coils.
There is no vaping store (online or B&M shop) that has them,i could order them from some other country (China for example) but the delivery charges on top of the risk of getting overcharged by the Spanish post office makes it impossible for me to get them.
Would i recommend this device:
Answer to this question is a resounding YES!! but with a small caveat,you need to have the ability to procure them coils at a good price.
In my case each coil would be almost 8 bucks,and that is if it doesn't get stopped by the thieves at the Spanish Customs Postal Service,if they were stopped the price of each coil would probably be around the 10 dollar mark.
More info about the Freemax Marvos X 100w right here:
Marvos X 100W Kit | Taste the Clouds, Feel the Flavors!
Thanks to all my friends at Freemax and specially
@Freemax_Jerry for giving me the chance to review for them.
Hope you enjoyed reading my review
")