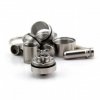
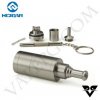
I have 2 of these and tonight I set out to wrap a few coils using the tool I made. So after each coil wrap I would mount it on one of the KF's and check the ohms.
I notice that the center air shaft screw came out of the positive terminal block quit far.

and the top gap between the negative terminal and the positive terminal black was very close. Both of those things meant I had to left the coil quit high for the wire from the negative side clear the center screw.

After looking at several images of different models of KF's, Clones and Real ones, I notice that the hcigar units have that center screw flush with the top of the positive terminal black.
So I set out to file down that center screw so it was flush and then I chamfered the positive and negative terminal block edges where they met. I made a larger chamfer on the positive block.


So now I should be able to get the coil closer to the deck of those blocks without having to worry about a short happening.
I used a small set of files and a diamond nail file.
I think I also cleared up some of the whistling by using a drill bit to clean out the air hole in the body. When I looked down through it I could see some chips from where the air adjustment screw comes through.
Hopes this helps others to clean up there KFL+ V2.
I notice that the center air shaft screw came out of the positive terminal block quit far.

and the top gap between the negative terminal and the positive terminal black was very close. Both of those things meant I had to left the coil quit high for the wire from the negative side clear the center screw.

After looking at several images of different models of KF's, Clones and Real ones, I notice that the hcigar units have that center screw flush with the top of the positive terminal black.
So I set out to file down that center screw so it was flush and then I chamfered the positive and negative terminal block edges where they met. I made a larger chamfer on the positive block.


So now I should be able to get the coil closer to the deck of those blocks without having to worry about a short happening.
I used a small set of files and a diamond nail file.
I think I also cleared up some of the whistling by using a drill bit to clean out the air hole in the body. When I looked down through it I could see some chips from where the air adjustment screw comes through.
Hopes this helps others to clean up there KFL+ V2.


