Let's talk chimney micro coils.

Status
Not open for further replies.

JeremyR

Vaping Master
ECF Veteran
Dec 29, 2012
6,611
14,051
46
Oregon, IL
Last edited:

minimalsaint

Ultra Member
ECF Veteran
Verified Member
Oct 4, 2012
1,897
4,048
Michigan
Damn how did u get ur cotton to wick like that and perfectly surround the coil without overdoing the cotton. Was that fresh cotton cause I see no burns.

Sent from my Nexus 5 using Tapatalk

I just pull the cotton apart so it's nice and fluffy. Use a small screwdriver to pack it down lightly into the wells and around the coil- done and done.
I took these photos on a fresh build, but I'm about to rebuild it again (for no good reason) and will take some pictures before I tear it down. I have been running this one for a couple of weeks but I'm willing to bet the cotton isn't scorched and maybe only a little off in color because I have been using a heavy vanilla that's a little darker.
 

LReyes66

Ultra Member
ECF Veteran
Verified Member
Dec 30, 2013
1,152
1,077
United States
Ahh. I've been following rip trippers video and been wrapping a small strand between the legs and 1 more tiny strand at the top exposed leg and pushed the cotton in the wells against the wall. Didn't think to put the bottom chimney piece on and then put the cotton

Sent from my Nexus 5 using Tapatalk
 

minimalsaint

Ultra Member
ECF Veteran
Verified Member
Oct 4, 2012
1,897
4,048
Michigan
Ahh. I've been following rip trippers video and been wrapping a small strand between the legs and 1 more tiny strand at the top exposed leg and pushed the cotton in the wells against the wall. Didn't think to put the bottom chimney piece on and then put the cotton

Sent from my Nexus 5 using Tapatalk

I haven't seen Rip's method so I can't comment on how to make it work, but this way has been working well enough for me.
I tore down the build in the Russian tonight and even after 2 weeks of at least one tank per day, the cotton was slightly discolored around the coil but not scorched.
The "donut" was placed around the coil and the other pieces were in the wells:

image.jpg

Even the coil was quite clean:

image.jpg

Quick dry burn and repack with fresh cotton:

image.jpg

All is good!

Attachment is a crappy pic of the cotton in the wells...
 

Attachments

  • image.jpg
    image.jpg
    23.9 KB · Views: 202

minimalsaint

Ultra Member
ECF Veteran
Verified Member
Oct 4, 2012
1,897
4,048
Michigan
Damn that's some pro wicking. I'm jelly of those skills. I find messing to try the perfect amount of cotton very difficult cuz of how fine n strandy they get when u unroll it.

Sent from my Nexus 5 using Tapatalk

LOL thanks, it takes some practice and you will get the hang of it in no time.
I must have built and torn down this setup a dozen times before I got it right.
It takes some poking and prodding to get it where you want it to go, but just keep in mind that it need not be packed tightly to perform well.
Keep at it!
 

minimalsaint

Ultra Member
ECF Veteran
Verified Member
Oct 4, 2012
1,897
4,048
Michigan
I use 3 pieces total. One for each well and one to wrap around the coil. If you need more, you can always add a piece. If you need less, pull it out and repack.
For the piece around the coil, start tat the bottom and work your way around the coil, packing it as you go. When the cotton is packed to a point just below the top coil it is good.
Once the cotton is in, I soak it just like a carto (dripping along the sides, away from the coil).
Once you see the liquid start to run out if the wick holes on the bottom deck of the atty it is primed and good to go.
Normally I screw the reducer onto the chimney and take a couple quick drags just to be sure everything seems good. Attach the tank, fill and enjoy!
I will say that I can't fill the tank completely to the top or I have a vacuum issue that hinders wicking, but as long as a little air is left in the tank it wicks without issue.
 

LReyes66

Ultra Member
ECF Veteran
Verified Member
Dec 30, 2013
1,152
1,077
United States
So I ended up finishing the tank and I attempted it.

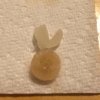
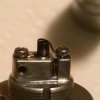
Here's what it looked like when I took out the previous wick which was just out on previous tank fill.

nubu3ahe.jpg


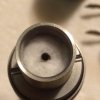
And here's with it packed with fluffy cotton.

yhemy4ad.jpg


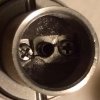
Saturated til it leaked from the wells.
neparygy.jpg


I'm not sure if I used too much cotton or not. I made it fluffy and thougt it was much til I packed it in lol. So far the flavor is there and the vapor but it gurgles... Hoping after a few draws/hours it goes away.


Sent from my Nexus 5 using Tapatalk
 
Last edited:

CheetahAce

Senior Member
ECF Veteran
Nov 16, 2013
149
144
San Diego
Can anyone comment on what they feel the pros are to this type of chimney build as opposed to RIP's method? I mean... the coil can only vaporize the liquid it comes into contact with so why the need for the carto style packing?

Also, I tried RIP's method today for the first time. I found the flavor to be a tiny bit better than the truman crossover build but the vapor was noticeably less. I did however add an extra loop on my coil by mistake which made it come out to 1.8ohms instead of my usual 1.5.
 
Last edited:

JeremyR

Vaping Master
ECF Veteran
Dec 29, 2012
6,611
14,051
46
Oregon, IL
Better flavor and more heat. This build tends to take more wattage. Your mod needs to be able to push 15 watts to it. If your using a vv/vw mod you may only be getting 10-11 with 1.5-1.8 ohms. It's a really touchy build and unless your lucky it takes some trial and error. You know its right when the flavors pop. It's typically not the type of build you can try once and say it's not that good because likely it's not right yet.

What atty are you using a Russian or ithaka
 
Last edited:

JeremyR

Vaping Master
ECF Veteran
Dec 29, 2012
6,611
14,051
46
Oregon, IL
Nice setup ! Forgot to add lmore vapor noticeably tee 5increaseed. Nic delivery , when I got t he cotton right I got a buzz right away... 12mg micros for a year no buzz with this buzz after 5 pulls. As for riptipper, as far was I can tell he ripped it off the forums here. We were doing these in sept last year. I will have to watch it to see how he shows it.
 
Last edited:

JD1

Vaping Master
ECF Veteran
Nov 20, 2010
4,180
2,641
KY
Better flavor and more heat. This build tends to take more wattage. Your mod needs to be able to push 15 watts to it. If your using a vv/vw mod you may only be getting 10-11 with 1.5-1.8 ohms. It's a really touchy build and unless your lucky it takes some trial and error. You know its right when the flavors pop. It's typically not the type of build you can try once and say it's not that good because likely it's not right yet.

What atty are you using a Russian or ithaka

That's my experience as well, and I just went back to a 1.2 ohm horizontal micro coil because of that. I don't have the batts for it yet. I'm building on my 'funalikes so I have to have the micro for good air flow. If I wrap a 1.2 ohm nano it'll really spit the vapor but the air flow through it doesn't suit me.

Edit: I better add than I'm not suffering any though. Love these 1.2 ohm, 28 gauge micro coils. :vapor:
 
Last edited:
Status
Not open for further replies.

Users who are viewing this thread