Question on Coil Details

Status
Not open for further replies.
Hi,

I had a few questions on coils, but I guess it could boil down to one question depending on the answer.

As an example if I have 1 inch of 32 awg kanthal, and it should have 1.0916 ohms (13.1/12=1.0916) does it matter how the coils are formed, how close together they are, how big they are, etc....

If I have my coils closer together, or farther apart, will that increase or decrease my restistance? Or if coils are bigger or smaller?

Or is 1 inch of kanthal, 1 inch of kanthal? Will I have 1.0916 ohms per inch no matter how my coils are wrapped, no matter the size or spacing?

Thanks for any help on this.
 

Fizzpop

Super Member
ECF Veteran
May 6, 2013
777
984
United States
You should always measure the resistance of your coils after they are made and mounted. Generally speaking, touching coils don't significantly change the resistance due to the oxidation of the surface of the wire, but with a micro-coil you could get a decrease in overall resistance. The length of the wire is a good estimate for your final resistance, but you should always measure the actual coil once it is built.
 
Last edited:
Thanks for clearing that up. So now for my next question:

I know that kanthal resistance is a bit lower at the initial start of a new coil on a battery. And it could change slighty as the coil is used.

If I torch my coil for a few seconds before I attach it to my contacts and battery will this do a "pre-treatment" to have them fully ready to go when I attach it to my battery?

Or is there something specific to needs voltage going through the coil/wire that does a sort of "break-in" period and the heat treatment has nothing to do with it?
 

DaveP

PV Master & Musician
ECF Veteran
May 22, 2010
16,733
42,641
Central GA
Torching a coil anneals the coil removing internal stress from the metal in the wire. It's done also to burn off any oils or extraneous materials from the wire. A beneficial byproduct of annealing is that once it's annealed, you can bend it and coil it and it will stay put. You can anneal then coil or you can wind the coil and then hold it together lightly with tweezers and anneal it. I like to torch it first. That way the coil doesn't try to unwind by itself.

Heating it after it's coiled is usually done to see how evenly it glows. Sometimes, you have to push and pull slightly on the coils to adjust the glow, remove hot spots, and produce an even red glow on the coil before inserting the wick. Once the wick is in place and juice is applied that may change and some dry burn if they are using a silica wick. If your wick is cotton, you need to do the coil testing before the wicking is installed.

Check out RipTrippers on Youtube. He builds just about every coil imaginable on many types of mods. He's clear, concise, has great video quality, and good post-production editing skills.
 
Last edited:

Shootist

Ultra Member
ECF Veteran
Verified Member
May 5, 2014
1,014
752
Decatur, GA, USA
You need to do more reading of both forum posts and other documentation for building, Wrapping, vaporizer coils.
Look at the charts on this website for the resistance of Kanthal PER FOOT then divide that by 12 to get the resistance PER INCH.

Kanthal A1

There is much more than 1 inch of Kanthal in any coil made to be used in a vaporizing device. It is the Total Length of the wire wrapped around a mandrel, drill bit or something else.

Oh yeah, I fully understand that. I was simply using the 1 inch and ohm rating for a simple reference point for what I was writing. I simply used the 1 inch as a point of reference to ask if 1 inch of wire gave X amount of resistance, would 1 inch give X ohms, or would it change based on the coiling technique.

I understand that there are variables after wrapping, and that it may not be exactly as the math dictates, but I was just wanting to get an idea of if the coiling method changed the resistance of the wire.

I want to be able to get a mathematical guess based on gauge and length before I start so I don't wrap too much, or not enough, based on the resistance I'm shooting for.
 
Torching a coil anneals the coil removing internal stress from the metal in the wire. It's done also to burn off any oils or extraneous materials from the wire. A beneficial byproduct of annealing is that once it's annealed, you can bend it and coil it and it will stay put. You can anneal then coil or you can wind the coil and then hold it together lightly with tweezers and anneal it. I like to torch it first. That way the coil doesn't try to unwind by itself.

Heating it after it's coiled is usually done to see how evenly it glows. Sometimes, you have to push and pull slightly on the coils to adjust the glow, remove hot spots, and produce an even red glow on the coil before inserting the wick. Once the wick is in place and juice is applied that may change and some dry burn if they are using a silica wick. If your wick is cotton, you need to do the coil testing before the wicking is installed.

Check out RipTrippers on Youtube. He builds just about every coil imaginable on many types of mods. He's clear, concise, has great video quality, and good post-production editing skills.

Thanks for detailing the heat treatment for me. That explains a lot more for me.

I have seen 1 of the vids done by Riptrippers, and I hear his name referenced SO many times in other vids... I guess I know why now! :laugh:

I'll check out his youtube channel and give his vids a watch for all the different methods. THanks for the suggestion and info!
 

p7willm

Super Member
ECF Veteran
Verified Member
Apr 11, 2014
936
458
Lansdale, PA, USA
Good luck and have fun with coils. I know I have, sometimes pretty, sometimes ugly, and sometimes frustrating. In the videos with the closeups full screen it looks so easy, but in real life with old eyes they look tiny. Also, whoever is doing it in the video has probably done it a lot more than me. My skills are improving with time, I can now get a not ugly coil wound, installed, and wicked in under an hour:)

My first attempt at a chimney coil was scary to look at, now it's just bad, and in the future I hope to reach OK.
 

NealBJr

Ultra Member
ECF Veteran
Jul 27, 2013
2,469
3,732
Lawrenceville, Ga.
Lol... my coil building skills have slowly improved myself. Youtube vids make everything look easy. It took me a few weeks before I could coil my Aqua. I got so frustrated at it... simple concept, wrap two coils, capture two coils, wick and go... It would take me an HOUR to get two coils wrapped. My reference video was only 15 minutes. After a while, I developed my own technique, and now it takes me only 20 minutes.

as far as "micro coils" where the coil wraps touch each other, that also took time. I ended up "cheating" and got some ceramic tipped tweezers. :) Now it takes me less than 5 minutes to make a micro coil that looks good. :)

Now, for reference, most people have a particular setup they use. Most people coil first, then put their wick through the coils. They usually use a thicker than 30 gauge wire so it doesn't deform the coil while running the wick through. If you're trying to re-coil a protank or vivi nova style, it might be better to just coil around the wick, and use 30 or 32 gauge, since you have an extremely tight area to work in.

When people coil, they usually use a particular diameter item they are familiar with. like a 3/32 drill bit. They build a coil, count the wraps, put it on a testing device, then test it.... they take off a few wraps depending on what their desired resistance is. So, when they do a new coil, they know X wraps around a 3/32 drill bit using X gauge kanthal = X ohm coil. IF they change the drill bit or the wire, they adjust the wraps according to their best guess.
 

Singaw

Super Member
May 21, 2014
404
463
ComVal, Philippines
When I initially began wrapping coils I would figure out how much kanthal I needed to reach the desired resistance, measure out a piece and mark it with a sharpie. I would then use these marks as a reference while wrapping the coil around a machine screw while leaving enough exposed for the legs. The machine screw threads kept my coils evenly spaced and having the little marks meant not having to count, recount and then count the wraps again. I don't use this technique anymore but it saved me loads of frustration when I first started wrapping coils.
 

supertrunker

Living sarcasm
ECF Veteran
Verified Member
Oct 12, 2012
11,151
52,106
Texas
What you can do - regardless of the gauge of wire, is get a meter and put one probe on one end of the wire and bend it. Then run the other probe along the wire until you hit the rough resistance you want and bend that.

The bit between the two bends is what you want to use as a coil. It's a rough guide but better than guesswork.

T

So the meter won't read the resistance of any of the wire ahead of it on the roll? I thought about doing that, but I was thinking that the wire attached to the roll would cause a misread of the resistance.

I guess it makes sense the it would only read the resistance of the the wire between the 2 leads touching the wire...
 

DaveP

PV Master & Musician
ECF Veteran
May 22, 2010
16,733
42,641
Central GA
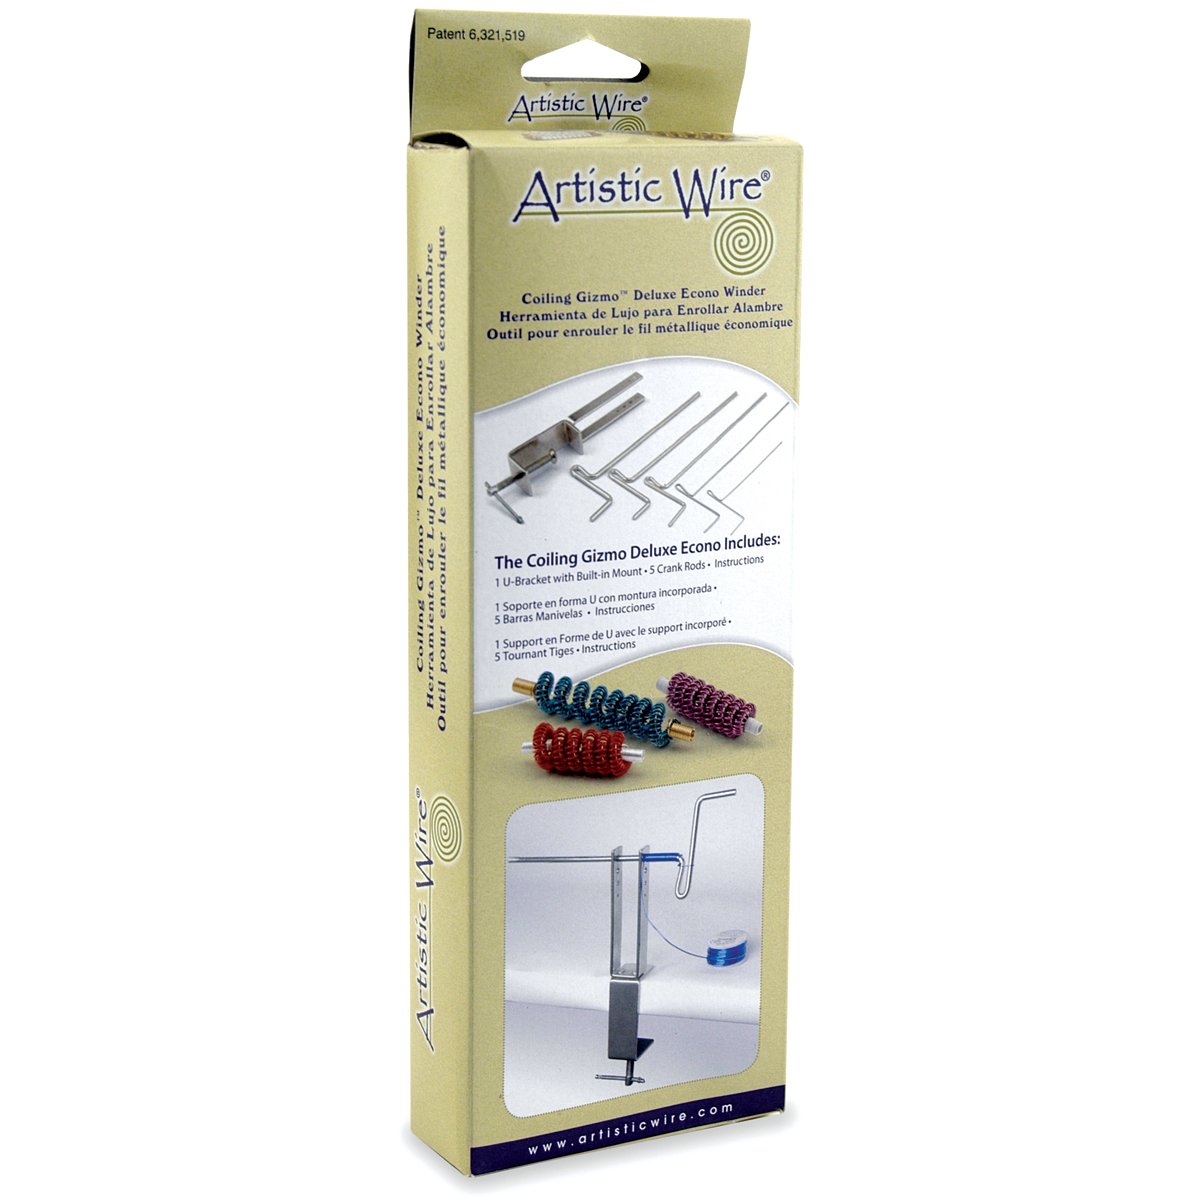
If you want to ramp up your coil building, check out this coil winder. It's also sold at Hobby Lobby. You just pick the rod diameter and insert it into the jig, cut and anneal a piece of wire and wrap the end around the crank and turn the crank the number of wraps you want. You get a perfect coil every time in seconds. It does micro and nano coils with touching wraps easily. If you anneal the wire first the coils stay tightly together when you pull it off the jig.

Amazon.com: Artistic Wire Coiling Gizmo(R) Deluxe Winder for Jewelry Making

61cg8PJEV6L._SL1500_.jpg
 
Status
Not open for further replies.

Users who are viewing this thread