Okino C100 Pod Kit - Powered by Innokin | Reviews by Z-Lee


Okino C100 Pod Kit - Powered by Innokin
OK For You


1685976402386.png

Hello again! Today I'm excited to bring to you a review of a product brand I've never heard of before, but has impressed me far beyond any expectations I might have had. The main reason is that Okino is a sub-brand of Innokin that has designed their products separate of Innokin, and from the ground up. The C100 is a small 800 mAh open pod device that has something I haven't seen yet, and has proven to come in quite handy. Their theme hovers around the word or idea of being "OK", but I will admit with a precautionary spoiler -
it's much better than just "OK". :cool:
I recommend heading over to Okino's site to get more info and check out their cute animations.

I appreciate @Innokin_timmy for sending me the Okino C100 for review. As always, it will be conducted in a fair and honest manner.

Let's dig in!

(pictures can be clicked on for easier viewing)


> OVERVIEW <

Colors:

1685977907341.png

There are 11 color options as of launch. Keep an eye out for more options if you're looking for a color more suitable to your liking.
> Red
> Pink
> Yellow
> Green
> Dark Green
> Aqua
> Cyan
> Blue
> Purple
> Light Grey
> Black


Main Features:

1685978318111.png

There are quite a few features included in this small kit. The big things to pull out of the above is that there are two coil resistance options, 0.4Ω and 0.6Ω, there are moisture pads included (new concept), it uses an 800 mAh internal battery, and it has a USB Type-C charge port. They also don't mention this in the features, but this device activates by both auto-draw and a fire button.
Okino-C100-Structure.gif


Specs:
1685978803436.png

Each kit comes with:
> C100 Pod Mod
> C100 Pod Cartridge (4mL; 2mL TPD)
> OK R2 Coil (0.4Ω)
> Condensation Pads
> A Vape Band
> A User Manual


> TEST RESULTS & OBSERVATIONS <

Intro:


1685979431176.png

The top picture of the two above displays everything that was sent to me for this review. What comes in the package itself is shown on the left. I would consider this a decent starter kit because it contains everything but your very own e-juice to start vaping. A reminder that his product is meant for DL/RDL vaping, so 2-5% salt nics are not advised. Stick to 1.8% salt nic or 18mg/mL freebase and lower. The only other nitpick that I have in calling this a great starter kit is that it only comes with a single coil. As a reviewer, I've been guilty on more than one occasion of accidentally frying my coil simply by trying to turn a device on before putting juice in the pod. As a fresh beginner, I'm almost positive that this is going to happen to more than a few people, and that's a terrible experience to start off with right out of the gate. I really wish every kit sold on the market would include two coils, especially when there are multiple different resistances available. I understand that the benefit is a lower cost, but cost really doesn't play much of a factor if the experience is ruined before you're even able to use the device. That's not a gamble I'd consider to be a good one - that's my two cents at least.

Additionally added to the kit that do not usually come in pod kits is a rubber lanyard band, and 5 condensation/moisture pads. The rubber lanyard band is self-explanatory and a nice feature if that is something you're interested in using. A lanyard itself is not provided, so that must be something are willing to seek out if you're interested in using the lanyard band.

The condensation/moisture pads are a completely new concept and are a welcomed gesture. While I can't say I've had any leaking issues thus far, I will say that due to the way I stored this device in my lunch bag, the moisture barrier created by a fully saturated wick was allowed to be interrupted and it ruined the normal capillary action that's needed to properly keep the wick saturated. The result ended up being a coil that became ultra-sensitive to burning if my draws were longer than about a second and a half. As an RDL vaper that's used to taking 3 or so second puffs, this felt a bit underwhelming. All of this because I stored this device on its side with a partial tank of juice. Even though the C100 is capable of being stored this way w/out leaking, it can cause issues and I don't recommend storing it on its side. I digress... So, while trying to resurrect the coil back to a useable state, the pod did end up leaking a bit due to my own diagnostics process and these moisture pads picked up that juice. The biggest reason that these pads are important are so that any juice that leaks down into the connector bay doesn't end up down in the pod mod, or in your lap, pocket, or purse. Additionally, these pads will keep juice from clogging up the auto-draw sensor which is a huge issue with pod devices that have the ability to be auto-drawn. Google it, it's a huge problem. Luckily with this device, it can be auto-drawn or fired using the fire button. That is however both a pro and a con when it comes to storing the device and is recommended to be turned off before stowing. I will explain how the functionality of the device works in more detail below.


The C100:
1685982326056.png

I received the Aqua colorway and it has a rather pastely look to it as you can see. At 25mm in width, this is a slightly larger pod device when compared to its apparent competitors in the market, however the C100 can not be directly compared to many of those products simply because this is not an MTL device like the Caliburns and Xroses. This would be more comparable to Vaporesso's Luxe X, Luxe XR, Luxe XR Max, and VooPoo's Vinci 3, in which this is a smaller device than all of those. The larger battery sizes found in direct-lung (DL) and restricted-direct-lung (RDL) devices are needed because each puff requires a higher wattage to provide that nice aromatic ploomage of vape. The 0.4Ω coil uses 22.5W and the 0.6Ω coil vapes at 18W. 800 mAh is not a lot for this purpose, however what you lose in battery capacity, you gain in size and pocket-friendliness. A reasonable compromise if you will, if size is of importance to you.

On the front of the Okino pod mod, it's quite easy to see the raised circular fire button. On the reverse side is where you'll find the USB Type-C charging port. The port is advertised to charge at 1.0A, and it reaches around 0.7A which is pretty common for 1.0A. At this rate with an 800 mAh battery, you can expect an empty to full charge to take around 75 to 90 minutes. The Okino C100 does support pass-through vaping for those that like to be able to take a few puffs while it's charging.

The pod mouthpiece tapers down quite nicely and fits between the lips very naturally. Unlike many DL devices with 810 drip tips, it will not feel like you're putting your lips around a garden hose.

On the underside of the pod mod, there's a white ring around the entire base that acts as the ring of illumination where different colored LEDs indicate specific functions of the pod mod. This can be confusing, but is a pretty common way for simple chips to provide a wide range of information.

On the top of the pod mod (under the pod), you'll see two brass-plated spring-loaded connectors toward the middle, two larger circular magnets, and a small black chimney that acts as the auto-draw sensor. Like I mentioned above, the white moisture pad you see here absorbs excess juice and prevents it from clogging up the connector pins and the auto-draw sensor. If a leak of any sort does occur, you'd simply replace it with one of the multiple backup pads that are provided in the kit. When purchasing additional coils, each of those boxes come with additional moisture pads, as well. Very thought out and considerate!

Part of the beauty in the C100 is how simple it is to use. Like most smaller pod devices, there really isn't too much to worry about in being able to just simply pop the pod in and begin vaping.

Use the following instructions to better understand basic functions:
Operation:
> 3x clicks of the fire button - Turns the device on and off
> 2x clicks of the fire button (when on) - Turns an LED on or off that flashes colors constantly through a rotation

Light indicators:
> Battery Status - Blue = >30%; Yellow = 10-29%; Red = 0-9%
> Battery has Died - 8x red flashes

Light Indicators when Charging:
> Red = <90%
> Blue = >90%
> Light turns off when fully charged

Additional troubleshooting safety light indicators can be found in the manual if you experience anything not mentioned here.


The C100 Pod:

1685985254360.png

Leave the sticker on until you've filled the pod up to prevent yourself from frying the coil. Don't let my past failures become yours. There's a "Max" indicator on the pod which is kind of odd to me now that I think about it, lol. Usually this is considered a "Min" line, but I suppose it can also indicate the "Max" juice consumption line as well. Regardless, do not get in a habit of allowing your juice levels to get below this, or funky things will start happening to you, and not in a good way. This is a great way to start experiencing dry hits.

The rubber refill tab has an arrow pointing to the end that pulls up. It's also the squared off end if you find yourself confused. The refill hole is large enough to easily accommodate 100/120 mL Chubby Gorilla bottle nozzles, so no worries there. Once you've filled the pod and let it sit for 5 or so minutes (I take a few dry pulls on the pod while it isn't on the pod mod to help quicken the wicking process - sticker must be removed to do this), take the sticker off, pop it on the pod mod, and away you go!

As I mentioned before, the mouthpiece is very comfy when putting it between your lips for a puff. Not something usually experienced in a DL device.


The OK Coils:
1685989758599.png

The kit comes with the R2 OK coil pre-installed which is a 0.4Ω coil. Between the 0.4Ω and 0.6Ω coils, the 0.4Ω coil has a larger bore for more airflow making it more ideal for DL vaping. The 0.6Ω coil is slightly more restricted and more aimed at an RDL airflow. Regardless, both coils perform great and put out an immense amounts of flavor. If battery life over airflow is important to you, you may want to consider using the 0.6Ω coil to use less wattage per puff. For overall flavor output, I'd put the 0.4Ω coil ever-so-slightly above the 0.6Ω, but they're very close and almost indistinguishable.

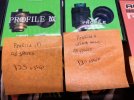
A quick reminder when installing the coils, there is a right and wrong way of installing them which isn't necessarily intuitive. The open sided gaps on the bottom of the coils should be lined up with the magnets. If they're situated perpendicular to the magnets like you see in the bottom left picture, the pink O-ring is visible meaning that it isn't seated and sealing properly. In the bottom middle picture, the airflow slots in the coil are correctly lined up with the magnets, and thus allowing the coil to seat and seal properly. The picture in the bottom right is showing you the different bores of the chimney which changes the amount of available airflow. The slightly more restricted 0.6Ω coil is on top, with the 0.4Ω coil on the bottom. The lower the resistance, the more open the airflow usually is. This a general rule that applies to all vape products if this is something you weren't aware of.

1685986480214.png

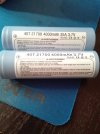
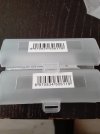
And lastly, this is what you can expect from a replacement package of coils. 3 coils come in each box, along with additional condensation pads. The R1's are the 0.6Ω coils, and the R2's are the 0.4Ω coils.


> CONCLUSION <

The Okino C100 has blown me away. At first it just looked like a cheap plastic vape device and I wasn't all that excited to try it out. I actually used the Aquios Bars Innokin also sent for this review as my backup devices while on-the-go. Reluctant to start testing the product out, I've got nothing but great things to say about it. It's small for a DL device, it has outstanding flavor output, and beyond user-error, the coils are lasting quite a long time. While it's near impossible to keep track of how many total puffs I've put on these OK coils, my guess is that they easily compete and exceed against what I would consider the market standard of 1000 puffs. My only gripe is the battery size at 800 mAh, but taking the overall size of the device into consideration, it's easier to let it slide. My overall rating on the flavor output very easily makes the OK coils comparable to the best tasting coils on the market.

++ PROS ++
> Small for a DL device
> Intense, in-your-face flavor output
> Price-point is an easy yes
> Comfortable in the lips
> Auto-draw and fire button activation
> DL and RDL airflow options
> Condensation/Moisture pads (innovation!)
> Lots of extra pads
> Pod sits firm, but easy to remove
> USB Type-C
> Pass-through vaping
> Decent charge time

- - CONS - -
> Package only comes with one coil

+- CONSIDERATONS -+
> 800 mAh battery is smaller for a DL device
> Lanyard band available
> No lanyard comes in the package
> Juice level can be harder to see w/out proper light
> Coils dictate airflow/non-adjustable airflow


> RATING <
9.5

I considered giving this a 10, but nothing's perfect. The battery size is smaller for a DL device and only one coil comes in the package. But other than that, Innokin has blown me away with the Okino C100. There hasn't been too many pod devices I've purchased additional coils for, but I will be looking for these better-than-OK coils. A part of me hopes that Innokin adopts these coils in one of their atomizers. I would for sure be buying multiples. That's all that really needs to be said - if you're a DL or RDL vaper and are looking for a smaller portable device, I highly recommend giving this a go!

I advise you to head on over to Okino's site and take a look around. For now, I only see this available on Innokin's site found here. As of the posting of this review, the price is $16.99 and 100% worth it. I am not blowing smoke up your booty hole, this is definitely a winner!

Again, I want to thank @Innokin_timmy for providing this product for review. It's very much been a treat. I encourage you folks at Innokin to adopt the OK coils into one of your atomizers! Maybe a top airflow? ;)

That's all I got for you folks. Thanks for reading, and I hope to catch you around in the next review.

Cheers and happy vape hoarding!
:rickroll:

Coming Soon !! Vandy Vape Requiem 95W Mod

The Vandy Vape Requiem box mod is a transparent mod that requires the installation of a 21700/20700/18650 battery max 95w output wattage.High strength transparent materials make it high value,and the mod design of the curve to make the product more excellent ergonomic grip.make it lightweight and corrosion resistant, and perfect to match the rad/rta diameter in 28mm.
vandyvape-requiem-mod-01.jpg

Features:
1. Classic Requiem series
2. High strength transparent materials
3. Excellent ergonomic grip
4. Lightweight and corrosion resistant
5. Integration up to 28mm

Click here for more:
Vandy Vape Requiem 95W Mod: Vandy Vape Requiem 95W Mod

Artic Fox offers some support for Lost Vape Quest chipsets...

Just stumbled across this folks and thought it would be of interest to many.

Artic Fox firmware forum link.


Russian reviewer/modder modding the firmware on a Centaurus BF. Apologies for only being available in Russian, but it at least goes through the process and shows what can be achieved.

Login to view embedded media
  • Useful
Reactions: Javichu

UK Coming: Dovpo Odin V2 Box Mod

Crafted with precision, this dovpo odin v2 mod boasts a lightweight aluminium alloy construction, weighing in at just 273g. Its sleek design and solid build quality make it a pleasure to hold and use.

Powered by 2x 21700 batteries or 18650 batteries (not included), the Odin V2 offers extended battery life for uninterrupted vaping sessions. The slider battery compartment provides easy access and ensures a secure fit.

Equipped with a USB Type-C charging port, this mod offers convenient charging options with a 5V/2A charging rate. No more waiting around for hours to get back to vaping!
dovpo-odin-v2-mod_(1).jpg

With a power output ranging from 5 to 200 Watts, the dovpo uk odin v2 delivers an impressive performance to cater to all vaping preferences. It supports a resistance range of 0.07 to 3.5 ohms, allowing for a wide variety of compatible atomizers.

Featuring multiple steam modes such as VW (Variable Wattage), VV (Variable Voltage), and TC (Temperature Control) for Nickel, Stainless Steel, and Titanium coils, the Odin V2 provides a customizable vaping experience to suit your preferences.

The mod features a vibrant and user-friendly 0.96-inch TFT colour display, offering clear visibility and intuitive navigation. With seven display colour schemes to choose from, you can personalize the mod to match your style.

The cushioned 510 connection ensures seamless compatibility with a maximum diameter of 30mm RDA/RTA/Sub Ohm tanks, allowing you to pair the Odin V2 with your favourite atomizers.

If you are interested in this kind of vape mod, you can visit our online vape store to learn more.

Cheap Vapes Online:
caliburn a3s pod vape kit
vaporesso luxe xr max uk
  • Informative
Reactions: MLEJ

Newly Launched: Funky Republic Fi3000 Disposable Vape

Happy to inform you all! Funcky republic fi3000 will be on sale soon. It adopts SPCC Metallic Side Cover, and the product parameters are engraved on the surface of the shell in an on-screen display style. Such a one-piece design not only makes the product more textured, but also enhances the resistance to impact and durability.

funky-republic-fi3000.jpg


The more important product parameters are as follows. Fi3000 disposable vape is pre-filled with 5ml of e-liquid, which contains 5% nicotine salt, and can provide about 3000puffs. It is equipped with 800mah rechargeable battery and QUAQ tech mesh coil, which fully guarantees that you can enjoy a smooth and wonderful vaping experience as soon as you inhale.

Last but not least, the fi3000 is rich in flavors and the funky republic brand is guaranteed. If you have any questions, you can contact the online vape store customer service at any time for solutions.

You may also be interested in these:
slimz bc5000 pro sale
cyber flask vape near me

Innokin + Aquios Labs = Aquios Bar Recyclable Disposable | Reviews by Z-Lee

Innokin + Aquios Labs = Aquios Bar Recyclable Disposable | Reviews by Z-Lee

Innokin & Aquios Labs | Aquios Bar


1685804238995.png

Hello! Today we're going to be taking a look at a collaborative disposable that Innokin has worked with Aquios Labs on. What makes this device especially unique is that it's almost entirely recyclable. On top of that, we have Aquios Labs' AQ30 e-juice that's comprised of 30% water and has already proven to output a stellar vape also seen in a previous review of the Innokin Innobar C1.

I appreciate @Innokin_timmy for reaching out to do this review. Innokin's products are a delight to test out because like their company name, they thrive on innovation and that is always great to see as a reviewer. This critique will be conducted in a fair, unbias, and honest manner.

I recommend checking out Aqiuos Lab's page here for more info. I will highlight some of the features before sharing my thoughts on the Aquios Bar.


→ OVERVIEW ←

Flavors:

1685880570200.png

From top left to bottom right, we have:
> Peach Ice
> Blueberry Ice
> Iced Cosmic
> Grape Ice
> Tropical Blue Ice
> Watermelon Ice
> Blueberry Bubble Gum
> Mango Passion Ice
> Sour Apple
> Sunrise Ice


Key Features:

1685880909427.png

As mentioned in the intro, the uniqueness of this device is due to:
> AQ30 water-based vape juice
> Nearly 100% recyclable


Specs:

1685881013858.png

The big things to pull from the specs are the size, estimated puff life, and the nic strength (2% or 20mg/mL).


→ Test Results & Observations ←

Intro:


1685881255212.png

The Aquios Bar comes individually packaged in brightly colored boxes relative to the flavor profile with everything you need to know on the outside of it. Inside of each box there's an Aquios Bar, and a folded pamphlet with direction on how to disassemble it for recycling once it's been fully utilized.

The size of this device is extremely petite. At 17 by 97mm, this little guy is a centimeter and a half wide which almost half as wide as most pod devices. You may want to say that bigger is better when it comes to disposables, but think about it - have you ever really gotten to 6000 puffs, or even 3000 puffs from one of the big ones? Also, when it comes to pocket-friendly devices, this one takes the cake. For those looking for a super small device without fear of any leakage, the Aquios Bar fits almost too perfectly inside your pocket or purse. By too perfectly, I mean that it's almost easy to forget you have it in your pocket.

As a restricted-direct-lung (RDL) vaper myself, I'm quite picky about disposables and even pod devices because the airflow is often too restrictive. On the other hand, mouth-to-lung devices (MTL) I try to vape in RDL often end up burning the coils, as they're not meant to be vaped that way. The Aquios Bar has an airflow restriction similar to that of a lightly packed cigarette, and I'd classify it in the slightly loose MTL range. If you're a previous smoker, you should know how this draw feels. I've vaped all of the four samples I received almost exclusively in RDL, and there hasn't been a hint of any burnt flavor which I'm very delighted to see.


The Aquios Bar:
1685885774591.png

The Aquios Bar itself is quite simple. The outer shell is composed of cardboard material with the cap and bottom made out of silicone. The writing on the outside notes the flavor of the device with Aquios Labs' trademark AQ30 water-based eliquid logo.

I can't say I've ever vaped a product with a silicone mouthpiece before, but it's quite pleasant. There's a softness when putting your lips to it that hard plastic simply doesn't have. You can even bite down on it which is kind of an odd thing to say while I'm rereading this (lol), but it feels nice between the lips.

The bottom of the device has two very tiny holes however only one of them creates the slightly loose MTL draw. The other hole leads to a blue LED that lights up when taking a puff. You can cover the airflow hole slightly with your finger if you want to tighten the draw, but do this at your own risk. While I've tested this out to confirm that it does in fact work, I'm not entirely sure how it will affect the overall lifespan of the product.

Both the silicone mouthpiece and buttom cap can easily be removed to expose the innards of the device for recycling.

It should be noted that not every flavor has the word "ice" in it to denote that it contains mint or menthol, but the Blueberry Bubble Gum and Sour Apple that I received did indeed have mint in them. However, the "ice" is very subtle and more reminiscent of a candy cane flavored mint which still gives you that cooling sensation, but it doesn't overpower the entire flavor profile. If you're a disposable user, in the past I'm quite sure you've taken a few puffs from a device and ended up with what feels like brain freeze? Yeah, that's not a good feeling, and something I'd prefer not to experience from vaping. The Aquios Bar does a great job of providing the cooling sensation that disposables have, while not destroying the entire flavor with it.


Almost Entirely Recyclable:
1685887080861.png

1685888856387.png

Nearly everything about the Aquios Bar is recyclable. The packaging, the wrapper, the protective silicone plug/cap, and the Aquios Bar itself, other than the juice reservoir, can be disassembled and recycled. This is a big win in my book.
1685889039270.png

The folded up pamphlet you will find in every package shows the directions on how to disassemble and dispose of each component. Please remember that lithium-ion batteries and silicone are not recyclable in the same way that we normally recycle paper and plastics. In the US, please check your local recycling policies on how to discard these parts properly.


Flavor Profiles:

- Blueberry Bubble Gum -
90% - Blueberry
5% - Sweetener
5% - Candy Cane

One of the best blueberry flavors I've ever tasted in any e-liquid. Before this, my favorite blueberry juice was a blueberry streusel. If you're a fan of blueberry, this is definitely be a great choice.


- Watermelon Ice -
95% - Watermelon
5% - Candy Cane

Certainly one of the best pure watermelon flavors I've ever vaped. The flavor is extremely moist and saturated.


- Sour Apple -
95% - Sour (tart) Apple

5% - Candy Cane

They captured the tartness of a freshly picked apple almost perfectly in this one. If you like tart flavored e-juices, this one is definitely a great choice.


- Mango Passion Ice -
85% - Mango
10% - Passion Fruit
5% - Candy Cane

A very good mango! The 10% Passion Fruit captures the citrus flavor quite well. It's reminiscent of an orange, but is a great blend with the mango. The citrus is very faint, and really brings out the flavor in the mango.


→ Conclusion ←

Aquios Labs' AQ30 water-based e-liquid is a game changer and for me, the new standard to compare other disposables against. There's something about the water that truly brings out the flavor in each of their flavor profiles. I don't quite know how to describe it, so I'll give an example. Popping a watermelon candy in your mouth lacks the juiciness we can smell when cutting open a perfectly ripened watermelon. Biting into that center piece and being overwhelmed with watermelon juice is nowhere near the same as biting into a watermelon candy. The Aquios Bar Watermelon Ice does capture a bit of this. It isn't obviously the same, but it's a much more authentic experience than previous iterations of watermelon flavored e-juice that I've tried in the past. The same can be said about the Blueberry Bubble Gum, Sour Apple, and Mango Passion Ice. If you're a fan of saturated vapes with a tiny bit of mint, the Aquios Bar is a must try.


++ Pros ++
> Very small
> Spectacular vape
> 600 puffs is a decent expectation
> Almost entirely recyclable​
> Easy to understand recycling instructions
> Very easy to disassemble
> Comfortable silicone mouthpiece
> 10 flavor options

- - Cons - -
> None

+- Considerations -+
> 2% nic concentration
> Non-rechargeable


For those that are unaware, Innokin constantly strives for new ideas while also being environmentally conscientious. For the dozen or so reviews I've written for them, their products have always used recycled packaging. In terms of recyclable products, this is something we haven't seen with disposables or anything vape related up until now, as far as I know. Disposables cause a much great concern than the standard box mod and atomizer, or even pod devices because they lack reusability. Instead of tossing a coil head or a cotton wick away, another piece of plastic with a lithium-ion battery in it lands on the ground somewhere on our planet. While many people don't seem to care all that much about this, it's a problem that future generations are going to have to face at one point or another. I'm asking anyone that reads this, to please take this into consideration when you purchase your vape products. Be part of the solution, not the problem.

That being said, I appreciate everyone that stuck with me through the entirety of this review. If you're a disposable vaper and you're looking for something new and refreshing, give the Aquios Bar a try. If you're a smoker and you're looking for harm reduction alternatives, look no further. If you're looking for a solid product as a simple on-the-go vape solution, this or the Innokin Innobar C1 are great options. If you're environmentally conscientious, this is about the only solution to fulfill that niche. There really aren't any negatives to give here. Truthfully, Innokin and Aquios Labs have hit it out of the park with this one.

As a side note, I need to stop vaping these before they taint the rest of my vapes, lol.

Thanks again and happy vape hoarding!
:rickroll:

These are same battery right? Safe to use as a pair? Help?

Guys i need some help

I dont like to mismatch batteries...
Anyway today i bought 2 40T samsung batteries for my mod came from the same shop but the sticker on the battery is not the same its slightly different from eachother, also the serial mumber on the case it comes in IS the same tho.. so same battery?
I made some pictures here

These are same right ? Cause of serialthe on the case? Just slightly diff sticker no biggie and is fine as a pair/married?

Attachments

  • IMG_20230604_185216.jpg
    IMG_20230604_185216.jpg
    3.5 MB · Views: 19
  • IMG_20230604_185224.jpg
    IMG_20230604_185224.jpg
    2.6 MB · Views: 17

chemical found in sucralose damages human DNA

I know sucralose and other fake sugars are bad for you, I never actually eat anything with fake sugar, but I know it's in the vape juice. This study is going off of what consuming the sugar by eating it and what it does to the stomach, could it have a similar effect on the lungs being vaped? I'm not exactly paranoid or worried about it, I have no idea if sucralose actually gets metabolized when we vape it vs eating it, and how much of it has an effect. If I think of someone eating sucralose, like drinking sugar free soda, they're definitely consuming way more sucralose than what we'd ever even have in a 100ml bottle of vape juice.

Just thought this may be an interesting topic since it is in our vape juice.

  • Informative
Reactions: Tor R

Hi from South Africa.

Hi all.
I joined hopefully to learn more and possibly share if I can.
I am hoping to learn more about DIY mixing and effective application of flavours. This seems to be a whole science on it's own. I have been mixing for the last 3 years now and would like to get better at it.

Cool, Enjoy :)

For Sale Flavors, Rta's, Wickd Goku Bridg'd V2, Pioneer insider

Booster- Bubblegum Milshake 3mg 100ml
Cream Collection- Cereal cream 6mg 90Ml
Juice head- Sweet cream 3mg 95ml
The One- Lemon 3mg 90ml
Cloud Chemnist-Frosty Science (Banana) 3mg 100ml
Holy Cannoli- Fruit Cereal 3mg 100Ml
Prohibition-Speakeasy(RB Float) 3mg 95ml
Why So Cereal? 3mg 100ml
Strange Fruit- Fried Eye Scream 6mg 95ml
Mr Malts Flurry's 2mg 100ml
Prohibition- Sin Tax 3mg 90ml
Kilo Revivial-Cereal ilk 3mg 100ml

$7 each or all for $70

Plus shipping

Profile X- All spares included $30+ship
Profile M- All spares included $25+ship
Aqua Reboot-All spares included $25+ship
Pharoah Mini- All spares Included $30+ship

Wickd Goku Bridg'd V2 Rba $100
Pioneer Insider- Used once $40 +ship

Attachments

  • 350933545_1254332761855984_7116853879777505321_n.jpg
    350933545_1254332761855984_7116853879777505321_n.jpg
    273.8 KB · Views: 23
  • 351118407_207852428320787_3314179846564976836_n.jpg
    351118407_207852428320787_3314179846564976836_n.jpg
    220 KB · Views: 29
  • 351101750_208959908206417_7164733511440701113_n.jpg
    351101750_208959908206417_7164733511440701113_n.jpg
    294.1 KB · Views: 31
  • 351130593_788105876048516_1845995509437912585_n.jpg
    351130593_788105876048516_1845995509437912585_n.jpg
    306.4 KB · Views: 28
  • 351156244_1024356975583590_6881571376251237198_n.jpg
    351156244_1024356975583590_6881571376251237198_n.jpg
    373.3 KB · Views: 24
  • 351193631_1235832080399003_5191301770807581243_n.jpg
    351193631_1235832080399003_5191301770807581243_n.jpg
    351.3 KB · Views: 25
  • 351782260_2805667402898227_8335879083419323894_n.jpg
    351782260_2805667402898227_8335879083419323894_n.jpg
    72.7 KB · Views: 26

The Steamcrave Meson AIO - Steamcrave's entry into the borotank craze.

The Steamcrave Meson AIO is Steamcraves entry into the ever expanding range of borotank and borotank devices which have been getting released into the market over the past year and a half.

CHAPTERS

00:00 - Intro and specs
01:00 - Close Up
18:00 - Vape
20:00 - Thoughts

As always with a Vaping With Vic review, you know that I have tested this item for three to seven days, instead of reviewing it the day after it comes in...this channel always tests items first before reviewing.

Social Media - Vaping With Vic | Twitter, Instagram, Facebook | Linktree

Rumble - Login to view embedded media
YouTube - Login to view embedded media

"crystalized" looking bubbles at the top of mixture?

I made this and had the top sitting off. Went to go take a look at it and I see all these little bubbles, but they're like solid and stuck to the top rim.
IMG_20230603_111721707_BURST000_COVER~2.jpg
don't move at all even after a shake. It's like they're stuck there. Anyone else experience this? I imagine it's some sort of chemical reaction with the flavors and possibly oxygen since it was at the top part where it's exposed to air.

I just noticed one of my flavor bottles had similar crystalization on the outside of it. I guess it's because of the flavoring being exposed to air.

Creamy Liquid makes my throat sore

Hi, i have been vaping for a little over 6 months now. I use Voopo Vinci 2 with 0.3 ohm coil. i always use fruity liquid before. but today, i bought a creamy liquid to try it. but, everytime i use it, my throat is becoming sore and dry, and i can barely taste the flavors at all. what do you guys think is the problem here? is it because creamy liquid need a different coil? or is it just me that's not used to creamy liquid?

the liquid i use are My Butter V1 Butter Cream Cheese 60ML by IDJ x Vaporking - Liquid - 3MG 60ML

In Stock!! Geekvape Obelisk 65 FC Mod Kit 2*1100mAh 4.5ml

Geekvape Obelisk 65 FC Pod Mod Kit 4.5ml is the first pod mod ever with fast charging. 18-min full charge-up speed. TUV-tested durable battery health. Chip-triggered Smart Mode. Industry-leading Z-series leakproof pod. And this tech-chic looking device fits right in your palm. Come and feel the electric speed now!
800-400.jpg

Features:
1. 18-Min Fully Charged
2. 2* 1100mah Built-in Battery
3. Max 65W Output
4. TUV Tested Battery
5. OTG Reverse Charge
6. Smart Mode
7. 4.5ml Clear Pod
8. Type-C Direct Charging

Click here for more:
Geekvape Obelisk 65 FC Pod Mod Kit: Geekvape Obelisk 65 FC Kit

Le Vaporium - Café Gourmand

Le Vaporium - Café Gourmand
Producer: French
Packaging: shortfill
This is a product from a completely unknown manufacturer, once again sent to me for testing by Peva71. A particularly delicious coffee that can also be enjoyed as a dessert. It is a real sweetness: tobacco, coffee (of course), vanilla, vanilla cream, caramel, hazelnut and a hint of coconut. It's a really complex and complicated flavour, with lots of ingredients in addition to coffee. It made me wonder what kind of setup to start testing with. I chose a mesh flat tank, which probably brings out the flavours the most, as I want to report on everything. The aroma is delicate and light coffee. On inhalation you get a smooth, not so pithy coffee that tastes creamy and creamy. A little sweet, but not in a latte way. On the exhale, you can taste the vanilla mixing with the coffee, which makes the overall effect very pleasant. The tobacco and hazelnuts are only noticeable during a longer steaming, as they are only a hint of them, to make the effect even spicier. I didn't find coconut in it, which might have made the soup more special, but it still has a really unique flavour. I tip my hat to the French producer for creating a terrifically delicious morning coffee with the right additives, and therefore deserves the premium seal of approval.

Attachments

  • le-vaporium-cafe-gourmand.jpeg
    le-vaporium-cafe-gourmand.jpeg
    95.9 KB · Views: 5

Solution to tank continuously spinning on mod

I have the smok i-priv with the TFV12 prince tank which I overtightened on my mod and broke the 510 connection so it just kept spinning. I was actually able to save my tank and my mod by doing this.

photostudio_1685776657186.jpg

i took the tank apart all the way down to the base.( I even took the base apart but I took this photo after I already got the base unscrewed from the mod and fixed/reassembled it) then I took a razor blade and wedged it between the base and mod as hard as I could without breaking it. Then used pliers to unscrew the base and was able to free the base from the mods 510 connection. Wedging the razor secured the 510 connection well enough to be able to unscrew it.

After that I took the mod apart to discover that the negative wire is soldered on a ring that is mounted around the base of the 510 adapter that's why the vape still worked even tho the connection was spinning. So the manufacturer knew the 510 connection could break. At least that's what it seems like to me.
PXL_20230603_050420126~3.jpg


So what I did to prevent it from happening again is used flex seal paste on it.

photostudio_1685777220766.jpg


Then I reassembled it.

So far so good. It's been working just fine. I'm just careful with screwing the tank on now.

I hope this helps someone. I was told that my vape was as good as trash and I should just get a new one. I was not okay with that answer.

Disclaimer: I am not a professional, just a fellow DiYer and have a lot experience repairing electronics. However, I am not responsible for any damages that you may cause to your mod, tank, or any other vaping device by following this solution.

I just wanted to put it out there. That there is hope to save your mod and tank, just be careful with your repair.

Good luck!
  • Like
Reactions: borno

VANDY VAPE KYLIN V3 RTA review by hittman

Hello again. I’m back with you today to present another review for Sourcemore. I just recently reviewed the Kylin M boro tank which was the first time I’ve used any of the Kylin series of tanks but today I’m with you to attempt to present a fair and honest review on the Kylin V3 RTA. The V3 boasts a classic Kylin design but with innovative honeycomb airflow. The tank comes with a bubble glass section pre-installed but includes a spare straight glass. This is backwards to what I am used to seeing on most tanks. Normally they come with the straight glass installed. The Kylin V3 has a 6ml liquid capacity with the bubble glass but they don’t give a capacity for the straight glass. Perhaps they should have just included a second bubble glass instead. The Kylin V3 claims to support both single and dual coil builds. We’ve heard that story before and often times the single coil operation on a dual coil rta is subpar. I plan on testing this one in both configurations so I will let you know how that goes. I have found that it often helps to run an oversized coil when attempting to run a single coil in a dual coil rta since the wick ports are usually large and you need to have enough cotton to avoid flooding.

P4llhab.jpg


D97DJm8.jpg


WHAT’S IN THE BOX?

1* Kylin V3 RTA
1* Pyrex Glass Tube
1* Accessory Bag
1* Coil Lead Guide
2* Tripe Fused Clapton Coil
1* Instruction Manual

jX2o19k.jpg


SPECIFICATIONS:


DiameterΦ25mm
Capacity6ml
FillingTop filling
CoilSingle/dual coil supported
AirflowTop/honeycomb airflow
ColorMatte Black, SS, Rainbow, Gunmetal, Frosted Grey

qZ1YO5G.jpg


3ZissxI.jpg


NvUZkL8.jpg


j54pGW3.jpg


LjCe7GN.jpg


PEAvcSM.jpg


laBgvZT.jpg


INITIAL THOUGHTS:

The Kylin V3 comes in a fairly plain looking box but has a clear viewing window which I very much like. The only text on the box is the Kylin 3 name. I’m a little surprised that the Vandy Vape name isn’t on the front also. As you can see in the picture below, I received the stainless steel version for this review and the bubble glass is pre-installed to provide a 6ml liquid capacity. The back side of the box has the usual contents list, a warning, and some features. I didn’t include pictures of the sides since I didn’t think it is necessary but there is an authenticity code and a sticker with the version and serial number on one side while the opposite side has the Vandy Vape company information.

1685750025579.png


1685750049609.png


Once the lid is removed then you can get a little better look at the tank sitting in a white foam insert along with a spare straight glass section also. Underneath the foam insert there is a cardboard divider and under that is where you find the accessories which includes two triple fused Clapton coils, a coil cutting guide, user manual, and an accessory bag with spare o rings, spare grub screws, and an allen wrench for the deck screws.

1685750087173.png


Here comes the broken record. Always clean your tanks before using them. I use a single drop of dish detergent in a glass cup with hot water. I let them soak for a short time and then rinse thoroughly and let them dry. The V3 breaks down easily and for once the glass tank section came off easily on this one.

The 810 drip tip is a nice height for me. I don’t like the really short ones. You might be able to see in the picture below that there is a black o ring in the top of the cap that secures the tip very well. Some prefer this but I have never really cared if the o ring was on the drip tip or in the top cap.

1685750145275.png


There is an o ring around the top of the center tube that can be seen with the top cap removed. It sits directly under the threads that the top cap screws on to. Yes, the top cap on the V3 is threaded and not a bayonet style cap like we see on most tanks these days. This seals the inner portion of the chamber while the o ring on the bottom side of the top cap seals the outside edge. Because of this you can fill the tank through the large fill ports all the way up to the bottom of the center o ring if you want to gain some extra capacity. I’m not sure if the 6ml capacity includes filling to the o ring or not.

1685750192171.png


1685750214525.png


I really like when a tank comes with a coil cutting guide like the Kylin V3 does. I’ve had other tanks come with these and there is an arrow on the side to tell you where to cut the coil legs but hadn’t seen one where the arrow was white like this one. That makes it extra easy to see which slot to use when cutting the coil(s). The Kylin M included two triple fused Clapton coils rated at .41 ohms each. They are 3mm in diameter and should read close to .2 ohms with both coils installed at the same time.

1685750260211.png


The build deck on the Kylin V3 isn’t really anything new as far as having the honeycomb airflow on both sides of the coils. There are 15 holes on each side of the deck. However, I don’t think that I’ve seen one with the honeycomb configuration like this one has underneath the coils. I counted 19 holes in this one. Feel free to count them for yourself to double check my counting skills. I very much like that they used Allen head screws on the build deck. To me there is less chance of stripping and it is easier to insert the hex screwdriver or wrench than trying to see a slot in a tiny slotted head screw.

1685750297436.png


1685750330457.png


The build deck for the V3 has plenty of building room. I think you could even go with two coils larger than 3mm on it and still have room. However, you would have to thin the tails out quite a bit to fit in the wick holes. Hopefully the wicking would keep up.

Since the V3 is advertised as a single or dual coil rta, I decided to start with a 3.5mm Ni80 flat wire coil for my first attempt. It came in at .53 ohms. I did a dry burn on the coil and inserted a cotton thread that fit well. The tails only had to be slightly thinned and fluffed to take up the room in the wick holes. I started low around 30 watts and worked my way up to 45 watts. This is a wattage setting that I seem to like with a lot of different coils. I started with the airflow about ¼ open and worked my way up to ½ open with the higher wattage. Even half open there is a lot of airflow so if you like big airflow then you’d probably like this tank.

I started out with the pre-installed bubble glass and ran a couple tanks through with it before switching to the straight glass. I kind of like the look of the straight glass on it but it requires more frequent filling. The results with the straight glass and the single coil were not great. To me the draw on the tank seemed different than with the bubble glass and I could only get up to about 42 watts with it without getting dryish hits. I turned it up to 45 which is a range I run in frequently and got a nasty dry hit. I thought maybe it was my wicking but when I put the bubble glass back on it wicked fine at 45 watts. Also, if you’re going to use the straight glass then you’re going to need to fill slowly because the liquid will back up on you instead of leveling out in the tank like it should if you fill too fast. I almost had mine overflow the first time filling it.

1685750404644.png


nwo7OPV.jpg


HHl6YH8.jpg


wk8Qclt.jpg


After running the single coil with the bubble glass a few days then decided to clean the tank out and install the dual coils that were included with the tank. The build deck has plenty of room even for two coils. I trimmed the coil legs at the 7 mark on the cutting guide and easily installed the coils, straightened them, and did a burn in on them. Next up was wicking both coils. I was able to use one COTN thread to wick both coils. The tails don’t need to be very long so I trimmed the wicks even with the outside of the knurled deck. You do need to give the wicks a good comb out since you are putting two into one hole and want to make sure not to over stuff the wick holes or it won’t work well. Some people like to just barely have the wick sticking in the holes but I like to see the cotton in the holes and as long as the wick ends aren’t too thick then it shouldn’t be an issue. To me this deck is super easy to build whether installing a single or dual coil build. I felt like I got really good flavor and of course larger vapor production compared to the single coil build. I honestly would not recommend using the straight glass tank section with the dual coil build. It just doesn’t seem like the tank wicks well enough with the straight glass and you can tell the straight glass seems a little too close to the inner chamber to allow proper liquid flow with thicker liquids. If you’re a higher pg ratio user then you might be fine with the straight glass but I mix all my liquids at 70vg.

5D4zyXY.jpg


gummOmf.jpg


oNXekYd.jpg


FINAL THOUGHTS:

The Kylin V3 seems to hold true to the claims of being truly compatible with single or dual coil operation. I was happy enough with the flavor and vapor production with both types of builds. As far as the vape quality I was very happy.

With that being said, I have a few complaints on the V3 that I reviewed. First off is the top cap is threaded and the knurled part that you have to grab to unscrew it is very narrow which makes it hard to get a grip on without turning the entire tank. Turning the entire tank on this one is a no no because the deck is not threaded and is basically a ¼ turn and pull type deck so if you try to turn the top cap and turn the tank instead then you could end up with a tank of liquid dumped on you. When installing the deck you have to align the juice flow holes in order to insert the deck. It only goes in one way which is a slight inconvenience. The airflow control ring on the one I received for review is very tight even after lubricating it so once again, I have to hold onto the center of the tank while adjusting the airflow or I risk loosening the base and dumping the tank. The base on mine is unusually loose and easy to turn. So much that I find myself constantly checking to make sure the base in turned in the correct position so it doesn’t dump on me.

Perhaps it’s just the tank that I received that had the above issues but for those reasons I really can’t recommend this tank. The tank does vape nice but to me there are other tanks out there that perform just as well or better and you don’t have the issues that I had with this tank. To me it’s just worth the hassle of constantly worrying if the base is going to come loose and dump the tank on me and it takes two hands to adjust the airflow to prevent the base from loosening.

I’d like to thank Sourcemore and Kavis for sending the Vandy Vape Kylin V3 for this review. Thanks as always to the readers. Below is a link to the Sourcemore website and there is a coupon code for you if you would like to try one.

CODE: VVV3 $23.29

Vandy Vape Kylin V3 RTA Φ25mm 6ml (sourcemore.com)

QRRcQTd.jpg

Filter