BP MODS TMD DOT TANK review by hittman

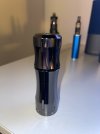
Hello everyone! I’m glad to be back with another review for Dovpo/BP Mods. This time I was sent a few different things but am going to start with the BP Mods TMD Dot Tank. This was sent to me by Dovpo in order to provide you with a fair and honest review. I personally have learned a lot lately about the difference between Dot and Boro tanks and what devices they fit in. I had only used Boro tanks in the past but had just recently bought the SXmini Vi mod that uses the Dot style tanks. They are smaller than the Boro type tanks so are not interchangeable. Luckily I had just gotten the new mod days before receiving this tank for review. The TMD Dot Tank is a pre-built coil tank and comes with two coils. In order to use it in the Vi mod you have to purchase a separate adapter which I just so happened to buy with the mod. The tank has a liquid capacity of 2.6ml and is made of PCTG. Besides the two included coils, it is also compatible with the PNP and GTX series coils from Voopoo and Vaporesso. I’m honestly a little surprised that they advertise this but am glad that they do. To me it shows that they believe in their products and aren’t afraid to let you know everything that they do about the tank.

XAVbjFV.jpg


WHAT’S IN THE BOX?

1* BP MODS TMD Dot Tank
1* BP MODS TMD Pro Coil 1.05Ω
1* BP MODS TMD Pro Coil 0.55Ω
1* Accessories Pack
2* User Manual

hKl5fkr.jpg


SPECIFICATIONS:

Material: PCTG

Capacity: 5ml

Fit For: DotMod AIO

TMD Pre-build 0.55Ω (RDL)/1.05Ω (MTL) Coil

TMD Mesh 0.3Ω (DL)/0.8Ω (MTL) Coil

PnP VM/TM/TR/RBA

GTX below 0.6Ω Coil/RBA Coil

hikn6Wt.jpg


FEATURES:

1. Tightness somatosensory airflow, easy to adjust

2. Anti-condensate cotton piece, washable and reusable

3. Compatible with DotMod AIO and TMD Pro/Mesh Coil

4. Fit for PnP VM/TM/TR/RBA Coil and GTX below 0.6Ω Coil/RBA Coil

5. Supports RDL/MTL/DL vaping

pI5WT4V.jpg

ggDhcQg.jpg

NW6VRWO.jpg

0JLhPts.jpg


MJwGIW2.jpg


INITIAL THOUGHTS:


The packaging for the Dot tank is nice. It’s the usual orange box with a black sleeve that slides over with the product name that BP Mods uses frequently. The back side of the sleeve has the package contents list, authenticity code, a sketch of the tank, and company information.

1671292011832.png


1671292029252.png


Once the sleeve and box top are removed then you are greeted by the Dot Tank sitting in a foam insert with the user manual and information card sitting on top. The tank is in a nice foam insert instead of a cheap plastic one like I see a lot of samples arrive in. To the side is an accessory box which contains a bag of spare seals for the tank only since the coils are also in foil packs in the foam insert below the tank.

1671292070919.png


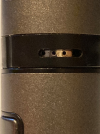
I’m hoping to make this pretty short since this is a pre-built coil tank and there is no building involved. The face of the tank has the usual rubber plug that you lift for filling the tank. I like to put just a little liquid in the tank before inserting it into the device being used to make sure the coil is good and I have a good connection. The TMD Dot Tank name is printed on the bottom and you can see the long slotted airflow control ring. You want to make sure this is facing out when you insert the tank into the mod so you can adjust the airflow once the tank is installed.

1671292102862.png


To insert the coil, you simply pull off the bottom of the tank that has the airflow control attached. The coils are a push in style so once you make sure the coil is seated then replace the bottom of the tank and insert it into your Dot device. This tank does not fit in Boro style devices.

1671292143368.png


The coils included with the Dot tank are the TMD .55 ohm coil rated for 28-35 watts and the TMD 1.05 ohm coil rated for 10-13.5 watts. The choice of a 1.05 ohm coil seems odd but that’s what it is. In the third and fourth pictures below you can see the size of the openings on the top of the coils which directly affects how much airflow is available even when the airflow control ring is wide open. The smaller opening in the 1.05 ohm coil greatly reduces the airflow resulting in an MTL vape that can be about as tight as you want it.

1671292186868.png


1671292217027.png


1671292241970.png


1671292269173.png


FINAL THOUGHTS:

I am very glad to have had a chance to try the BP Mods TMD Dot Tank. I just recently got my first Dot style mod and was thinking about buying this tank anyway. Besides it being able to take the TMD coils, it also can use GTX and PNP coils which is a definitely plus for me since I have pretty good stockpiles of both of those types of coils. There are some restrictions on the coils that are compatible though. The Voopoo R/M coils and GTX coils above .6 ohm will not work. The reason the GTX coils won’t work is that the size of the end of the coils is smaller on the higher resistance coils.

Since the only device I had to test these in is the SX Mini Vi class mod then that is what I used. A word of warning to others. If you are using this tank in the Vi then you will have to buy the adapter separate to allow this mod to use the Dot style tanks since they are shorter than the stock tank that comes with the mod.

I first decided to try the .55 ohm coil in the tank. Just a reminder, always prime your coils before inserting them into the tank. I found this coil to provide very good flavor and vapor production while running wattage at 32 watts and the airflow was about ¾ open. I have no complaints on this coil.

Next I decided to test out the 1.05 ohm coil. To be honest, I was less than excited about testing this higher ohm coil that is limited to a maximum of 13.5 watts. It’s just not a range that I normally operate in. Just like with the .55 coil, I used my RY4 Cream recipe to try to get a feel for the flavor production. I made a stupid mistake and fired the coil without turning my wattage down from where I was running the .55 coil and instantly burned it. Luckily Dovpo was nice enough to send extra coils so I removed the tank, cleaned it, and inserted a new 1.05 ohm coil. I started out at 10 watts and quickly worked my way up to 11 and then to the maximum 13.5 watts. The flavor is decent and vapor production was greatly reduced. Even with the airflow wide open it’s just a slightly loose MTL. It’s not bad but just not a good fit for my vaping style.

I’d like to thank Dovpo and Dorothy for sending the BP Mods TMD Dot Tank for this review. I have enjoyed testing it. Thanks also to the readers for making this possible. Below is a link to the Dovpo site where you can find the BP Mods products as well as the Dovpo products.

TMD Pre-build Coil Dot Tank – DOVPO Official
1671292303698.png

  • Locked
VANDY VAPE PULSE AIO.5 KIT review by hittman

  • Locked
VANDY VAPE PULSE AIO.5 KIT review by hittman

Here I am again with another review for you. This time I was sent the Vandy Vape Pulse AIO.5 Kit by Sourcemore in order to provide you with a fair and honest review. The Pulse AIO.5 is the second edition of the Pulse. It has the ability to use 21700, 20700, or 18650 batteries with the included adapter. It has a maximum output of 80 watts and is what I call a boro type device. There are two different versions of this kit. One comes with just pre-built coil tank and for an additional charge you can get what they are calling a Vessel DIY RBA tank. I received the pre-built coil version only which uses the VVC series coils. I think it’s very nice that the kit comes with an extra set of panels because it also includes a second button panel that you can switch out depending on whether you want to use the round button with the panels that have the round hole cut or the square button panel with the corresponding side panels.

egU2nD7.jpg


x7kFQYr.jpg


WHAT’S IN THE BOX?

1* Pulse AIO.5 Device
1* Pulse Vessel Pre-Built Tank
2* VVC Coil
1* QC Type-C USB Cable
1* Instruction Manual
1* Accessory Bag
1* Wrench
1* 18650 Battery Adaptor
1* Bonus Round Button Set

1671289704263.png


SPECIFICATIONS:

Size: 55.6*97.5*28.2mm

Power Range: 5-80W

Operating Voltage: 3.2-4.2V

Maxim Output Current: 32A

Charging Input Voltage 5±0.25V

Resistance: 0.05-3.0ohm

RBA Pod Capacity: 3.7ml

Charging Current: 1000mAh

Pre-built Pod Capacity: 5ml

Battery Type: 21700/20700/18650 cells (Not included)

Color: Black, Frosted Blue, Frosted Black, Frosted Red, Frosted White, Frosted Green

lrS4zc0.jpg


FEATURES:

1. Metal interface for the 510 nut

2. New square button and matching panel

3. Round button for matching inner panel and round button panel

4. Compatible with all previous accessories and aftermarket accessories

5. Vessel DIY RBA tank with curved 180 degree airflow

6. Vessel pre-made coil tank with 5ml capacity

7. Supports 21700, 20700 and 18650 (w/adapter) batteries

8. Adjustable positive pin, type-c charging

9. Temp control/voltage/bypass/smart mode, 80W max

10. LEXAN EXL1414T polycarbonate reinforced design

11. Easy to customize button and plates

12. Boro compatible and tanks work in most boro style mods

13. The pre-built tank is compatible with VVC coils

14. Safety protections: Open Circuit/Over-current/10s Cut-off/Short Circuit/Over-temperature/Low-battery Warning Protection

6pmkMVS.jpg


FoUDzb8.jpg


N1vwt2o.jpg


kcckUoN.jpg


VHRo2rM.jpg


oQa9nRy.jpg


YxwQzNY.jpg


INITIAL THOUGHTS:

I found the packaging for the Pulse AIO.5 rather interesting. If you’ve read many of my reviews then you know that I like viewing windows on packaging. This one is a real treat for me because it has viewing windows on both sides of the box. The front has the Tony B Project written on the top. I don’t know much about him besides he helped design both of the Pulse mods. On the bottom is the Pulse AIO.5 name and through the viewing window you can see the mod, pre-built coil tank, and drip tip. There is a different kit that comes with an rba tank but Sourcemore did not send that kit so I won’t be covering the vessel rba. I noticed immediately that this updated version has a square button instead of a round button like the original.

On the opposite side is a second viewing window where you can see a second set of panels are included and have a really nice design on them. To the right of the panels is a round fire button panel that can be used only with this second set of doors that also have a round cut out for the round fire button. As much as I like the square button, I like the round button panels much better and immediately swapped out the button panel so I could use the side panels with the nice design on them.

1671290078824.png


1671290110405.png


Some time ago, I reviewed the original Pulse AIO. From my understanding, some people had issues with the top of the Pulse breaking from over tightening the nut on top. I never had that issue. So with this updated version there is an extra metal ring around the top of the nut housing on top and the body of the unit has been reinforced on top. Also they body was made from a different material from what I have heard. However, once Vandy Vape was aware of it then they started replacing units under warranty. It is good to hear about a company standing behind their products like that. Since I have already reviewed the original Pulse AIO, here is a link to my prior review (10) VANDY VAPE PULSE AIO KIT review by hittman | E-Cigarette Forum (e-cigarette-forum.com).

As I mentioned earlier, the AIO.5 comes with the square button panel installed. I do like the pulse symbol on the metal ring around the fire button but like the side covers with the round button cut out better so immediately changed the button panel. To do this you need to remove the four screws in that panel. There is an allen wrench included but it’s much easier if you have a screwdriver with magnetic bits. The screws are very small and can be a little hard to get a grip on. Initially the 18650 adapter is sitting inside the battery compartment but I always use a 21700 when I can so set the adapter to the side and installed the larger battery.

In the second picture below you can see the 21700 battery installed as well as the pre-built coil tank that was included in the kit I received. That side has the Pulse and Tony B names below the opening for the tank. One of the included drip tips is installed but end up using either of the included tips.

The third picture below is after I installed the round button panel and the extra side covers that were included. I like these side covers much better than the plain black ones. I kind of wish that these would have been the ones with the square cut out so I could have used the square button with these.

1671290144109.png


1671290169906.png


1671290194640.png


The display for the AIO.5 is fairly basic and shows Set Wattage, Coil Resistance, Puff Counter, and Battery Indicator. The fire button is located above the display while the + and – buttons as well as the USB-C charging port are below. The USB-C port offers a charging rate of 5V/1000mah although no one ever recommends charging inside a mod. The menu/button operation for the AIO.5 is as follows.

  • Press the fire button 5X to turn the device on/off
  • Press the fire button and the – button to reset or retrieve the puff counter
  • Press the fire button and the + button to lock the adjustment buttons
  • Press the fire button 3X and the wattage will flash. Use the + and – buttons to choose between Wattage, Voltage, TC (SS, TI, Ni), Bypass.
1671290233715.png


The tank included with the basic kit is called the Pulse Vessel Prebuilt Tank. The tank is clear which I like very much. The white fill plug that you lift to fill the tank seems kind of thin and cheaply made. I’m not sure how long that will last. However, you can use about any boro tank in this so if you have a couple others wondering around like I do then the plug is no worry. T

The coils included with the tank are VVC-30 which is .3 ohm and rated at 30-45 watts and the VVC-60 which is .6 ohm and rated at 18-26 watts. The coils are a simple push in type coil and just seats into the bottom of the tank which has an airflow control ring built into it. All of the VVC series of coils are compatible with this unit. Once the coil is primed, inserted, and the tank is filled then you simply slide it into the AIO.5 and screw the top nut down to hold the tank in place. The kit comes with two white drip tips but I really didn’t like either one of them and ended up using one of my own 510 drip tips.

zNpVvaM.jpg


CQyhs5Y.jpg


1671290371197.png


1671290391656.png


1671290410542.png


pdFKbD6.jpg


FINAL THOUGHTS:

I have just started getting into AIO or Boro type devices the last year or so. I like the idea of the tank being protected inside the mod with only the drip tip being exposed. I liked the original Pulse AIO and very much like the AIO.5 with its upgrades like the metal support plate on top, the reinforced frame, and the use of a stronger material in the Lexan that was used.

I like the side covers with the design on them but wish that I could use the square button with them. I could always use the panel with the design on it on the back and use the plain black one with the square button panel on the front. It’s very nice that they include two sets of side covers and two button panels in the kit. I would have liked to have gotten the Vessel RBA to try out but unfortunately was not sent the deluxe version of the kit.

I started out using the .3 ohm coil in the tank with an RY4 Cream recipe that I very much like. I had about 400 puffs on the counter and the coil was still performing pretty well when I made the switch to the second coil. I thought the flavor and vapor production was very good while running the mod at 38 watts and the airflow control completely open.

Next up I switched out the coil to the .6 ohm coil. By the way, I would suggest keeping track of the tool that comes with the kit. It not only is good for tightening the top nut but also makes pulling out a coil much easier than doing it with your fingers. I ran this coil starting at 18 watts and worked up slowly from there. I ran it at 22 watts with the airflow half open and got what I thought was very good flavor from it. I was actually kind of impressed with the flavor while using the same RY4 recipe. After a day or two I tried running it up to 24 watts which was still in the operating range but after a few puffs I felt like the coils wasn’t staying saturated and the puffs seemed a little dry/slightly burned tasting so I went ahead and dialed it back to 22 watts and it was fine again. This took place with about 250 puffs on the counter.

Overall, I think the Vandy Vape Pulse AIO.5 is a pretty nice device and would recommend it if you like AIO/Boro type devices. I don’t have very large hands so the body of the AIO.5 is a little wide for me but I can still put my hand around it and fire it with my thumb. I look forward to trying some of my other boro style tanks and rbas in it.

I’d like to thank Sourcemore and Kavis for sending the Vandy Vape Pulse AIO.5 for this review. As always, thanks to you the readers. I greatly appreciate you taking time to read my reviews. I have a coupon code for you below as well as a link to the website.

COUPON CODE FOR $39.99 = PAIO5K

Vandy Vape Pulse AIO.5 Kit 80W Box Mod Kit (sourcemore.com)


  • Locked
INNOKIN ENDURA APEX KIT ( MTL ) REVIEWED BY BIGBOB2322

Hello and welcome back friends for todays review of the Endura Apex Kit from Innokin. I was surprised after opening the package that it was a tube styled device because you don't see many of these now days or at least ones with a 510 connection and a wattage adjustment. The Endura Apex stand about the same size or slightly shorter than your typical box mod with a atomizer connected which is good, I am not fond of tall tube devices because they fall over to easy and if a glass atomizer is attached you stand the chance of breaking it. The tank with this kit has a protective metal cage around the glass that is color coded with the device for a nice look. Prior to my review of the Endura Apex Kit lets find out a little about it with some information from Innokin.


1671284298280.png


COLOR CHOICES


1671284391199.png


IN THE BOX

* 1pc Innokin Endura APEX battery device


* 1pc Prism APEX Tank

* 1pc 0.9ohm Prism S Mesh (T20S) coil (pre-installed)

* 1pc 0.8ohm Prism S (T20S) coil

* 1pc Type-C USB charging cable

* 1pc Spare O-Rings / User Manual


20221210_073129.jpg


20221210_080545.jpg


Device Dimensions: 22*55.5mm
Tank Capacity: 3.0ml/2.0ml(TPD)


20221210_111844.jpg


FEATURES


* 1800mAh Internal Battery


* Adjustable Airflow

* Compatible with T20s Mesh Coil

* Two Power Levels

* For MTL & RDL Vaping

* Top Filling System

* Resistance And Wattage Range: 0.9ohm 14.5-18W

* Body Material: Glass/Stainless Steel

* Coil Material: KAL

* Coil Compatible: T20s Coil

* Airflow: Bottom Adjustable Airflow

* Battery Capacity: 1800mAh


FULLY ADJUSTABLE AIRFLOW


1671286300363.png


TOP FILL


1671286342243.png


T20S MESH COIL


1671286388109.png


1800mAh INTERNAL BATTERY


1671286487872.png


2 POWER LEVELS


1671286587148.png


The first thing that I wanted to do was check to see to battery strength and find out how full the battery was so I plugged in a type-c charge cord and found the Black one was fully charged while the Green Endura needed some charging before it was full. The power button has a bright LED that surrounds it using a 3 color battery indicator, each time the button is pressed the battery indicator LED will illuminate and shows the strength of the battery. To turn the device on/off press the power button 3 times.

GREEN - 100-30%

YELLOW - 30-10%

RED - 10% And Under

  • Locked
SEND IT Disposable | 5000 Puffs | 12mL preview

Send It 5000 Disposable with 400mAh rechargeable battery, 12mL pre-filled with 50mg e-liquid, lasts up to 5000 puffs.

send-it-5000-disposable.jpg


Features:
Nicotine – 5%
Liquid – 12mL
5000 Puffs Per Device

Not only is this single-use vape perfect for users on the go, it also has a pre-filled 12ml e-liquid capacity for up to 5,000 puffs. Try all 12 delicious flavors now for the best price!

Related kits you may prefer:
Cube Zero Disposable Vape Kit 3000 Puffs 11ml
MISS 8000 Puffs Disposable Vape Kit 15ml

  • Locked
Newly Launched: R and M Tornado 7000 Puffs Disposable Vape

The appearance of the newly launched r and m tornado 7000 disposable vape follows the classic style of the past, with a cylindrical body matched with beautiful colors and fashionable and grotesque animation prints, bringing you a more interesting fashion trend vision experience. The transparent design of the upper part of the shell is very user-friendly, which is convenient for you to observe the internal state and internal structure of the device, and the pc transparent material can also facilitate you to understand and control your device.

This disposable vape has many smart and technological designs. It has an airflow adjustment system at the bottom, you can gently rotate it to adjust the airflow to any degree you are used to, and adapt to your personal usage habits to the greatest extent. Not only that, when you want to enjoy vaping, you only need to take a light puff and the device will be automatically activated, no need to wait for a long time. It also has RGB lights, which can display different states and modes of the device in different colours, which is very convenient.
randm-tornado-7000_(1).jpg

If you are still worried about battery life, then you must take a look at this disposable cigarette. Its battery capacity can reach 1000 mAh, and it also supports charging. Even if the battery is exhausted, it can continue to serve you after charging to prolong its service life. You can continue to enjoy the perfect and pure atmosphere until the last drop of e-juice is exhausted.

The cylindrical body is matched with the straw-shaped mouthpiece, which is ergonomically designed and scientifically designed to perfectly fit the curve of the lips, making your use more comfortable. This device is pre-filled with 14ml of e-juice, which can provide you with a vaping experience of 7,000 puffs with rich clouds and strong flavours.

If you are still looking for the latest and most fashionable electronic cigarette products, you are welcome to go to our online vape shop uk to choose.

We would also like to recommend the following products for you:
randm disposable vape
xros 3 uk

  • Locked
New Coming: R And M Monster 7000 Vape

Hello friends, today I would like to introduce you r and m monster, a disposable cigarette that provides 7000 puffs, and the device is pre-filled with 15ml of e-liquid. The device can be recharged, which can be realized through the type-c charging interface at the bottom.

The device as a whole adopts relatively energetic elements, which are shaped like bottles and jars. The pattern design includes tigers, leopards, orangutans, etc. Personality and fashion at the same time. The mesh coil inside the Monster 7000 disposable vape sale can ensure stable heat and bring a pleasant taste.
r-and-m-monster-disposable_(7).jpg


In terms of taste, it adopts the taste of fruit, ice and drinks, including peach mango ice, lush ice, snow cone ice, energy drink, kiwi dragon berry ice and so on. If you like the taste of ice, then the taste of fruit mixed with ice like this must not be missed, it will definitely make you feel refreshed after inhaling.

R and M Monster 7000 is light and stylish, I believe you will definitely have a new view of it after trying it. We at the online vape shop uk look forward to hearing more from you.

You may also be curious:
aroma king jewel
best drag 4 voopoo

  • Locked
Lost Vape Thelema Mini Kit | Ursa Nano Art Kit

Lost Vape Thelema Mini Kit

Thelema Mini Kit comes with cuter-mini size and built-in 1500mAh battery. The ultra compact 510 mod is smaller than 95% of the 510 mods available in the market, it features 45W max power and type-c charging. Besides, you can covert the 510 mod into a tank mod device or a pod mod device with different atomizers. And there are two versions of kit for you to choose, one is equipped with UB Lite Pod Tank, the other is equipped with UB Lite Tank, both of them have 3.5ml e-liquid capacity and are compatible with new improved UB Lite mesh coil, feature leakproof protection. UB Lite Pod Tank features bottom filling, UB Lite Tank features humanism top filling system. Thelema Mini is fully compatible with tight-MTL, loose-MTL, RDL and DTL vaping. And two different replaceable drip tips are included to fit your different vaping airflow experience.

Details:
1. Ultra compact 510 mod
2. From tight MTL to DTL
3. Convert to pod anytime
4. Built-in 1500mAh battery, type-c charging
5. New improved coils of UB Lite mesh coil
6. Adjustable airflow, leakproof protection
7. Two types of drip tip for RDL and MTL


Lost Vape Ursa Nano Art Kit

Ursa Nano Art Kit is the new generation of Ursa Nano that has colorful and stylish appearance. It is powered by a built-in 800mAh battery with 18W max and 5V/2A Type-C charging to bring you all day vaping experience. Powered by the Lost Vape Quest Chip, it has multiple protections to guarantee the safe use of the Kit. It is fit for Ursa Empty Cartridge, Ursa Nano Cartridge and UB Mini Coil to allow you enjoy the pure MTL flavor. It also features 2.5ml e-juice capacity, easy side filling system and leak-proof design.

Details:
1. New generation of the Ursa Nano
2. Powered by Lost Vape Quest Chip
3. Built-in 800mAh battery with 18W max
4. Adopts Type-C 5V/2A charging
5. Designed with responsive auto-draw
6. Fit for Ursa Empty/Ursa Nano Cartridge
7. Fit for UB Mini Coil
8. Able to bring you MTL flavor
9. 2.5ml capacity, leak-proof design
10. Designed with comfortable drip tip
11. Colorful and stylish appearance


  • Locked
ECF Tutorial - Bookmarks

The Xenforo forum software update (24 August 2022) arrived with some very cool new features. One of those is Bookmarks. Most people are familiar with web browser bookmarks. Xenforo's bookmarks work much the same way. The only difference is you are bookmarking a user post versus a web page.


Bookmarks Part 1 - The Basics

In this tutorial I'll cover how to use the Bookmarks feature. Bookmarks are very easy to setup, configure and use.

Bookmarks allow us to bookmark any user post. It's a very useful feature. Any post that you may want to revisit at a later date can be bookmarked.


Why would I want to use a Bookmark?

There are many reasons why someone might want to bookmark something. I've created many bookmarks that cover a wide variety of topics.

You might want to create a bookmark if, for example, you come across a useful post that contains information on how to build a specific RBA, posts about coils, wicking, DIY information or recipes, a vape gear review, blog entries, Mooch's battery or charger info etc. etc. Or even posts in the Lounge.

Any post on ECF can be bookmarked.

Bookmarks also save a significant amount of time when compared to using the global Search function.

For this tutorial I suggest opening a new tab in your browser so you can easily follow along while performing the steps as they are covered. Also, open a thread in another browser tab. For this tutorial is doesn't matter which thread or post you select. It can be deleted at the end of the tutorial.


How do I create a Bookmark?

Find a post you want to add a bookmark for. In the example below I simply chose one of my posts.

The bookmark symbol is located immediately to the left of a post number. If you hover over the bookmarks symbol the outline turns red. Click the Bookmark symbol to create a bookmark.

01.png


Clicking on the bookmarks symbol turns it black and the following popup appears.

02.png


The Message field is where you name your bookmark. Name it and click Save. You don't have to name a bookmark. I recommend adding names to bookmarks to suit your individual needs.

For me, adding names (Message field) to my bookmarks makes for a tidier entry on my Bookmarks page. It's optional. Adding a name overwrites what is displayed (users post) for the bookmark. A bookmark name can be deleted at a later time if you only want to see the users post under your bookmark (see Edit Bookmark below).

Note: Labels will be covered in Part 2.


To view your saved bookmarks click on your avatar then click on the Bookmarks symbol. Your avatar, and user name, are located on the upper right of every ECF page.

03.png


On your Bookmarks page you will see a list of your saved bookmarks.

To visit a bookmarked post click on the bookmark URL (the orange hyperlink). The URL for each bookmark = the thread name and post number where the bookmarked post is located.

04.png


How do I edit and/or delete Bookmarks?

Click on the Gear symbol for the bookmark you want to Edit or Delete.

05a.png


The Bookmark tools window opens. You can then select Edit or Delete for that bookmark.

06.png


Click Edit and the following popup window appears.

07.png


In the Edit bookmark window you have the option to name (if you haven't already), rename or delete a bookmark.

You do not have to give your bookmarks a name. A bookmark name can also be deleted without deleting the bookmark. Select the name and press delete on your keyboard.

If you do not give a bookmark a name (Message field), or you delete a name, it will be displayed as the user post in the thread (see my first screenshot above).

Click Save to save your changes.

Clicking Delete will delete that bookmark.


At this point you can Delete any test bookmarks you created during the tutorial.


You now know the basics of how to create, edit and delete bookmarks.

  • Locked
The BP Mods TMD Boro Tank

BP Mods have been very busy lately with a number of releases in quick succession covering the middle ground into the advanced ground of the vaping market. This one, the TMD Boro is a bit of an oddity, a stock coil boro tank...

CHAPTERS

00:00 - Intro and specs
03:00 - Close Up
07:00 - Vape
08:00 - Thoughts

Rumble - Login to view embedded media
YouTube - Login to view embedded media

  • Locked
Review: IQTE Tornado Vape Disposable Kit - 10000 puffs

IQTE Tornado Vape Disposable Vape Pen Device 10000 Mouth 950mAh comes pre-filled with 22ml of 15mg silky nicotine salt e-liquid.
IQTE_Tornado_(9).jpg

SPECIFICATION
Size: 32*109mm
Puffs: 10000
Capacity: 22mL
Battery: Rechargeable 850mAh
Charger: USB Type-C
Nicotine Strength: 1.5%
Nicotine Type: Freebase
Heating Element: Mesh Coil
Draw-Activated Firing Mechanism
Airflow: Adjustable

It is powered by a 950mAh battery and is good for around 10000 puffs per device.

Airflow control lets you choose the position that suits you best, and it features a rechargeable Type-C port on the bottom of the unit to ensure you're always drinking every last drop of juice in the vape tank.

Related kits you may prefer:
tres leches e juice
coastal clouds mango berries

  • Locked
Sourcemore Award Celebration Giveaway, 2 winners, ends on Dec. 22nd, 2022


It is an honor for sourcemore to be ranked 2nd place for Best Overall International Online Store in the 10th Annual Ecigclick Vape Awards 2022.

To celebrate it with joy, we are running a giveaway to thank you for your support and voting for Sourcemore.

Good luck!

Sourcemore Award Celebration Giveaway, 2 winners, ends on Dec. 22nd, 2022

Enter here

  • Locked
A Christmas Invatation: Flash Sale & Sitewide Discounts at Vapesourcing

Christmas Event ENTRANCE: Christmas Vape Sale

"Jingle bells, jingle bells, jingle all the way.." I know you're singing that too. Cuz the annual event that everyone is most looking forward to has quietly arrived. Some of you may have placed a super-sized Christmas tree at home, may have shared candy with your family around the warm fireplace, and may have been thinking about what gifts to give to your family, friends and lovers...

This is an invitation from vapesourcing, we sincerely invite you to come and spend this festival full of love with us.

christmas.jpg


Christmas event time: 12-16 00:00:00 to 12-26 23:59:59

The activity is divided into two parts:

1. Sitewide Discounts, 12% OFF, discount code: XMAS12

2. Flash Sale (other discount codes cannot be used for flash sale products), within 10 days, there will be 5 flash sale activities, each event is limited to 48 hours, and the flash sale discount code is: XMAS48
12/16-12/17: 15% OFF For All Disposables
12/18-12/19: 18% OFF For All E-juice
12/20-12/21: 15% OFF For All SMOK
12/22-12/23: 15% OFF For All UWELL
12/24-12/25: 15% OFF For All Vaporlax

At the same time, you will get:
1. Free shipping on $99+ in US
2. Get 1 free disposable kit on $129+ (expires 12/19/22 23:59:59)
*Only for orders from USA Warehouse(after discounts)

You may want to know:
e liquid near me
us warehouse

  • Locked
Newly Launched: Dovpo DnP Pod Tank

The new dovpo dnp pod tank attracted widespread attention as soon as it was released. It comes in silver and charcoal black for an understated look that accentuates texture. The shell is composed of two parts. The upper part is made of transparent material, which is more convenient for you to observe the internal status and obtain device information. The lower part is decorated with a grid pattern, with the logo of dovpo, which shows the texture. The whole is simple and elegant, full of charm.

This pod tank has a capacity of 5.5ml. I believe that for most friends, the capacity of 5.5ml is very convenient and can meet your high-frequency pumping. In order to enable you to have a more perfect experience, we recommend that you use it with the dovpo Mvp vape kit with 510 thread connection, they are well compatible with each other.
dovpo-dnp-pod-tank_(1).jpg

The design of the bottom filling system is very convenient, you can fill from the bottom, easy to operate. At the same time, if you like the feeling of being smoky, then this pod tank will definitely satisfy you. It has a dual air intake design that brings you more and richer clouds.

The DNP coil can further enhance its flavour performance and bring you a more wonderful taste. If you are still looking for a pod tank to help you get an immersive and wonderful vape experience, then this dovpo DNP pod tank with its elegant and low-key appearance and practical functions must not be missed.

If you still want to know more vape information, you are welcome to go to our vape shops uk online cheap for detailed browsing.

Sincerely recommend for you:
geekvape sonder u
aroma king dark knight

  • Locked
IJOY LIO Bar Disposable Vape Kit 5000 Puffs $15.99

LIOBar is a new amazing flavor best disposable vape available online, dazzling appearance with dual-mould injection technology. It comes with a new mesh coil and Innovative Infinite Airflow System. It powered by 650mAh built-in battery with type-C charging, and 12 ml prefilled e-liquid for about 5000 Puffs. Additionally, 25 amazing flavors are optional.

More Details of IJOY LIO Bar Vape
Size: 24mm*24mm*110mm
Battery Capacity: 650mAh
Charging Type: Type-C charging
Output Mode: 12/10W
Material: PC+ABS
Resistance: 1Ω
Nicotine: 50mg
Capacity: 12 ml
Puffs: 5000 Puffs

LIO_Bar_5000.jpg


Recommended products:
moti play
nicotine free vapes

  • Locked
Nic Salts and dizziness--

Figured I'd check here because you can't get a straight answer from a Google search.

I've been using Nic salts for about half a year (Sad Boy-28mgs). Recently I've been getting dizzy when I stand up. Lasts for about 10 seconds. Does anyone else experience this? I vape pretty heavily, but it came on suddenly. Could be a sinus thing, or a sinus thing aggravated by the vaping. Blood pressure's fine. Everything else is fine, except for the dizziness. Any input?

Thanks.

  • Locked
New Released: Freemax M Pro 3 Tank

Today I want to introduce to you a very atmospheric and reliable atomizer, freemax m pro 3 tank. This is a safety device with ISO 8317 protection certification. It uses a large capacity of 5ml and basically allows you to enjoy it for a few days. The vaping time can be easily filled by unscrewing the top cap without any risk of e-liquid leakage.
The mouthpiece is the larger diameter 810 drip tip, so you get a bigger cloud and denser vapour with each inhalation. The adjustable airflow system at the bottom can customize the way of inhalation, and the airflow you want can be controlled more precisely.
freemax-m-pro-3_(5).jpg


FM-COILTECH5.0 Double-D Mesh technology makes the taste of e-liquid more delicious and mellow, m pro 3 tank is compatible with m1-d mesh coil and 904l m2 mesh coil, so you can choose the coil according to your own preference comes. Low-resistance coils allow for more aggressive throat hits and DL vaping.

Freemax maxus 2 kit is perfectly compatible with the tank, the overall design of the kit is gorgeous, it provides you with dual 18650 batteries and the maximum power can reach 200W, Power/VPC/Bypass/TC-NI/TC-TI/TCR mode allows you to operate More variety.

If you are interested or like it very much, you can learn more about it through online vape shop uk.

Quick Link: https://vapesourcing.uk/freemax-maxus-2-kit.html

More recommended e-cigs:
uwell caliburn ak3
aroma king vape 7000 review

  • Locked
Ecigclick Vape Awards 2022 Released -- Innokin Won Again!

Hi ECF,

We have some big news to share with you guys! Thank you to everyone who voted for INNOKIN during the Ecigclick awards 2022. As a result of your support, we had our best year ever :hubba::hubba:

Ecigclick awards.jpg


:thumbs: 1st Place Award
- “Best Pod Vape” INNOKIN Klypse
- “Best Tank: MTL” INNOKIN Zlide Top
- “Best Vape Pen” INNOKIN Endura T18X
- “Best RBA” INNOKIN Ares 2 RTA

:thumbs: 2nd Place Award
- “Best Overall Vape Brand” INNOKIN
- “Best For Beginners” INNOKIN Klypse

:thumbs: 3rd Place Award
- “Best Vape Mods” INNOKIN Coolfire Z60
- “Best Pod Vape” INNOKIN Sceptre 2

Your passion and feedback help us create the best possible products, thank you to everyone who has supported INNOKIN this year!

For more information, please visit: Ecigclick Vape Awards 2022: Results - Ecigclick

Best regards,
Innokin Team

  • Locked
Coming Soon! Innokin Endura Apex Pod Kit 1800mAh 3ml

The Innokin Endura APEX Kit is powered by a built-in 1800 mAh battery, featuring an adjustable airflow system and power mode change, and the tank is integrated with new Prism S (T20S) Mesh coil technology, this small yet powerful pen-style vape has everything you need. Holding 3ml of vape juice, it is compatible with a T20s mesh coil. Worked as an MTL & RDL kit, it offers two power levels. The atomizer is connected via 510 thread and is refilled via the top filling system.

Endura-Apex-Pod-Kit-17.jpg


Features:
1. 1800mAh Internal Battery.
2. Adjustable Airflow.
3. Compatible with T20s Mesh Coil.
4. Two Power Levels.
5. For MTL & RDL Vaping.
6. Top Filling System.
...

Click here for more:

Endura Apex Kit: Innokin Endura Apex Pod System Kit

  • Locked
Hijacked | FDA Approval Process in Shambles | RegWatch

  • Locked
INNOKIN ENDURA APEX STARTER KIT review by hittman

Hello and welcome. Today I will be doing my best to provide you with a fair, honest, and hopefully informative review on the new Innokin Endura Apex Kit that was sent to me by Innokin. The Apex is a tube style mod starter kit that includes the Apex mod and the Endura Apex Tank. The mod has an internal 20500 battery rated at 1800mAh/6.66Wh/3.7V and has a 5V/800mah charging rate. It does not have a display screen but instead uses two indicator lights located in different places on the mod. The Apex tank has a diameter of 22mm to match the diameter of the mod. It has a liquid capacity of 3ml and is made of stainless steel and glass. It is compatible with the T20S coils.

VPzRaie.jpg


Xf077Aj.jpg


WHAT’S IN THE BOX?

1ea Endura Apex battery

1ea Endura Apex tank

1ea .9 ohm Prism S coil (Preinstalled)

1ea .8 ohm Prism S coil

1ea Spare o ring set

1ea USB charging cable

1ea Quick guide

1ea Warning booklet

1671111550763.png


MOD SPECIFICATIONS:

nKYmJR1.jpg


APEX TANK SPECIFICATIONS:

XrN12vn.jpg

FEATURES:

New Mesh Coil


The new T20S mesh coil delivers enhanced flavor and more vapor compared to previous T20S coils. Experience the true potential of your e-liquids, with maximum nicotine satisfaction.

Easy Top-fill

Our simplified top filling system allows for easy, mess-free refills on the go.

Adjustable Power

Spin the bottom cap to select from two power levels, indicated by colored LEDs. Whether you want a cool and stealthy vape (red LED), or something more intense (green LED), the Endura Apex has you covered.

Precise Airflow Control

Our precise airflow system allows you to find the perfect MTL draw, from a tight airflow that closely mimics the experience of a cigarette, to a looser setting that produces more vapor.

Long Battery Life

Powered by a premium-grade 1800mAh built-in battery, the Endura Apex delivers all-day vaping on a single charge.

Satin Finish, 6 stunning colors

Our new satin finish gives the Endura Apex a premium feel in the hand, while highlighting all six of the bold colorways available.

USB-C Charging

USB-C allows for more convenient and reliable charging, with all of Innokin’s industry leading circuit protections.

vrxYEdo.jpg


LWSuV2H.jpg


INITIAL THOUGHTS:

The packaging for the Endura Apex Kit is made of the same recyclable materials that we’ve become used to seeing from Innokin all the way down to the little paper pouches that the accessories come in. Instead of the usual two part box with an outer sleeve, the Apex comes in a box with a hinged lid that flips up. The front of the box has a color picture of the device contained inside as well as the device name and some features listed. The back side has a contents list, company information, authenticity code, and warnings. Both the front and back have a large warning on the lower end of the box. This seems to have become common place for samples that I have been receiving that are marketed for sale in the U.S. as far as I know.
b36smml.jpg


Once the seal is broken and the lid is flipped up then the Apex is visible. The tank with coil pre-installed is located in a smaller box that you can see below the Apex. The other accessories are underneath. I feel like Innokin did this type of packaging to save space and materials always keeping in mind that they are trying to be as environmentally conscious as possible. On the inside of the top cover is a sketch of the Apex and a smaller picture showing how to fill the tank.

VFS3RBL.jpg


It has been a long time since I have used a tube style mod so the Apex made me feel a little nostalgic. I’ve been vaping since 2009 and I have gone from the original 510 cigalikes thru the tube mods and up to today’s full featured mods. It’s been quite the journey. It has been so long ago that it felt strange holding a tube mod.

The side of the Apex that has the fire button on it has the Endura Apex name on it while the opposite side of the tube mod has the Innokin name on it. I received the gray and purple versions for my review along with a spare box of .9 ohm coils. The fire button has a lighted ring around the square button that indicates the battery level. The color indications for the battery level are as follows.

  • Battery >30% = Green
  • Battery 10-30% = Yellow
  • Battery <10% = Red
When charging, the indicator will be Red if the battery is less than 90% and it will turn Green when it is charged more than 90% but not fully charged. When fully charged the indicator light will turn off.

Besides the battery level indicator around the fire button, there is also a light indicator ring around the bottom of the tube. This indicates the output power level. You can turn the black ring on the bottom to change between two output levels. They are as follows.

Lower output level indicated by Green indicator light = 3.6v/14.5 watts

Higher output level indicated by Red indicator light = 3.85v/16.5 watts


The Apex mod has an 1800mah battery with a charging rate of 800mah. I think this is a really good size battery capacity for a device like this and would think that most people could get at least a day’s use out of it with the higher resistance coils that come with it. I think it’s interesting that Innokin tells us that it is a 20500 battery inside the Apex. I don’t know that I’ve ever seen a manufacturer tell what battery they are using for an internal battery device.

tE9dMDQ.jpg


Da1mmqH.jpg


The top of the Apex has the standard 510 connection with a gold plated spring loaded center pin. The ring around the 510 connection seems to be some sort of hard plastic. The USB-C charging port for the 1800mah battery is located on the bottom of the mod so can’t be stood up while charging. In general, tube mods seem to be easily knocked over so it doesn’t really seem like a big deal that it can’t be stood up while charging. The charging rate is 800mah which means it should take possibly up to a couple hours to fully charge the Apex. This charging rate seems a little low when most pod devices can charge at this rate or higher.

bLHhbpb.jpg


MJkXstQ.jpg


The tank included in the starter kit is the Endura Apex tank and it comes in six colors to match the colors of the Endura Apex mod. It has a diameter of 22mm and can hold 3ml of liquid. As always, disassemble and clean your tank before its first use.

Like the Zenith tanks, the Apex tank has two notches in the base of the tank that can be seen once the base is removed. There are two flats on the T20S coils that you have to align with the notches on the base when inserting a coil. Much like the Zenith coils, the T20S coils have the 510 connection built into them. However, they are quite a bit longer and it appears that the chimney is part of the coil in this design.

The top cap for the tank seems to be made of the same hard plastic that I mentioned earlier and uses a 510 drip tip. The top cap is knurled and is easy to unthread. It is threaded rather than the bayonet style we see on a lot of tanks these days. There is a large black gasket on the underneath side of the top cap that makes the seal to keep the tank from leaking. The fill hole in the top of the tank is a fairly large kidney shaped hole that should allow most bottles to be used to fill the tank.

When I first received the Apex kit, the airflow control ring built into the base of the tank was very hard to turn. I set up both samples I received and both were very hard to adjust the airflow. Once the tank was installed on the battery then it was nearly impossible to adjust the airflow without the entire tank turning. I ended up removing the tank from each, removed the airflow control ring, and put a drop or two of liquid on each of the o rings and re-installed the control ring. This made a world of difference and I could then adjust the airflow as needed. It made them useable without making the control ring too loose. There are four air inlet holes available to allow the user a very tight to loose MTL experience. I tried several different ways but could only capture three of the holes in my picture due to lighting and the shape of the airflow control ring.

llRQQoj.jpg


GNhNNTm.jpg


1671112265682.png


FINAL THOUGHTS:

As I mentioned earlier, it had been a long time since I had used a tube style mod. It was a bit awkward at first but grew accustomed to it after a week or two of testing the Endura Apex kits. I like that the battery indicator is separate with the lighted ring around the fire button and that the power level indicator is a separate lighted ring around the base. The bottom turn knob is stiff enough that it won’t be moved accidentally taking the mod in and out of a pocket or purse. The 1800mah battery seemed to provide very long battery life with the included higher ohm coils. At least these days I consider anything above about a .6 ohm to be a higher ohm coil. It’s hard to believe that we used to use two and three ohm coils back in the day.

I think the Apex kits have a nice appearance and offers enough colors that most people can find one that they like. The matchy matchy of the tank and mod will surely appeal to some. I personally vape quite a bit when driving and kind of wish that the fire button either protruded a little more or had some sort of texturing as I found myself feeling for the fire button while driving because it’s never a good idea to take your eyes off the road.

I have to admit that initially I was disappointed with the flavor production from both the .8 and .9 ohm coils. I even mentioned it to the Innokin rep that I deal with. I tried three different recipes that I commonly use for reviews and wasn’t very happy with the flavor production with any of them. I tried Dinner Lady Purple Rain, RY4 Cream, and Dinner Lady Berry Blast. The samples were sent to me weeks prior to the review so I didn’t give up and kept using them. It was suggested to me by Innokin to close the airflow down to one hole and turn the power adjustment to the high position. This did seem to help and over a period of a week using the same coils the flavor did improve. I don’t know if I was just being impatient or it just takes a few tanks to break in the coils but honestly I was never impressed by the flavor production even after following their suggestions. If I had to rate the flavor production at the time of writing this review then I’d probably give it a 6.25 out of 10. This was a difficult one for me because I’ve used Innokin coils a long time and normally flavor production is pretty good. All of that being said, I think this would still be a great starter kit for someone looking to quit smoking. If I was going to use this kit long term then I would have to mix higher flavor percentages in my recipes to be happy with the flavor production. A smoker making the switch would probably just buy commercial liquids which usually have higher flavor concentrations than what I mix at normally.

I’d like to thank Innokin and Nicole for sending the Innokin Endura Apex Kits for this review. As usual it has been a pleasure. Thanks to you the readers. I hope you enjoyed my review. Below is a link to the Innokin website where you can find the Endura Apex and many other quality made products from Innokin.

Endura Apex - Vape Kit | INNOKIN®

1671112429908.png


Attachments

  • 1671112354442.png
    1671112354442.png
    2.5 MB · Views: 37

Filter