
That's about it for the basic build. Only other recommendation is pick up some slightly heavier wire. The wire attached to the boxes (which most re-use for the build) is a bit thin. It will work, I just prefer the path of least resistance.
You are using an out of date browser. It may not display this or other websites correctly.
You should upgrade or use an alternative browser.
You should upgrade or use an alternative browser.
- Status
- Not open for further replies.
Yep thats all you need, other than tools,soldering iron,glue gun,small knife and wire cutters/strippers also try to use leadfree solder.
Besides the items listed below, what else do I need to add to make these work..... first time so i need all the help I can get..
3mm Fast color changing led.
510 Battery Connector, Sealed
Horn style switch -- Blue
Horn style switch -- Green
Tranparent Blue 2xAA Battery Box with On/Off Switch
Clear 2xAA Battery Box with On/Off Switch, Clear
make sure you get 2 connectors if you're making 2 boxes. I believe the leds come with the 475ohm resistor [i'm sure it's listed on the website].
You'll need something to drill the holes and ream them out to the correct diameter.
Soldering iron and solder [maybe even flux] for connecting the electronics
and epoxy for holding things still [switch, led, atty connector, some of the tabs/springs, etc]
wire strippers if you don't want to do it by hand, but the small wire sometimes doesn't hold up to some strippers
instructions help a lot: MadVapes e-Cig 'How To' Tutorials • View topic - 2xAA 3.7 Volt Box Mod
Then you need:
14500 batteries [PROTECTED!!!!]
suitable lithium ion charger
atties/cartos
optional but handy:
helping hands: these help hold stuff still while you solder and can have magnifying glasses or lights to help you see
multimeter: useful for all sorts of electrical trouble shooting like finding shorts in a system and checking for ohms and volts
work area
youtube: like howto solder if you don't know how
support: Modders Forum
sober and distraction free time
Have fun and good luck!!!
Ok I ordered 2 of everything besides the box it self which I got 1 blue and 1 clear. And 2 14500 batt. the ones with what looks like fire on it....????? All on the madvapes website... let me see if I can paste my order list....
MVLBAT14500.900TF Protected Trustfire 14500 Battery, 900 mAH
$4.29 x 2
$8.58
MVLEDFC-3MM 3mm Fast color changing led.
$0.79 x 2
$1.58
510CONNC 510 Battery Connector, Sealed
$1.99 x 2
$3.98
MVSWHRNBL Horn style switch -- Blue
$1.79 x 1
$1.79
MVSWHRNGN Horn style switch -- Green
$1.79 x 1
$1.79
MVAABOX-TB Tranparent Blue 2xAA Battery Box with On/Off Switch
$1.99 x 1
$1.99
MVAABOX-CL Clear 2xAA Battery Box with On/Off Switch, Clear
$1.99 x 1
$1.99
I hope I got what I needed...ohh also, the chargers, are they certain kind for that sorta batt. or well the chargers I have for say my reg. rechargable batt. work??
What do yall use to cut out the hole with? And I believe the flux and epoxy and all the rest I can get out of my husbands tool box, he is a lic. plumber so I am sure he has it all. I am new at this and can not WAIT...to start. I have soldered with stained glass, is that the same?? Sorry for all the ??? I just want to make sure I get it right the first time.. How do you know exactly where to drill the holes at, and where to solder at. ( i know yall are dying laughing at me, im sure I will totally screw this thing up...haha) But reallly I have no clue what I just got myself into. I just seen a project and jumped on it...lol. ohhhh also on my ego I use the LR510s...are those ok or do I need to get reg 510s. And can I use my drip tips on them the same as my ego..that is 99% what I use is drip tips. Thanks for the help, hope you can follow all this, I know it is all over the place.
Check your other post. I listed drill bit sizes. Yes...LR510's will be AWESOME. I'm actually using "meduim resistance" @2.5ohm now but had a few @approx 1.9ohm. Think stained glass soldering only way smaller (I used to do stained glass many years ago). At least you can wield an iron. Make sure you use a 30 watt or less iron as well. As far as where to drill the holes you can either refer to the MadVapes tutorials or I'll try to get pics of my custom mods up that, while take some work, will hold a 3ml bottle or spare atty/carto inside (scroll way up for pics of this). And finally, you can use your drip tip....LOL
I hope I got what I needed...ohh also, the chargers, are they certain kind for that sorta batt. or well the chargers I have for say my reg. rechargable batt. work??
depends on what you mean by "reg rechargable". What is it made to recharge?
You will be using 3.7v 14500 lithium ion batteries (NOT to be confused with "AA" batteries which range from 1.2v-1.5v). You must have a lithium ion battery charger or one capable of charging lithium ion batteries.
take a look at these..theyre the best mods i have seen/used by far!
REO's Mods | Home of the REO PV
REO's Mods | Home of the REO PV
Ok so that means the regualar kind of recharger that I could go get from walmart, like as in my Kodak charger that chargers AA AAA batts.....that wont work. I will just order next week from MV and get his charger. I had a dream last night, all my stuff came and I dove right in....but then the drill jumped and I ended up with holes all over my house... yea not funny....lol I will get it finished though. I am the sorta person that takes things apart and gets it all back together...laptop, stove, washer dryer... stereo...etc... Dont know what the heck Im doing or what parts are called but 9 times out of 10 I either fix it or know what I need to get it fixed...
I am the sorta person that takes things apart and gets it all back together...laptop, stove, washer dryer... stereo...etc... Dont know what the heck Im doing or what parts are called but 9 times out of 10 I either fix it or know what I need to get it fixed...
You're the perfect wife if you also cook, do the dishes, clean the house, by groceries....
You're the perfect wife if you also cook, do the dishes, clean the house, by groceries....
lol......I do all that but I REFUSE to do the dishes.... thats what I had kids for..haha and my husband does them. I figure if I do 110% of the kid stuff and sports practices and groceries and laundry house work etc...... the least he could do is go to work, take out trash and load the dish washer...
My file-dump is acting up but let's see if this works;


1st pic is my 5v Passthrogh with a control pin regulator to use the small tactile switch (vaping this right now as I type).
2nd pic is showing my love of Flowmaster mufflers...er....I mean....a few of the box mods I have with me today. From left to right is my 2AA box I designed to fit a 3ml juice bottle or spare cartomizer/atomizer inside (note the LED using the existing hole at the bottom of the box).
Next is the MadVapes pre-drilled kit (my first build). No room for extras.
And last is the 3AA box utilizing 2 14500's in parallel for extended battery life (especially when using low resistance). This will also fit a spare bottle or carto/atty inside for convenient carry. Also note the heavier gauge wire.
It's a ton of minor fabricating to squeeze out every last bit of extra tolerance to make the extra room inside but it's well worth it. May be hard to tell but the switch retaining nut is shaved as well as the switch itself. The connector has also been shaved.
Hmmm...pics are small. Larger pics available on my CarDomain page here; http://www.cardomain.com/ride/644162/1995-chevrolet-camaro-z28-convertible-2d-rochester-ny-us?p=9
Last edited:
take a look at these..theyre the best mods i have seen/used by far!
REO's Mods | Home of the REO PV
you do realize this is the madvapes sub forum, right?
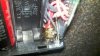
Soooooo I figured that since I got the complete box kit, predrilled that it would be my mess with box. So I am sure that I got all the connecters right. The + that goes into the attomizer connector, I was not sure where to solder that to...I am assuming anywhere in there would be ok, I tried to get it on the middle plate inside of it. Soooo I get it all put together, and I believe I have burned more items then I did solder, but I get it all attached and turn it on and I have power....wow so cool....lol. but then it goes off automatically after about 4-5 and the led only turns from red to green before it is off... so then I figured maybe I have to much solder so I turn it upside down and heat up the solder on the button until it drips off ( really need some solder wick ) so then turn it back on again and it now goes for about 6-8 sec...but the neg. peg on led broke off so no led....thought I had it going good but still figured maybe it should NOT be shutting off automatically.... next power up NOTHING...was soooo tired I just threw it all in the box and went to bed. I had my grandson last night also sooo having to stop for him waking up and crying did not help. Im glad I went for it though ( even if it did not work out to good ) now I know somewhat where things go and have a feel for what needs to be done. Soldering is alot harder on this that Stained glass....haha I burned my FAVORITE juice bottle, the carpet, wire, box, paper hair....hahahaha list goes on.
On the connector you can pop the center pin out (from the "bottom") to make soldering easier . It sounds like you may have a short (and a protected battery, thankfully). Check that the center pin connection on the connector is not shorted to the outer part of the connector.
Attachments
a cheap pair of helping hands is a great thing to have when you're fist learning to do these... you can find em at harbor freight for $2-4 ....they basically hold everything for you... Helping Hands or Jumbo Helping Hands with LED Lights
that's step 1 in making your life easier when doing a mod...
second I find that using an old burned out atty in the connector will work as a heat sink so you don't have to pull the center post fron the connector....
now as far as getting in there to solder the center post...
make sure your iron is well tinned....and pre solder your parts individually...wires connector etc...then when you go to actually solder the connection you're heating the tiny bit that's already beend deposited there and it's easier to make the connection and solder that.....if that makes any sense
I am going to HF this week to get a ton of stuff...Im so excited. Sooo the middle part of the attomizer connector CAN be popped out???? That might be the issue that it is touchin the side in there instead of being on the middle only. How do I get it out, does it pop or screw or what.
You can just push the center contact out with a small screwdriver or similar tool.
knowing that the center can come out of the connector would have made life a whole lot easier when I did mine today.
it was my first box mod when I ordered they didn't have any kits in stock so I got all the parts seperately.
did my drilling with a boot knife last night, took a while but everything fit fine. installed all the parts and tested everything but the connector and everything worked.
then today at work I got the soldering iron from the tool room and it had a huge flat tip on it, not the greatest for this, but it is all they had.
every thing works but the led. I think I cooked either it or the resistor. no big deal.
It vapes great, lots of fun to build, and I got enough to make 2 for the price of replacing 1 ego bat.
I already have some of the guys in the shop suggesting what I am to mod next... like I really needed someone to give me more ideas !!
Hooliogan
Double check your connection. Keep in mind that LEDs have a polarity. The longer leg is positive. Some do have a flat on the rim of the LED indicating negative. They only work one way. Additionally, the resistor attaches to the positive leg (have seen people solder the resistor across the positive and negative legs).
- Status
- Not open for further replies.
Similar threads
- Replies
- 14
- Views
- 4K
Users who are viewing this thread
Total: 2 (members: 0, guests: 2)