Took me a hot minute to sort everything out for this thread, but here goes!
My intent is not to be the definitive build instructions for these enclosures. the following is only my own personal build and yours is likely done as well- if not better- than mine. My only intent is to share the knowledge in the hopes it could assist someone else.
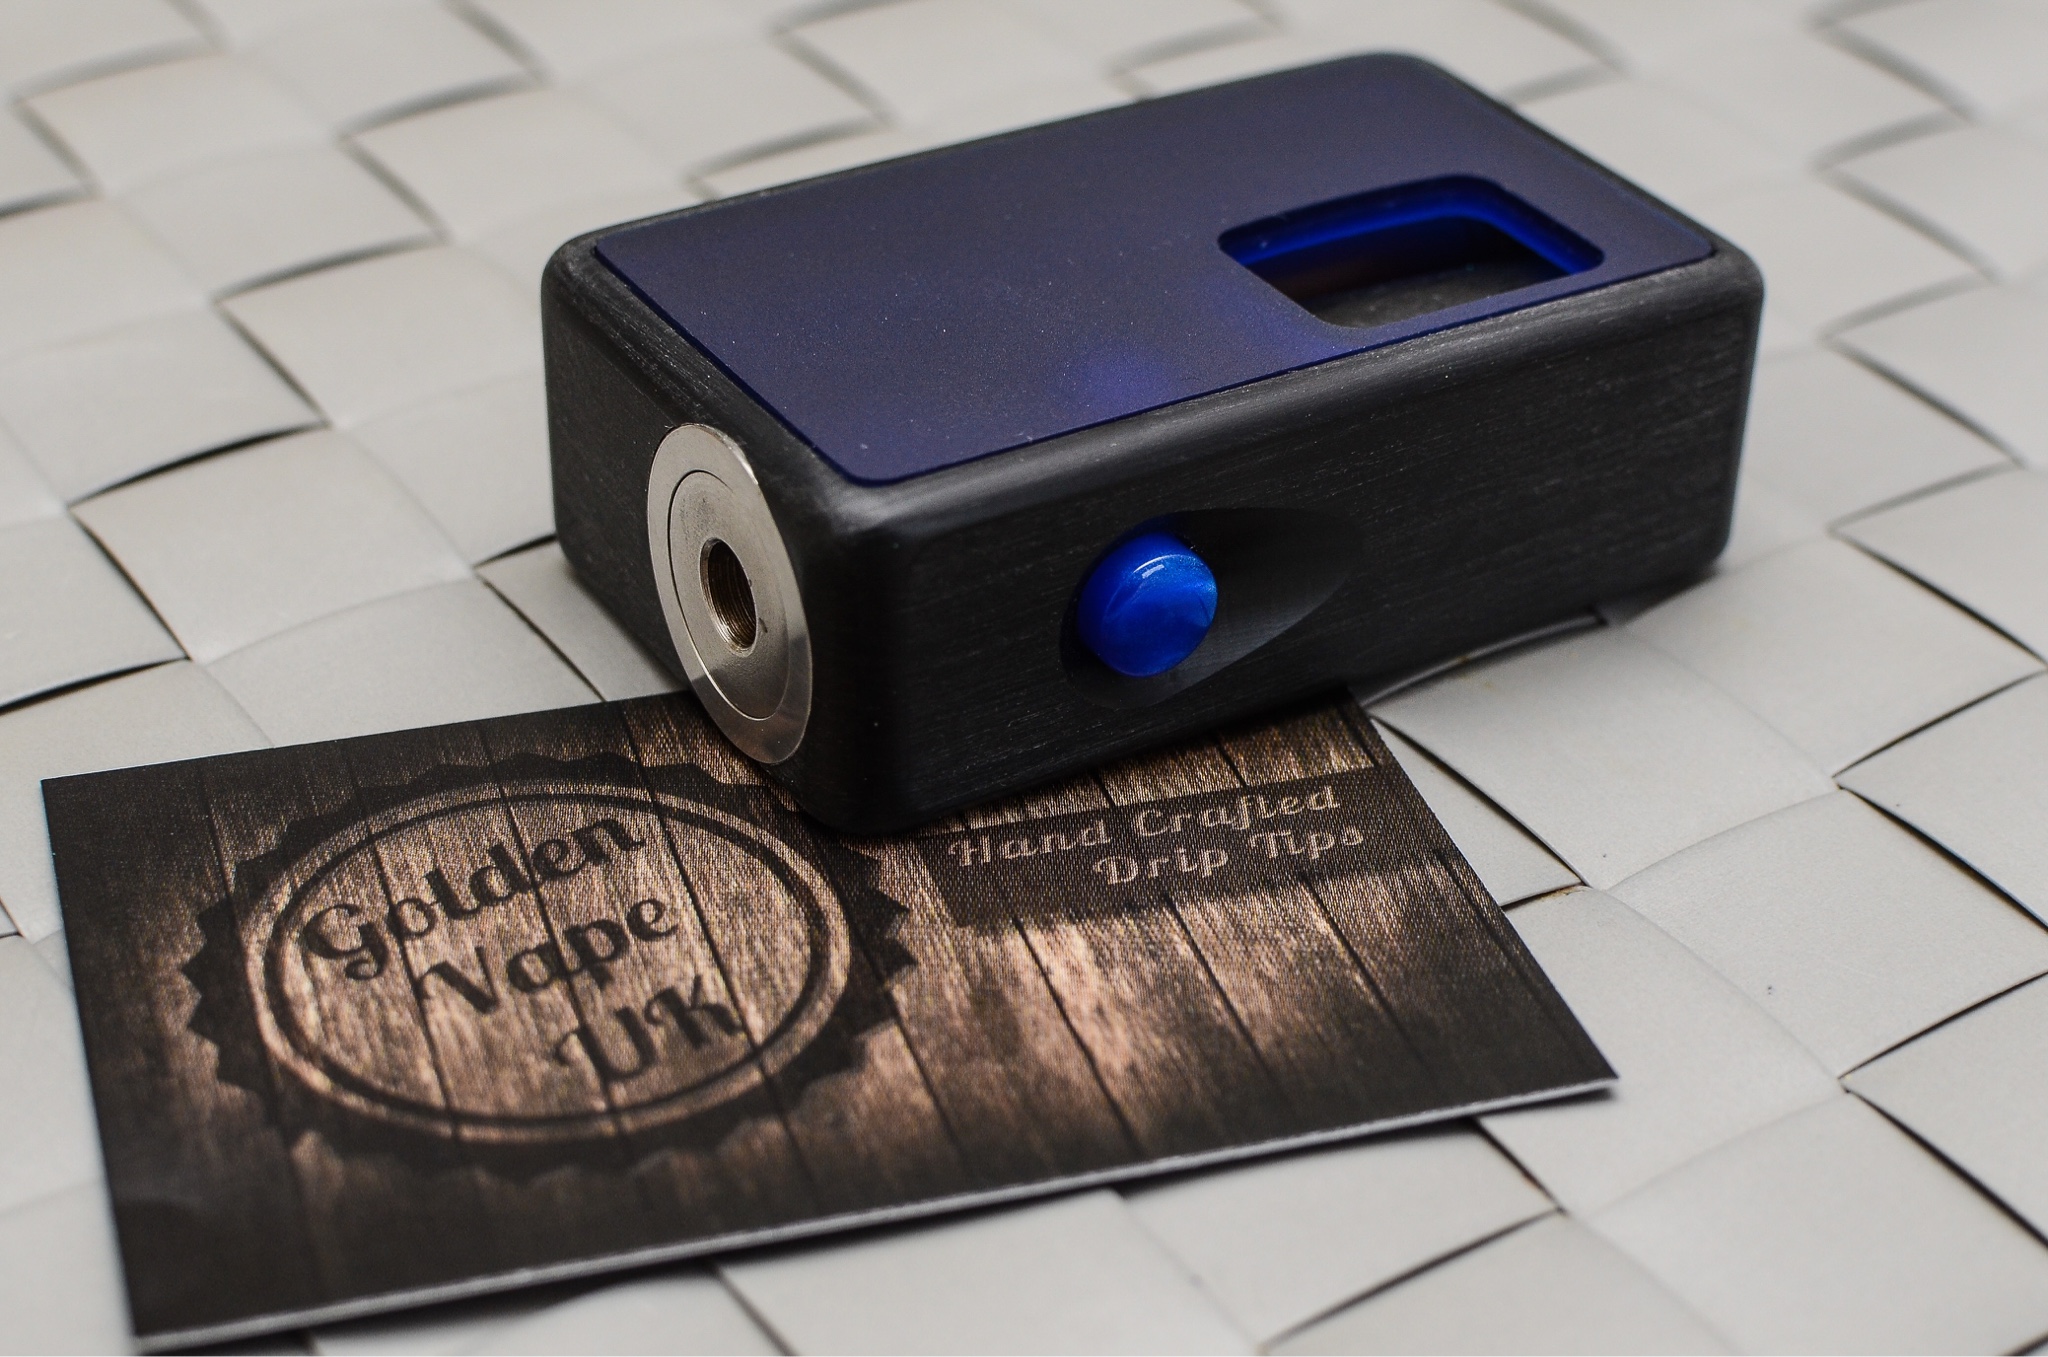
The enclosure for this build (black mech little orca) was purchased from Floris Delfino @ Floris Box
Connector is a Varitube 510, slightly modified
Contact strip is .010 beryllium copper sheet
The box came unfinished as expected and had some surface marks from the machining, so my first task was to shine it up a bit. Lots of time, lots of sanding and a few hours later it was looking much better.


I won't go into many measurement details for the contacts since it will depend on how you personally prefer the setup. For an idea, I think 5-6 inches would suffice if you didn't have any goof-ups during the process
*ahem*

fitting the top contact:
I wanted to keep the edges as rounded as possible where the battery would fit to help avoid any wrapper tears on the batteries.

basic contact shape formed after measuring.

Once the contacts were formed, I used the "0" from my stamping set for the contact points

Without getting into too much boring detail, I chose to shape the contact so it would have a flat face for the contact points and gave it a nice polish (thanks Pete!).

My finished contact strip. Note how it bends backward slightly, the purpose of which is to keep even tension against the button to keep from rattling, also to keep even pressure on the button to keep it straight in the hole and avoid binding when it is depressed. This application also works for my setup because of the adhesive tape I used to secure the strip to the enclosure, so your won tweaking may be necessary.
This is where your own personal taste will come into play more than just about anything else on the build. The contact strip will determine the button feel and throw, so it may take a bit of positioning and fitting before you get a button feel that is good for you. Binder clips help to hold the contact in pace while you experiment with placement.

The tape I chose to use was Gorilla mounting tape, mostly because I have experience with how it holds and I was confident it would do the job. secondly, I wanted something to take up the small amount of extra space left in the enclosure since I was using thinner contacts. As luck would have it, the tape serves several purposes both intended and not. Since it is soft, it allows the contact strip on the bottom of the enclosure to "give" slightly when a battery is inserted, also doubling to hold the battery in place. It also allowed the battery and bottle to fit more snugly in the enclosure, so it is a perfect fit without having to squeeze anything in and nothing is loose once the door is in place.

Give the contact strip a good sanding where the tape will apply for better adhesion.
apply sticky side and leave the backing in place. trim off excess and test fit.

I moved on to the 510 before placing the contact strip in permanently, and I had taken previous measurements while test-fitting so the 510 could be finished separately, off the enclosure.
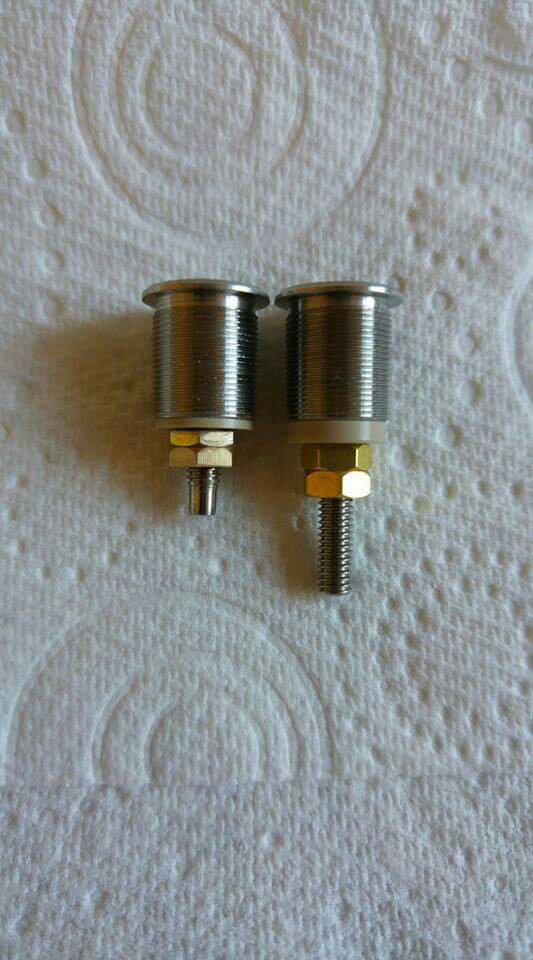
The VT 510 is a long beast for this application, but by shaving down the manual adjustment insulator I was able to get everything to fit together nicely. The only other modification was to remove about 11-12mm from the feed tube.
Originally I had set up the contacts to work using only the supplied brass nuts from the VT 510, but I wasn't satisfied with the contact point. This picture shows some of the fitting and planning, hence the red o-ring for spacing.

I ditched this plan anyways in favor of a more solid contact, so "the tab" was born.
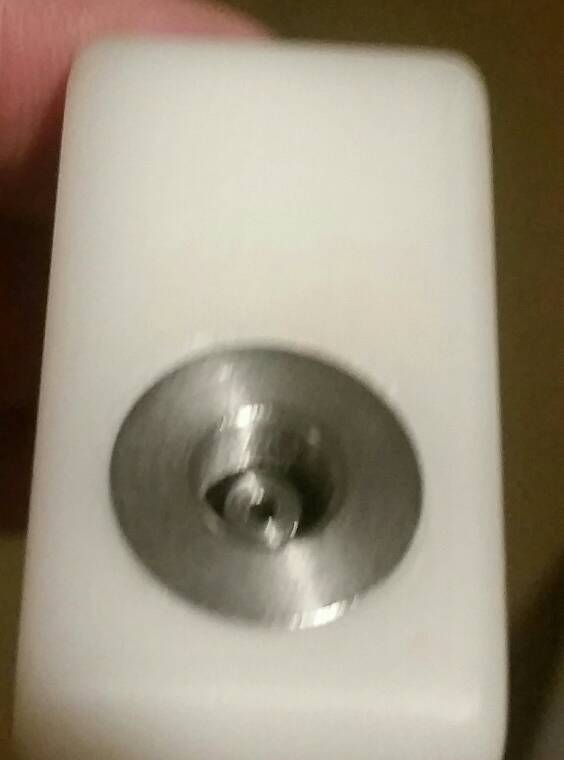
the hole is just big enough for the threads on the feed tube to catch, so it threads onto the feed tube with the nut for a solid fit once it's tightened. polished it as well, cleaned up the contact points between the brass nut and tab, assembled the 510 and done.


510 installed into the enclosure, contact strip installed, note the large, flat contact area in comparison to the original idea of utilizing the VT brass nuts for contact points. Polishing has eliminated arcing that I can visibly detect and the button lands on "fire" nice and solid.


The throw is long, but this is my pocket device and I wanted to be sure that I had plenty of "wiggle room" should the button be depressed. The thin contact strip gives the button a nice light touch though, so its far from a workout when you want a puff.
All assembled, ready to go

Overall, I love every little thing about these enclosures. It literally is the smallest package I've ever seen for a squonker and it is a beast to boot.
I hope this wasn't too choppy and I have lots more pics and things to discuss if anyone cares to know, Otherwise thanks for reading!


My intent is not to be the definitive build instructions for these enclosures. the following is only my own personal build and yours is likely done as well- if not better- than mine. My only intent is to share the knowledge in the hopes it could assist someone else.
The enclosure for this build (black mech little orca) was purchased from Floris Delfino @ Floris Box
Connector is a Varitube 510, slightly modified
Contact strip is .010 beryllium copper sheet
The box came unfinished as expected and had some surface marks from the machining, so my first task was to shine it up a bit. Lots of time, lots of sanding and a few hours later it was looking much better.
I won't go into many measurement details for the contacts since it will depend on how you personally prefer the setup. For an idea, I think 5-6 inches would suffice if you didn't have any goof-ups during the process
*ahem*
fitting the top contact:
I wanted to keep the edges as rounded as possible where the battery would fit to help avoid any wrapper tears on the batteries.
basic contact shape formed after measuring.
Once the contacts were formed, I used the "0" from my stamping set for the contact points
Without getting into too much boring detail, I chose to shape the contact so it would have a flat face for the contact points and gave it a nice polish (thanks Pete!).
My finished contact strip. Note how it bends backward slightly, the purpose of which is to keep even tension against the button to keep from rattling, also to keep even pressure on the button to keep it straight in the hole and avoid binding when it is depressed. This application also works for my setup because of the adhesive tape I used to secure the strip to the enclosure, so your won tweaking may be necessary.
This is where your own personal taste will come into play more than just about anything else on the build. The contact strip will determine the button feel and throw, so it may take a bit of positioning and fitting before you get a button feel that is good for you. Binder clips help to hold the contact in pace while you experiment with placement.
The tape I chose to use was Gorilla mounting tape, mostly because I have experience with how it holds and I was confident it would do the job. secondly, I wanted something to take up the small amount of extra space left in the enclosure since I was using thinner contacts. As luck would have it, the tape serves several purposes both intended and not. Since it is soft, it allows the contact strip on the bottom of the enclosure to "give" slightly when a battery is inserted, also doubling to hold the battery in place. It also allowed the battery and bottle to fit more snugly in the enclosure, so it is a perfect fit without having to squeeze anything in and nothing is loose once the door is in place.
Give the contact strip a good sanding where the tape will apply for better adhesion.
apply sticky side and leave the backing in place. trim off excess and test fit.
I moved on to the 510 before placing the contact strip in permanently, and I had taken previous measurements while test-fitting so the 510 could be finished separately, off the enclosure.
The VT 510 is a long beast for this application, but by shaving down the manual adjustment insulator I was able to get everything to fit together nicely. The only other modification was to remove about 11-12mm from the feed tube.
Originally I had set up the contacts to work using only the supplied brass nuts from the VT 510, but I wasn't satisfied with the contact point. This picture shows some of the fitting and planning, hence the red o-ring for spacing.
I ditched this plan anyways in favor of a more solid contact, so "the tab" was born.
the hole is just big enough for the threads on the feed tube to catch, so it threads onto the feed tube with the nut for a solid fit once it's tightened. polished it as well, cleaned up the contact points between the brass nut and tab, assembled the 510 and done.
510 installed into the enclosure, contact strip installed, note the large, flat contact area in comparison to the original idea of utilizing the VT brass nuts for contact points. Polishing has eliminated arcing that I can visibly detect and the button lands on "fire" nice and solid.
The throw is long, but this is my pocket device and I wanted to be sure that I had plenty of "wiggle room" should the button be depressed. The thin contact strip gives the button a nice light touch though, so its far from a workout when you want a puff.
All assembled, ready to go
Overall, I love every little thing about these enclosures. It literally is the smallest package I've ever seen for a squonker and it is a beast to boot.
I hope this wasn't too choppy and I have lots more pics and things to discuss if anyone cares to know, Otherwise thanks for reading!