My First Coil. :P

Status
Not open for further replies.

Myk

Vaping Master
ECF Veteran
Jan 1, 2009
4,889
10,654
IL, USA
See... That pic looks so much cooler!

Oh you mean mine, I'm a jeweler with watchmaking schooling. I had a lot of training and experience bending wire before ecigs. Making a bent hairspring pulsate like new is hair pulling stuff.
You'll get there.
 

Suomynona

Full Member
May 10, 2018
34
79
48
Gauge? Inside diameter? Material? Total length of wire?

Right off without knowing specifics it looks like some of my NI200 coils. It might be high Ω if it's something other than nickel.

If it's a micro diameter, I had better luck since giving that up and going with large diameter. I'll run out of lung capacity long before the center of my wick dries out. (Still good to try micros for yourself.)

It looks like you may have your end coils crossing over the inside diameter. That would make it hard to wick.
View attachment 743539

You can adjust the inside diameter and the roundness of the outside coils by putting it on an arbor/metal rod/nail to hold it and adjust it until it's installed.
View attachment 743537

Your wire is under a pile of paper towels.
Shouldn't you make your coils with a smaller ID? The coil seems a little big for that build deck and seems to touch your post as well.

Personally I don't like too big of an ID. You prevent fast dry hits, but juice stays too much inside of the wick, losing flavor when you're vaping near an empty drip well. With decent temp control, you don't have to worry about dry hits anyways, so I usually stay around 2.5mm to 3mm ID coils.
 

Myk

Vaping Master
ECF Veteran
Jan 1, 2009
4,889
10,654
IL, USA
Shouldn't you make your coils with a smaller ID? The coil seems a little big for that build deck and seems to touch your post as well.

Personally I don't like too big of an ID. You prevent fast dry hits, but juice stays too much inside of the wick, losing flavor when you're vaping near an empty drip well. With decent temp control, you don't have to worry about dry hits anyways, so I usually stay around 2.5mm to 3mm ID coils.

IMO everyone should do whatever works best for them.

It doesn't touch my post, close but not. This is for a tank I don't run them dry. I do use the same build in a RDA but it's a squonker.
I haven't found any problems with big diameter horizontal but I do usually build vertical if the air hole is round (they're not on this deck). This is a new tank but I haven't run into any problems yet and it puts out plenty of flavor and clouds, same as my squonker.

I think everyone should do their own experiments with gauge, diameters, etc. That's why I said it's good to try micro coils yourself if you want, you might like them more than I do. I forget the rational for micro coils but I debunked it in my mind and decided fat coils were better.
I was just trying to figure out what that coil was, why it has so many wraps. If it would've been a micro coil I would've warned about drying out the center of the wick with long skinny coils/wicks.

TC measures the whole coil. You can have hot spots. If my long verticals don't spit enough from the bottom the top can dry and burn.
 

stols001

Moved On
ECF Veteran
May 30, 2017
29,338
108,118
It looks good! Even though it may not be your target resistance (I'm thinking you probably doubled your wraps) you may want to install it and vape it, just to see how it goes and how well it vapes, for fun!

And congrats. My first coil looked a lot different than THAT.

More like this:

3cb5f5aa836c4a9335627053389888c0.jpg


Only, far less functional... .LOL.

Anna
 
  • Winner
Reactions: Coyote628

hell_storm2004

Super Member
ECF Veteran
Jun 17, 2013
318
555
Richardson, Texas, USA
So i made my first coil. Turned out at 0.4 ohms. With 7 turns i was getting around 0.17 ohms. So I tried 12 turns. But on one side I lost the count watching the Sunday Supplement on Youtube. :oops:

Vapes alright at 48W. Its not perfect! But its a start! :cool:

20180524_123150_zpstfvyrq4j.jpg


20180524_123239_zpsczu8nc5z.jpg


20180524_123259_zps1gg5xtki.jpg


20180524_123916_zpswtyubmtk.jpg
 

stols001

Moved On
ECF Veteran
May 30, 2017
29,338
108,118
Nope. I have a fine motor tremor, my coiling is... not so great.

I can make a mean DIY mix (it's nice to be good at something) but my coiling skills are, one would say, subpar. LOL, if I can get one coil built, installed and wicked, I'm just happy if it reads, IDK if you noticed or not but I rarely, rarely post build pics. :lol::lol::lol:

Anna
 

Suomynona

Full Member
May 10, 2018
34
79
48
So i made my first coil. Turned out at 0.4 ohms. With 7 turns i was getting around 0.17 ohms. So I tried 12 turns. But on one side I lost the count watching the Sunday Supplement on Youtube. :oops:

Vapes alright at 48W. Its not perfect! But its a start! :cool:
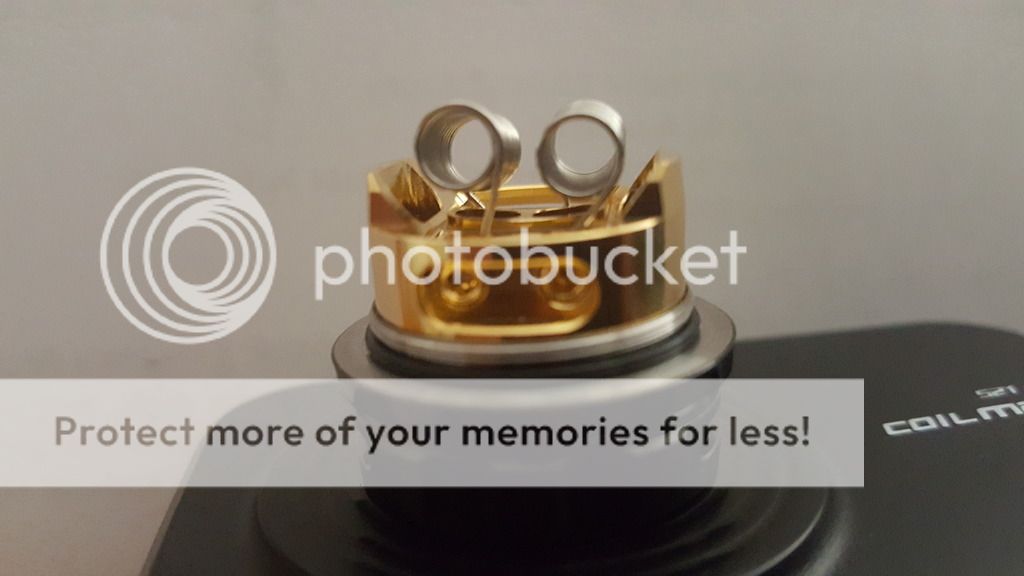
20180524_123150_zpstfvyrq4j.jpg


20180524_123239_zpsczu8nc5z.jpg


20180524_123259_zps1gg5xtki.jpg


20180524_123916_zpswtyubmtk.jpg
If you lose count of your wraps, just put the coils next to each other after they're wrapped and they should be identical in width.
If not, just unwrap 1, 2 or whatever amount necessary to make them the same size. Unwrapping is easy, just put the coil on your rod and pull one leg carefully.
 

Ionori

Senior Member
ECF Veteran
  • Mar 26, 2017
    210
    342
    38
    @hell_storm2004 did you try glowing them before putting the cotton in? It looks like some of the wraps are making contact with each other, which may cause hot spots that result in an unpleasant or burnt taste. Glowing them should also tell you if they are close enough in resistance to work together (if one of the coils has a significantly higher resistance, it won't heat up enough to vaporize e-juice).

    The left coil looks like the wraps are closer together, you may want to pulse and pinch the coil with tweezers (make sure not to fire and pinch at the same time if your tweezers are made of a conductive material) to get the coils tighter, then strum the top of the coils with the tweezers a little bit to get the wraps to separate slightly. Don't pinch too hard, though, particularly if you are using wire that is thinner than 24 gauge, or the wraps may go over one another.
     

    Suomynona

    Full Member
    May 10, 2018
    34
    79
    48
    The left coil looks like the wraps are closer together,
    If I counted right, the right coil actually has an extra wrap..
    They won't have the same performance so one wick will remain wet and produce slight vapor while the other could be burning the cotton. Impossible to do proper temp control with coils like this too.

    So i made my first coil. Turned out at 0.4 ohms. With 7 turns i was getting around 0.17 ohms. So I tried 12 turns. But on one side I lost the count watching the Sunday Supplement on Youtube. :oops:

    With dual coils, always make sure both coils have the same amount of wraps and same leg lengths and that they glow the same way. As I said in a previous post, before installing them in the RDA, put them next to each other and they should have the same width. If not, put an extra wrap on one of them or unwrap the other. And pay attention when you count, these are both more than 12!

    I'd also avoid long tight coils like this. The center of the coil always becomes the hottest and you can't visually see how well your wick performs inside such a coil. Using less wraps will give you the room in the RDA to space your coils. That will give you better flavor, less hot spots, better cooling after firing your coil, a visual check on your cotton... but also a lower resistance.
    Use steam-engine.org to calculate how many wraps you should have (I always use Wire wizard | Steam Engine | free vaping calculators, just half your resistance for a dual coil).

    Use less wraps, space your coils and if you think the resistance is too low for you, use either higher gauge wire, a single coil or even a different material like nichrome or kanthal.
    To evenly space your coils, just pull the wraps apart with the coil on your rod, then push them back together and let go. There are quite a few youtube vids that can show you and it's one of the easiest improvements you can do with your coils.

    Even if you space your coils, always glow them slightly red so you know there's not a bad contact or a short somewhere. Both coils really should be performing the same same. For a satisfying vape and safety, you should spend the extra minute to accomplish this when you're building on an RBA.
     

    Ionori

    Senior Member
    ECF Veteran
  • Mar 26, 2017
    210
    342
    38
    I find it very easy to unwrap coils by putting them back on the coil jig/rod I wrapped them on and pulling with tweezers on one end.

    Ideally, you want at least some microscopic distance between the wraps to avoid hotspots, gently strumming a coil with tweezers a few times is enough to get rid of hotspots most of the time (the goal is to get the coil to glow evenly, starting from the center), but pulsing and pinching the coil is a good way to get rid of irregularities in the coil before strumming.
     

    Coyote628

    Ultra Member
    Supporting Member
    ECF Veteran
    Contest Winner!
    Sep 16, 2017
    2,913
    8,342
    60
    It looks good! Even though it may not be your target resistance (I'm thinking you probably doubled your wraps) you may want to install it and vape it, just to see how it goes and how well it vapes, for fun!

    And congrats. My first coil looked a lot different than THAT.

    More like this:

    3cb5f5aa836c4a9335627053389888c0.jpg


    Only, far less functional... .LOL.

    Anna
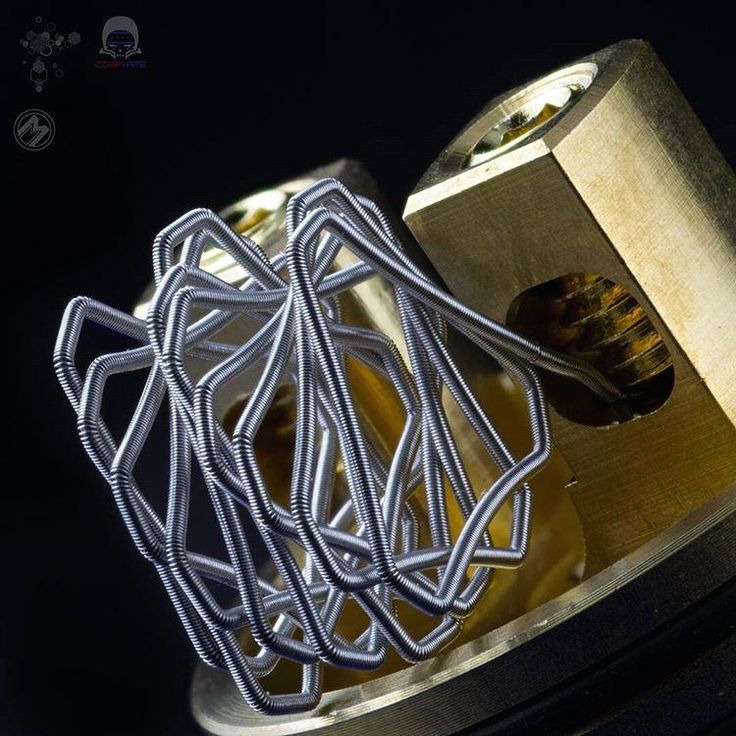
    That is cool looking coil there, but, uhhhhh how did you wick it?
     
    Status
    Not open for further replies.

    Users who are viewing this thread