Status
Not open for further replies.

weisner

Senior Member
ECF Veteran
Jun 1, 2012
276
259
Costa Mesa, CA
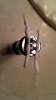
The Igo w is essentially the same base as the L from what I can tell. THey added another post and put holes in them for easier building. Also, the cap seems to have a little more volume inside. I swapped the W cap onto my L and it seemed to hit harder? :confused:

I know in cars, longer intake runners create more air turbulence, resulting in a better dispersion of particulate matter (fuel) in the air. THink this has a similar effect when vaping? haha

The same principles shoulud apply I don't see any reason they shouldn't.

You should pick up a cheap mech to play with. Its a lot of fun.

I have considered it. At this point however I am going to hold off a bit longer. I have yet to see one that really does get my attention design wise that I can afford.

Thank you for the additional info on the IGO-W I was under the impression it was just another shape/diameter.
 

davewuvswaffles

Senior Member
ECF Veteran
Verified Member
Jul 29, 2013
193
432
33
Philadelphia
Last night I got a little bored and decided to mod my sigelei #13a for a lower voltage drop and improved button performance.

Following Rader's Sigelei #8 Performance Guide and modding my button as he posted here, I lowered my voltage drop to around 0.15V on load and have made my button work flawlessly.

After getting the tinkering bug, I grabbed a propane torch and heat treated a steel drip tip and an Igo-L cap, both of which I don't really use much anymore.

Starting with the drip tip, I cooled it down after heating it by dropping it in water. I found that the colors came off very easily with some 1500 grit sandpaper and were very muted to begin with. I found that I was unable to achieve the colors I was aiming for consistently and grabbed my Igo-L cap determined to be more precise with my results.

By trying to evenly heat the cap and letting it air cool, I found that I was better able to achieve the colors I was aiming for and they seem to be a tad more permanent, even after trying to lightly sand the inside with 1500 grit sandpaper.

I am now thinking of color treating my Sigelei and Igo-W to either a purple or blue hue in the oven, though I may just try to reduce the outer diameter and polish it to a shine before I make any big jump like color treating it.
 
Last edited:

weisner

Senior Member
ECF Veteran
Jun 1, 2012
276
259
Costa Mesa, CA
Last night I got a little bored and decided to mod my Sigelei #13a for a lower voltage drop and improved button performance.
......
I am now thinking of color treating my Sigelei and Igo-W to either a purple or blue hue in the oven, though I may just try to reduce the outer diameter and polish it to a shine before I make any big jump like color treating it.

Really nice post.
Are you trying to get that Stainless Steel coloring like you might see on a Harley Davidson chrome exhaust? If so that coloration comes from repeatedly being heated and cooled and occasionally misted due to humidity. I have always thought there was something unique and cool about that kind of bluing.

Thanks for posting your experience Mr. davewuvswaffles.
 

onoh89

Full Member
May 30, 2013
19
2
socal
Last night I got a little bored and decided to mod my Sigelei #13a for a lower voltage drop and improved button performance.

Following Rader's Sigelei #8 Performance Guide and modding my button as he posted here, I lowered my voltage drop to around 0.15V on load and have made my button work flawlessly.

After getting the tinkering bug, I grabbed a propane torch and heat treated a steel drip tip and an Igo-L cap, both of which I don't really use much anymore.

Starting with the drip tip, I cooled it down after heating it by dropping it in water. I found that the colors came off very easily with some 1500 grit sandpaper and were very muted to begin with. I found that I was unable to achieve the colors I was aiming for consistently and grabbed my Igo-L cap determined to be more precise with my results.

By trying to evenly heat the cap and letting it air cool, I found that I was better able to achieve the colors I was aiming for and they seem to be a tad more permanent, even after trying to lightly sand the inside with 1500 grit sandpaper.

I am now thinking of color treating my Sigelei and Igo-W to either a purple or blue hue in the oven, though I may just try to reduce the outer diameter and polish it to a shine before I make any big jump like color treating it.

any pics of this?
 

weisner

Senior Member
ECF Veteran
Jun 1, 2012
276
259
Costa Mesa, CA
I know this has been done before, however I am getting outrageously long use and great performance from this build. Over a week so far without needing a replacement wick. I have been vaping 100% VG home brewed DIY and am getting very little build up on the coils. The trick with cotton is simple, keep it wet.

The bare coil
IMAG0509.jpg
The 30GA and the machine screw used to make a nice coil 2.5mm
IMAG0510.jpg
What my Tesla mod seems to think of the coil
IMAG0511_1.jpg
Inserting the trimmed cotton wick
IMAG0512_2.jpg
Looping the wick ends into the base
IMAG0514.jpg

So far this is the best dripper build I have been able to build and reproduce.
 

super_X_drifter

ECF Guru
ECF Veteran
Verified Member
Oct 4, 2012
10,635
45,119
Somewhere out there
www.youtube.com
I know this has been done before, however I am getting outrageously long use and great performance from this build. Over a week so far without needing a replacement wick. I have been vaping 100% VG home brewed DIY and am getting very little build up on the coils. The trick with cotton is simple, keep it wet.

The bare coil
View attachment 257670
The 30GA and the machine screw used to make a nice coil 2.5mm
View attachment 257671
What my Tesla mod seems to think of the coil
View attachment 257672
Inserting the trimmed cotton wick
View attachment 257673
Looping the wick ends into the base
View attachment 257674

So far this is the best dripper build I have been able to build and reproduce.

Sweet bro. Looks very much like mine except I run shorter wick tails and touching wraps :)
nave2yte.jpg
 

weisner

Senior Member
ECF Veteran
Jun 1, 2012
276
259
Costa Mesa, CA
Sweet bro. Looks very much like mine except I run shorter wick tails and touching wraps :)
nave2yte.jpg

Very much so, I have been following the micro coil thread that you are very active on and drew some inspiration from those conversations. However when I do a micro coil it runs a bit warm for my taste. I run this between 8 and 9.5 WATTS approximately 4 -5.5 volts.
 

Lessifer

Vaping Master
ECF Veteran
Verified Member
Feb 5, 2013
8,309
28,986
Sacramento, California
Rocket RBA(Kayfun/Russion clone)

28g K micro coil, 1/16" ID, ~1ohm at 9 wraps, cotton ball wick. This was a pretty easy build, it almost seems made for a micro coil. V/F/TH are pretty phenomenal for a very cheap clone. The Rocket itself has some issues with leaking, though that's probably user error, and not being able to use your own drip tip is a drag, but all in all it's a winner in my book. Of course it's all up to your build, but with a good wick/coil I'd say it's on par with a well built RDA, with the added bonus of having a tank attached.


Last edited:

weisner

Senior Member
ECF Veteran
Jun 1, 2012
276
259
Costa Mesa, CA
So far liking the mod, it will need some hand deburring and maybe some polishing. But overall the adjustable air flow and the uniquely slotted posts on the build deck make it a winner.

IMAG0649.jpgIMAG0650.jpgIMAG0654.jpg
Setting up a dual coil from a single wire due to the unique slotted posts in the Trident.

IMAG0655.jpg
Can't run it on the Tesla, but it makes a good build tool.. .5 Ohm
 

Attachments

  • IMAG0656.jpg
    IMAG0656.jpg
    17.1 KB · Views: 53

weisner

Senior Member
ECF Veteran
Jun 1, 2012
276
259
Costa Mesa, CA
I took an interest in building my own mod and decided it should be a squonker with space for a DNA mod to be added at a later time.

I used light wook that you can purchase in small quantities at hobby shops Birch or some other light and relatively durable will do. I used Cool Aid for wood stain Grape and Cherry. I purchased some of my electronic hardware from MarVac and boggermods.com for the specialty items like the bottle and 510 connector with catch pan.

This will be a pictoral mostly. I'll be available to answer questions if there happen to be any.

Well here goes...

Building the frame...

IMAG0900.jpgsizing
IMAG0903.jpgIMAG0901.jpgIMAG0902.jpgIMAG0904.jpg
 
Last edited:

weisner

Senior Member
ECF Veteran
Jun 1, 2012
276
259
Costa Mesa, CA
I found the mini scar to have the required center post hollow and two holes in the post in the build platform the lower is being used for e-juice to pass with the upper being used as a wire trap. This thing is sweet!

IMAG1107.jpg Googly eyes added by friends, left on seems to be a nice touch for something that should be fun.
IMAG1108.jpgIMAG1109.jpgIMAG1110.jpg

Yes the deck is tiny, however it is really quite easy to build on.

Until I decide to add the DNA chip in that third slot and cut button and screen holes on the side of the box this will be my last post regarding the build of this box.

Hope you enjoyed the trip.
 
Status
Not open for further replies.

Users who are viewing this thread