Tutorial: Juicebox for around $8

Status
Not open for further replies.

mgmrick

Ultra Member
ECF Veteran
Verified Member
Sep 12, 2010
2,813
2,369
66
New York
My first mod. Used a triple a box much easier to work with. Put the fire button on top in case I forget to turn off and put in shirt pocket
 

Attachments

  • DSCF5958.jpg
    DSCF5958.jpg
    21.1 KB · Views: 274

highping

Ultra Member
Supporting Member
ECF Veteran
Aug 29, 2009
1,292
197
Columbus, OH
mgmrick: nice lookin' mod. I like the idea of using a 3-AAA box. It gives you enough room to add a beefy switch. You could even fit a 5V step-up chip it the middle compartment if you wanted more power or a USB charger connection.

Cyberwolf: Great job on the box. The oval hole looks good. I noticed that you cut the hole for the switch a little bigger. Did you have trouble getting the switch to fit? I think I read somewhere back in the thread (or the other forum) that the newer boxes and/or switches are not an exact fit like they were when I built mine.

Big Hitter (and anyone else building this mod): See this thread ...http://www.e-cigarette-forum.com/forum/modders-forum/97828-brass-juice.html#post1463032 There are lots of suggestions for alternative materials in that thread.
If you have already built one of these and used brass (or copper, etc), the easiest fix is to cut your tube short (so it's not soaking in the juice) and then turn it upside-down when you squeeze.
I am actually still using my original (with the full length tube) and have never noticed any more discoloration as long as the juice doesn't sit for a couple weeks.
 

cyberwolf

Reviewer / Blogger
ECF Veteran
Verified Member
Apr 22, 2009
2,217
403
Coral Springs, FL
Did you have trouble getting the switch to fit?

I was using a switch recycled from something or other, so I only had an actuator of about a millimeter or two to work with and it couldn't be recessed. I ended up just cutting a square hole and gluing the whole thing in. Using the longer actuator like you did is definitely recommended.
 
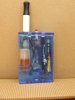
Thank you for this tutorial Highping. I have created your mod myself. As requested I have put in a picture. I think now that I have a new MOD, I need to buy a new camera. I tried everything to get clearer pictures.

Couple of different things on mine.
I used a larger switch. I wasn't really worried about the amp rating of the earlier switch, but saw some other people were, so wanted to try this one. It is rated at .5 amp. I'm not an electrician so have no Idea what the current rating should be. But I think .5 amp is larger capacity than 50 mA. In order to make this modification, I had to remove the small cover over the on/off switch, and remove one of the pegs holding that cover. It barely fit, but I got it in there.

Found a 1/16 brass tube at my local True Value Hardware store. They also had aluminum and copper. I probably should have went with aluminum, but had not read about the juice changing color from oxidation, until I already had made my purchase. Doesn't really matter, it will not self feed with my VG juice anyway. The inner diameter is too small to push thick liquid through. It feeds fine with pg. I had a little left over from when I started.

Also I used a flashing LED. Just personal preference on that one.

One more thing I would like to add to help with the solder challenged. I too am solder challenged. But one thing I did not see in advice of soldering was using a good flux. Do Not Over Estimate the ease of soldering with a good flux. The solder will just run. Remember when soldering, it's Not "the bigger the blob, the better the job." Use just enough to get a good thin hold. Solder is amazing. It will do the rest.

P.S. I guess I need to change my name. I no longer have an eGo. One battery died because of the switch being accidentally pushed in my pocket. Must have been awhile, because it was burnt up completely. But no problem right? I have a spare. Well my charger gave out the same day. Glad it did. It rushed me to build this MOD, which I love more than my eGo.

Thanks again for the instructions.

Everyone happy Modding.
STA60065.jpg
 
Thanks WillyB.

The picture is blurry enough you don't see the imperfections. First off, I didn't have large drill bits. My holes are made with the soldering iron. (it only stunk for a min or two.. I promise). And yes, flux is mentioned in the forums, but was not brought up in this post when people were asking.
This is the first project I have worked on and used flux. I bought new solder, and it was just sitting by it. I said "what the heck. I'll try it." I don't do a lot with solder. I can count my projects on one hand in 40 years of life. But the flux made it easy. Easy enough I think everyone should try their creations.
Now Tip Tinner. That I will have to look up.... no clue what it is, but if it's related to flux, I want in.
This project makes me want to do a toy gun mod. Have you seen such a mod around the forums? Put the barrel in your mouth, pull the trigger for draw, and then blow down the "smoking barrel". Could be an eye catcher if nothing else.
Thanks for your input.
 

highping

Ultra Member
Supporting Member
ECF Veteran
Aug 29, 2009
1,292
197
Columbus, OH
Nice build (boy...ego). Looks pretty clean considering you 'drilled' your holes with a solder gun.

For anyone putting off modding because they 'can't solder'... soldering is not as difficult as many people fear. To me, there are really only two things that make for an easy, clean solder joint... 1)use flux-core solder (so your flux is always right where you need it) and 2)always use the material that you are soldering to melt the solder...IOW: don't feed the solder into the tip of you iron. Put a little solder on your tip just to conduct the heat better (tinning), then use that to heat the material you are soldering, and use the heated material to melt the solder. Do those two things and you will get a perfect joint every time.
 
Hey Griz.
I would build you one for cost plus shipping to you. It was just fun. Sadly, I don't have the proper tools to make anyone one. I made my hole in the top with by melting it with my solder tip. And as you can tell, I don't even have the hole for your thumb to push the bottle. I have to remove the cover to squeeze the bottle. This works for me, because I drip most of the time. VG won't go through my pipe anyway. My bottle is filled with pg for that "just in case" that we all need.
It is a great first project box, but if you don't want the project, highping's recommendation of the wetbox or mrPuffer might be what you are looking for.

BTW: Large hands can handle this project easily. I used vice grips to hold my small parts, and every bit of soldering required is done on dis-assembled parts. So out in the open. You may just want to give it a try. Also, you can take out the LED circuit altogether. This makes for a higher amperage build. Maybe not much, but the LED has to use some that is not going to the atty.

Highping:

Thanks.. I understand tip tinning now. Did not do that.. well I put a little solder on the tip. put my flux on the part I was soldering, and touched the 2 together. The solder ran. I was amazed. I must have heated the material enough. The solder looks good. But perhaps they will fail later. I'll see.

Thanks

Harold
 

hotone

Super Member
ECF Veteran
Apr 1, 2010
499
50
Toronto
Thanks for the instructions highping. I finally built my first mod based on these instructions. Just waiting for the epoxy to dry.

I got shipped the wrong boxes from madvapes. They sent me the 3 X AA version rather then the 2 x AA used here. I actually think I like it better as I have fairly big hands and there was lots of room for a switch so I installed a larger switch on the top. If I can find my camera I will post some pictures.
 

hotone

Super Member
ECF Veteran
Apr 1, 2010
499
50
Toronto
Here are some pix of my creation. I did not add the LED yet still trying to decide if I want to.
I had lots of time to experiment with a feed system while I was waiting for my parts to arrive. Sadly my mr puffer did not survive this testing.

Added a catch cup to the top, as much to give me a little more room in the box as prevent juice from leaking. Used a SS 18g blunt syringe tip with rubber hose attached to the end. There is another hose inside the bottle. No leaks so far and super easy to change flavours. The only part I really had trouble with was soldering the negative wire to the atty. It would not stick


hotone-albums-first-mod-picture29150-picture-002-small.jpg

hotone-albums-first-mod-picture29149-picture-001-small.jpg

hotone-albums-first-mod-picture29151-picture-003-small.jpg

hotone-albums-first-mod-picture29152-picture-010-small.jpg
 

mgmrick

Ultra Member
ECF Veteran
Verified Member
Sep 12, 2010
2,813
2,369
66
New York
Here are some pix of my creation. I did not add the LED yet still trying to decide if I want to.
I had lots of time to experiment with a feed system while I was waiting for my parts to arrive. Sadly my mr puffer did not survive this testing.

Added a catch cup to the top, as much to give me a little more room in the box as prevent juice from leaking. Used a SS 18g blunt syringe tip with rubber hose attached to the end. There is another hose inside the bottle. No leaks so far and super easy to change flavours. The only part I really had trouble with was soldering the negative wire to the atty. It would not stick


hotone-albums-first-mod-picture29150-picture-002-small.jpg

hotone-albums-first-mod-picture29149-picture-001-small.jpg

hotone-albums-first-mod-picture29151-picture-003-small.jpg

hotone-albums-first-mod-picture29152-picture-010-small.jpg

Looks just like mine. I also had a hard time with the negative wire on the atty connection. What did you do with the center? Looks like you leave the needle in atty connection. Did you seal the needle in there? How do you refill? I like the fire button on top (put mine there too) much better placement than where oldgoat put his on the one I bought from him
 
Status
Not open for further replies.

Users who are viewing this thread