I've picked up a broken Vaporshark. What have I done now?

The thing showed signs of life as the display was lit up in the picture before it arrived. Maybe, just maybe.
Diagnosis:
Leaky atomizer filled the casing with juice. This thing really needs seals at the top from the factory.
Tools:
Powered vacuum desoldering iron.
Variable soldering iron and solder.
Pure isopropyl
x-acto knife
Cotton swabs
Cotton
toothpicks
Here is how it went:
I wanted to get some pictures of the repair progress, but then I just wanted to get it done. The old juice in the case was smelling terrible. Looks like some of it cooked to the bottom of the 510 connector. I doubt that anyone is going to attempt this, but doc'd it for ya anyhow.
I charged it just enough to determine that the button was bad. It was shorted permanently it appeared. You will want to desolder a leg of the battery and tape the exposed battery lead at this point. Disassembled the casing. Popped the button assembly out by prying lightly from the side closest to the casing. The 510 connector will come out easy. The wired electronics comes out as an assembly inside a plastic tray. Well thought out little device. Everything aside from this plastic tray assembly went into soapy water. The plastic tray and everything else associated was scrubbed with swabs and isopropyl.
The button assembly was desoldered. The "blue ring" tabs on the back of the board are melted in. Light prying/forming with the x-acto on the melted tabs will allow them to slip back through. Lightly pried the blue plastic away from the board. The metal portion comes out with it to expose a tiny surface mount type button underneath. It needed to be replaced. I don't have surface mount tools and didn't want to wait on the part. There is a tiny metal retainer on top. It pops off with super light prying with the knife. Go easy here. The plastic button and "clicky dome" came out exposing a very dirty set of copper contacts. I scrubbed the contact well and all tiny parts with the toothpick, cotton, iso. Snapped the button back together, soldered the button assembly back on and applied the power to it.
I couldn't believe it. The button works perfectly. It all works perfectly. Finished the cleaning and reassembly of the rest in reverse order.
Ordered a skin and wireless charging reciever for it too. It's just the perfect size for my hand and the battery can last me though my 10hr work day.
The battery seems to have a longer discharge life than a comparable IMR would. I will figure out how to seal it up better at some point. I've got to give kudos to Vaporshark on the design otherwise. It's really what I wanted after tons of searching and almost built something for myself this size.
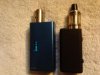
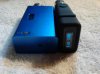
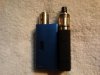
Sorry for the craptastic photos of the finished results.
The thing showed signs of life as the display was lit up in the picture before it arrived. Maybe, just maybe.
Diagnosis:
Leaky atomizer filled the casing with juice. This thing really needs seals at the top from the factory.
Tools:
Powered vacuum desoldering iron.
Variable soldering iron and solder.
Pure isopropyl
x-acto knife
Cotton swabs
Cotton
toothpicks
Here is how it went:
I wanted to get some pictures of the repair progress, but then I just wanted to get it done. The old juice in the case was smelling terrible. Looks like some of it cooked to the bottom of the 510 connector. I doubt that anyone is going to attempt this, but doc'd it for ya anyhow.
I charged it just enough to determine that the button was bad. It was shorted permanently it appeared. You will want to desolder a leg of the battery and tape the exposed battery lead at this point. Disassembled the casing. Popped the button assembly out by prying lightly from the side closest to the casing. The 510 connector will come out easy. The wired electronics comes out as an assembly inside a plastic tray. Well thought out little device. Everything aside from this plastic tray assembly went into soapy water. The plastic tray and everything else associated was scrubbed with swabs and isopropyl.
The button assembly was desoldered. The "blue ring" tabs on the back of the board are melted in. Light prying/forming with the x-acto on the melted tabs will allow them to slip back through. Lightly pried the blue plastic away from the board. The metal portion comes out with it to expose a tiny surface mount type button underneath. It needed to be replaced. I don't have surface mount tools and didn't want to wait on the part. There is a tiny metal retainer on top. It pops off with super light prying with the knife. Go easy here. The plastic button and "clicky dome" came out exposing a very dirty set of copper contacts. I scrubbed the contact well and all tiny parts with the toothpick, cotton, iso. Snapped the button back together, soldered the button assembly back on and applied the power to it.
I couldn't believe it. The button works perfectly. It all works perfectly.
Finished the cleaning and reassembly of the rest in reverse order. Ordered a skin and wireless charging reciever for it too. It's just the perfect size for my hand and the battery can last me though my 10hr work day.
The battery seems to have a longer discharge life than a comparable IMR would. I will figure out how to seal it up better at some point. I've got to give kudos to Vaporshark on the design otherwise. It's really what I wanted after tons of searching and almost built something for myself this size.
Sorry for the craptastic photos of the finished results.