
You are using an out of date browser. It may not display this or other websites correctly.
You should upgrade or use an alternative browser.
You should upgrade or use an alternative browser.
Vivi Nova Rebuild tutorial
- Thread starter urquidezj
- Start date
- th_trl_thread_readers 0
-
- Tags
- provari vamo vaping zone vapor pro
- Status
- Not open for further replies.
I didn't know what it was about that picture Cyrus that reminded me of something until MISTer E made it move. It brought me back 34 years to this:
Flounder Gets Even - Animal House (4/10) Movie CLIP (1978) HD - YouTube
Go to the 2:30 mark.
Flounder Gets Even - Animal House (4/10) Movie CLIP (1978) HD - YouTube
Go to the 2:30 mark.
Last edited:
I'm with you all the way Mister! Don't know what we would do with ourselves if it wasn't for all your wonderful experiments, camera work, Graphics and your Mystery Laboratory. ")
Errol
Errol
I want to say the following words and get back to Vivi Nova stuff.
I am very much not right in the head (its ok with me I enjoy it mostly) & mrelwood is needed here. I am sad, because I was mean to him. Because that is what I accused him of doing to mE & others. Part of my illness is word, letter, & language processing related. mrelwoods words I concentrated too hard on negatively & he is sometime a mean teacher in my eyes, but Dan Aykroyd is mean. I do not like Dan(nor mrelwood nor anyone not even myself), but his characters saved me from years of tears. mrelwoods science is hard fact & that is needed here lots even if its done harshly.
mrelwood
I went wrong. I am & have always been a broken mentally ill runt that since birth lives in the shadows because words make me fall ill. I am an mostly feral ignorant in much hard science fool wanting to be & tring to act cool here on ECF. You are an educated tool with vastly more school in joule(that is needed here more than mE for safety!, although we are both are needed). I am a developmentally disabled 45 year old with the emotions of a child that lived feral in the woods alone like an animal for too long. Do not take it too personally & keep being you. If I am challenged in certain ways about things I do or say I become unhinged, yell, cower, hide, & then cry like a wussy. No pity wanted nor needed. It is a dis-ease I have known all my life & it has its +s that no one alive can know
I want this to be known because you all need to deal with mE & my posts.

Last edited:
Well I got my nickle NR, 30 awg kanthal, 32 awg nichrome, 33 awg kanthal. I just spent a few hours trying to twist the non resistant wire to the 30 gauge kanthal with no success. Anyone have any nr to rw twisting/wrapping technique that you have perfected for the vivi nova head?
xMackx, I am assuming you were using the (V splice?) technique in Post #1[by urquidezj] of this[his] thread. I have no luck with it. It slips or unravels on mE.
I just twist the legs on Vivi Novas(not much space for the splice). I have done the a sloppy "western union splice" on a Vivi Nova, twisting is just easier. A real western union splice is done with big big wire & the directions do not scale down easy for mE .
This video I put together may or may not be of assistance. It's the way I do a scaled down one sorta.
sloppy quick western union splice - YouTube
I embedded the video but WATCH in FULL SCREEN 720P[HD] (Small = no detail & a white haze)
The video page has this description:
32 AWG pure Nickle & 32 A1 Kanthal joined in a sloppy quick western union splice. Hard to do quickly looking through the camera display, but it held them tugs @ the end nicely
After tying one side be sure to move the pliers over the work completed. If you just tie the other side there is a gap where the pliers held them & the splice will slip.
Take your time & it can actually look like a nice mini western union splice.
] thread. I have no luck with it. It slips or unravels on mE.I just twist the legs on Vivi Novas(not much space for the splice). I have done the a sloppy "western union splice" on a Vivi Nova, twisting is just easier. A real western union splice is done with big big wire & the directions do not scale down easy for mE .
This video I put together may or may not be of assistance. It's the way I do a scaled down one sorta.
sloppy quick western union splice - YouTube
I embedded the video but WATCH in FULL SCREEN 720P[HD] (Small = no detail & a white haze
)The video page has this description:
32 AWG pure Nickle & 32 A1 Kanthal joined in a sloppy quick western union splice. Hard to do quickly looking through the camera display, but it held them tugs @ the end nicely
After tying one side be sure to move the pliers over the work completed. If you just tie the other side there is a gap where the pliers held them & the splice will slip.
Take your time & it can actually look like a nice mini western union splice.
Last edited:
xMackx, I am assuming you were using the (V splice?) technique in Post #1[by urquidezj] of this[his
I just twist the legs on Vivi Novas(not much space for the splice). I have done the a sloppy "western union splice" on a Vivi Nova, twisting is just easier. A real western union splice is done with big big wire & the directions do not scale down easy for mE .
This video I put together may or may not be of assistance. It's the way I do a scaled down one sorta.
sloppy quick western union splice - YouTube
I embedded the video but WATCH in FULL SCREEN 720P[HD] (Small = no detail & a white haze
The video page has this description:
32 AWG pure Nickle & 32 A1 Kanthal joined in a sloppy quick western union splice. Hard to do quickly looking through the camera display, but it held them tugs @ the end nicely
After tying one side be sure to move the pliers over the work completed. If you just tie the other side there is a gap where the pliers held them & the splice will slip.
Take your time & it can actually look like a nice mini western union splice.
So you're saying I should just double twist my 30 awg kanthal rather than use nr wire? For some reason I was thinking the thicker gauge might burn the grommets easier than my 33 gauge.
No, that's your decision. I mostly just made the video to give you an alternative splicing method. (I figured you used the other splice method from post #1 of this thread.xMackx said: So you're saying I should just double twist my 30 awg kanthal rather than use nr wire? For some reason I was thinking the thicker gauge might burn the grommets easier than my 33 gauge.
It was mainly a reply to this:
(I forgot to use a quote caption bubble in my last post & I am just Spin E like thatAnyone have any nr to rw twisting/wrapping technique that you have perfected for the vivi nova head?
 )
)I would imagine you may be able to get away with twisted legs with your 30 & not burn the grommet. 30 is thicker & thus has less resistance. I just twist the legs (of 32)on Vivi Novas & I get no burn with the twisted legs. I am just guessing somewhat though about 30, wait for a second opinion on your exact scenario.
[post=6840057]HERE is a link[/post] to a post by TomCatt with a table of resistance per inch. It may help too

No, that's your decision. I mostly just made the video to give you an alternative splicing method. (I figured you used the other splice method from post #1 of this thread.
It was mainly a reply to this: (I forgot to use a quote caption bubble in my last post & I am just Spin E like that
I would imagine you may be able to get away with twisted legs with your 30 & not burn the grommet. 30 is thicker & thus has less resistance. I just twist the legs (of 32)on Vivi Novas & I get no burn with the twisted legs. I am just guessing somewhat though about 30, wait for a second opinion on your exact scenario.
[post=6840057]HERE is a link[/post] to a post by TomCatt with a table of resistance per inch. It may help too
Thanks for the help, the nice thing about buying wire from kingorchid on ebay is well first it's cheap and he lists the ohms per foot.
33 Awg Kanthal - 17.6 ohm/ft.
32 Awg Nichrome - 10.57 ohm/ft.
30 Awg Kanthal - 8.55 ohm/ft.
Haven't tried the nichrome yet, but i do see the advantage of less ohms than Kanthal for the same gauge.

Here is a mod I found interesting called the Acorn (I can see why). Thought us and other vivi nova modders might find this intersting. It uses Ce2 atomizer heads which I have no experience with but see why a ceramic cup would be much easier to work with for mods. I found it at Tank Mods
I have been pondering on making my own mods. I have been thinking about taking my diamond rotary tool and carving a stone cup for the vivi nova head.
I have been pondering on making my own mods. I have been thinking about taking my diamond rotary tool and carving a stone cup for the vivi nova head.
Attachments

xMackx neat little ceramic vial mod they're selling. I like as much metal & as little plastic as possible, on my atomizers. I hope to keep my Vivi Novas going, but its hard with all of the current metal geni's. If my big block ceramic works out, I plan on getting one of the [no window] aluminum Vivi Nova tanks, to make it just as bullet proof as a real tank  or @ least more bullet proof than stock.
Modding is fun for m
 . It brings back days of modding muscle cars in my youth. [I only had a licence for a few years(I do not drive by choice ), but my 68 Firebird & 67 GTO were fun to mod though while I had'em.]
I once lived on a volcanic isle. I found an old file in a hidden stash in the jungle of forestry. I proceeded to carve river stone. I made a few pipes & had some wild tobacco for the few times i did not have stashed cans of roll your own. In making stone pipes & sweat lodges, I learned by trial & error about what rock types & in my area were suitable for heat/fire. Rock types then needed to be checked for fractures or abnormalities in their structure as best i could so that they not explode from moisture or flaws. Even lava rock explodes if you pick the wrong one. I was in an old house once & a white quartz crystaline stone the size of a loaf of bread popped from a flaw(only a few chips went flying). I am sure you shall select a suitable stone material for such a project if you try it(sounds cool).
or @ least more bullet proof than stock. Modding is fun for m
), but my 68 Firebird & 67 GTO were fun to mod though while I had'em.]I once lived on a volcanic isle. I found an old file in a hidden stash in the jungle of forestry. I proceeded to carve river stone. I made a few pipes & had some wild tobacco for the few times i did not have stashed cans of roll your own. In making stone pipes & sweat lodges, I learned by trial & error
about what rock types & in my area were suitable for heat/fire. Rock types then needed to be checked for fractures or abnormalities in their structure as best i could so that they not explode from moisture or flaws. Even lava rock explodes if you pick the wrong one. I was in an old house once & a white quartz crystaline stone the size of a loaf of bread popped from a flaw(only a few chips went flying). I am sure you shall select a suitable stone material for such a project if you try it(sounds cool).
Quick question..
Still rebuilding with silica, I know old school. I rebuilt a head with three pieces of 1mm and it's working pretty good. Would using 4 pieces make any difference, like with vapor production, flavor, etc? Thanks guys.
Still rebuilding with silica, I know old school. I rebuilt a head with three pieces of 1mm and it's working pretty good. Would using 4 pieces make any difference, like with vapor production, flavor, etc? Thanks guys.
Still rebuilding with silica, I know old school. I rebuilt a head with three pieces of 1mm and it's working pretty good. Would using 4 pieces make any difference, like with vapor production, flavor, etc? Thanks guys.
Nothing wrong in rebuilding with silica in my mind, if it works for you. If you wrap the coil around the wicks, 4 wicks could behave slightly differently. In general a bigger coil warms up slightly slower, but you can pull slightly longer drags without the wick getting dry. The performance depends on everything, so it's worth a try, if not for else than just to learn the difference. It might even help you find the perfect coil for you.
By the way, honestly and purely out of curiosity and perhaps stupidity on my part... About your signature. Why exactly is that called "freestyle"?
Thanks for the info. I actually tried it before I read your post and wasn't too thrilled. 3 pieces work better for me. Ha at least I tried so I'm not curious anymore. Freestyle is a rare type of music that was mainly popular in the late 80's early 90's. There is a link to one of the songs on my signature. Oh and it's cool you are in Finland. My mom moved to the US when she was 18 from Kuopio.
.
Quick question..
Still rebuilding with silica, I know old school. I rebuilt a head with three pieces of 1mm and it's working pretty good. Would using 4 pieces make any difference, like with vapor production, flavor, etc? Thanks guys.
I would probably use 5 or more strands of that, but I like a slightly large wick. It will likely atomize more liquid, and wick better, IMO.
If I remember correctly, you asked about using 3mm diameter wick some time ago. That could be a little difficult to get into the slot without some trouble. I'm not sure. But, something to think about: A 3mm diameter wick has approximately 9 times the cross-sectional area of a 1mm diameter wick, so 3 strands of 1mm does not even come close to a 3mm wick in terms of wicking ability.
The 1mm wick is more flexible in what you can do with it. When you put several strands together, you end up forming more 'capillaries' between the strands, where they don't quite fit together tightly because of their shape, and that should probably help it wick better. I'd guess that 6-7 1mm strands would probably be similar to one 3mm strand in finished diameter, and would probably work well at 8-9 watts or more with a good coil (using a larger than normal diameter wire.)
The good thing about using multiple smaller strands is that you can try out several wick sizes easily, and zero in on your ideal setup.
Thanks LS,
That makes a lot of sense. I've been messing around with it too much today making three different wicks. I'm done for the day lol. I'll experiment more later with different configurations. Part of me wants to get away from the nova with maybe an aga-t which can use both silica and ss mesh. The last wick I made registered at 1.8 which ...... me off a bit because I prefer 2+ the luck.
That makes a lot of sense. I've been messing around with it too much today making three different wicks. I'm done for the day lol. I'll experiment more later with different configurations. Part of me wants to get away from the nova with maybe an aga-t which can use both silica and ss mesh. The last wick I made registered at 1.8 which ...... me off a bit because I prefer 2+ the luck.
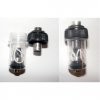
Hi, I been trying to read through all the posts (almost impossible) and gathering info on how to rebuild my Vivi Nova. Here is what I got:

That is what I call perfection!
That is what I call perfection!
Hi, I been trying to read through all the posts (almost impossible) and gathering info on how to rebuild my Vivi Nova. Here is what I got:
View attachment 151705
That is what I call perfection!
Nice work! What are the specs? Cotton? Kanthal/Nichrome? Twisted Legs? Just curious what you found in the thread that worked out so well for you.
Nice work! What are the specs? Cotton? Kanthal/Nichrome? Twisted Legs? Just curious what you found in the thread that worked out so well for you.
I forgot about that
I used Aunt Lydia's bamboo thread, size 10 - 4 or 5 threads
Kanthal A1 32 gauge - I think 5 loops?
Twisted legs - I didn't want to spend even more money on a NR wire lol
And if my multimeter reads correctly, the total resistance is of 2.8 +/- 2 (My multimeter is giving me problems at the reading time, I think I should get the croc ends :S)
I've been playing around with rebuilding these for some time now, with the goal of having a cotton wick instead of silica. I finally have a process that, so far, has reliably worked for me that I thought I'd share. Sorry for the long post.
What you'll need:
1) 100% cotton yarn, #4 size (I use white Peaches and Cream from Wal-Mart)
2) Kanthal A-1, 32 gauge for the coil
3) A small piece of spare Kanthal, say 3 inches long, to act as a needle threader.
4) A 2-56 screw. You can get these as pushrods or pushrod ends at a hobby store, especially ones that specialize in RC airplanes.
5) A vise is useful to hold the screw/threaded end to free up both hands for wrapping the coil, although not totally required.
6) a Bic lighter (or equivalent).
7) A straightened-out small paper clip, or a relatively small sewing needle.
First, boil your yarn for at least 20 minutes or so, changing the water a few times. Allow to dry.
Take your small piece of spare Kanthal, bend it it half, and twist half of it together tightly. This will make a loop, that looks similar to, well, a sperm (we're all over 18, right? ). You'll use to thread your cotton yarn through the coil... in essence, a cheap needle threader.
Cut 4-5" of Kanthal from the spool, and run the lighter under the length of it a few times.
Using the 2-56 screw, tightly coil the Kanthal around it, using the threads as a guide. Don't miss any threads, as you want the coil to be tightly and evenly spaced. 5 wraps equates to about 2.4ohms. You want both ends to be pointing down when you're done.
Holding and pulling the ends straight down very tightly, while the coil is still on the screw, heat the coil/screw with the lighter for a few seconds. This will "set" the coil. Once cooled down, "unscrew" the coil off the screw.
Cut a 2-3" piece of your pre-boiled yarn, and separate the 4 individual threads of the yarn.
Feed the ends of the (now separated) threads through the loop of your needle threader, then double the yarn back. You only need to double-back maybe 1/2" or so of it, just enough for you to pinch so it doesn't slip out of the loop of the needle threader.
Pinching the yarn tightly where it is doubled back, feed the twisted end of your needle threader through the coil, then pull the coil onto the yarn. It will be a bit tight until it clears the "double backed" section, then will slide easily.
Center the coil roughly, remove your needle threader.
Slide the paper clip/needle through the coil, parallel to the yarn threads.
Grab your empty Nova head, feed the coil ends down through it until the paperclip down to the very bottom of the slots. This paperclip will help you keep the coil centered vertically as well as horizontally while you assemble the bottom end.
Assemble the grommet and push-pin as normal, using the paper clip to keep everything centered. I usually push down on the paper clip with one hand (holding it tightly against the bottom of the slots) while I push up on the push-pin with the other. This prevents the leads from slipping and popping the coil/wick up out of the head.
Remove the paper clip, center your wicks, do any last-minute adjustments to the coil (center it in the head, make sure they don't touch each other or the outer head), screw onto the base, and cut the wicks to the correct length.
Vape away! You will notice slight cottony/muted flavor for about the first 20 vapes or so, but the flavor will come through very cleanly after about 1/2 tank. Longevity depends on the juice... I have one that is still going strong after 3 weeks of pretty constant vaping (it's my favorite juice at the moment), while another juice (RY4) kills them in about 1 to 1.5 weeks.
Hope this helps...
What you'll need:
1) 100% cotton yarn, #4 size (I use white Peaches and Cream from Wal-Mart)
2) Kanthal A-1, 32 gauge for the coil
3) A small piece of spare Kanthal, say 3 inches long, to act as a needle threader.
4) A 2-56 screw. You can get these as pushrods or pushrod ends at a hobby store, especially ones that specialize in RC airplanes.
5) A vise is useful to hold the screw/threaded end to free up both hands for wrapping the coil, although not totally required.
6) a Bic lighter (or equivalent).
7) A straightened-out small paper clip, or a relatively small sewing needle.
First, boil your yarn for at least 20 minutes or so, changing the water a few times. Allow to dry.
Take your small piece of spare Kanthal, bend it it half, and twist half of it together tightly. This will make a loop, that looks similar to, well, a sperm (we're all over 18, right?
). You'll use to thread your cotton yarn through the coil... in essence, a cheap needle threader.Cut 4-5" of Kanthal from the spool, and run the lighter under the length of it a few times.
Using the 2-56 screw, tightly coil the Kanthal around it, using the threads as a guide. Don't miss any threads, as you want the coil to be tightly and evenly spaced. 5 wraps equates to about 2.4ohms. You want both ends to be pointing down when you're done.
Holding and pulling the ends straight down very tightly, while the coil is still on the screw, heat the coil/screw with the lighter for a few seconds. This will "set" the coil. Once cooled down, "unscrew" the coil off the screw.
Cut a 2-3" piece of your pre-boiled yarn, and separate the 4 individual threads of the yarn.
Feed the ends of the (now separated) threads through the loop of your needle threader, then double the yarn back. You only need to double-back maybe 1/2" or so of it, just enough for you to pinch so it doesn't slip out of the loop of the needle threader.
Pinching the yarn tightly where it is doubled back, feed the twisted end of your needle threader through the coil, then pull the coil onto the yarn. It will be a bit tight until it clears the "double backed" section, then will slide easily.
Center the coil roughly, remove your needle threader.
Slide the paper clip/needle through the coil, parallel to the yarn threads.
Grab your empty Nova head, feed the coil ends down through it until the paperclip down to the very bottom of the slots. This paperclip will help you keep the coil centered vertically as well as horizontally while you assemble the bottom end.
Assemble the grommet and push-pin as normal, using the paper clip to keep everything centered. I usually push down on the paper clip with one hand (holding it tightly against the bottom of the slots) while I push up on the push-pin with the other. This prevents the leads from slipping and popping the coil/wick up out of the head.
Remove the paper clip, center your wicks, do any last-minute adjustments to the coil (center it in the head, make sure they don't touch each other or the outer head), screw onto the base, and cut the wicks to the correct length.
Vape away! You will notice slight cottony/muted flavor for about the first 20 vapes or so, but the flavor will come through very cleanly after about 1/2 tank. Longevity depends on the juice... I have one that is still going strong after 3 weeks of pretty constant vaping (it's my favorite juice at the moment), while another juice (RY4) kills them in about 1 to 1.5 weeks.
Hope this helps...
- Status
- Not open for further replies.
Similar threads
- Replies
- 5
- Views
- 1K
- Replies
- 10
- Views
- 23K
- Replies
- 5
- Views
- 1K
- Locked
- Replies
- 51
- Views
- 11K
- Replies
- 0
- Views
- 1K
Users who are viewing this thread
Total: 2 (members: 0, guests: 2)