• Locked
Black Note Nic Salt "What device do you use?"

If you use Black Note Nic Salt What device are you using? I am currently using a Voopoo V-thru 1.2ohm pods at 3% nicotine. I go back and forth between 5watts for a light cigarette and 7watts a full flavored cigarette. I notice the pods don't last. I know Black Note is different from other eliquid or nic salts since it's naturally extracted tobacco. So I was wondering if there's a better device or does black note just kill pods in general? Tell me something I don't know. Btw I came up with those 2 wattages 5 & 7 because I discovered that 8 watts is a true nicotine hit of the pecentage number. Example 8watts at 3% you are absorbing that amount. So at 7watts at 3% I'd be absorbing like 2.6% and at 5 watts I'd be absorbing like 1.8%.
  • Creative
Reactions: Izan

  • Locked
Closed/Sold Vandy vape pulse dual

Ok, first of all I have question. Did they ever fix the auto fire problem with the pulse duals. If so, I would very much be interested in finding on that was in pretty good shape. Cosmetic and function wise. I've scoured the internet trying to find a place that still has them in stock. Ignore this post I got my answer thanks.

  • Locked
For Sale THC Mike vapes blaze 26mm rta.

I have a like new mike vapes blaze rta. Gold in color. Had it less than 3 months and have used it sparingly. I have the box and all the original part. I broke the 2ml straight glass and I ordered new one from china and accidentally bought 5 of them. Lol so it comes with the 5ml bubble glass and 5x 2ml straight glass. Asking $30 for it. Authentic.

Attachments

  • IMG_20221105_213552159.jpg
    IMG_20221105_213552159.jpg
    3.4 MB · Views: 20
  • 16694339484698384297431641076412.jpg
    16694339484698384297431641076412.jpg
    939.3 KB · Views: 18
  • Like
Reactions: Nthome91

  • Locked
Hi I am new here. Names Cameron.

I'm a new user. Just registered. Takin the advice of the forum and introducing my self. Names Cameron. I quit smoking about 7 months ago. Started vaping one pod mods. Now I'm into rebuildable for the last three months. I have really basic building skills but improving. I've noticed I've seen to really gottn my wicking just right the last week or so. So that's cool lol. Just looking for a community to ask questions and discuss things. So, here I am. Attached a picture of my setup. Pulse v2 with a 28mm nightmare rda. Running dual claptons stainless steel in power mode. Im actually sad to say I think I fried the chip in my pulse the night before last temp control has worked since and it keeps overheating. I was out and my vape died no batteries so I went against my better judgement and charged with the USB for like 10 minutes And the chip got super hot. The mod hasn't worked right since. I've applied for warranty at vandy vape. I've only had less than a month. So hopefully I get it sorted out. Cheers

Attachments

  • 16694177693573655939720620468072.jpg
    16694177693573655939720620468072.jpg
    696.5 KB · Views: 8

  • Locked
Flash E Vapor VS Dual MTL RTA - Step back in time...

The Flash E Vapor VS Dual MTL RTA is an RTA which has been sold by FEV for a number of years now. Dating back to the tine of the tall MTL RTA's and roundwire builds with silica wicking, the tank has changed little since its first launch.

CHAPTERS

00:00 - Intro and specs
03:00 - Close Up
06:00 - Vape
09:00 - Thoughts

Rumble - Login to view embedded media
YouTube - Login to view embedded media

  • Locked
JOYETECH EVIO POD KIT review by hittman(not the same as the C2)

Here I am again. Back with yet another pod review for your viewing pleasure. This time I’m going to do my best to cover the Joyetech Evio Pod Kit not to be confused with the Evio C2 pod kit. The Evio has a 960mah battery which is a little larger than most other pods this size on the market. It has a maximum output of 17 watts which sounds pretty good for a smallish pod. This one takes about an hour to fully charge since it only has a 5V/1A charging rate. The pod included has a 3ml liquid capacity and has a slide to fill top fill system which I am looking forward to trying. I don’t think I have seen this type of fill system on a pod before. Very impressive. Also one more thing it has to its advantage is a 3ml liquid capacity compared to most pods on the market. Like the C2, the Evio pod claims that you can switch from MTL to RDL by rotating the pod. We shall see how that works out later.

zc17Ot5.jpg


VmAJoEK.jpg


WHAT’S IN THE BOX?

1* EVIO Pod Battery
1 or 2* EVIO Pod Cartridge 3ml (0.8ohm)
1* USB Type-C Cable
1* User Manual
1* Warranty Card

CtL5gKN.jpg


SPECIFICATIONS:

Size: 15*27*101mm (2ml), 15*27*106mm (3ml)

Battery Capacity: 960mAh

Pod Capacity: 2ml/3ml

Coil: Mesh 0.8ohm

Output Wattage: 17W max

Charging Current: 5V/1A (USB-C)

Filling System: Slide to fill

Color: Grey, Black, Blue, Red

KutYKFf.jpg


FEATURES:

1. From MTL to RDL

2. Innovative airflow-output sync control

3. Mesh coil for great flavor

4. Slide to fill

5. 3ml 0.8ohm pod

6. Type-C fast charging

7. 960mAh battery capacity

A2NS3qC.jpg


xrD7HZ5.jpg


RkRFdmP.jpg


sLjSaTu.jpg


INITIAL THOUGHTS:


The packaging for the Evio Pod is a black box with a very nice color picture of the actual device contained inside the box on the front and a series of 3d lines wrapping around the picture. Also some icons with features are listed on the right side. The back side of the box has the contents list, specifications, authenticity code, and a bar code with the color version listed. The sides of the box have social media icons and information listed on one side while the other side has the Joyetech name and the logo “Forward Thinking”.

1669396172158.png


1669396190554.png


Once opened, there is a plastic tray contained inside which has the Evio device with one .8 ohm mesh pod installed, a second .8 ohm mesh pod in a foil pack, a USB-C charging cable, user manual, and warranty card. There are actually two different kits available. There’s one with one pod and the one I received which comes with two pods. I like that Joyetech has offered both giving the user the option to save a couple bucks or to pop for the two pod kit. The pods are disposable and do not use replaceable coils like the Evio C2 did. There are also two different pods available in 2ml and 3ml capacities. I received the 3ml version. I would assume the 2ml version is to meet TPD requirements which is not necessary here in the U.S. where I live.

1669396224701.png


The Evio Pod kit is a bit different from the Evio C2 kit that I just reviewed before this one. I can honestly say that I like this one better than the C2 for a few reasons. First off, it is auto draw only so there is no button at all on this one. This prevents accidental firing when carrying it in a pocket. Next would be the increased battery size of 960mah versus the 800mah of the C2. More battery is always better to me. The Evio is a little thicker than the C2 and not quite as ergonomic but a trade I am more than willing to make. On the side with the Joyetech name, there is an indicator light on the very bottom that illuminates when taking a puff or charging the battery. The Evio Pod has the same indications for battery level as the C2 did which are as follows.

  • Green = 60-100%
  • Blue = 20-60%
  • Red = 20%
The Evio pod has a really cool design on both sides that reminds me of a stone walkway or something. On one side is the Joyetech name and on the other is the Evio Pod name. Just like the C2, the USB-C charging port is located on the bottom but this one has a little more surface area that is flat on the bottom so stands up better on a desk than the C2 does.

1669396258458.png


1669396276794.png


1669396435422.png


The pod opening on the Evio has the standard gold plated contacts to feed power to the coil and you might notice that like the C2, there are no magnets. The pods snap into the opening and are held in by the lips that stick out on either side so it takes a little effort to remove the pod. Luckily with the fill design of this one you won’t need to remove the pod very often. Also notice the airflow channel leading from the hole on the side of the Evio to the raised airflow sensor inlet. The pod has two different sized airflow channels on it to switch between MTL and RDL. I thought it was really nice that Joyetech opted to put an H and an L on the sides of the Evio to help the user keep track of which airflow type they want. So, like the C2, you insert the pod one of two ways depending on which type of vaping experience you would like. I feel like this one shows a little more difference between the two airflows than the C2 did.

1669396490781.png


1669396513165.png


1669396534124.png


The other things that made me like the Evio Pod better than the C2 is that it is a top fill design and the pod is clear instead of being tinted like the C2. You simply press on the side of the pod to slide it open and expose the fill port with the rubber gasket over the top. No need to pull the pod out to refill and you can clearly see the liquid level even when using clear liquids. It’s a little hard to see but there is a water drop shape on one side of the pod indicating which side to move the mouthpiece in order to expose the fill port.

1669396592961.png


BHwqBgh.jpg


FINAL THOUGHTS:

I have very much enjoyed testing the Evio Pod Kit. I really have no complaints on this one. I preferred the pod with the larger airflow and felt quite comfortable using it as an RDL device. The lower airflow side was still a loose MTL but like the C2, I could cover the hole with a finger and get a tighter MTL.

The flavor produced was pretty good for a pod device and the amount of vapor produced was enough to be satisfying. I used the Dinner Lady Purple Rain one shot for testing the Evio and felt like it did a good job of bringing out all the flavors.

So, here’s what I like about the Evio Pod. First up is the 960mah battery in a size field where most are around 800mah. More battery is more better! Next up is that they took the time to mark each side of the device with an L and H to make it more user friendly. The increased liquid capacity of 3ml is much appreciated where once again in the pod market it seems the majority are 2ml. Finally the thing I like the most is that it is top fill and you can simply slide the top open and fill the pod without removing it. I guess if there was one thing I would change it would be to include a sliding airflow control on the side instead of just flipping the pod to change airflow. I know I’m being demanding but you know what? Some other devices I’ve tested have it all and don’t think it’s too much to ask.

So, would I recommend the Evio Pod kit from Joyetech for you? With no regrets, I really would. It’s a little thick but still very pocket friendly and had no leaking or noticeable condensation while testing it. I’d like to thank Joyetech and Adela for sending the Joyetech Evio Pod Kit for this review. Thanks again to the readers for hanging in there until the end. Below is a link to the website if you’d like to look around.

EVIO Pod Kit | Joyetech Official Website
bJ35IH5.jpg

  • Locked
JOYETECH EVIO C2 POD KIT review by hittman

Hello and welcome back for another pod review. This time I’ll be taking a look at the Joyetech Evio C2 Pod Kit that was sent to me by JWEI in order to attempt to provide a fair and honest review. The C2 has an 800mah internal battery that can be charged in less than 30 minutes via the 5V/2A charging circuit. The 2ml Evio pod uses replaceable EN .8 ohm mesh coils. The pod can be rotated for switching from MTL to RDL. I’ve seen this pod rotation feature on a couple different pods and it works better on some than others so I’ll have to wait and see how well this one switches between the two. Many times what I find is that the MTL is fine but there isn’t quite enough airflow for a true RDL.

upPpM05.jpg


43lug7U.jpg


WHAT’S IN THE BOX?

1* EVIO C2 Battery
1* EVIO C Pod
2* EN 0.8ohm Mesh Coil
1* USB-C Cable
1* Warranty Card
1* User Manual

32FjF9Z.jpg


SPECIFICATIONS:

Size: 22.5*12.7*116.6mm

Battery Capacity: 800mAh

Pod Capacity: 2ml

Max Output: 18W

Charging Current: 5V/2A, USB-C

Color: Stellar Brown, Goblin Green, Purple Haze, Space Blue

7MRhx6q.jpg


FEATURES:

1. Optional MTL/RDL vaping

2. New updated version of Joyetech EVIO series

3. Upgraded CMF design

4. Adopts the newly upgraded EN 0.8ohm mesh coil

5. Open the silicon plug on the side to refill the pod

6. Two ways to vape: button triggered, draw activated

7. Type-C 2A fast charging

8. Battery indication lights

h4jHju2.jpg


M3CqdFu.jpg


UAn7f0e.jpg


0PwXyWl.jpg


ji2XiWx.jpg


kIwiX7e.jpg


INITIAL THOUGHTS:


As usual. I’ll start by taking a look at the packaging for the Joyetech Evio C2.The box for the C2 is quite colorful. The front has a nice color picture of the device contained inside along with the Joyetech and Evio C2 names near the top. The front and back have some pretty large warnings on both which I believe are required for the U.S. market but am not sure about that. I have seen similar warnings on other review samples. The back side of the box has the contents list and some specifications as well as the company information.

The sides of the box have the authenticity code as well as Joyetech company information and a couple of icons with short feature descriptions. The one you’ll want to pay attention to is the one that says dual airflow which I’ll talk about later. You can also see part of the flame label on the corner of the box pointing out the infamous black mesh coils included in the box. This is the same sticker that was on some of the Eleaf samples that I have previously reviewed recently.

1669394874282.png


1669394904318.png


Once you slide off the outer sleeve of the box then the C2 is visible with the pod installed one it. There is not a coil installed in the pod when you receive it. To the left side is a white skinny box that contains the two .8 ohm black mesh coils rated at 13-18 watts, user manual, warranty card, and a rather short USB-C charging cable to charge the 800mah battery. I’m glad it came with two of the .8 ohm coils. This resistance seems to be my favorite for most pods. I have to say that I really like the color fade on the C2 samples I received. I received the space blue and the purple haze versions. They are very shiny and attractive looking. I have not noticed that they really leave fingerprints despite being so shiny.

The C2 can be button fired or used as an auto draw device. I have different devices before where you could disable the fire button and only use auto draw but the C2 does not have this feature. In the center of the lower portion of the fire button there is a light indicator that illuminates when you activate the device with either process. It also illuminates when you charge the C2. Besides this, the light indicates the battery levels which are as follows.

  • Green = 60-100%
  • Blue = 20-60%
  • Red = <20%
As you can see in the picture below, the Joyetech name is printed on the lower portion of the front of the device in a vertical orientation. The opposite side has the EVIO C2 name printed on it. I don’t really feel that it’s necessary to provide a picture of that side as there is no other interest on that side. The skinny sides of the C2 have vertical grooves cut into them and on one side there is a single airflow inlet hole. Take notice of the side containing that hole because it will come into play shortly with the dual airflow I mentioned earlier.

1669394947666.png


1669394969491.png


1669394990382.png


The USB-C charging port is located on the bottom of the C2. The claim is that the C2 has a 5V/2A charging rate which should allow it to charge in less than 30 minutes. Using a 65 watt adapter and my Klein USB tester, the highest initial reading I got was 1.7A and it leveled out quickly to 1.4A. However, the battery was not fully drained when I tested it. I’m not sure if that would make a difference.

1669395032075.png


The pod opening on the C2 has the standard two gold plated spring loaded contacts to power the coil in the pod. At the top you can see the grooved area that leads to the hole in the side of the device and also ends at the hole for the airflow sensor. This is where the dual airflow that I mentioned earlier happens thanks to two different sized holes in the bottom of the pod on each end that are visible in the last picture below. So depending on which way you insert the pod then you will notice a difference in the amount of airflow available. It is noticeable but honestly is not a drastic change between the two.

In the second picture below you can see that the Evio C2 pod is fairly dark tinted and this combined with the design of the center of the pod made it somewhat difficult for me to see the liquid level when filling the pod with a clear liquid. The pod is a side fill and normally I do well filling that style but had a bit of difficulty with this one. I ended up overfilling the pod a couple times and when I closed the rubber plug it pushed some liquid out of the bottom of the pod. I’m not a fan of having to clean up messes. It would have been a much better experience if the pod was simply clear. I know that manufacturers tint them for aesthetic reasons but I personally care more about functionality.

In the third picture below you can see the side fill plug and port. There is an arrow molded into the plug to show you which side to pull up on to fill the pod. You might have notice that there are no magnets on the bottom of this pod or in the pod opening on the C2. The pods snap into place rather securely and you really have to get a good grip on it to remove it for filling. You’ll never have to worry about this pod coming out accidentally.

1669395071077.png


1669395100070.png


1669395141208.png


1669395167307.png


FINAL THOUGHTS:

Since the C2 came with two of the same coils instead of two different resistances, I filled the pods for both samples I received with the same liquid and inserted one pod so that I got less airflow and the other one with the larger airflow opening toward the inlet hole. The one with the least amount of airflow is still what I would call a loose MTL. However, with just like with many pod devices, I could hold the C2 so that my finger or thumb covered the side airflow hole and then got what I consider to be a proper MTL vape. The second device with the larger amount of airflow for me hit that awkward spot where it’s too loose for MTL and a bit too restricted for RDL but found if I let a little air in through my lips while taking a puff then I could do a comfortable RDL. Despite this I did really like the shape and feel of the mouthpiece for the pod.

As far as the flavor and output level of the C2, I found it acceptable but not impressive. Also I do wish there was a way to disable the fire button when pocket carrying the device. While testing the C2, I pocket carried it in my front shirt pocket at work and a couple times accidentally fired the device while leaning into something while working. If I could disable the fire button it would not have been an issue. I’ve seen other pods do it so know it is possible.

So, would I recommend the Joyetech Evio C2 Pod kit for you? Maybe. The new black mesh coils do deliver good flavor and the amount of vapor is respectable but I feel like there could be some improvements made to the device. A proper airflow control, top filling, and the option to disable the fire button would be improvements that I would recommend. All of this being said, the Evio C2 does have a very nice appearance and does work but just doesn’t do a great job of fitting my vaping style. I know everyone is different and it may be the greatest device ever for others.

I’d like to thank Joyetech and Adela for sending the Joyetech Evio C2 Pod kit samples for this review. Thanks to the readers for reaching the end of another one of my reviews. I hope it wasn’t too long. Below is a link to the website for you.

EVIO C2 Kit | Joyetech Official Website
gU5kr5l.jpg

  • Locked
GEEKVAPE AEGIS T-200 TOUCHSCREEN KIT REVIEWED BY BIGBOB2322

  • Locked
Giveaways! Win VOOPOO DRAG 4 Launched on 28th November!

Dear all,

VOOPOO DRAG 4 is Coming!

Have you ever used VOOPOO DRAG, DRAG 2, or DRAG 3 and their derivative editions? What do they impress on you most? Fast Ignition? The 177W Max wattage output, the Fit Mode, or the excellent atomization performance?

1669387821940.png


Just leave the product name and your comment! VOOPOO will randomly choose TWO of you and give each of you one DRAG 4 that will be launched on November 28th! Let’s retrospect the previous DRAG MOD and look forward to the DRAG 4 together!

Notes:

1 You must be 21 or older.

2 The contest will end on 29th November.

3 We will choose the winners randomly.

  • Locked
VOOPOO Infinity Go Go Go! Create Your Own Artwork and Win Prizes!

Dear All,

Come to the VOOPOO official website activity page, create your own artwork on DRAG H80S and support your favorite team!

Participation gift, match gift, and $5000 grand gift for the final, lots of chances to get gifts!

The link to this activity: INFINITY-GO-VOOPOO VAPE Spark Your Life


1669370312918.png
  • Like
Reactions: hittman

  • Locked
Wotofo Profile X RTA Review By Frenkyou

Wotofo-Profile-X-RTA-1.jpg


Hi, Today let's take a look at Wotofo Profile X RTA. In this Test I will examine each of the characteristics that distinguish this item. I hope that at the end of this reading you can understand this product, and therefore decide whether to invest in it or not. As always, my opinions are free and based on my personal experience.
• Enjoy the reading.

► Before starting, let's see the main characteristics declared by the manufacturer:

• 1. Creates a large amount of vapor and provides a rich and smooth flavor.
• 2. It is the only top airflow RTA in the market that fits all Profile meshes and is compatible with both single and dual strand coils simultaneously
• 3. A whopping 8ml capacity when used with bubble glass.
• 4. Quarter-turn top fill system with dual low fill ports for more comfortable filling.
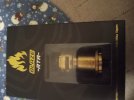
Wotofo-Profile-X-RTA-2.gif


► Packaging:
The package with black / green colors and white writing has a window on the front to see the internal content, you can also read the product name (Profile X), the website and the manufacturer by Wotofo. On the back side of the box are listed; The warnings, the place of origin of the product, the legal logos and trademarks. On the other sides of the packaging are; the packing list, a barcode, color indication (Black), the check security code and other identifying writings.

Wotofo-Profile-X-RTA-3.jpg


Wotofo-Profile-X-RTA-4.jpg


► Packing List:
• 1 X Profile RTA
• 1 nexMESH Chill A1 0.15Ω
• 1 nexMESH Turbo A1 0.13Ω
• 1 nexMESH Extreme A1 0.16Ω
• 2 Framed Stapled Clapton Ni80 0.33Ω
• 3 Cotton strips 6mm thick
• 2 strips of cotton 3mm thick
• 1 Bubble Glass 8ml
• 1 Mesh bending tool
• 1 Phillips screwdriver
• 1 bag of accessories
• 1 User Manual

Wotofo-Profile-X-RTA-5.jpg


► Specifications:
• Dimensions: Φ28*43.7mm (with drip tip and 510 pin)
• Drip Tip Material: 810 colored resin
• E-liquid capacity: 5ml Standard Edition PCTG tube, 2ml TPD edition, 8ml bubble glass (included in the package)
• Deck diameter: Φ28mm
• Type of coils supported: Single Mesh, Single Wire, Dual Wire
• Type of airflow: Top adjustable
• Pin insulation material: German PEEK
• Deck insulating material: Ceramic
• Thread: 510

Wotofo-Profile-X-RTA-6.jpg


► Available Colors:
• Black
• SS
• Gunmetal
• Gold
• Blue
• Rainbows

Wotofo-Profile-X-RTA-7.gif


► First Impressions:
The Profile X RTA is the result of meticulous engineering and continuous manufacturing improvement to increase the performance of the original Profile RTA.
The deck of the new Profile X RTA can accommodate different configurations of Coils; Single mesh, dual and single wire coils. With the supplied bubble glass, the maximum capacity is increased up to 8ml. Wotofo has always built its devices in a qualitative way to satisfy its customers. The upper structure in stainless steel gives the Profile X RTA the necessary structural solidity. The Profile X RTA comes in multiple color options such as; steel, black, gunmetal and rainbow. When choosing a Tank RTA it is important to first evaluate its characteristics in order to choose the correct Mod to match it. For this test I used MDURA 230W which is a powerful and captivating dual battery-Mod from Wotofo.

Wotofo-Profile-X-RTA-8.jpg


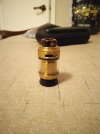
For this test I received from Wotofo a nice example of Profile X RTA in the Black color version, the paint has nice glossy reflections. The top cap has a perimeter in the shape of a "bolt head" but you don't need a wrench to unscrew it, rather it is rather a 1/4 turn counterclockwise to access the two huge filling slots. The 810 drip tip is set in a slightly raised collar and its red color with black streaks goes well with the color of the tank. It is a Top AFC with rather small height dimensions, and in width the bubble glass is imposing but does not disfigure the design at all. There are some white writings that stand out well against the black background, at the top you can read "Profile X Wotofo" in small but sharp font, and in the middle (through the glass) you can see the Wotofo logo.

Wotofo-Profile-X-RTA-9.jpg


► Honeycomb AFC:
At the top, there are two rows of 18 holes for each side (total 36 holes), and this kind of top airflow structure prevents e-liquid from leaking. Counterclockwise rotation of the control ring progressively closes the flow and clockwise rotation opens the flow.

Wotofo-Profile-X-RTA-10.gif


The exploded view of Profile X RTA highlights some details, look at the slots for filling as they are positioned below! This solution is very clever because it allows you to drop the liquid inside the tank with any bottle, you could even fill it with a glass, and without wasting even a drop of liquid. As I anticipated, the top cap unscrews/screws easily with a 1/4 turn rotation, this is the classic "bayonet" system. The air control ring has rotation stops and is quite fluid and precise to operate, and can also be disassembled for periodic cleaning operations. The upside-down deck shows a threaded connection with a rather protruding but fixed pin, around which there are numerous intification writings. The one-piece central structure has the internal shape of a hemispherical dome which is flanked by two large slots for the inflow and air extraction. The inside of the bell is threaded to join solidly to the deck.

Wotofo-Profile-X-RTA-11.jpg


Wotofo-Profile-X-RTA-12.jpg


► Builds:
The Profile X deck has a configuration for Single Mesh, the Phillips screws and a pair of clamps fix the mesh correctly in the designated point, it is also possible to insert one or two traditional type coil of wires. In the kit there are 3 different types of mesh and two traditional wire coils, I tried them all and also in single wire coil configuration, so I will describe my impressions. Before starting the construction it is necessary to take the tool supplied for bending the mesh coils. After preparing and bending the mesh coil, you need to proceed carefully so as not to deform it, then you need to insert it into the deck and tighten the clamps. The white ceramic plate is spring loaded and when you insert the cotton laces (present in the package) you need to press the ceramic plate down and insert the cotton lace at the same time. The pushing action of the spring lifts the plate and pushes the cotton to fit snugly against the mesh. The liquid draft buttonholes are huge, however it is necessary to reduce the size of the cotton whiskers to be able to insert them comfortably in the buttonholes, the lower part of the cotton whiskers I cut them diagonally leaving the upper part intact and in close contact with the outer edges of the network. Unfortunately, describing this procedure is complicated, and if you are inexperienced, a video of the operation would solve many doubts. Youtube is full of useful videos of how to proceed to correctly position the cotton inside a mesh coil.

Wotofo-Profile-X-RTA-13.jpg


Wotofo-Profile-X-RTA-14.jpg


► Vaping Test:

• nexMESH Extreme A1 0.16Ω:

After some tests I preferred to use this coil at 52W of power, I noticed that with higher powers the absorption of the liquid struggled to keep up with the needs of the cotton and the coil. With the vents closed at 50% I found my sweet spot experiencing good flavor and quite interesting vapor production.

Wotofo-Profile-X-RTA-15.jpg


• nexMESH Turbo A1 0.13Ω:
The low resistive value of this coil would need a very high selected power, however I had to "settle" for 60W because once again, raising the power too much, the correct feeding of the cotton was in crisis. However with this power (60W) the activation is instantaneous with a very fluid delivery of the steam and with a slightly better flavor than the previous one. Clouds are consistent and again I selected 50% AFC aperture to get just the right amount of warmth.

Wotofo-Profile-X-RTA-16.jpg


• nexMESH Chill A1 0.15Ω:
Unlike the previous coils (in steel) this one is in Kanthal A1, and is reactive in ignition even with relatively low selected powers. Initially I received some dry-hits because I had left the "shoulders" of the cotton too low (as in the photo), after having raised the shoulders of the cotton putting them in close contact with the mains I was able to select 50W of power. So after solving my mistake I was very happy. The clouds are thick and creamy, and the flavor is perhaps the best compared to the previous nexMESH's in steel.

Wotofo-Profile-X-RTA-17.jpg


• Single Clapton Coils:
I initially tested a 3.5mm inner diameter coil, but due to the large chamber size, the flavor was rarefied and below average. Then I rewound the resistor onto a large 5mm diameter tip. Things immediately started to work out much better. With 40W of power and with this configuration the Profile X has nothing to envy to other tanks that are designed for exclusive use with single wire coil .

Wotofo-Profile-X-RTA-18.jpg


• Dual Framed Stapled Clapton Ni80 0.33Ω:
The final resistive value settled at 0.12Ω. I used these double coils with a power between 65 and 75W. As I expected this is a hotter type of vape, and it stays hot even with the AFC wide open. The amount of clouds and quality of flavor are less impressive than setups with Mesh coils. However in this case the performances do not fear comparison with other RTA tanks born and developed for the classic use with coiled wire coils.

Wotofo-Profile-X-RTA-19.jpg


► Final Conclusions:
Undoubtedly Profile X RTA is a well-built tank, decidedly cute and with a large liquid capacity, especially if it is combined with the supplied bubble glass. The top air adjustment with rotating ring is simple and effective, moreover the Top AFC forgives any cotton positioning error avoiding losses. There are several possibilities to regenerate the Profile X RTA; it also works well with traditional coils, but this is a specific tank for Mesh Coil and it is with these configurations that Wotofo's new product offers the best performance, just what you were looking for.

I would like to thank Wotofo for providing me with the Tank. Hope this review was helpful for anyone who wants to buy Wotofo Profile X RTA.

Thanks for reading.

Wotofo-Profile-X-RTA-20.gif

  • Locked
Review: Kingston Zero Disposable Hot In UK

The kingston zero disposable is a disposable kit that provides 3500puffs. The pod is pre-filled with 10ml of e-liquid for you. The e-liquid cannot be refilled. There is a built-in 1500mAh battery, which can basically maintain the battery life of your electronic cigarette for a day. If your battery capacity is exhausted, you can also solve it by charging it.

If you are a fan of nicotine free vape, then this e-liquid with 0mg nicotine concentration will be very suitable for you. In addition to concentration, another user is most concerned about the taste of disposable cigarettes. I think that if a taste can be deeply rooted in the hearts of the people, it will be a great plus for the brand and will attract more loyal users.

Provides you with 20 flavours, combining the taste of fruit, ice, drink and menthol. Kingston Zero cheap disposable vape is an inhalation-activated device. Apart from the need to charge your hands, there are basically no other issues that will bother you.
kingston-zero-disposable.jpg


Features
• 0mg Nicotine Strength
• 20 Kinds Of Flavors
• Rechargeable Battery
• 1500mAh Built-in Battery
• Pre-filled 10ml E-liquid
• 3500 Puffs
• Inhale-active

The vape black friday deals event was officially launched during 11/21-11/30. There are various e-cigarette promotions once a year. If you miss it, there will be nothing. I believe you will gain something.

And this newly launched pod mod kit also deserves your attention https://vapesourcing.uk/lost-vape-thelema-mini-kit.html.

You may also in fond of :
caliburn a2s review

  • Locked
Hi! I am THE most stupid vaper in vape history, though I learned a few things.

I live in Edmonton, Canada. I touched down to vaping March 2018 after buying a Smok G-Priv with a tank. Back then there was still a lot of sugar in the vapes so I burned out coils after a few puffs. I decided to try out an RDA, not actually understanding what "dripper" means for FOUR YEARS!!! I ended up with a couple Apocalypse RDA clones off of Fasttech. I though they must be the "best", but they were very loose and leaky. For FOUR YEARS I put up with leaks, kleenex, wet rags and towels. I thought that a loose cap and removing it each time was the optimal method of refreshing the cotton and coils with a unicorn bottle. I had figured out how to do DIY juice making, although I'm kind of lame and prefer shake and vape. I got sick of the mess from the Apocalypse all over my desk... but it took FOUR YEARS! A drop of e-juice even destroyed one of my favorite computer mice making it unable to scroll. The stupid Apocalypse would often spit out fire and leave me with burns on my lips like cold sores. Two or three years back I had bought an original "Drop" RDA, but dismissed it because it was "too tight". Finally I started getting mad, and bought some 510 curved tips to avoid burns. FINALLY I got some sense into me and loaded up the Hellvape? Digiflavor Drop RDA, and the leaks and mess were gone. I only had to use the unicorn bottle to drip into the 810. It took me FOUR YEARS thinking that a leaky Apocalypse clone was the real deal. I may be one if the THE most stupid vaper in all history. I just wanted to share this short story of how stupid I have been. After using the Drop RDA I have had NO mess, and everything pretty much works great. I ended up ordering a Recurve V2 and a SRPNT yesterday to try them out. I can't believe how stupid I was to constantly mop up juice all over the place - and spitting all over the place from the Apocalypse. FINALLY I learned that you're just supposed to drip the damn juice through the drip tip. I guess I was temporarily misled because I was adding sweetener to my DIY mixes - needing frequent cotton changes. But e-juice is really sweet enough as it is! I'm posting because I just needed to get this off my chest! Four years of STUPIDITY and one unused Drop RDA fixed everything! I can't believe it!

  • Locked
Wow! This is RTA or RBA?Come explore with me!#RTA#RBA

RTA or RBA?Hazard RTA by Across Vape

The design concept of the HAZARD RTA is derived from Bio Hazard gas masks with the bridge design looking similar to side filters . The tank is not only compatible with our bridge, but it’s also compatible with most BB bridges on market.

Login to view embedded media
  • Like
Reactions: hittman

  • Locked
NOVO BAR AL6000 Shines at Las Vegas MJBizcon Show

NOVO BAR, a renowned vape brand, showcased its new product AL6000 at the 2022 Las Vegas MJBizcon Trade Show, that took place this year between Nov 16 and 18. This year’s Las Vegas MJBizcon Trade Show attracted smoke and vape shops, dispensaries, glass blowers, online marketers, and cultivation product & service industry professionals from around the world.

Founded in 2020, NOVO BAR is a disposable vape brand designed for the US market. It is committed to using industry leading technologies to provide customers with a more extreme taste and a better atomization experience. With the motto successfully ‘making ultimate taste better’, the brand is relatively new on the market. Nevertheless, NOVOBAR has seen healthy growth, and it has made a strong breakthrough with its new product, the AL6000.

AL6000, designed by the well-established vape company SMOK, is produced based on the demand for large-mouth disposable vapes in the US market. It has attracted the attention of the industry with its exquisite design and excellent performance.

AL6000 is intended to redefine the meaning of the ‘ultimate flavor’.It keeps you clear about the remaining battery life and e-liquid capacity with battery&e-liquid indicator,and it brings you an experience you won't find in any other disposable vape. It’s designed to please your taste buds, with the rechargeable function and the pre-filled e-liquid of 13ml able to deliver up to 6000 puffs.

The meshed coil is the key as to why the AL6000 can generate such amazing flavors. With an airflow control function, AL6000 can cater to many different vaping preferences.

Main Features of AL6000
Rechargeable
13ml pre-filled e-liquid & up to 6000 puffs
E-liquid indicator & Battery life indicator
Size in 78* 42* 25mm
Built-in 650 mAh battery capacity
Meshed coil & adjustable airflow
1e26PMOkLzt3NErzngLlTmKqMmAX.jpeg

The AL6000 grabbed the attention of many vape enthusiasts, retailers, wholesalers, and distributors, who came by the NOVO BAR booth for product testing at the MJBzicon. With an emphasis on innovation, great flavors, and top quality, it’s easy to see why the AL6000 has proven so popular.

As a star product of NOVO BAR, the AL6000 surpasses other typical disposable vape brands in performance and is well placed to be at the forefront of the fast-developing disposable vaping industry.

In the future, NOVO BAR will continue to focus on consumer needs, carry out a diversified product line, create high-quality products for all vapers around the world, and accelerate the development of the vaping industry.
微信图片_20221122163900.jpg

For more information on the product, please visit
novobar.com

  • Locked
GEEKVAPE AEGIS T-200 TOUCHSCREEN KIT REVIEWED BY BIGBOB2322

  • Locked
ELEAF iSTICK i80 KIT WITH MELO C TANK review by hittman

I’m back once again with another review for you. I was sent the Eleaf iStick i80 mod kit by JWEI in order to provide you with another fair and honest review. The i80 is the big brother of the iStick i40 that I reviewed a short time ago. This one has a maximum output of 80 watts and has an internal battery rated at 3000mah and is charged via the 5V/2A USB-C charging port. Included in the kit is the Melo C tank which has a liquid capacity of 5ml and uses the EC2 series coils. The two included in the kit come in at .3 and .5 ohm resistance. Maybe it’s just me but for some reason I just don’t see many .5 ohm coils any more. I think that resistance used to be more popular. The Melo C uses a slide to fill system. I tend to like these since I don’t have to find a place to sit the top cap down while filling the tank.

ix9jVc9.jpg


PsLgs6X.jpg


WHAT’S IN THE BOX?

1* Eleaf iStick i80 Mod
1* Eleaf MELO C Tank
1* Eleaf EC2 0.5Ω Coil
1* Eleaf EC2-M 0.3Ω Coil (Installed in the tank)
1* USB Type-C Cable
2* User Manuals
1* Warranty Card

P1n58Ms.jpg


SPECIFICATIONS:

Product Size: 36*29*134.5mm

Battery Capacity: Built-in 3000mAh battery

Output Wattage: 1-80W

Charging Current: 5V/2A (USB-C)

E-juice Capacity: 5ml (Standard)

Filling: Top filling

Fit For: Eleaf EC2-M 0.3Ω Coil and EC2 0.3Ω/0.5Ω Coil

Color: Black, Green, Brown, Blue, Red

gMQRcvy.jpg


FEATURES:

1. Composed of iStick i80 Mod and MELO C Tank

2. Built-in 3000mAh battery with 80W max output

3. 5ml e-juice capacity, easy slide-and-fill system

4. Fit for EC2-M 0.3Ω and EC2 0.3Ω/0.5Ω Coil

5. Equipped with smart chip inside for better use

6. Compact and ergonomic, comfortable to hold

Pz6ugyl.jpg


nASo7aR.jpg


imNkPw2.jpg


iWF4ZMd.jpg


7eRxYrI.jpg


INITIAL THOUGHTS:

If you’ve seen my last two reviews then you’ll recognize the packaging on the iStick i80. When I first received the package with all these different samples, I thought I had received several of the same one but then noticed the different sizes of the boxes and took a closer look to discover that the FlasQ, i40, and i80 were in fact different devices. The packaging once again is the black box with the large green symbol and a small picture of the device on the front. Once again one side shows the contents list, specifications, and company information while the other side has the authenticity code and some icons highlighting a few features. The included tank uses the EC2 series coils instead of the GTL coils seen in my last review. As far as I know there aren’t any black coils for this one.

1669308450567.png


1669308477587.png


Much like the i40, the i80 sits in a foam insert with the Melo C tank above it. You might notice the little pull strap at the top above the tank. That’s to make it easier to lift the insert so you can get to the rest of the contents that are underneath which include a .3 ohm GTL coil rated for 30-50 watts and the .5 ohm coil rated for 30-100 watts. I find it strange that the .5 coil has such a large wattage range. I never go anywhere near 100 watts in my normal usage. Also under the insert there are two user manuals, a warranty card, and a USB-C charging cable.

1669308556719.png


The i80 has a 3000mah internal battery with a charging rating of 5V/2A. Theoretically you should be able to fully recharge in about an hour and a half if you have a wall wart that will deliver 2 amps of power.

As you can see below, the vinyl like material on the i80 wraps around the entire body continuously only exposing the metal edges of the mod around the exterior of the mod. There are no names or branding at all on the colored portion of the mod.

1669308585873.png


The bottom of the mod does have the iStick i80 name on it along with a single battery venting hole. The top of the mod seems to have the same 510 connection plate as the i40 with the four grooves cut in the plate as well as the same shaped gold plated spring loaded center pin. The top also has the Eleaf name which is the only other branding besides the bottom.

1669308617544.png


The front of the i80 has a large square fire button near the top followed by the OLED display, + and – buttons, and finally the USB-C 2A charging port on the bottom used to charge the 3000mah internal battery. In theory, if you have a charger that will supply a consistent 2A of power then you should be able to charge the battery entirely in about an hour and a half. The OLED display is a simple display much like the i40 had. It only shows the Set Wattage, Battery level indicator, Coil resistance, Output Voltage, and Amperage while firing. The i80 does have what I would call a modified Smart mode. It will sense the resistance and change to a recommended setting. You can change the setting and once you have fired the mod twice then it will remember that setting. The button operation for the i80 is as follows.

  • Press the fire button 5X to turn the mod on/off
  • Press the fire button and the + button to enter the Set menu where you can choose from Exit, Sub parameters, Stealth, Preheat, Version, Battery, Coil, and TCR
  • Press the + and – buttons to lock the wattage adjustment buttons but the mod will still fire
  • Press the fire button 3X to enter the menu where you can choose from VW, Bypass, TC-Ni, TC-Ti, TC-SS316, TCR-M1,2, or 3
To me the Set menu gets a little confusing because it uses symbols instead of words and the display isn’t that big so for my old eyes it’s hard to tell what you are selecting. I’m sure if you used the mod long term then you would get used to it. The i80 does have some built in protections and has a 10 second cutoff. I personally couldn’t imagine taking a 10 second puff but maybe someone could.

1669308664540.png


The tank included in the i80 kit is the Melo C tank. This tank uses the EC2 series coils and as I mentioned earlier it comes with one each of a .5 and .3 ohm coil. The EC2 coils thread into the base and thread into the chamber. This is something I haven’t seen in a long time. Most coils I see these days are simple push in coils. Nothing wrong with threaded coils it’s just odd to see them these days. It will hold 5ml of liquid with the standard kit or 2ml with the TPD version. As always, disassemble and clean your tank before using it. The Melo C tank uses a sliding top cap like the D20 tank did on my last review. I like that there isn’t a fill gasket. That’s a personal preference of mine.

1669308700108.png


7meRX2p.jpg


htDliJd.jpg


FIINAL THOUGHTS:

To me the iStick i80 has that old school feel like the i40 had. I like it. Maybe it’s because it brings back old memories since I’ve been vaping for over 13 years now. From what I can tell from testing the i80, it is a really solid and lightweight device that has worked flawlessly for me. The 3000mah battery with a 2A charging rate should be sufficient for most people to get at least a full day of use.

The .5 ohm EC2 coil has quickly become my favorite of the two. I feel like I get very good flavor using Dinner Lady Berry Blast in it for testing. This coil really brought out the highlights of this one shot that I’ve been using in a couple other devices. Also, this coil provides a very large amount of vapor with me setting it at 45 watts and having the airflow maybe ¼ open.

The .3 coil is very good also. I ran this one at 40 watts with the airflow 1/3 open and it also produces plenty of vapor while providing very good flavor. Maybe it’s the liquid I chose which is a raspberry custard but the .5 coil ended up being my favorite. The flavor was very good but not quite as good as the .5 coil. Also I should mention that 45 watts seems to be my sweet spot so that may have had some effect on my results.

Despite the i80 appearing to be simplistic, it does have a lot of features. I however find the menu system to me unnecessarily complicated and unless you know what the symbols mean then you may be lost without the user manual like I was. Fortunately for me, you really don’t need to use the menu system if you don’t want to. Just turn the mod on and vape in wattage mode.

So, would I recommend the iStick i80 for you? I would. I feel like it is a solid mod and tank combination and if you don’t like the tank then you can use your own tank on it. This one can be as simple or complicated to use as you want it to be. It has lots of options but they aren’t necessary to use the mod. I feel like the 300mah battery is a good size for an 80 watt mod.

I’d like to thank Eleaf and Adela for sending the Eleaf iStick i80 samples and extra coils for this review. It is much appreciated. Thanks goes out to you the readers. You make this possible. Below is a link to the website if you’d like to take a look at all the different devices available from Eleaf.

Eleaf iStick i80 Kit with MELO C Tank - Eleaf Official Website (eleafworld.com)
1669308837919.png

Filter