Hi, today let's take a look at the Innokin Lota Enviro and F600 both are new water based pods. In this Test I will examine each of the characteristics that distinguish this item. I hope that by the end of this reading you may have understood this product, and therefore decide whether to invest in it or not. As always, my opinions are free and based on my personal experience.
• Enjoy the reading.
► Innokin Lota Enviro and F600 - h2o Pods; Before starting let's see together some special features indicated by the manufacturer:
•

Smoother steam, faster satisfaction
•

Better nicotine delivery
• 3 Reduced irritation and sensitivity
•

Reduced dehydration
•

Improved chemical stability
•

Lower vaping temperature
• 7 10+ Delicious flavors
•

600 Puff
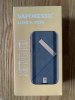
► Innokin Lota Enviro and F600 - h2o Pods; Packaging:
Innokin also continues in the disposable sector to use recyclable materials for its packaging. The small multicolored hardcover makes it clear what will be inside. Both packs show; images, instructions for use and other numerous information.
► Innokin Lota Enviro and F600 - h2o Pods; Packing List:
Inside the cardboard box there is the disposable pod Lota Enviro or, depending on the choice, Lota F 600. Both are sealed in a sachet. Once the sachet is opened, we notice that the spouts are protected by a transparent silicone rubber cap to be removed, while for the battery protection we find a silicone rubber cap for Enviro and a transparent stick to be removed for F600.
► Innokin Lota Enviro - h2o Pods; Technical data:
• Dimensions: 96mm (height) x 17mm (diameter)
• Weight: 24 grams
• Cartridge capacity: 2ml
• Nicotine: 20mg / ml (Nic salts 2%)
• Automatic activation (up to 600 puffs)
• Battery: Internal non-rechargeable 450mAh
• Low Battery Warning: Blue LED blinks 10 times
• Cut Off: 10 seconds
• Resistance: 1.1Ω Mesh Coi (not replaceable)
• Output power: 11W
• Output voltage: 3.6V
• Construction: reinforced cardboard shell + food grade silicone
• Blue LED indicator at the base of the device
• Airflow: Double airflow intake holes on the base
• 10 different flavors available
• 30% water-based e-liquid
• Recyclable
► Innokin Lota F600 - h2o Pods; Technical data:
• Dimensions: 83mm (height) x 22mm (diameter)
• Weight: 29 grams
• Cartridge capacity: 2ml
• Nicotine: 20mg / ml (Nic salts 2%)
• Automatic activation (up to 600 puffs)
• Battery: Internal non-rechargeable 450mAh
• Low Battery Warning: Blue LED blinks 10 times
• Cut Off: 10 seconds
• Resistance: 1.1Ω Mesh Coi (not replaceable)
• Output power: 11W
• Output voltage: 3.6V
• Construction: PC + Transparent silicone driptip
• Blue LED indicator at the base of the device
• Airflow: Single airflow intake hole on the base
• 10 different flavors available
• 30% water-based e-liquid
► Innokin Lota Enviro and F600 - h2o Pods; First impressions:
After having released all the Enviro and F600 specimens from their respective packages, I realized that I had received two slightly different versions of Lota Enviro; the difference is the Driptip, consulting Innokin I learned that the final version is the one with the duckbill driptip and that some of the first pre-production models had a circular driptip. F600 instead came here for testing only with its final appearance. Both Enviro and F600 are compact in size and also particularly light, Enviro's compressed cardboard body gives it a weight of only 24g. F600 weighs slightly more because it has a shiny plastic body covered with soft transparent silicone. I had some doubts about the structural solidity of Enviro being made from a cardboard tube, but my fears proved unfounded when I tried to squeeze Enviro between my fingers and the compressed cardboard did not give way!

Both Enviro and F600 Driptip holes are 4mm in diameter for MTL / RDL extraction. The Enviro driptip is removable and is made of semi-opaque food-grade silicone while that of F600 is made of soft transparent silicone and is not removable for disposal. At the bottom of both there is a blue LED integrated in the support base. The led lights up when aspirating and when the e-liquid has run out or the battery is running out, the LED will flash blue 10 times indicating the end of the life cycle and the start of disposal.

The Enviro body is wrapped in paper and is colored according to the flavor contained in it, there are some identifying writings; the name of the taste, Lota Enviro and Aquios 30. The body of F600 is also colored in order to identify with the flavors it contains and lets you see some writings found on the plastic and below the transparent silicone layer; these writings are; Lota F600 and Aquios 30. The lower base of Enviro is removable and is made of soft food-grade silicone, houses two small holes for the passage of air, while the base of F600 is integrated and not removable, houses a single hole for passage of the air that has a diameter equal to the sum of the two holes of Enviro, moreover the base of F600 shows the indications on the contained taste.
► Innokin Lota Enviro 100% recyclable:
Innokin includes in the packaging an illustrated sheet on how to dismantle and dispose of the Lota Enviro. When Lota Enviro is completely exhausted, both the silicone driptip and the silicone base must be removed and it is very simple. Is simple to press with a finger on the part where the driptip was removed to extract the battery and the e-liquid tank from the compressed cardboard case. After cutting the threads, each of the individual components can then be disposed of properly. Logically I took apart a specimen of Lota Enviro to see how easy it was to do it and to see exactly how it looked inside.
► Innokin Lota Enviro and F600 - h2o Pods; Available flavors:
For this review, Innokin sent me the complete line of 10 flavors of Lota Enviro and Lota F600. These are the flavors currently available:
• Sour Apple
• Grape Ice
• Peach Ice
• Sunrise Ice
• Mango Passion Ice
• Blueberry Ice
• Blueberry Bubble Gum
• Watermelon Ice
• Iced Cosmic
• Tropical Fruit Ice
I liked the 10 flavors of Enviro and F600 and I continue to vape them and I would gladly vape them all day long, were it not for the high concentration of nic salts they include. I started vaping in 2017 and have been using a low nic concentration in my liquids for about 3 years, sometimes even zero nic!
However the flavors are very pleasant and very sweet, even if they are not too concentrated in the dilution. Enviro produces a slightly wider MTL / RDL shot than F600 ... Some flavors have a fairly strong iced part but never too intrusive, indeed the iced part dosed in the liquid greatly improves the hit in the throat and leaves a good dose of freshness. After hours and hours of using the Enviro and F600 I didn't notice any inconvenience and I really appreciated that these devices didn't dehydrate my jaws! Usually with traditional e-liquids (VG / PG) I am forced to drink a lot of water to counteract dryness in the palate. This in my opinion is the biggest and most obvious advantage that Enviro and F600 are able to give to their users. Very well Innokin!
► Innokin Lota Enviro and F600 - h2o Pods; Final conclusions:
While disposable products continue to be an important topic of discussion in terms of waste and environmental issues, Innokin addresses and strives to improve this issue. In fact, all Innokin products have been packaged in 100% recyclable cardboard for some time and now we also have the Enviro that can be broken down piece by piece. Great Innokin!
As for disposable devices, there are countless proposals from various brands and with different e-liquid capacities, with more or less large batteries and with the possibility of recharging the batteries with USB or not. On some markets such as Italy, the TPD law is in force (2ml max of preloaded liquid) so some companies (including Innokin) they thought it was useless to insert the USB charging socket and that the internal non-rechargeable battery was sufficient to ensure that they consumed all 2ml of liquid. Thus also limiting costs. I'm not able to state with confidence that the Enviro and F600 actually hit 600 puffs, but the feeling is that if they don't hit that number, they still get close. Even if the battery probably runs out of charge first of running out of liquid, preventing you from receiving the unrewarding "dry shots" and this is a logical protection.
So what is the substantial difference between Lota Enviro and Lota F600? The real difference is in the body structure of the devices; Enviro is wrapped in a compressed cardboard tube and is fully demountable piece by piece, and each individual component can be disposed of separately. While F600 is entirely made of hard plastic coated with soft transparent silicone, so the F600 device must be returned to the store to be disposed of correctly, or taken to the appropriate ecological islands.
Lota Enviro and Lota F600 are both preloaded with e-liquid containing the maximum concentration of nicotine allowed by the law Tpd 2% (20mg / ml) the striking thing is that both contain a high percentage of water. Innokin availed itself of the collaboration of the Aquios specialized laboratory which carried out the development using precisely 30% of water in the e-liquid. This means that the PG and VG content is reduced, which in turn significantly lowers the dry mouth problem. I also find it very interesting to note that this new composition has only minimally affected the flavor, which is slightly less concentrated, but which still remains of a high level. Furthermore, Enviro and F600 are able to both return very good performances also as regards the quantity of vapor and the substantial blow to the throat that perfectly follows that of traditional cigarettes. I sincerely believe that Lota Enviro and F600 may really be able to win the battle against smoking for all those people who want to get super simplified devices, reliable against e-liquid leaks and with a very high potential for victory.
Pro:
• Right dosage of nic salts for those who want to quit smoking
• Very comfortable to carry and to put in your pocket
• Simple and easy to use
• Good flavor and good performance
• Smooth and silent puffs
• Good battery life, 600 fairly realistic shots
• 30% water-based E-liquids cause less dry mouth
• Enviro fully recyclable and environmentally friendly
Versus
• F600 cannot be dismantled for recycling
I would like to thank Innokin for providing me with these kits. I hope this review was useful for anyone looking to buy the new revolutionary 30% water based Pods, Lota Enviro and F600.
• Lota F600
Lota F600 - Disposable Vape | INNOKIN®
• Lota Enviro
Lota Enviro - Disposable Vape | INNOKIN®
Thanks for reading.