
You are using an out of date browser. It may not display this or other websites correctly.
You should upgrade or use an alternative browser.
You should upgrade or use an alternative browser.
Mike n Tibs DNA Mods!
- Thread starter Proetus
- Start date
- th_trl_thread_readers 0
- Status
- Not open for further replies.
OK So I have been a bit slow on making mods but here you go.
From one (or more) of Mike's co-ops
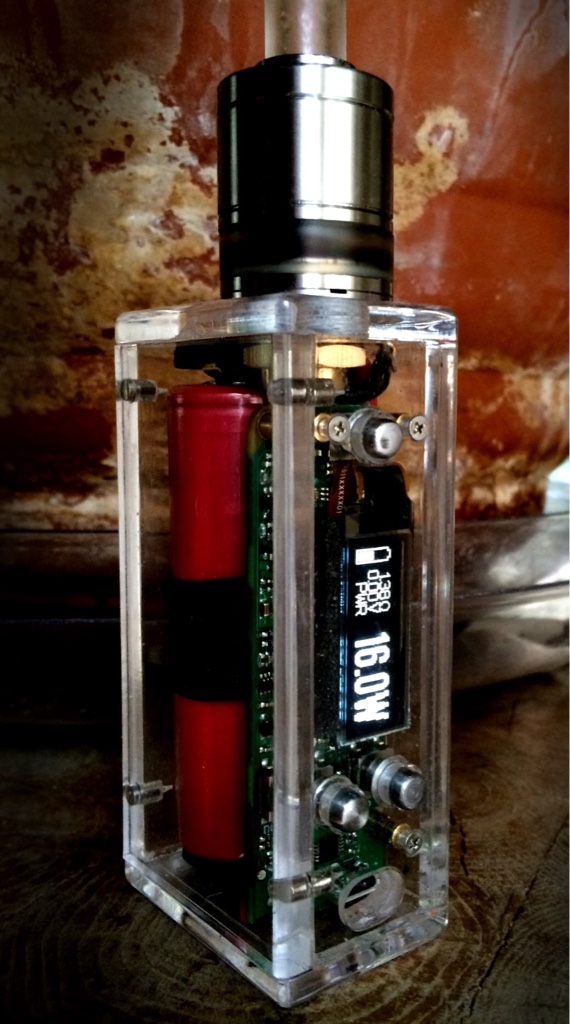
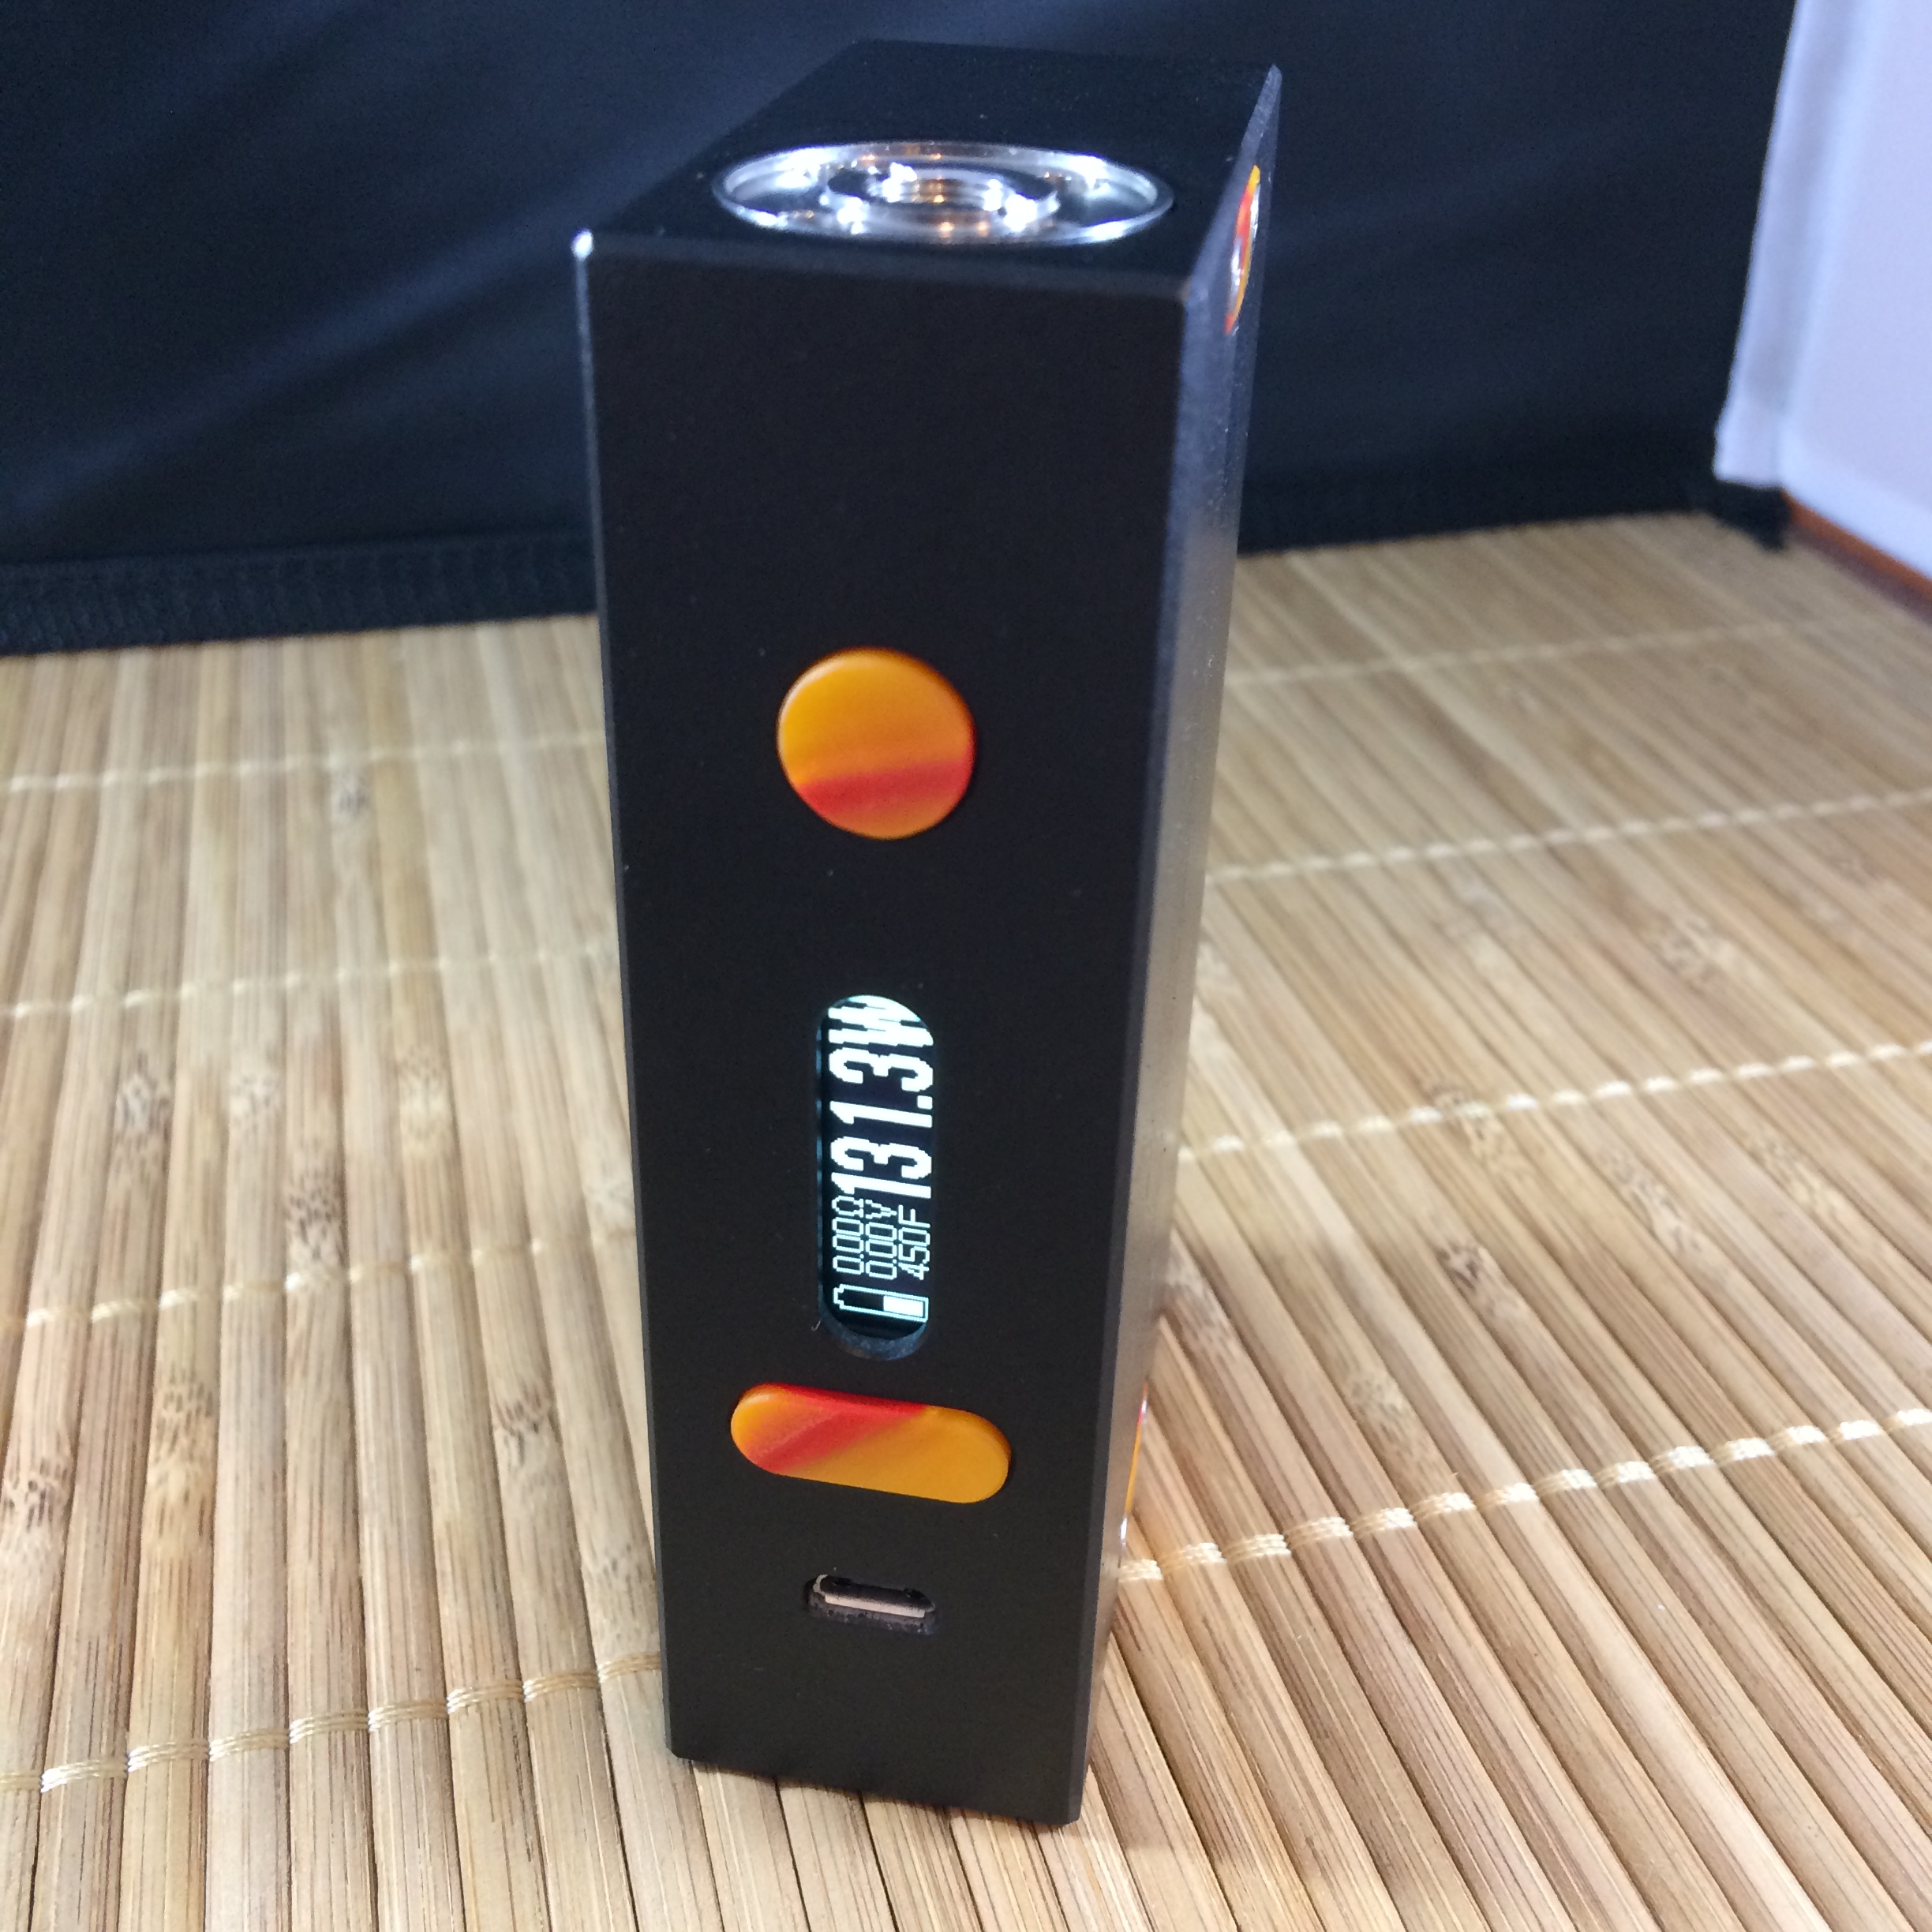
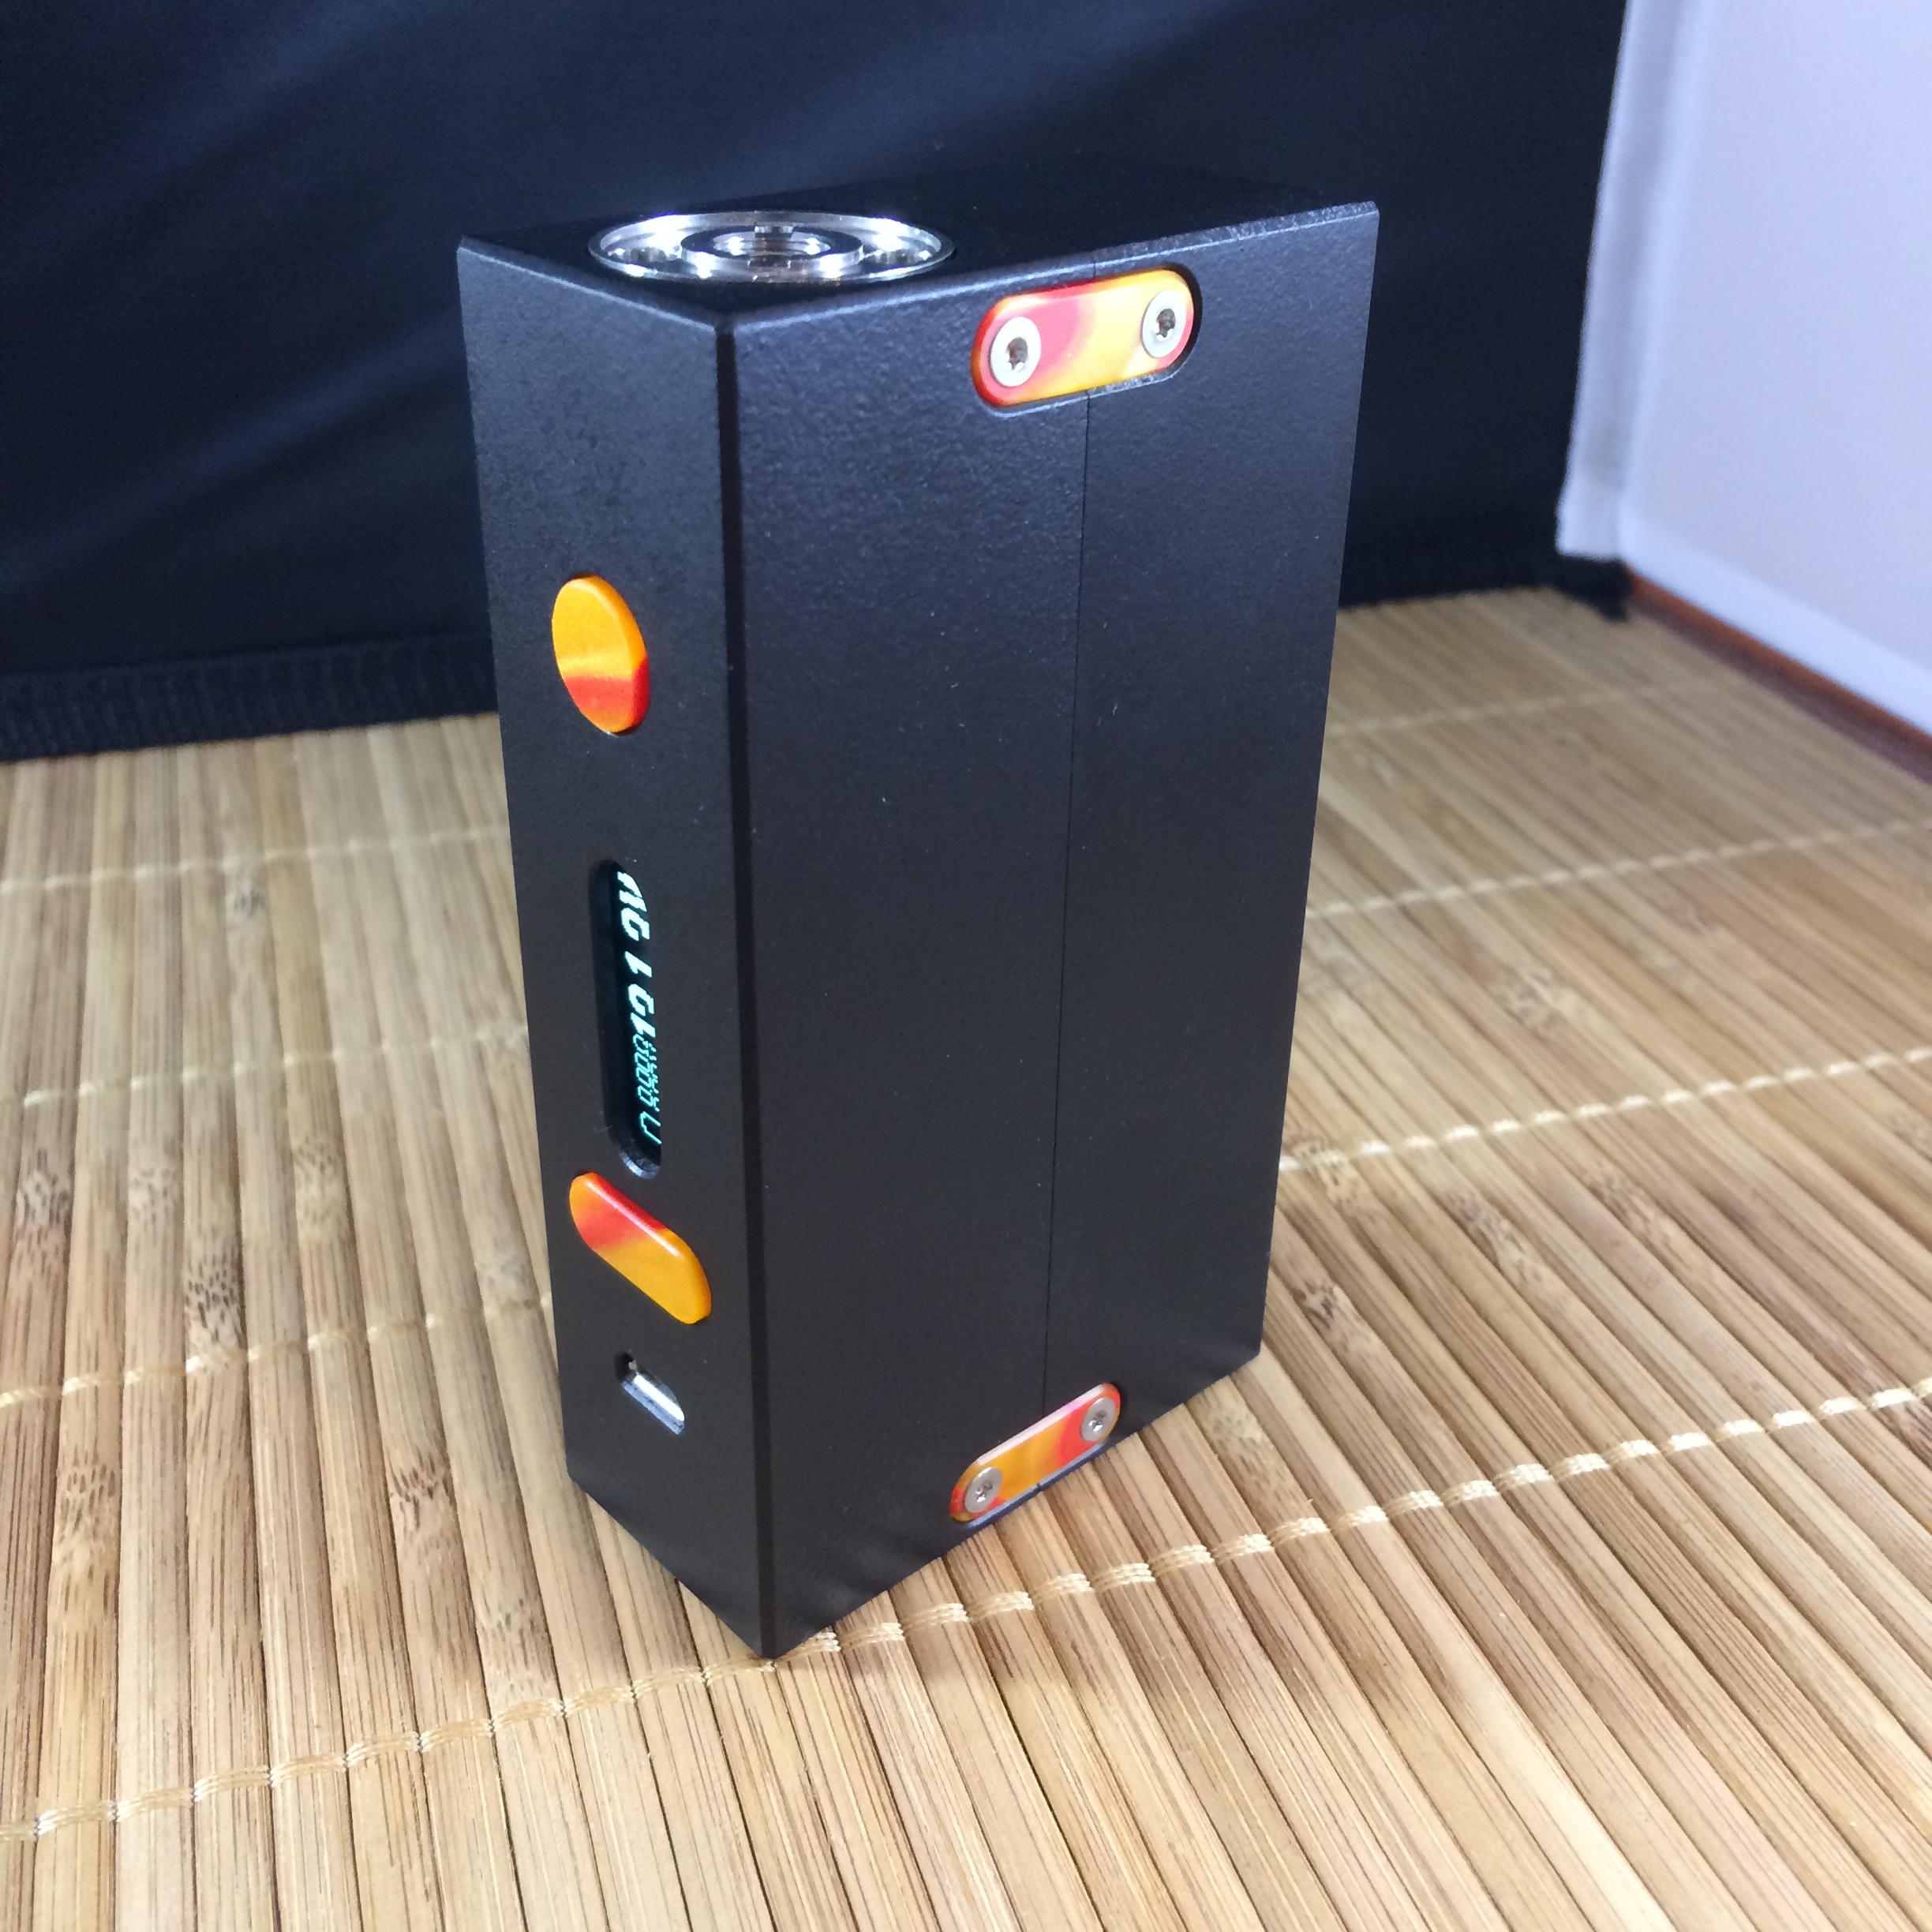
DNA40 Big Screen Squonker and DNA200 with 3s 1300mah lipo using the on chip buttons
From one (or more) of Mike's co-ops
DNA40 Big Screen Squonker and DNA200 with 3s 1300mah lipo using the on chip buttons
First DNA75 done! Very happy with getting all the features in such a small enclosure.


Sent from my SM-G935T using Tapatalk
Sent from my SM-G935T using Tapatalk
My thoughts on the Lipo dilemma.
With the release of the DNA200, as well as several other Mods, that utilize Lipo batteries, a lot of fear and apprehension has surfaced in the community.
Why do we even consider Lipos?
Lets face it, we have pushed our Mods and the current 18650 technology to its max! Our ever escalating hunger for more power, a better vape, bigger clouds, etc.. has pushed our need for a portable energy source beyond what 18650 IMR/ICR cells are designed to deliver. We are running these cells at their maximum discharge ratings, and pushing them even further if we can. No battery is happy being run continually at its upper rating. Batteries perform better, last longer, and are safer, when run at a about 75% of the rated capacity. This means that for high power Mods - 18650s just aren't cutting it anymore.
Lipo was selected by Mod engineers because it has the highest energy density of any commonly available energy source. It also has a much better voltage curve as it depletes. These are the exact same reasons that industries supplying Robotics, Electric Bikes, Cellphones, Tablets, Kindles, R/C Hobby, and many other Consumer Electronics products, adopted Lipo batteries.
Why are so many people so scared of Lipos?
Early generation Lipos were adopted by the R/C hobby enthusiasts long ago because of their energy density. Just like us vapers push our 18650s, their pushed these Lipos to the max! They did all sorts of things to push the performance to higher levels. Things like over charging, heating the batteries, charging them super fast, and a variety of other tricks. Their application is also a lot more physically demanding than ours. They are flying planes and driving cars, often pushing the vehicles limits and sometimes crashing them causing physical damage to the cells. Between the performance enhancement tricks and the physical damage, many incidents occurred where the batteries failed spectacularly. These failures were captured on YouTube and hit the newspapers, and the spectacular nature of how a Lipo can fail became well known, albeit not very well understood by the uninitiated. Suffice it to say that failure rate experienced by R/C hobbyist probably dwarfs anything we will see in our application.
Are Lipos really more dangerous?
They "can" be, YES! The more energy you store, the more densely you store it, the more dangerous it can be in an uncontrolled release. This applies to electricity, compressed gas, springs, or any other energy source you can imagine. However they "can" be used quite safely. Think about that Smartphone that you might be reading this on. Safe use is a function of proper engineering, and operating the battery within its designed parameters. We use Lipo tech in all sorts of things everyday. Dont attempt to push a cell beyond its design limits and you will not be likely to encounter any issues. Overcharging, excessive heat, excessive drain, short circuiting, physical trauma, are all things that can cause the magic smoke and even fire.
Can we use them safely?
Yes we can! I have been using Lipos in my Mods for a few years now, and I have not had a single incident with them. Today's generation of Lipo is very safe IF used within their design parameters. The key is EDUCATION. Not casually reading one of my, or someone Else's, posts, but really studying the technology and understanding it if you are going to utilize them in your build. It is beyond my intended scope to "teach" this technology, I do not feel qualified, but I will include several good links at the end of this.
IMHO the fear that many feel towards this technology results from inadequate education.
There is no lazy way out, if you want to be safe you must educate yourself!
Here are a few resources to get you started, Google is your friend!
http://www.rogershobbycenter.com/lipoguide/
Lithium Polymer Etiquette: A Comprehensive Guide to Working with LiPo
http://www.rcaces.org/RC Aces News Letter/A_Guide_to_LiPo_Batteries.pdf
Lithium Polymer Charging/Discharging & Safety Information
RC Battery Guide: The Basics of Lithium-Polymer Batteries - Tested
All about lipo balance connectors - TJinTech
http://oes.tamu.edu/web/guidelines/battery/LiPo Procedures.pdf
The Ultimate LiPo Drone Battery Care Guide - Dronethusiast
Understanding RC LiPo Batteries
Complete Guide to Lithium Polymer Batteries and LiPo Failure Reports - RC Groups
BU-206a: Finding the Optimal Runtime and Power Ratio of Li-ion – Battery University
Basic understanding of LiPo, Li-Ion and LiFePo4 battery, its use and care
While this all only theoretical right now, this is what I "think" I might be able to do (+/- 20%) over in the Forum that is not to be mentioned........

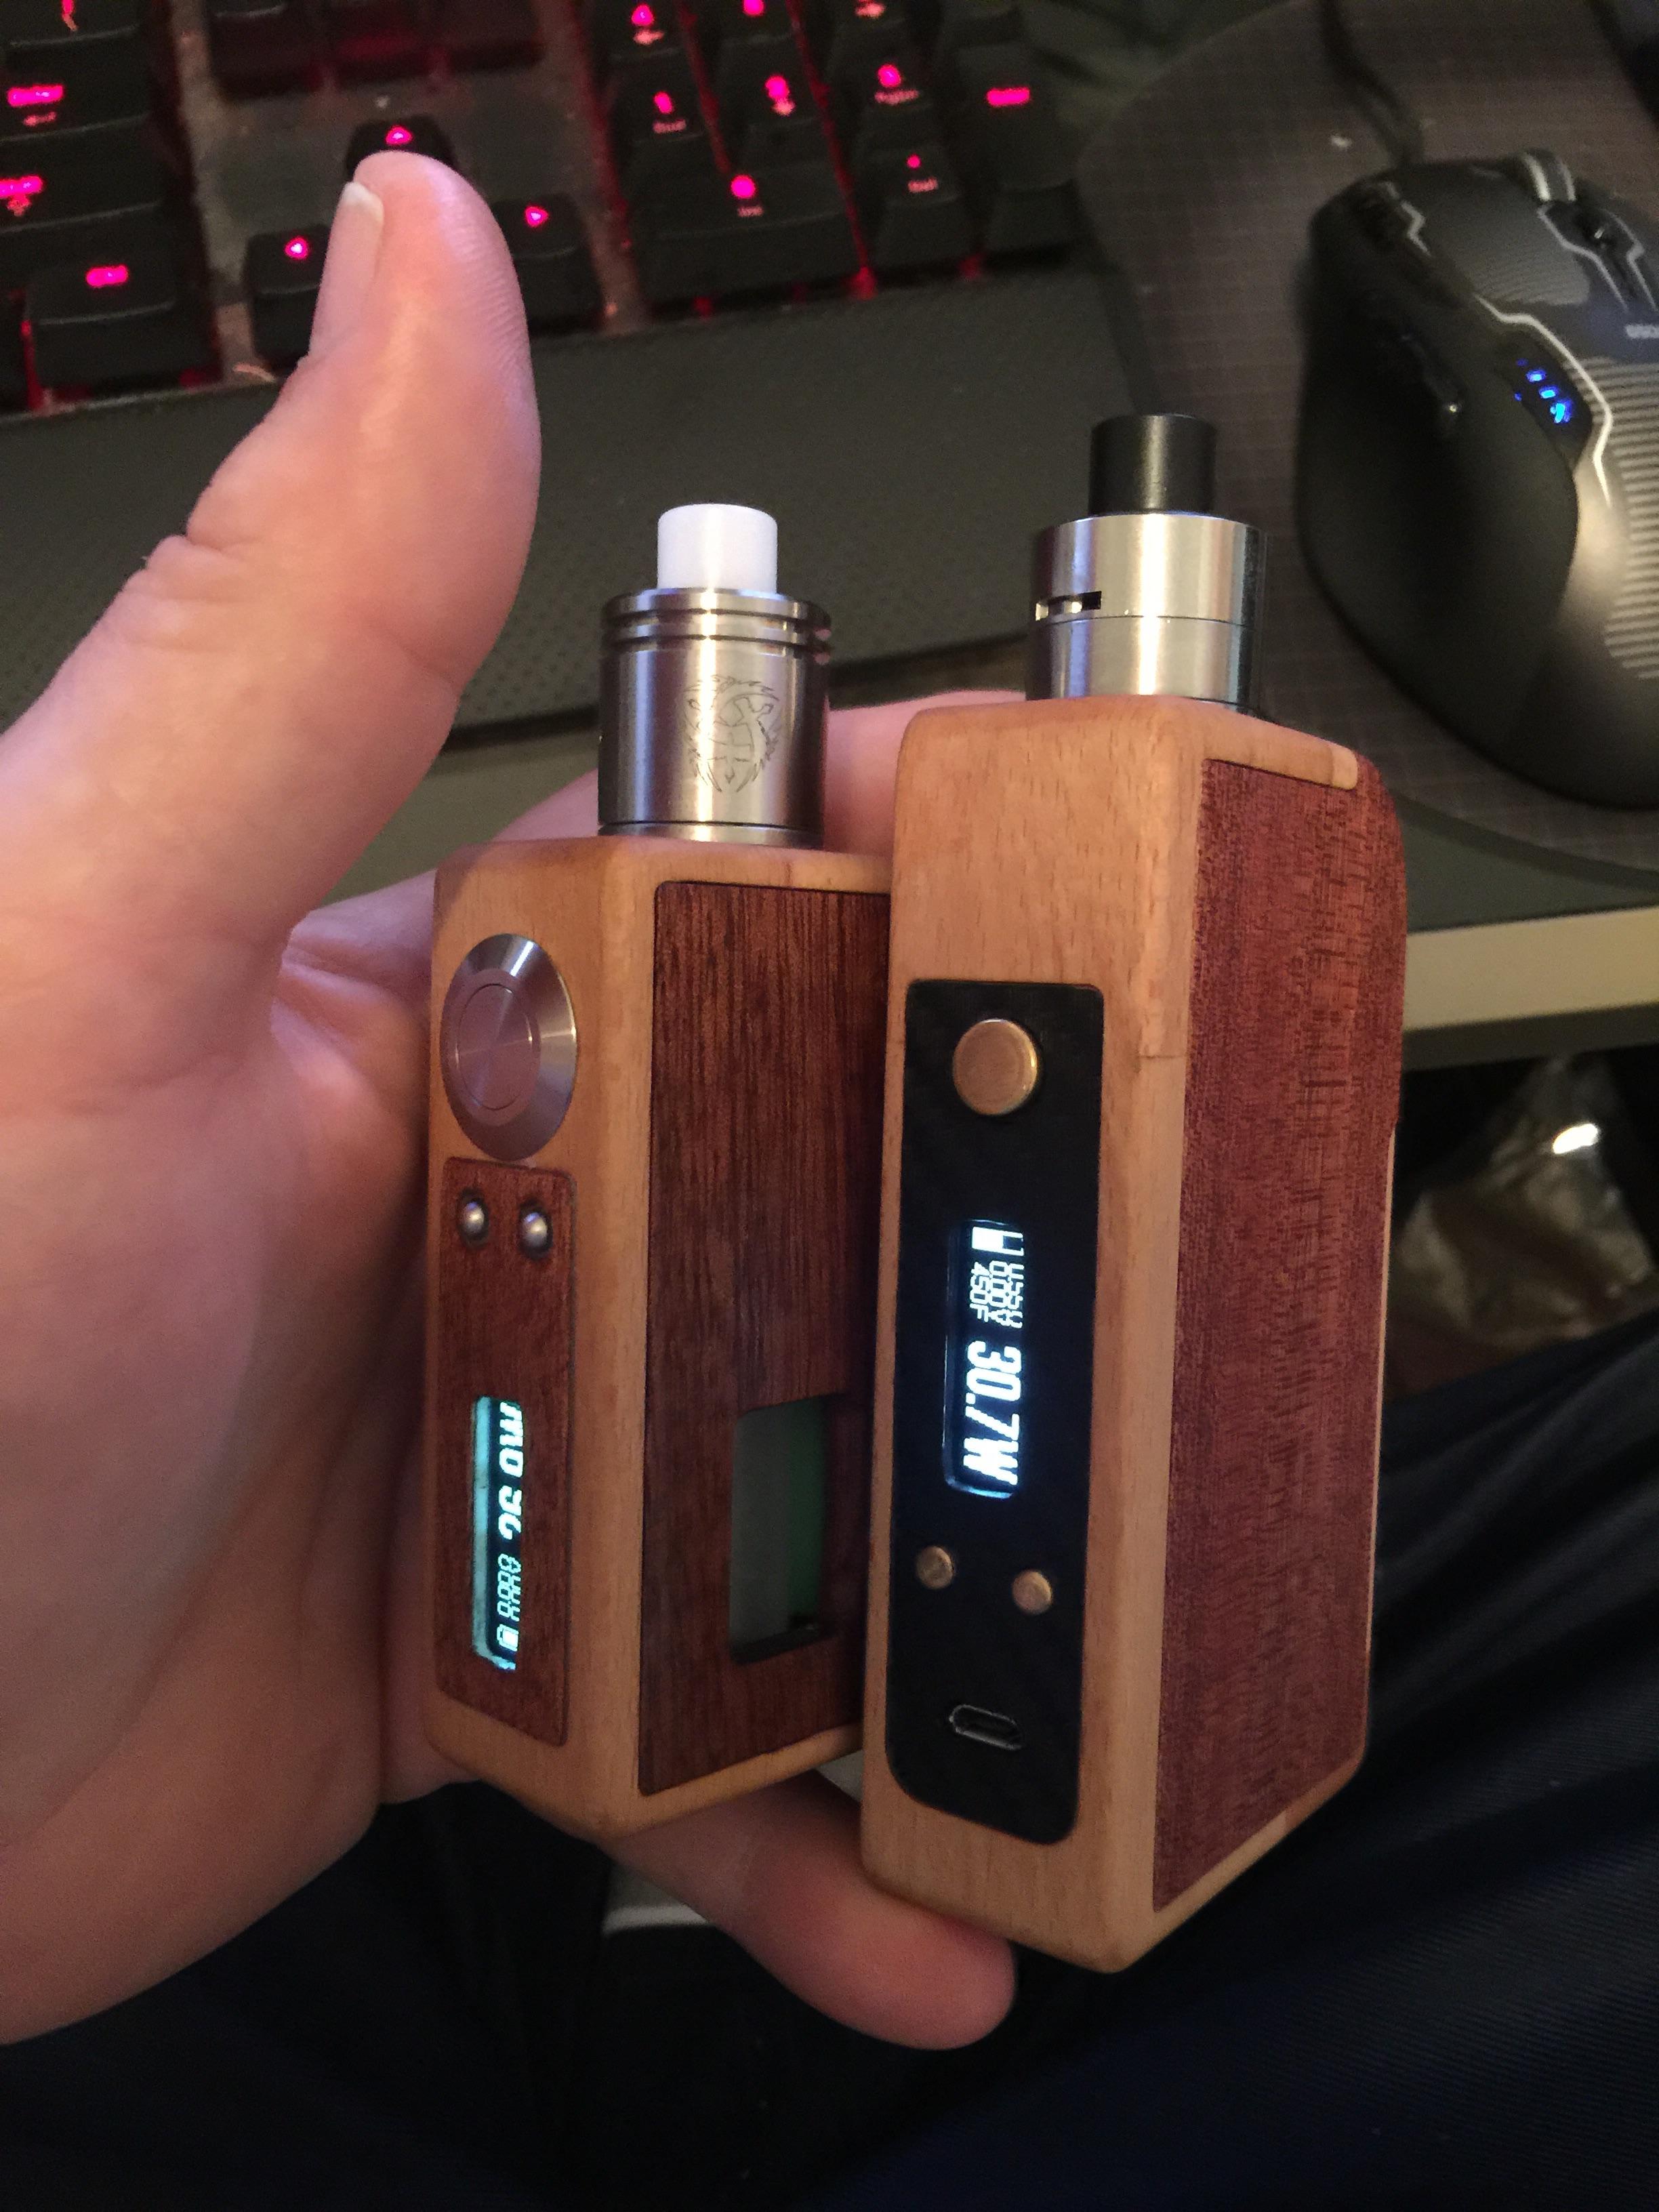
here's a few pics of mine, still not finished. the main body is african blackwood, the chip mount and central support is billet aluminum that started out as a 1"x 2" solid block, still needs some more machining. the rear support/door mounting frame is titanium plate. buttons are brass. still a lot of work to do here. with all the work something like this takes I can really see the appeal of drawing it on a computer and printing it, this is kinda the opposite of that 


I took some other pics of things I thought might give ideas and helps others, things I learned through my build. A lot of what I did were idea's shared from others who posted prior to my build, great bunch of folks here who are willing to share and help, thank you! Now it's my turn to pay it forward. To save space I'm posting thumbnails, click on them to view full size.
First I was going to use KTM's idea of cutting pieces from a CD holder to make a holder for the board, then I was going to glue the holder to the box with JB Weld, here's some pics of what I had started. I made brackets to hold each side of the board, super glued the small pieces, first scuffing the plastic so the glue would have a good grip. The board fit snugly. Once both sides where done I was planning on joining the two sides by cutting and gluing pieces across the back of the board.


Instead of the holder I decided to go with Vaping Bad's idea of stand off posts, I made mine out of square aluminum stock with three short screws going through the back of the board into the posts then mount the board and post to the box with three screws through the face of the box.
(You can see one of the stand offs on the board in the center pic above)

To hold the screen to the mod, I used 3M double sided tape that is used to hold screens on ipod's and ipod touch, this works very well, it's a little gummy and you can play with it to position, then lightly clamp and it sets up to a full bond over night. If you ever tried to remove a broken screen from an ipod you know how strong this stuff is! Watch video on youtube on replacing touch screens. You can get it on amazon cheap, a few bucks shipped.

I also used Vaping Bad's idea to make the button from shelf pins, I cut them to length, leaving them a little long, chucked them in my drill press and used the press like a lath to spin them, using files and sandpaper to shape them. The problem I ran into was how to file them shorter once I had them like the three on the left

After some thought I decided to drill holes in this piece of aluminum angle. I drilled holes the same size as the button, then slip the buttons in, set the angle in my vise, slightly tighten, tap the angle with a hammer to drive it down and clamp the buttons, I was then able to file and work the buttons easily.

Last, here's how I made the tension tighter on my VT 510's. I sanded down the insulator by laying a piece of 320 sandpaper on the bench, then with the insulator screwed into the 510 I carefully ran it over the sandpaper until the cap that screw on and holds the spring is up against the divider of the insulator.

I also stretch the spring just a tad

On other thing I do to make the 510 center pin move smoothly up and down is carefully sand the edges of the pin rounding them just ever so much to break that sharp edge (Best I could do for a close up, pin on right was sanded). This ensures the pin won't bind and sit cocked when you screw an atty on, it will sit flush giving full contact. Once again those number drills come in handy, I found one that fit tight in the bottom solder hole, then I could spin the bit and pin with my fingers to sand the edges.

I'll also add I drilled the hole larger in the cap so my 18ga wire would slide through freely when the pin moves up and down. I also used a lager bit, spinning it by hand to break the edge of the hole on each side of the cap.
First I was going to use KTM's idea of cutting pieces from a CD holder to make a holder for the board, then I was going to glue the holder to the box with JB Weld, here's some pics of what I had started. I made brackets to hold each side of the board, super glued the small pieces, first scuffing the plastic so the glue would have a good grip. The board fit snugly. Once both sides where done I was planning on joining the two sides by cutting and gluing pieces across the back of the board.
Instead of the holder I decided to go with Vaping Bad's idea of stand off posts, I made mine out of square aluminum stock with three short screws going through the back of the board into the posts then mount the board and post to the box with three screws through the face of the box.
(You can see one of the stand offs on the board in the center pic above)
To hold the screen to the mod, I used 3M double sided tape that is used to hold screens on ipod's and ipod touch, this works very well, it's a little gummy and you can play with it to position, then lightly clamp and it sets up to a full bond over night. If you ever tried to remove a broken screen from an ipod you know how strong this stuff is! Watch video on youtube on replacing touch screens. You can get it on amazon cheap, a few bucks shipped.
I also used Vaping Bad's idea to make the button from shelf pins, I cut them to length, leaving them a little long, chucked them in my drill press and used the press like a lath to spin them, using files and sandpaper to shape them. The problem I ran into was how to file them shorter once I had them like the three on the left
After some thought I decided to drill holes in this piece of aluminum angle. I drilled holes the same size as the button, then slip the buttons in, set the angle in my vise, slightly tighten, tap the angle with a hammer to drive it down and clamp the buttons, I was then able to file and work the buttons easily.
Last, here's how I made the tension tighter on my VT 510's. I sanded down the insulator by laying a piece of 320 sandpaper on the bench, then with the insulator screwed into the 510 I carefully ran it over the sandpaper until the cap that screw on and holds the spring is up against the divider of the insulator.
I also stretch the spring just a tad
On other thing I do to make the 510 center pin move smoothly up and down is carefully sand the edges of the pin rounding them just ever so much to break that sharp edge (Best I could do for a close up, pin on right was sanded). This ensures the pin won't bind and sit cocked when you screw an atty on, it will sit flush giving full contact. Once again those number drills come in handy, I found one that fit tight in the bottom solder hole, then I could spin the bit and pin with my fingers to sand the edges.
I'll also add I drilled the hole larger in the cap so my 18ga wire would slide through freely when the pin moves up and down. I also used a lager bit, spinning it by hand to break the edge of the hole on each side of the cap.
Finally, and from two co-ops ago, here's my completed, working low tank DNA40, in the flesh baby!


And a comparison with a VTR -

And, if you're interested, a slide show of all the photos -
Low Tank Mod Slideshow by awsum140 | Photobucket


And a comparison with a VTR -

And, if you're interested, a slide show of all the photos -
Low Tank Mod Slideshow by awsum140 | Photobucket
Last edited:
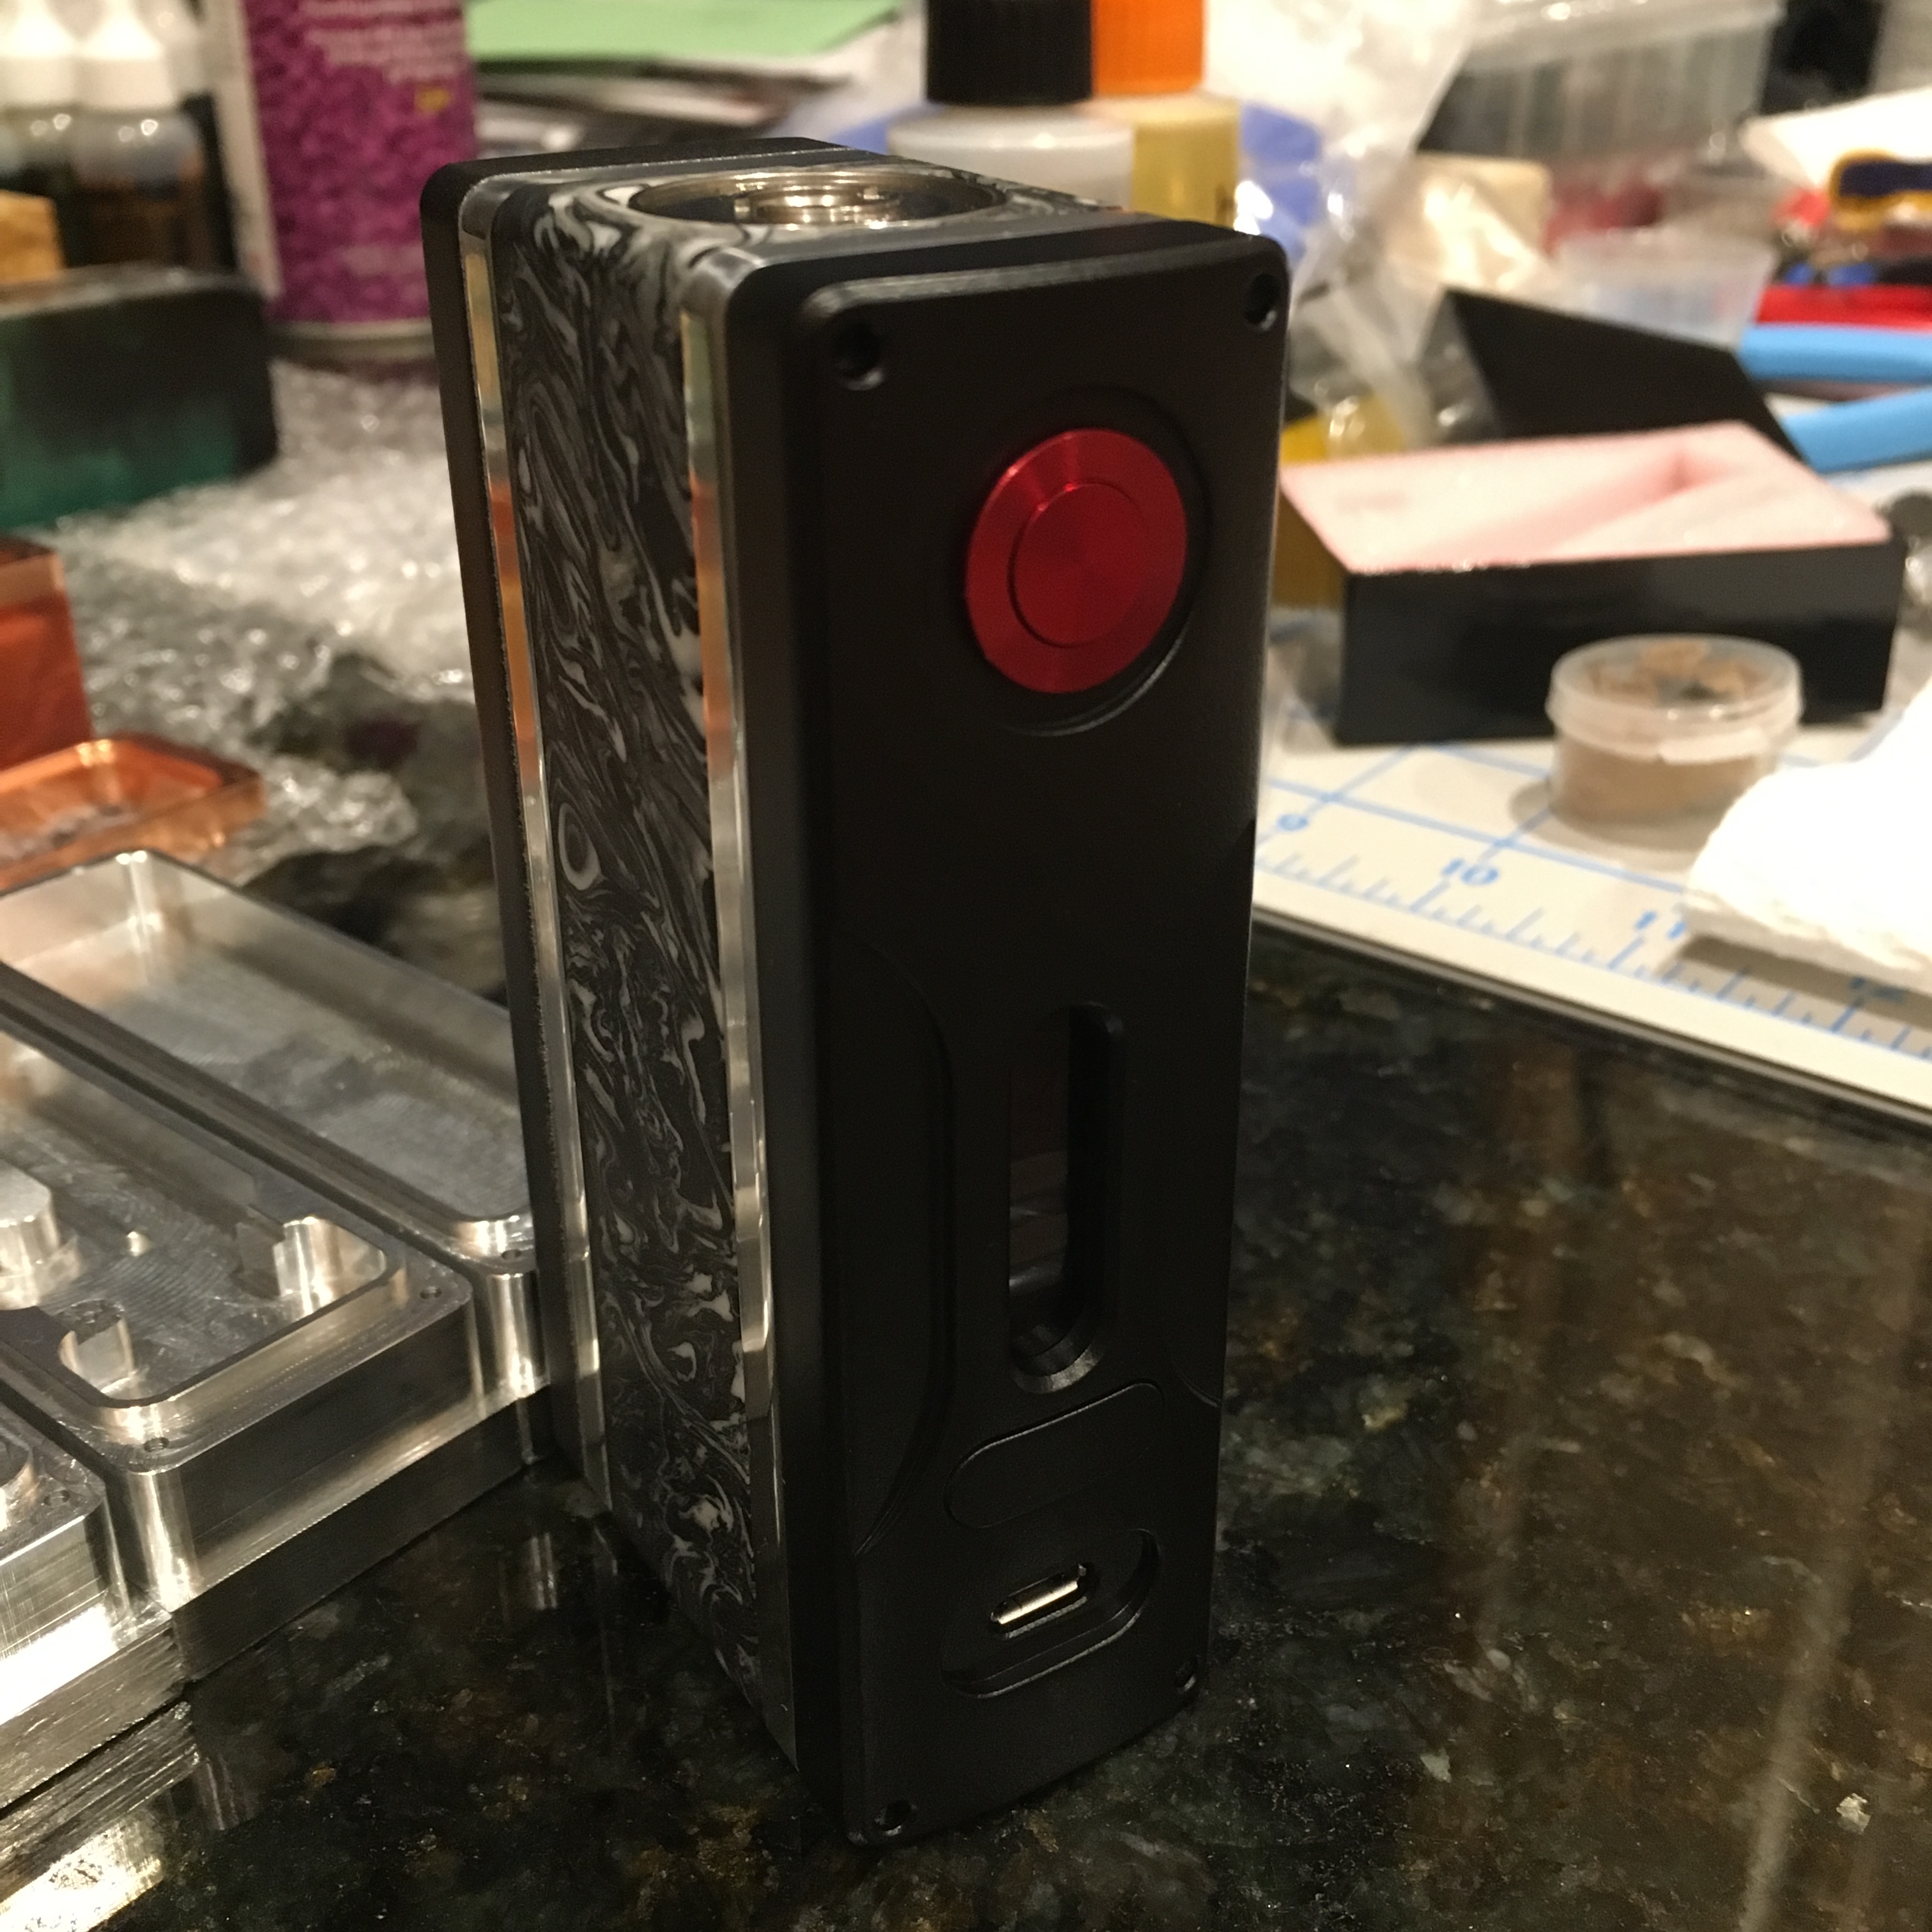
Finally got this DNA200 mod completed today. Body is cerakoted 6061 aluminum and the buttons and side plates are sunspot pearl kirinite. It uses the Evolv 510 connector and Turnigy A-Spec 1300mAh 60C battery.

So my U-Frame design came from Sculpteo about 30 minutes ago...the print quality is yet again far superior to Shapeways. My chosen battery fits great and the door slides on perfectly. The 510 and board mounts are again spot on. I'm building this one over the weekend!


So the U-Frame build went reasonably well today. My wife was out for the afternoon, so the build took longer than I wanted while I was watching the kids. I had it all put together and started having odd battery issues...tracked it down to a cold solder on the balance connector. After a teardown and minor re-solder of the connector it's working great! I like the look with the black VT 510 and rounded black buttons. It's definitely big at 98mm x 65mm x 28mm, but it feels really good in the hand (and I don't have exceptionally large hands), especially with the rounded back facing the palm.

Too bad my build partner fell asleep and left me to do all of the work.

Too bad my build partner fell asleep and left me to do all of the work.
Last edited:
Everything is done, FINALLY! I milled the buttons this afternoon and that was a finicky job. Working with round aluminum that small to file it down to fit was time consuming. I did a test assembly, board in the enclosure with buttons installed, display plugged in and a battery clipped to the board. Everything works fine. I can't say I'm a fan of the onboard fire button on the DNA40 though, but it does work and that's what counts.
Finished parts -

You can see the guide rails for the board/battery contact sled and the cleat to fasten it into the enclosure. The bottom cap is the one with the brass contact on the door. Right now the back half of the atty cutout is installed and waiting for the JB weld to dry. I'll put it together for actual use tomorrow. The anticipation is killing me. I've also got to install the battery tube, but will use silicon adhesive for that.
AlpineTech box with the "glue" in chip holder.
I used the chip from my BRD squonker that got "wet". Once dried it still works!
Its been soldered and re-soldered quite a few times so its not a new one.
Because I didn't know for sure if the adhesive I was going to use would get to the screen or not
I put some Kapton tape on it for a screen saver. And it was a good thing. I first tried some 3M 8001
because it sticks to just about everything, and it did, including the screen when it oozed with the pressure
when I put the chip in place.


The screen is trapped under the chip holder. To remove it will probably be total destruction of the chip holder because of the glue. It might be possible to remove it all intact, but I'm hoping it will last forever!


It looks clean.
I used the chip from my BRD squonker that got "wet". Once dried it still works!
Its been soldered and re-soldered quite a few times so its not a new one.
Because I didn't know for sure if the adhesive I was going to use would get to the screen or not
I put some Kapton tape on it for a screen saver. And it was a good thing. I first tried some 3M 8001
because it sticks to just about everything, and it did, including the screen when it oozed with the pressure
when I put the chip in place.
The screen is trapped under the chip holder. To remove it will probably be total destruction of the chip holder because of the glue. It might be possible to remove it all intact, but I'm hoping it will last forever!
It looks clean.
Getting real close now. Final dry fit after cerakote ... just soldering and final assembly left!


Really neat job @SlickWilly it looks great!
Thanks man, I owe Mike and all you guys credit for making this happen! It's the nicest mod I've ever had, I've come a long way since I started buying the gas station ecigs.
Seems strange where vaping has taken me, it all started because I became very sick from all the years of smoking. Ended up in the hospital gravely ill with very bad lung problems including spots showing up on the scans. It took months before I could breath semi-normal and left me living on inhalers. I dodge the big one after sweating it out for two years, those spots never turned out to be C.... After all that I fell back to smoking again, within two weeks I was having problems breathing, the doctor told me if I couldn't find a way to quit it was going to kill me. He gave me his blessing to try ecigs and so it began. The expense of those store bought carts drove me to search the internet for ejuice that I heard of in hopes of being able to refill those carts and during that search I found this forum. The road has led me here today, my last scans shows my lungs are completely healed, I have no more problems breathing and I stopped using the inhalers long ago, the doctor was very impressed. I have to say, with this new DNA 200 board I feel even better about vaping, I know it's making vaping the safest it can be for where we are today and I am so thankful to Evolv, this forum and all the members, vaping has given me my life back. I'm one of the damn few lucky ones, I know there are a lot of smokers who didn't dodge the bullet and I count my blessing every day!
Hope everyone has a great day, Thank You!
here's a few pics of the chip mounting and wiring. I used a mini deans and a pair of jst's to make the battery quick disconnect. I used 16ga silver coated becu for the main battery wiring and 12ga silicone wire for the atty out

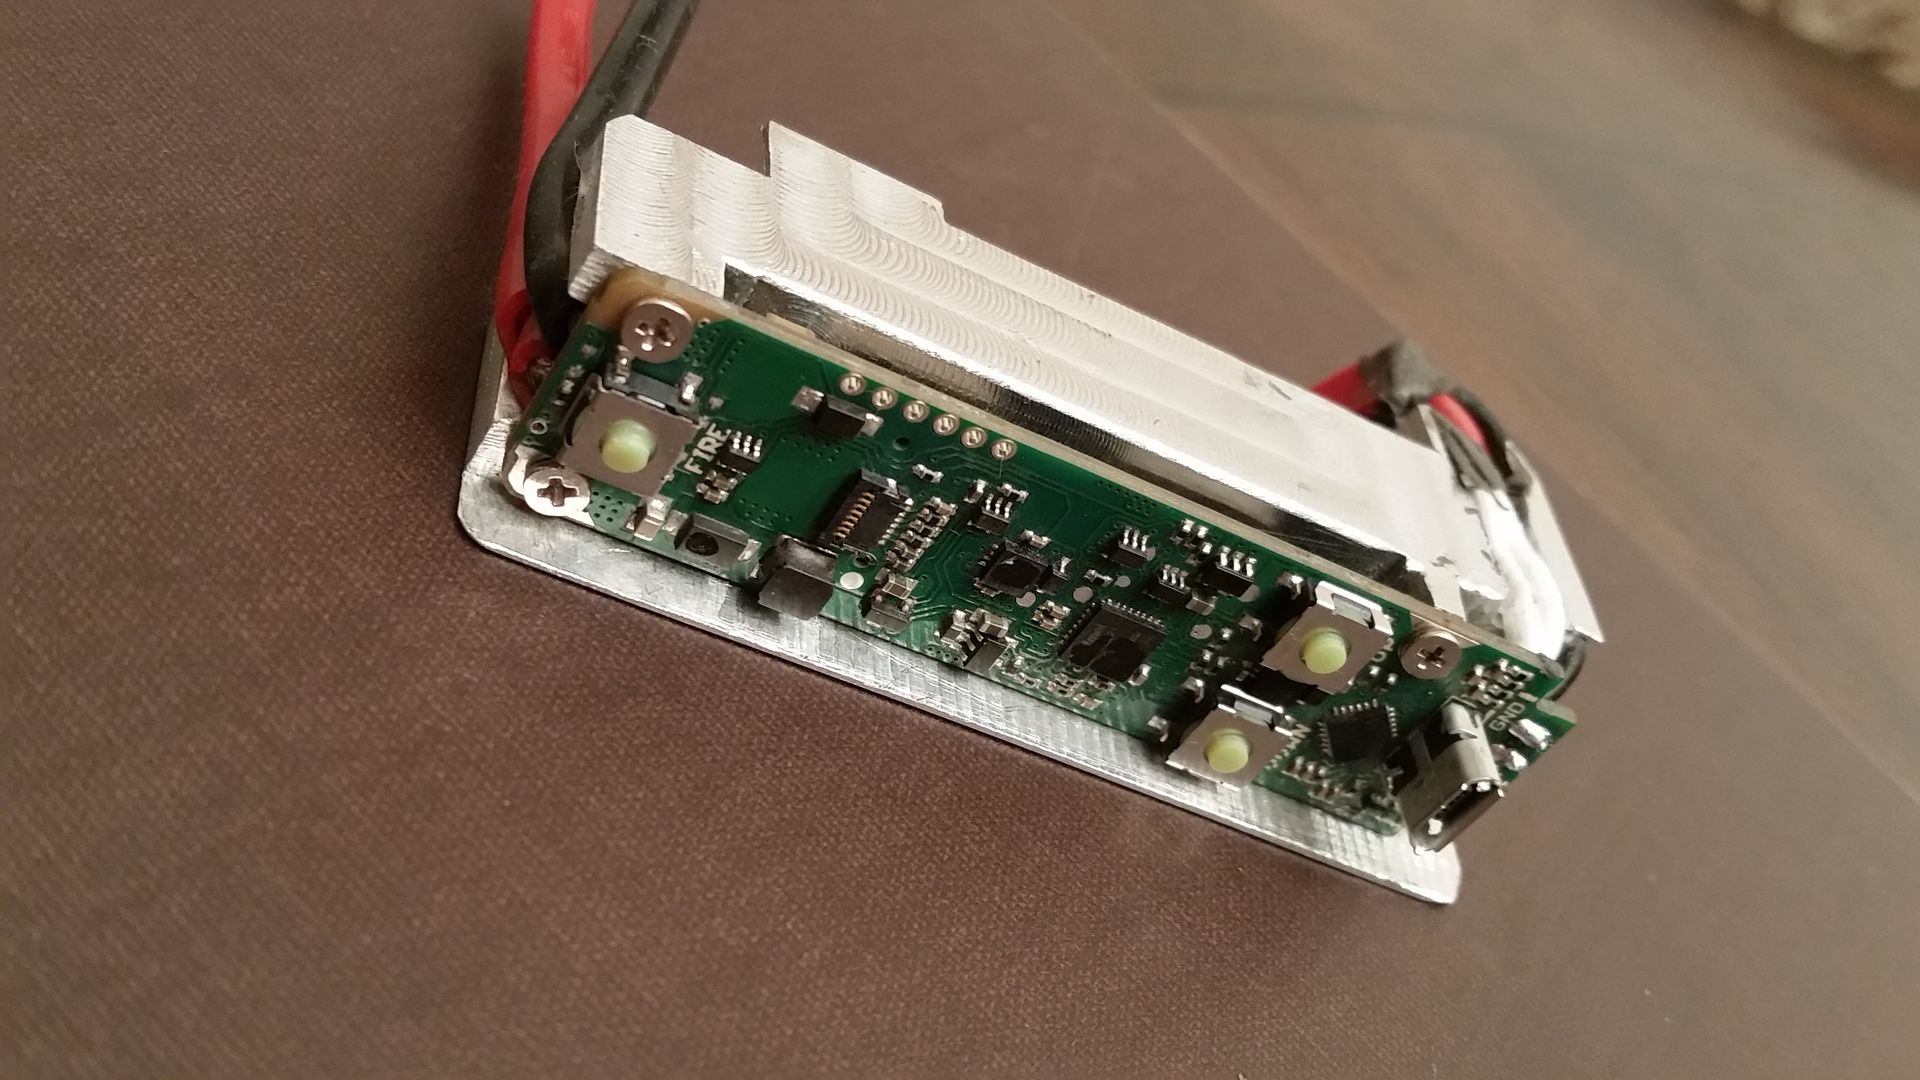


and here it is with a 1,000mah standard pack plugged in, in this config the center cell slot becomes a wire channel

and here it is with a 1,000mah standard pack plugged in, in this config the center cell slot becomes a wire channel
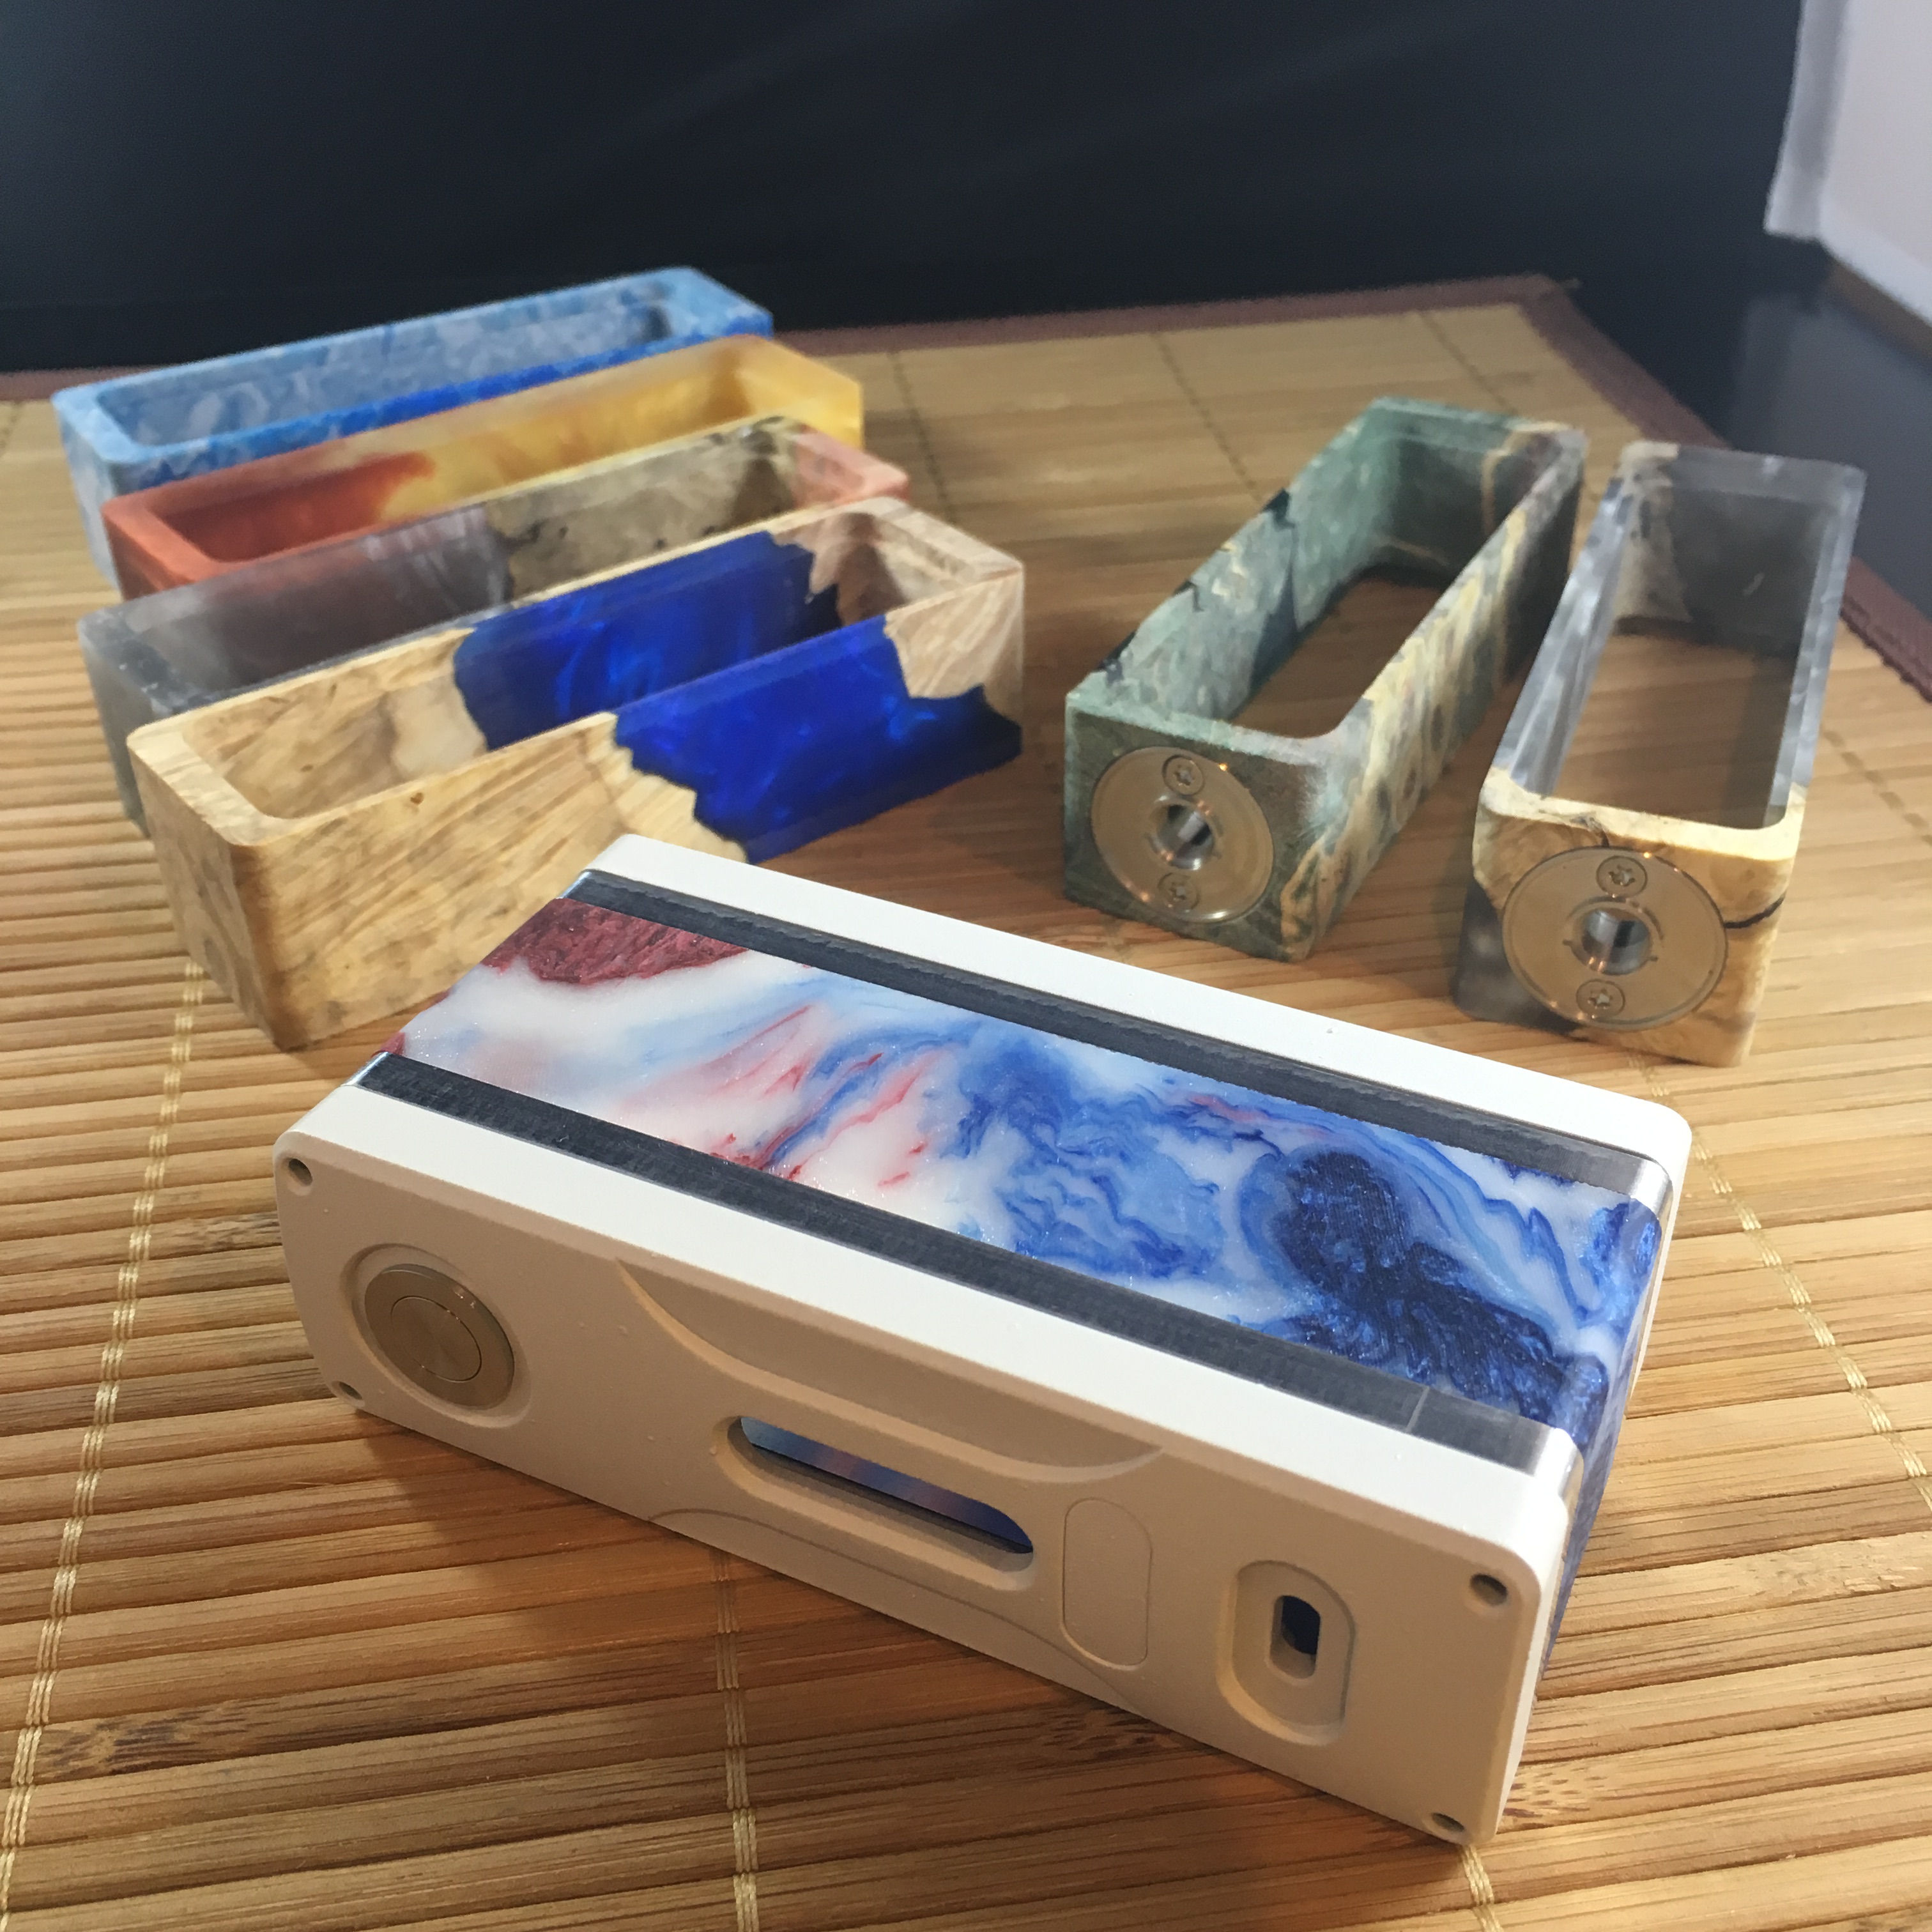
Have all of the machining done on my red, white and blue M4 DNA200 mod. Just need to sand and polish the body and trim rings and then it will be ready for final assembly. Might just have it done in time for a 4th of July vape! Few other completed and in-progress bodies in the background.
- Status
- Not open for further replies.
Similar threads
- Replies
- 2
- Views
- 877
- Replies
- 6
- Views
- 824
- Replies
- 24
- Views
- 2K
- Replies
- 0
- Views
- 217
Users who are viewing this thread
Total: 2 (members: 0, guests: 2)