Not sure I get your meaning pj, sorry. But yes stress is relieved by heat. The springiness you refer to is the minimal tension already existing in the coil from the factory as the product has already been made into a coil
on the spool. Heating it (torching) ERASES any tendency to adhesion (as to remain a coil even coming off a spool) and builds in rigidity instead.
Coils don't
adhere with torching or compression. There remain difficult to perceive gaps. So in truth they
are not microcoils by super_X_drifters definition but
approximations somewhat less efficient by varying degrees. It depends on how much torching, how much compression, etc. may be applied to correct the inconsistencies. But some imperceptible incongruity may remain. These all affect electron flow. These gaps can also contribute to deformation during wicking (or operation). Then suddenly you find your grommet burning and it's not evident why.
The reality is hand tensioning a coil into existence isn't perfect either. Your pull must be constant or you can introduce the same issues. You shouldn't let off in pressure unless you're practiced enough to resume the exact same pressure in the wind or you will get interruption gaps.
Were all human and subject to error. Let's face it, sh!!t happens. But the reason I feel this system of winding is superior is the ease of accomplishing it. Especially for beginners as a modicum of tension is all that's required to achieve adhesion. Done consistently end-to-end, in less than 30 seconds, and you get the result in my photograph. And when slight separation of the coils occurs during installation, and it happens, it's not disaster. The coil doesn't have to come out to be re-formed or re-torched. Simply aligning the leads in their orientation of exit from the wind will cause the coil to snap back into as close to the original orientation as the current geometry (localization) will allow. And that's why it's essential to leave the coil on the bit it was wound and locate it solidly to the bottom of the slot
so as to not lose this advantage. It always wants to be the original coil that was made, in adhesion, if this is accomplished.
Seems to me and consistently from much experience that if you pulse that coil, the latter one, in adhesion it stands a far and away better chance of firing as a microcoil from the get go. With it, the singular advantage that there is a bonding of the developing alumina oxide layers with each burn. You can aid this with mild compression but its unnecessary. In fact hand pressure is more of a risk than an aid as we can easily trash the coil with the slightest wrong gesture. Pulsing is all that's required to perfect a coil in adhesion.
Still no worries. It took 30 seconds to wind.
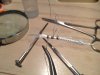
So I would ask your honest opinion do you think the coil example in the pic needs to be torched?
Or would you use it as is? Isn't it what we've all been trying to get to by forming through torching and compression?
That's my question.
")
p.s. pj btw I sympathize, I'm blind as a bat too. I've often had to photo things and blow them up to see what I was doing. These days I can gladly do a microcoil practically with my eyes closed. And that's what I'd like more users to be able to do.