Status
Not open for further replies.

lorderos33

Ultra Member
ECF Veteran
Verified Member
Mar 6, 2011
2,226
1,563
FL
here's what I don derstand . the center post hole is directly under the coil why would that not be the optimum placement for air flow . except for the fact is a huge hole a lot of air flows through there and create a very light draw . how does drilling a hole of any size create an adjustable draw . also the center hole is much closer to the coil then any hole would be drilled in the side of the polycarbonate


spoken from Inspire 4g


The reason it doesn't work well is because the wire is in the hole and while it does not restrict the airflow enough to make a difference, what it does do is split the airflow so it goes around the coil instead of on it. That is why it gets hot and creates a harsh TH. Trust me, the hole in the top tube works wonders.

To fill the center hole I just soldered the hole shut in the 510 connector. it was easy and looks neater since there is no silicone or glue in the vapor chamber. It's one of my quirks, lol, I am really particular about how my mods look so for me it has to look as good as it performs. If not I have to tinker with it till it does :)
 

cosmic charlie

Super Member
ECF Veteran
Verified Member
Oct 12, 2010
414
194
Boise ID
Ok so I used a silicone .... plug from a boge carto to plug the hole in the connector i cut the top off so it would clear the positive center terminal but i could still fish it out I then drilled a 5/64" hole just below center in the clear polly tube cut the center post off a ce2 i just eyeballed the length and used some juice to lubricate the ce2 part slipped it through the 5/64" hole and it is much better tightened up the draw killed the nasty TH. thank you it is a very cold vape flavor is excellent until i turn up the voltage to get the heat I want then its burnt but it does make a huge difference!

Sent from my DROID BIONIC using Tapatalk
 

lorderos33

Ultra Member
ECF Veteran
Verified Member
Mar 6, 2011
2,226
1,563
FL
Ok so I used a silicone .... plug from a boge carto to plug the hole in the connector i cut the top off so it would clear the positive center terminal but i could still fish it out I then drilled a 5/64" hole just below center in the clear polly tube cut the center post off a ce2 i just eyeballed the length and used some juice to lubricate the ce2 part slipped it through the 5/64" hole and it is much better tightened up the draw killed the nasty TH. thank you it is a very cold vape flavor is excellent until i turn up the voltage to get the heat I want then its burnt but it does make a huge difference!

Sent from my DROID BIONIC using Tapatalk

Since you re using a "straw" to direct the airflow, you ma just have put it too close to the coil. If you pull it away so it is just barely inside the cap and cut off the extra, the vape should warm up considerably. I would pull it a little at a time till you got it to the point where you can get the warmth you like without needing the higher voltage.

You're almost there, just a little fine tuning left :)
 

cosmic charlie

Super Member
ECF Veteran
Verified Member
Oct 12, 2010
414
194
Boise ID
Just refilled I had dropped my nic in half trying to compensate for TH. Put my normal nic amount in the refill and it lets me up the voltage get the TH, and not burn the juice may still have to drop the nic some but its much better now thank you lorderos33 and lexi60
Edited due to burbon fingers
Sent from my DROID BIONIC using Tapatalk
 
Last edited:

Jebus

Senior Member
ECF Veteran
Verified Member
Apr 14, 2011
165
57
NSW, Australia
Correct O-ring size and part numbers.

#015 Red Silicone O-ring (9/16" ID x 11/16" OD) for the main body. McMaster-Carr Part # 9396K21

#009 Red Silicone O-ring (7/32" ID x 11/32" OD) for the drip tip. McMaster-Carr Part # 9396K14

If anyone has spares of these they are willing to sell please pm me as mcmaster refuses to ship to Australia, Thank you!
 

Youssefa

Super Member
ECF Veteran
Verified Member
Sep 15, 2009
720
288
49
Gainesville, FL USA
PkZap27 built my V3 it is SOO clean, No clunky nuts and big washer..Or wires showing..I just hate to "F" it up! Maybe I could plug the carto sleeve from the bottom with a toothpick or sealant. See its sooooo pretty.

IMAG0382.jpgIMAG0384.jpgIMAG0385.jpg

Then all I would have to do is drill a hole for a small roll pin....press in the pin and go???
 

cosmic charlie

Super Member
ECF Veteran
Verified Member
Oct 12, 2010
414
194
Boise ID
PkZap27 built my V3 it is SOO clean, No clunky nuts and big washer..Or wires showing..I just hate to "F" it up! Maybe I could plug the carto sleeve from the bottom with a toothpick or sealant. See its sooooo pretty.

View attachment 82555View attachment 82556View attachment 82557

Then all I would have to do is drill a hole for a small roll pin....press in the pin and go???

I cut a piece from a cartomizer umm .... plug drilled a hole so it lines up just under the arch of the wick but it is still harsh even at the lowest setting on my BP it has that cough reflex I used a ce2 center tube smashed flat to extend the air intake but nothing. Finally I used a hourglass shaped ce2 mouth piece and a center tube to choke down the draw but still harshness. I'm thinking this is landfill bound:mad: as I can't see passing it on
a6fa010f-33a7-7a1b.jpg


Sent from my DROID BIONIC using Tapatalk
 

Attachments

  • uploadfromtaptalk1331180499086.jpg
    uploadfromtaptalk1331180499086.jpg
    19.8 KB · Views: 61

Youssefa

Super Member
ECF Veteran
Verified Member
Sep 15, 2009
720
288
49
Gainesville, FL USA
Spend a couple $$$ and send it to pkzap27 or one of the other "masters" and let them take a look. I had major issue with mine until got the wick broken in properly. Wick with COIL Quenched repeatedly in vg then soaked and burned off with vg .... But I do all that after tempering the entire wick. The next time I did a setup, I was in a rush and didn't put the coil on first and I was having the same issue you r having.


spoken from Inspire 4g
 

Scubabatdan

Vaping Master
ECF Veteran
Verified Member
Jul 14, 2009
4,749
6,733
62
Dothan, AL
Spend a couple $$$ and send it to pkzap27 or one of the other "masters" and let them take a look. I had major issue with mine until got the wick broken in properly. Wick with COIL Quenched repeatedly in vg then soaked and burned off with vg .... But I do all that after tempering the entire wick. The next time I did a setup, I was in a rush and didn't put the coil on first and I was having the same issue you r having.

spoken from Inspire 4g

Yes the issues he is having is indicitive of a short or hot spot. Properly conditioning the wick where the coil touches the wick will solve these problems. I would suggest removing the coil, pulling the wick out and butane torching the area where the coil sets red hot, resoak with PG or VG and repeat burning process 3-4 times. Then put a new coil on and re-try. Also he is only running 4 wraps, me personnaly prefer around 6 wraps this should also cool down the coil so it is not burning to hot.
Dan
 
Last edited:

l3oertjie

Super Member
ECF Veteran
Aug 26, 2009
549
236
South Africa
Yes the issues he is having is indicitive of a short or hot spot. Properly conditioning the wick where the coil touches the wick will solve these problems. I would suggest removing the coil, pulling the wick out and butane torching the area where the coil sets red hot, resoak with PG or VG and repeat burning process 3-4 times. Then put a new coil on and re-try. Also he is only running 4 wraps, me personnaly prefer around 6 wraps this should also cool down the coil so it is not burning to hot.
Dan
Gentlemen (and ladies if there are any),

I have not had one single short circuit or hot spot on any of my wicks.

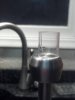
I'm of the opinion that most shorts are caused by the frail edges of the mesh' edge where it's cut with either scissors or a blade. The following picture is not that of the mesh we use but I think proves a point. Any one of those sharp ends of the woven wire on the edge can cause a short.
Adaptic_close_up_electro.jpg


Basically what I do is to cut the mesh to size with sharp scissors and then fold one edge over (about 2mm or 0.1" - for those metrically impaired ones). I flatten the fold properly with my nail or any flat and blunt object. You start rolling the wick from the opposite side of the folded section so that the fold (and the cut edge) ends up inside the wick when done. This way you prevent any frail and sharp edges (even if they are small - remember it's tiny wire segments making up the mesh) to stick out and cause a short onto the resistance wire. Something like this:
IMG00351-20120220-0939.jpg


Hope it helps a bit. :)

You can also try it like this: Wicks like a rain water gutter downhill.
Wick-1.jpg
 

Youssefa

Super Member
ECF Veteran
Verified Member
Sep 15, 2009
720
288
49
Gainesville, FL USA
let me see if I understand this correctly . by using more wraps you increase the resistance thus increasing the voltage required to heat them and this drops. the amperage, overall it cooling the whole system down . I personally have been running 1.5- 1.7 ohm's and my voltage was between 3.3 and 3.9 ...are you saying that this is what was causing my harshness problem ?
when I first got my scuba gen I did not have a V voltage devices. based on internet instructions I wrapped it at 2.6 - 3 ohms . this also corresponded with resistance of the other atomizers I have been using on my 3.7 volt devices . as a result I was having to fire it a long time Before I was able to take a drag with good vaper. during this . I was getting poor vapor but good flavor and no harshness . as I begin to lower the resistance vapor production improved but then I would get harsh hits


spoken from Inspire 4g
 
Last edited:
Status
Not open for further replies.

Users who are viewing this thread