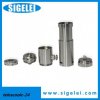
Sigelei Mechnical Mods

Status
Not open for further replies.

Asmotron

Senior Member
ECF Veteran
Verified Member
May 28, 2013
120
237
United States
Yea, getting attys to sit flush is the main thing i want. What are the "flush mod instructions" your talking about? I'm hoping its a detailed post somwhere with pictures on how to do it.

I can give it a shot with your instructions, but if theres a more detailed guide id feel more comfortable doing it that way.

Thanks for the response.

I haven't seen any good tutorials yet. When I get around to it I'll make one and post it if it turns out.
 

parkerr

Full Member
Verified Member
Jul 26, 2012
20
3
Paradise


Here's my #8 and original aga-t. The aga had ugly knurling so I got rid of the knurling a while ago. I've had the #8 for a few weeks now and I just got around to removing the chrome on the end caps last night. Only took about 20 - 30 mins. All I used was 220 sandpaper, first dry, then wet. The caps are perfectly flush with the tubes now and I think it looks way better. When I first got it I sanded down all the contacts and used a bent paperclip to shorten the button throw. Im not sure whats up with the spring though, I sanded the heck out of it and can't find any brass. This one has the small sigelei logo above the button. Does anybody know what kind of spring came with it? Its funny how the sigelei logo looks awfully similar to the Samsung logo, I cant wait to get my Sig flat screen!! :D

I did try to figure out the spring and also thought there's no brass in it. In the end I just threw it away and replaced it with beryllium copper spring. :)
 

Gummy Bare

Ultra Member
ECF Veteran
Verified Member
Nov 2, 2012
2,244
1,867
46
San Diego, California
One other thing you'll need to do if file down the 510 top pin to keep the same gap inside the switch once it's countersunk.

I take it i gotta take the hole top apart to get to that right? So, with the way this thing is designed, there is no adjustable pin on it right? Like how most other mods you can screw the top pin up and down based on how long your atomizers 510 threading is... So, if i take it apart and sand down the brass 510 section that pops up above the top of the mod, and then sand down the pin the atty touches since after sanding the top section it will be to long; i still wont be able to adjust the top pin on the fly based on the lenth of my atomizer?

So even after getting the popped up star section sanded down flush to the top of the mod, i'm still gonna risk the atty either not sitting flush, or not making a connection since i can adjust the length of the top pin on the fly?

:: sent from android with tapatalk ::
 

justinstar77

Senior Member
ECF Veteran
Verified Member
Apr 2, 2013
94
67
48
Santa Rosa, CA
I take it i gotta take the hole top apart to get to that right? So, with the way this thing is designed, there is no adjustable pin on it right? Like how most other mods you can screw the top pin up and down based on how long your atomizers 510 threading is... So, if i take it apart and sand down the brass 510 section that pops up above the top of the mod, and then sand down the pin the atty touches since after sanding the top section it will be to long; i still wont be able to adjust the top pin on the fly based on the lenth of my atomizer?

So even after getting the popped up star section sanded down flush to the top of the mod, i'm still gonna risk the atty either not sitting flush, or not making a connection since i can adjust the length of the top pin on the fly?

:: sent from android with tapatalk ::

Yes. I think if you take the switch apart you'll see how it makes the connection. What happens is the firing pin nudges against a spring that's wrapped around the bottom pin pushing the spring over to connect it to the top pin where the 510 is. The diameter of the top pin is smaller where it connects and there's a gap between the two pins to prevent it from continuously firing. If you wanted it to be adjustable you'll have to find or fabricate a top pin that you could thread into the derlin but was the same diameter as the original top pin underneath. You're still not going to get a lot of play out of the adjustment though because the derlin is not that thick to begin with. So if you want to get it set uo flush for one atty you probably could but that's probably about it. It's sad how badly the switch was designed.
 

Elantis

~≈Dragonfly≈~
ECF Veteran
Verified Member
Aug 31, 2012
6,752
7,065
Hoosier Cornhusker
I take it i gotta take the hole top apart to get to that right? So, with the way this thing is designed, there is no adjustable pin on it right? Like how most other mods you can screw the top pin up and down based on how long your atomizers 510 threading is... So, if i take it apart and sand down the brass 510 section that pops up above the top of the mod, and then sand down the pin the atty touches since after sanding the top section it will be to long; i still wont be able to adjust the top pin on the fly based on the lenth of my atomizer?

So even after getting the popped up star section sanded down flush to the top of the mod, i'm still gonna risk the atty either not sitting flush, or not making a connection since i can adjust the length of the top pin on the fly?

:: sent from android with tapatalk ::

I have a #20 that I did the process and now it only works with the AGI and nothing else - which is okay I guess but even the AGA T2 I have won't make connection. So now that mod is strictly used with that AGI. Most of the gap is gone, but I decided to stop while I was ahead of the game and deal with the tiny little gap I have left.
 

justinstar77

Senior Member
ECF Veteran
Verified Member
Apr 2, 2013
94
67
48
Santa Rosa, CA
I have a #20 that I did the process and now it only works with the AGI and nothing else - which is okay I guess but even the AGA T2 I have won't make connection. So now that mod is strictly used with that AGI. Most of the gap is gone, but I decided to stop while I was ahead of the game and deal with the tiny little gap I have left.

Might be tricky to find or make but a 510 size brass slug or washer could help complete the connection?
 

Elantis

~≈Dragonfly≈~
ECF Veteran
Verified Member
Aug 31, 2012
6,752
7,065
Hoosier Cornhusker
Might be tricky to find or make but a 510 size brass slug or washer could help complete the connection?

I also do miniatures (like in dollhouses 1/12 scale) and I have a huge supply of brass tubes etc, - I may look into making a small brass washer to fit over the top of the pin to help the connections for other devices - but for now I am happy with the AGI on it - it's the only mech mod I have at this time.
 

crss

Ultra Member
ECF Veteran
Verified Member
  • Mar 19, 2013
    1,704
    4,439
    dev/null
    I love my #20, perfect from day 1, after a hot spring install. Perfect with my oddy medium on top. Since the oddy is a bottom air intake. Its a great combo. Just put the Fusions Mods SG-1 on my #8 + Terminator-C. No gap's, seemless. The #20 is solid, oddy does not leak. No fear to take it any place, leave it in my tool bag. The 1st week of use, i did not like the #20 on-off switch. Now its broken in, smooth & i am used to it. I was going to sell my #20 after having it a few weeks. Now, i will not part with it.. Looking fwd to #19's arrival in a few weeks. Guess i might look for a 13a also.
     

    NamVet68

    Super Member
    ECF Veteran
    Verified Member
    Feb 16, 2013
    797
    1,245
    Orlando, Florida
    home.roadrunner.com
    Just got my #20 today & so far the biggest issue is the positive pin is too low for most of my RBAs, but works with about 75% of my tanks/Vivis, and EVODS & CE4s work fine with an adapter. I got one of the newer ones - it has the Stainless steel button and came with a Hot Spring already installed. Overall, it's a nice little MOD, I'll just have to fiddle with it a little to iron out some stuff I don't like (but I usually do that with most of my MODs anyway).

    I've had my #19 for a few weeks, I hated it at first (a lot of miss-fires), but after some modifications, I love the thing.

    First thing you HAVE to do is get a "Hot Spring" for a Silver Bullet and trash the stock stainless spring...hits 100% better, and feels far better also. Not a single miss-fire since I swapped the spring. You have to fiddle around with it to get the new spring to fit - I had to wind it tighter to fit smoothly inside the #19, but it's not hard to do. I would recommend NOT cutting it down if you retain the magnets - its a softer spring, and you need to have enough power in the spring to pull the magnet away from the battery. You also have to make sure the spring doesn't bind against the inside of the button if you want the "safety" to unscrew smoothly.

    Some have said to remove the magnets, but I didn't find that necessary - I just polished them a bit and they work fine and don't appear to have much resistance at all... works great with them in. I also ground down the top of the 510 connector until it sat flush, hit it with a Scotch bright pad to even up all the machine marks and its good to go. After a few simple changes, it's become a new favorite (takes a Kick perfectly too BTW).

    Sigelei has been coming out with some great little mechanicals lately...with a few simple tweaks, they are outstanding MODs. You can't beat them for the money....
     
    Last edited:

    NamVet68

    Super Member
    ECF Veteran
    Verified Member
    Feb 16, 2013
    797
    1,245
    Orlando, Florida
    home.roadrunner.com
    That's awesome, be happy!

    Does anyone know of a vendor that has the 13a in stock?

    I think Vaportekusa has them, but they are down for maintenance at the moment. I've ordered a bunch of stuff from them, including both my #19 & my #20 - good people....
     

    justinstar77

    Senior Member
    ECF Veteran
    Verified Member
    Apr 2, 2013
    94
    67
    48
    Santa Rosa, CA
    I got some more pictures of the #24.
    311500984.jpg
    looks like they figured out how to not chrome plate all the brass bits!
    311501863.jpg
    what's with the tiny springs though?
    311501864.jpg
    cant tell the depth but a little sanding on the top might give a nice flush fit
    311504046.jpg
    311500923.jpg
    still curious how the switch works inside hope it's not like like the 13b or the 20.
     

    Gummy Bare

    Ultra Member
    ECF Veteran
    Verified Member
    Nov 2, 2012
    2,244
    1,867
    46
    San Diego, California
    Yes. I think if you take the switch apart you'll see how it makes the connection. What happens is the firing pin nudges against a spring that's wrapped around the bottom pin pushing the spring over to connect it to the top pin where the 510 is. The diameter of the top pin is smaller where it connects and there's a gap between the two pins to prevent it from continuously firing. If you wanted it to be adjustable you'll have to find or fabricate a top pin that you could thread into the derlin but was the same diameter as the original top pin underneath. You're still not going to get a lot of play out of the adjustment though because the derlin is not that thick to begin with. So if you want to get it set uo flush for one atty you probably could but that's probably about it. It's sad how badly the switch was designed.

    Yea, that sure if a bummer the way they made the switch and pins on this one. I guess I’m gonna have to figure out with atty I want permanently stuck to my #20 and start moding it to sit flush.
     
    Status
    Not open for further replies.

    Users who are viewing this thread