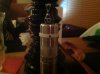
Hey just to put this out there...
After trying loads and loads of wicking setups I finally came down to 2 really good ones
1: SS wire wick 7x7 with the centre core removed,
2: 400 mesh wrapped once around a good sized cotton centre.
At present the cotton /mesh setup is unreal, I use .5 ribbon wire either 3/2 or 4/3 wrap and its unstoppable. It brings in around .8 to 1ohm, flavour and vapour is probably as good as its gonna get. It's taken a long time playing around with this to get here, should mention I reluctantly drilled the air hole out to about 2mm but its made a hell of a difference to my usual vape style, instead of fighting draws this is a very smooth big deep draw thats full of flavour and buckets of vapour.
A major issue I found was the time to heat the coils, hence centre core removed means less SS to heat and more
juice instead. One wrap of ss mesh instead of several also reduces heating time and quicker to reach the liquid...
To mention I have the silver plated centre screw in to speed up the firing time and it has made a substantial difference. I also shaped a piece of tinfoil to bulk up the inside of the chamber but caution - it must not be able to touch the centre screw or negative screw. Cos it makes another big difference I'm going down the safer Delrin insert road as its gonna be worth it, 10 bucks from Ifancyone site then I'm closing the book on this beast.
Well I hope this is of some value to you rsst fans out there, all the best and speak again! McR

 , the hotspot seems to be persisting particularly the top part. Is there any tips that I should be looking out or any recommended videos particularly on hotspot fixing?