SPRING? . . . . .. what spring?

Status
Not open for further replies.

pdib

ECF Guru
ECF Veteran
Nov 23, 2012
17,151
127,511
www.e-cigarette-forum.com
Good - because then instead of me buying new stuff i can wreck some of hers! Plus ca change!

i have a very expensive kitchen Ninja that ought to fit the bill. Lightly used etc.

T

just realized (on account of I posted another drip tip) . . . . your posting in the wrong thread. And . . . . therefore . . .. disqualified. No Osterized drip tips for you! :p
 

turbocad6

Unregistered Supplier
ECF Veteran
Jan 17, 2011
3,318
16,450
brooklyn ny
I've been using the reo with the dna a bit now and I tried to measure voltage drop, but I'm not even sure how I could. I metered the battery at 4.06V then I fired it and measured at the atty and got 5.07V, took me a second or so for me to register, duh... vv :) that's set to 20 watts with a 1.3 ohm coil (how do you type the ohm symbol?)


the screen displayed voltage under fire at 5.1V and it measured 5.07 actual at the atty. the dna measures voltage to the atty under fire and it seems pretty accurate I guess, it's reading and adjusting to maintain the actual targeted voltage

it's still not finished 100% but it's back to vapable and all most done, only it's held together with a few wraps of scotch tape :) I underestimated how much space I would need for the wiring :oops:, all the battery and atty wiring is 20 gage and I figured I could just tuck them in the corners but just not enough room to fully close it and I don't want to put too much pressure on anything so now I have to make a spacer to fill this void, overall this thing winds up being ~1/4" taller than a VV grand


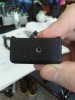
it glows red when it's charging, can't see it in the shot but the whole screen glows too :)


it lives :)


Alexander Mundy

Ribbon Twister
ECF Veteran
Verified Member
Apr 1, 2013
4,408
26,100
Springfield, MO

supertrunker

Living sarcasm
ECF Veteran
Verified Member
Oct 12, 2012
11,151
52,107
Texas
so my fellow REOnutz...

I just did a firing pin rebuild on my fuse block reo since it had a few MacGyvered bits in there and my rebuild bits arrived today...

My previous statement was a lie. I do have a teeeeeeeeeny tiny bit of melted delrin on my button


But the Dibbmeister has a cure for that.

T
 

SeaNap

Super Member
ECF Veteran
Verified Member
Mar 27, 2009
699
2,520
38
Atlanta
Alright so I mentioned a while back that modeling clay might work... well.. here it is! I took a page from Xobe's Mcgyvering skills and did this with nothing more than a 1/16th drill bit in a dremel (because I don't have an actuall drill), hammer, pliers and an oven.

I started with two female spade connectors: 2013-10-12 10.35.39.jpg

I took the plastic off, and hammered that end flat. I stuck the fuse into the female ends and bent the flat ends. The left leg flat end was bent down, and the right leg flat end was bent up. I then alligned whe left leg with where I wanted it to end up and drilled a hole for the screw to go in. Since i dont have any tap's that are that small I just used the bottom screw and some elbow grease to make the hole "threaded".
2013-10-12 10.37.15.jpg2013-10-12 10.37.24.jpg

I bought some clay at the local Michaels, and i just started to cover the whole fuse/connectors making sure that the flat "plates" were exposed and would make contact. I never have done this before but it was surprisingly easy. Once I got the exact shape and I was able to test it, I put it (fuse and all) into the oven at 275 F for about an hour then turned off the oven and left it in there to cool over night. It works perfectly, and the best part is that there is no modification to the ATM blade fuse. So if it blows you just pull it out and pop a new one in.


I will do some testing later, but it works flawlessly and makes the REO feel even more solid.
:vapor:
 

Attachments

  • 2013-10-12 10.39.05.jpg
    2013-10-12 10.39.05.jpg
    21.3 KB · Views: 75
  • 2013-10-12 10.36.44.jpg
    2013-10-12 10.36.44.jpg
    22.8 KB · Views: 74
Last edited:

gdeal

Moved On
ECF Veteran
Aug 4, 2012
2,324
7,271
( -_-) Ω~
I know I am late to this party.

My mosfet switch was acting up so I did a quick swap. This mod was too easy. :) Just a quick bend here and a quick bend there and tucked it under the spring plate... A couple of safety checks and vape away. The spring plate actually makes a nice securement point for the bottom leg. The slight bump up from screw hole (resting against the plastic) was just enough to level out the fuse.

Using a copper firing pin gave pretty good results on a .7ohm coil.

Reo10 amp.jpgReo Ceramic 7ohm 392v.jpg
 
Status
Not open for further replies.

Users who are viewing this thread