Tensioned Micro Coils. The next step.

Status
Not open for further replies.
This is a great thread and interesting discussion. I stayed up till 1:00am Friday night reading the whole damn thing! While I'm not ready to abandon my twisted coils I did stop at Hobby Lobby yesterday and picked up the gizmo. My curious nature just can't let the idea rest. The TMC looks like a perfect fit on the tiny build deck of the Subtank Mini that's where I'll try it first probably.

For tension I'm going to look at attaching various weights to the end of a length of wire and then winding. It seems to me that gravity and a specific amount of mass on the end of the wire would provide a very precise and repeatable tension.

Turbo -Awesome job on your prototype! I love the way the arm extends out to follow the length of the coil.
 

ReigntheGamer

Account closed on request
ECF Veteran
Oct 14, 2014
5,979
26,132
Superx, how do you insure that your washers and wing nut don't hit the pole of the gizmo while pressing the coil against it?

I get the wing nut where it is parallel to the "U" shaped dip on the back side (facing away from me) and while holding it in place with my wire in between the washers tighten it from the front side with a screwdriver. It was akward at first but now it's second nature and I can start my wraps with the wire again the vertical rod support and work outwards.
 

MacTechVpr

Vaping Master
ECF Veteran
Verified Member
Aug 24, 2013
5,725
14,411
Hollywood (Beach), FL
i started playing with my gizmo today and my coils ohms seem off. I feel like i must be stretching this 30 gauge. not sure exactly whats happening. my coils always agreed with the calculator in the past. on the bright side, the vape tastes way better with this micro vs. the twisted i was using. much cooler too. ill build more tomorrow and see whats going on.

It stands to reason astro that as you get closer to refining the contact oxidation you get closer to the actual line wire resistance.

Close contact starts to induce electron jump as uninsulated contact points bridge the flow of current across wires. This abnormally and unfavorably raises resistance and temperature fouling up the vape. Optimizing contact as a means towards a more complete oxidation is the purpose of using tension as the most uniform manner to shape wire in a consistent and predictable way. It's at this point of adhesion (closest proximity) and with a consistent isolation of turns that you will see the tightest normalization of resistance values to the actual theoretical published values.

Thank you for validating the premise and the delightfully effective thermal results this brings us.

Good luck and vape on!

:)


attachment.php
 

Attachments

  • IMG_0805a.jpg
    IMG_0805a.jpg
    40.5 KB · Views: 327

Darryl Licht

Ultra Member
Verified Member
Jan 19, 2015
1,263
996
So Cal
I posted this information about the coiler I use last summer. Seems like a little revival here about different coiler options, so I just wanted to throw this out, in case anyone is interested. There are certainly a lot more options today. I do like both the side tension and drag on the reel in conjunction with the coiler. Produces great tensioned micro coils super quick. I will add additional drag to the reel sometimes with gentle finger pressure on the reel. I can get it to any level of tension I like this way. Like Supe, I don't make coils for fun, but because I need to for vaping. This is much easier than doing it by hand, for me.

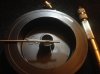
Here's the Coiler Pics:

View attachment 412577View attachment 412578

That last picture (lower right) is where this all started. It's come a ways. Has a ways to go. We shall see where this leads.

Some Combo shots of the coil at the Mandrel/Chuck. Notice the leg catcher with the spring. This feature makes it very quick to wrap the coil. The alternative is usually to get the wire into the chuck jaws and tighten. I have found this difficult and time-consuming. I want my coils right now, right?

View attachment 412579

Upper Left: Wide shot of the mandrel at the post and chuck connections.
Upper Right: Shot of the spring-loaded leg catcher on the 1/16" drill stop collar.
Lower Left: Close up of the coil while winding. The first two, or three, coils are generally removed.
Lower Right: The Coil just cut from the Spooler. Causes the loss of a half wrap.

Here's the reason the coiler is so important to our wraps. Even though the coils in the first picture below are "touching," you can see that the pitch is different on the first four or five coils, than on the last four or five coils. For this reason, the coil has to be overwrapped, and then the first two, plus an additional four or five coils are removed with the pliers at 90 degrees to the coil and literally pulled off the coil, leaving the very tight coil like you see in the last picture below.

View attachment 412580

Upper Left: Close up of coil after removal from both the leg-catcher and the spooler.
Upper Right: Another close-up of a different coil.
Lower Left: Notice the pitch change at the far right.
Lower Right: Close-up of the pitch change. Concerning...

Notice that the pitch of the coil changes as we remove the coils (Lower Right in picture above), presumably for the purpose of improving the wrap. So, I decided to try to improve the tension from the side and added another spring-loaded drill stop:

View attachment 412581

Upper Left: Tension added from the side at the wrap.
Upper Right: Coils are not only touching, but being literally squeezed together at the wrap.
Lower Left: Remove Spooler tension and remove coils while still under side tension.
Lower Right: Finished coil.

Ok, that turned out to be a pretty good ten coil wrap. Tensioned through drag from the reel spooler and from the side with a spring loaded drill stop, then unwrapped while under side tension. Needless to say, this coil does not need to be additionally "formed" through the use of a torch.

However, as we examine the photos at super close-up, we do see a lot of imperfections on the surface of the wire. These imperfections will be very detrimental to our metallic oxide layer formation when we pulse the coil. Ideally, by pulsing the coil, we can add up to three layers of alumina (the metallic oxide that forms on kanthal after heating). This alumina layer is critical for us to achieve what SuperX calls the "Effect." The effect will be discussed in another blog (someday). For now, our work with this coiler is almost done. I would like to add an adjustable guide pulley from the spooler to the mandreal. Right now I do that function by hand, but it doesn't need to be that way. I would like to automate as much of the process as possible, so that when I do find my perfect coil, I can repeat it.

Thank you State O'Flux for naming the coiler. Ok, the BMV Coiler 2.0 Parts List:

ParaWire Cobra Coiler: Cobra Coiler | ParaWire
1/16" Stainless Steel Mandrel: Aura Visual Concepts, Inc.. Almost Indestructible Mandrels
Fuller 1/16" Drill Stop Collar: 1/16 DRILL STOP - Jigs - Amazon.com
Misc. 8/32 x 1/2" Machine screw, spring, L metal and washer
Crystal River Cahill Fly Reel: Amazon.Amazon.com : Crystal River Cahill Cahill Rim Fly Reel : Fishing Reels : Sports & Outdoors
Mounts for Fly Reel: http://www.walmart.com/ip/24775805?www=true&productRedirect=true

So, materials cost is about $75.00, plus shipping. Additional reels for different wire gauges are extra. I have two for 28 and 29 gauge. Also, a piece of scrap wood or whatever to mount the jig. Anyway, that's the story. Good luck!

My brain is going to explode... what an awesome concept to keep constant tension! Use a reel and it's drag adjustment, this sir is brilliant!
 

turbocad6

Unregistered Supplier
ECF Veteran
Jan 17, 2011
3,318
16,450
brooklyn ny
an average Pot won't handle the amperage and will burn out immediately, you'd need a higher power variable resistor at least or Best way to vary speed on a motor would be pulse width modulated control, but adds to the size and cost, also not really necessary from what I'm seeing. I'm using a .47 ohm 3 watt resistor right now.higher or lower speed can be achieved with different resistance. I'm also thinking it may be very possible to run this thing on a DNA module. Haven't tried it yet but I'm thinking it would probably work, raise and lower the wattage to raise and lower the speed, then I'd have a volt display too...

right now I have the battery soldered in, haven't made a holder with terminals for it to be swappable yet. I checked the battery voltage after doing that last coil test video and it was down to 3.5 v. I added a charger to the base and charged it back up now, I'll play more with it tonight. Mac the new tension slip ring wasn't burnished in yet in that video but I'm shooting for consistent drag for consistent tension. Can't say I really see what your seeing on the first 4 wraps but I haven't blew it up on a big screen so I believe you're seeing something there. I'll do another with the tension mechanism completed and a charged battery to see how that looks. the only variable should be approach angle

The slight wobble in the bit is a compromise in the design. I choose to use a 1/4" drive instead of a chuck to keep things compact and for quick ID changes, a 3 jaw chuck would allow me to get a perfectly concentric rotation but really, everything is a trade off, I could make a rock solid version that would be twice the size of this one but I didn't think that slight rock in the bit would be detrimental to the results, I'm not convinced that it is yet. I wanted tiny for this but if it proves inadequate then I'll address it I guess
 

Darryl Licht

Ultra Member
Verified Member
Jan 19, 2015
1,263
996
So Cal
an average Pot won't handle the amperage and will burn out immediately, you'd need a higher power variable resistor at least or Best way to vary speed on a motor would be pulse width modulated control, but adds to the size and cost, also not really necessary from what I'm seeing. I'm using a .47 ohm 3 watt resistor right now.higher or lower speed can be achieved with different resistance. I'm also thinking it may be very possible to run this thing on a DNA module. Haven't tried it yet but I'm thinking it would probably work, raise and lower the wattage to raise and lower the speed, then I'd have a volt display too...

NOW that would be kinda cool in a vape oriented device!!!

I look forward to more posts and modifications on this one.
 

MacTechVpr

Vaping Master
ECF Veteran
Verified Member
Aug 24, 2013
5,725
14,411
Hollywood (Beach), FL
The slight wobble in the bit is a compromise in the design. I choose to use a 1/4" drive instead of a chuck to keep things compact and for quick ID changes, a 3 jaw chuck would allow me to get a perfectly concentric rotation but really, everything is a trade off, I could make a rock solid version that would be twice the size of this one but I didn't think that slight rock in the bit would be detrimental to the results, I'm not convinced that it is yet. I wanted tiny for this but if it proves inadequate then I'll address it I guess

It's the physical universe T and most of what we do is trial-and-error. Much of the best, pure accident. Great example of a compact device and saw better in the second clip how the feed block travels. You are an encouragement. Thank you.

Good luck!

:)
 

Darryl Licht

Ultra Member
Verified Member
Jan 19, 2015
1,263
996
So Cal
here's an attempt of a shot from the top mac


That is a freaking incredible rube Goldberg vape tool! I love it. One thing is clearly evident... we need to start a fund to get turbocad a nice high res video camera!

Just a thought turbo... would the tension and feed system possibly work better if the wire stayed on the same plane the entire time? Next revision?

I'd like to see that second close up with you cutting the coil wire. How much spring in that coil when you cut?
 

super_X_drifter

ECF Guru
ECF Veteran
Verified Member
Oct 4, 2012
10,635
45,119
Somewhere out there
www.youtube.com
Fun fact: screen shot of some of my threads - look at the number of views on that original micro coil thread - funny thing is that ain't even the original thread. I originally created it in REOvil - yep the first micro coil was built in a chalice on a REO grand :)

251efa3d02188ab6ab2f1cd9ef4f48c1.jpg


1.16 million views. That's pretty sick :)

Here's a link to the inception thread :)
http://www.e-cigarette-forum.com/forum/showthread.php?t=389074
 
Last edited:

turbocad6

Unregistered Supplier
ECF Veteran
Jan 17, 2011
3,318
16,450
brooklyn ny
yeah Russ, my wife knows that there is def something wrong with me, but if you ask her, it goes way back to even before ecig stuff :) that's a lot of views brother :)

Darryl I do have a high res video camera but hardly ever drag it out charge it up and then get the tripod :) that vid was extra bad because I was just holding the phone. here's another more stable one?


this is that coil:


IMG_20150302_002157_zpsomcprhpx.jpg


IMG_20150302_001614_zpsaitfkatu.jpg


on a 10-11 wrap on average the spring back is ~ 1/2 a rotation, 180 deg, so I stop the wind opposite where I want the leg to fall. when you say "would the tension and feed system possibly work better if the wire stayed on the same plane the entire time?" are you talking about the slight difference in feed angle from beginning to end of wrap, or the wobble in the spindle drive? I could easily make it stay exactly on the same angle throughout but it requires me to use my guide block manually, IE; guide it by hand, which is what I originally designed, but the difference in approach angle from beginning to end without guiding it is probably less than a degree, don't know if a matter of a few minutes angle change affects much. for me to make it a controlled power feed for the feed arm would be very complicated and elaborate and would require a variable geartrain to select different pitches for different wire gages or better yet CNC control... I think this thing is rube Goldberg enough without cnc controlling it :D


I've done some research on drag clutches on fishing reels and learned a bit about them, ideally you want a very consistent amount of resistance but there is more to it, stuff like initial braking torque VS continuous and also precision in the amount of resistance held. an ideal scenario is that the reel releases it's hold at a certain amount of pounds of line pull and then still maintains the same amount of resistance throughout it's release. in reality it will require at least slightly more line pull to break loose against the brake but then require less line pull to continue the drag. cheap reels use cork or plastic composites as the variable friction clutch but really expensive reels are now using multi carbon fiber clutch to SS or titanium discs and spline drives. I've seen the insides of some $800-$900+ reels and there pretty funky and elaborate spine drive multi disc clutch mechanisms for the ultimate in consistency of drag resistance

main reason I'm mentioning this is to simply say that using a fishing reel is the easiest and most practical way for anyone to build a tension wrap rig, even a cheap reel should provide adequate resistance I would think, I'm doubting anyone is going to go buy a competition reel just to wrap coils, I just figured I'd share what I learned in researching these. I also found some really tiny fly fishing reels and even some fly fishing reels that use a cartridge insert so quick wire changes are practical. main reason I decided on working right off the wire spools is because I wanted the versatility of being easy to swap between 4-5 different wire gages and type, but if I was to do another and compact was not my main goal I might think to either get a reel and several empty cartridges for it, or just buy several cheap mini reels and keep them loaded with my different wires and make the reels quick release to swap...


researching how the high end reels work for consistent drag has given me some ideas as to how to make my drag resistance a lot more linear and consistent though, so I am going to revise my clutch mechanism design on this one for much more consistent drag throughout the wind.

I know my rig is kinda beyond what most guys are going to want to or be able to build, but a really simple rig could be built for well under $100 to do pretty much the same thing as I have done here. yeah it may be larger and uglier but still may be a great working tool... I'm thinking pick up a cheap reel and a cheap cordless drill and mount them both to a frame, could be a short piece of a 2x4 even, doesn't have to look fancy to get the job done :) whenever I have the time I'm going to put one of these together with strictly off the shelf parts and in a way that an average tinker would be able to build something like this to spark attainable ideas for all the tinkerers here :)
 

astronomicals

Senior Member
Feb 5, 2015
86
35
Ive been playing around with using weight hanging from the wire. I realized that dead weight has some issues. It hangs straight down so its not a great angle of attack. I propped it against a smooth piece of wood to get about a 10 degree angle with minimal drag. Any suggestions on optimal angle? I need to do get some more wire so I can test how much tension they can handle and try to determine a good weight for each gauge. I currently only have 26.

Once the wire arrives I plan to do a stress test on each gauge just to see what point they break at. Im thinking ill dial back about 10-20% from whatever number that is and wrap with that much weight as resistance. The drag added from the angle will be an unknown because I'm not that mechanically inclined nor do I think it will make a huge deal.
 
Last edited:

MacTechVpr

Vaping Master
ECF Veteran
Verified Member
Aug 24, 2013
5,725
14,411
Hollywood (Beach), FL
Fun fact: screen shot of some of my threads - look at the number of views on that original micro coil thread - funny thing is that ain't even the original thread. I originally created it in REOvil - yep the first micro coil was built in a chalice on a REO grand :)

251efa3d02188ab6ab2f1cd9ef4f48c1.jpg


1.16 million views. That's pretty sick :)

Here's a link to the inception thread :)
Micro Coil for the RBA on your REO

Yep, and I read it and quit. Thank you kind sir!

:D

Good luck.
 

turbocad6

Unregistered Supplier
ECF Veteran
Jan 17, 2011
3,318
16,450
brooklyn ny
a weight should give a nice even amount of resistance I would think, just make sure whatever your guiding the feed with doesn't add friction to skew that. angle is something that's kinda hard to nail down anything precise as being "correct", Id say you at least want some negative rake on the approach, it may be more important for the angle to be consistent throughout the wrap than what the actual angle is but I'm finding with a good amount of tension you don't need to be more than just slightly less than 90* really, consistency is probably more key than any exact value when it comes to resistance or angle I would think... Mac?
 

MacTechVpr

Vaping Master
ECF Veteran
Verified Member
Aug 24, 2013
5,725
14,411
Hollywood (Beach), FL
Ive been playing around with using weight hanging from the wire. I realized that dead weight has some issues. It hangs straight down so its not a great angle of attack. I propped it against a smooth piece of wood to get about a 10 degree angle with minimal drag. Any suggestions on optimal angle? I need to do get some more wire so I can test how much tension they can handle and try to determine a good weight for each gauge. I currently only have 26.

Once the wire arrives I plan to do a stress test on each gauge just to see what point they break at. Im thinking ill dial back about 10-20% from whatever number that is and wrap with that much weight as resistance.

Astro I'd say the optimal would be close to the direction of wind or what's called the bias angle of the wind. Prolly somewhere between that and the perpendicular. How much might depend on things like the wire gauge and how much tension is being applied. If you go to the outside with attack angle and too much tension it will get pulled off the natural bias and skew (elongate). Being able to adjust the angle of attack is helpful to getting consistency.

A resting weight which can be angled and supported by degrees, that might work. If so, add some consistency. As much as a mechanical that's been tuned to the correct angle.

Good luck.

:)
 

Katya

ECF Guru
Supporting Member
ECF Veteran
Verified Member
Feb 23, 2010
34,804
120,147
SoCal
Fun fact: screen shot of some of my threads - look at the number of views on that original micro coil thread - funny thing is that ain't even the original thread. I originally created it in REOvil - yep the first micro coil was built in a chalice on a REO grand :)

251efa3d02188ab6ab2f1cd9ef4f48c1.jpg


1.16 million views. That's pretty sick :)

Here's a link to the inception thread :)
Micro Coil for the RBA on your REO

687 of those are mine. :D

Thanks, guys! :wub:
 

MacTechVpr

Vaping Master
ECF Veteran
Verified Member
Aug 24, 2013
5,725
14,411
Hollywood (Beach), FL
yeah Russ, my wife knows that there is def something wrong with me, but if you ask her, it goes way back to even before ecig stuff :) that's a lot of views brother :)

Darryl I do have a high res video camera but hardly ever drag it out charge it up and then get the tripod :) that vid was extra bad because I was just holding the phone. here's another more stable one?

this is that coil:


on a 10-11 wrap on average the spring back is ~ 1/2 a rotation, 180 deg, so I stop the wind opposite where I want the leg to fall. when you say "would the tension and feed system possibly work better if the wire stayed on the same plane the entire time?" are you talking about the slight difference in feed angle from beginning to end of wrap, or the wobble in the spindle drive? I could easily make it stay exactly on the same angle throughout but it requires me to use my guide block manually, IE; guide it by hand, which is what I originally designed, but the difference in approach angle from beginning to end without guiding it is probably less than a degree, don't know if a matter of a few minutes angle change affects much. for me to make it a controlled power feed for the feed arm would be very complicated and elaborate and would require a variable geartrain to select different pitches for different wire gages or better yet CNC control... I think this thing is rube Goldberg enough without cnc controlling it :D


I've done some research on drag clutches on fishing reels and learned a bit about them, ideally you want a very consistent amount of resistance but there is more to it, stuff like initial braking torque VS continuous and also precision in the amount of resistance held. an ideal scenario is that the reel releases it's hold at a certain amount of pounds of line pull and then still maintains the same amount of resistance throughout it's release. in reality it will require at least slightly more line pull to break loose against the brake but then require less line pull to continue the drag. cheap reels use cork or plastic composites as the variable friction clutch but really expensive reels are now using multi carbon fiber clutch to SS or titanium discs and spline drives. I've seen the insides of some $800-$900+ reels and there pretty funky and elaborate spine drive multi disc clutch mechanisms for the ultimate in consistency of drag resistance

main reason I'm mentioning this is to simply say that using a fishing reel is the easiest and most practical way for anyone to build a tension wrap rig, even a cheap reel should provide adequate resistance I would think, I'm doubting anyone is going to go buy a competition reel just to wrap coils, I just figured I'd share what I learned in researching these. I also found some really tiny fly fishing reels and even some fly fishing reels that use a cartridge insert so quick wire changes are practical. main reason I decided on working right off the wire spools is because I wanted the versatility of being easy to swap between 4-5 different wire gages and type, but if I was to do another and compact was not my main goal I might think to either get a reel and several empty cartridges for it, or just buy several cheap mini reels and keep them loaded with my different wires and make the reels quick release to swap...


researching how the high end reels work for consistent drag has given me some ideas as to how to make my drag resistance a lot more linear and consistent though, so I am going to revise my clutch mechanism design on this one for much more consistent drag throughout the wind.

I know my rig is kinda beyond what most guys are going to want to or be able to build, but a really simple rig could be built for well under $100 to do pretty much the same thing as I have done here. yeah it may be larger and uglier but still may be a great working tool... I'm thinking pick up a cheap reel and a cheap cordless drill and mount them both to a frame, could be a short piece of a 2x4 even, doesn't have to look fancy to get the job done :) whenever I have the time I'm going to put one of these together with strictly off the shelf parts and in a way that an average tinker would be able to build something like this to spark attainable ideas for all the tinkerers here :)


What can I say T. Fab-u-lous! Sign me up.

:D

G'luck.
 
Status
Not open for further replies.

Users who are viewing this thread