Wizard/ Vrajitorul Smallest and lightest mod ever made

Status
Not open for further replies.

Roxxette

Ultra Member
ECF Veteran
Verified Member
Feb 4, 2012
1,535
656
Caribbean
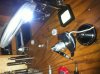
If the basic design was not change (was fortune enough to enjoy the wand in beta form when all started) just need to unscrew the big post and the base will come off plus the bottom, orings in each place and the glass should slide out; doing this will also give you the choice to align the wick hole with your mod in case it face the other way you vape.

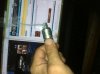
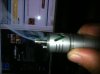
As you guys probably know the screw on the connector gives you the ability to close the gap between the coil and the post and is not to tight the post down if im correct so dont try to tight/loose that.

Hope it helps and enjoy ! :) later in the year il try my chances to get ahold of one in the classifieds :eek:


Sent from my iPad using Tapatalk
 

ukeman

PV Masher
Supporting Member
ECF Veteran
Verified Member
Aug 22, 2010
7,718
5,129
Kauai, Hawaii
Someone got a Wizard and Wand Ti in the classies for a very reasonable price just a couple days ago....

After seeing emonty's vid, i happened on a Wand Ti in classies this morning, and well I always figure if you get a chance at a great Genesis, its opportunity knocking...

on its way to me now... unless I find a Wizard, this is going on my ELA as soon as i get that in a couple/few weeks.
 

SissySpike

Vaping Master
ECF Veteran
Verified Member
Apr 1, 2012
6,926
12,310
San Diego CA
Got mine and all I can say is the craftsmanship it exceptional! Metal magicians is right! I used 30 gauge wire got a 1.7 OHM coil with a ceramic wick. I removed the insulator and used 1/8 in wick.
IMG_1065.jpgIMG_1070.jpg
 

Attachments

  • IMG_1065.jpg
    IMG_1065.jpg
    43.4 KB · Views: 106
  • IMG_1070.jpg
    IMG_1070.jpg
    40.4 KB · Views: 279
  • IMG_1072.jpg
    IMG_1072.jpg
    33.8 KB · Views: 228
Last edited:

dragos77

Moved On
Aug 9, 2011
64
52
romania
I just set up my wand, and all I can say is wow, beautifully, no immaculately machine, great vape all around and as an added bonus it's so light that it won't even fire my 18650 caravela with the button unlocked even with a full tank

I am so impressed with this atty, my expectations were high, but Mark Bugs blew me away with this device. It's so rare that a manufacturer gets it so right with v1 devices these days, but the metal magicians did

My only question is will there be a way to get replacement wick insulators? I damaged mine a little bit trying to get it out, then changed my mind and put it back in lol, it still works, but knowing I can get more in case it melts or lose it for whatever reason would be nice


Mate
PM me
 

ukeman

PV Masher
Supporting Member
ECF Veteran
Verified Member
Aug 22, 2010
7,718
5,129
Kauai, Hawaii
I got my Wand going nicely on a Poldiac ...

- *but couldn't get it to fire on the P+500... *is the bottom screw of the Wand an adjustable center pin/post? Its sitting pretty tightly in there and don't want to force anything....?

any help appreciated..

(the satin of the Wand and the polish of the Poldiac doesn't go well together and the P+ would look fine with it...
the wick and the air hole line up nicely and btw it sits right over the button of the Poldiac...
 

Thorbear

Senior Member
ECF Veteran
Verified Member
If you unscrew the bottom screw you will be able to completely disassemble your wand, and line up the W cut-outs how you like them to be with the mod you are using.
I guess you could unscrew it a little to see if you get it to fire with the P+ too, maybe it's just slightly over tightened so it doesn't make contact.
You can do that, and even remove the screw to disassemble the tank without disrupting your coil, which is a nice feature.
 

ukeman

PV Masher
Supporting Member
ECF Veteran
Verified Member
Aug 22, 2010
7,718
5,129
Kauai, Hawaii
thanks much Thor,
I love how light this puppy is... nice air draw too....
I was a little concerned about not letting the wick touch bottom and not able to see very well, but i'll get used to cutting my wicks just the right height soon enough.
I oxidized it the whole length but just with a couple of turns with blue flame...
If you unscrew the bottom screw you will be able to completely disassemble your wand, and line up the W cut-outs how you like them to be with the mod you are using.
I guess you could unscrew it a little to see if you get it to fire with the P+ too, maybe it's just slightly over tightened so it doesn't make contact.
You can do that, and even remove the screw to disassemble the tank without disrupting your coil, which is a nice feature.
 

ukeman

PV Masher
Supporting Member
ECF Veteran
Verified Member
Aug 22, 2010
7,718
5,129
Kauai, Hawaii
There's been a few MB Wizard and Wands in the classies lately. I horse traded for an Apprentice 500 and another Wand.
Especially after hearing the tank is plastic... I'll tell you the tank is pretty strong as I had Pluid in mine for at least a week with little damage. I did clean it out though... And have some glass tanks coming with the WA/W set.
I still haven't taken my Wand apart yet... I wish there was a post or vid of a Wand breakdown...?
 

terry0769

Senior Member
ECF Veteran
Verified Member
May 11, 2010
82
168
55
immingham
Hey I just realized that my intention is to use the Wand on the Wizard's App. 500 with sub 1.0 Ohms... I believe it is doable from JCWest's youtube review, but can someone explain how Mark designed the Wizard for this high amp load? Thanks

I dont think he did anything below 1.4ohm and my battery tube seems to get warm / hotter the longer i use it
 

ukeman

PV Masher
Supporting Member
ECF Veteran
Verified Member
Aug 22, 2010
7,718
5,129
Kauai, Hawaii
my bad... i hope not. I see anything with a Genesis and i think sub 1.0... actually right around 1.0 is great.
At least the Wand is SLR friendly and I have a Precise+ satin that matches the finish of the Wand almost to a Tee.
I dont think he did anything below 1.4ohm and my battery tube seems to get warm / hotter the longer i use it
I'll have to check it out.
 

Duckonquack

Senior Member
ECF Veteran
Verified Member
Oct 4, 2012
137
42
Canada
It really is quite intuitive, Just undo the screw in the 510 connection, then everything will become apparent to you :)
Just don't pull off the airflow adjuster ring, It'a a PITA to get back on.

I took mine off and lost the wire that provides the resistance to it, I actually kind of prefer it now as it slips on and off effortlessly allowing me to clean it when condensation causes it to get leaky

it very rarely even comes off by accident
 
Status
Not open for further replies.

Users who are viewing this thread