
Hi all,
I discussed about this issue on several e-cig forums, tried many different approaches. This method is probably most reliable and most generalized, so I would like to share it with you.
This method removes all dirt and leftovers from your wick and heater, making your aty almost new.
Therefore, you should use this method every 7-10 days(depending on your e-liquid usage) to maintain your eGo-T atties. I have 3 regular eGo-T aties type B, and they are now entering 4th month of very intensive usage(5+ml per day), working great as on day one.
This is not atomizer mod, readjusting... this is simple way to expand your regular atomizers lifespan.
First of all: watch this video, very carefully:
then follow this tutorial, step by step (I bolded parts that are not on this video, or not highlighted enough):
You don't have to use EXACTLY the same tools like that on this picture or video.
Feel free to use everything you have that can serve it's purpose.
List:
1. Screwdriver/hemostat
2. Tweezers
3. Lighter
4. Something thin: for pushing wick (but not too thin!)
5. Something for installing atty needle back (e.g metal pen body or screwdriver with detachable head)
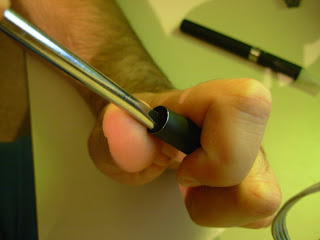
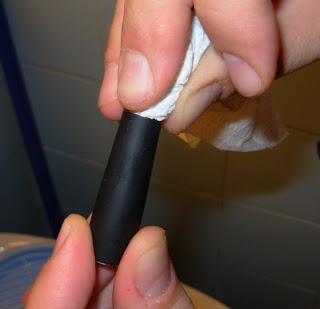
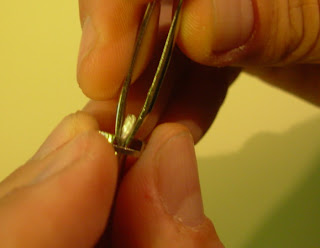
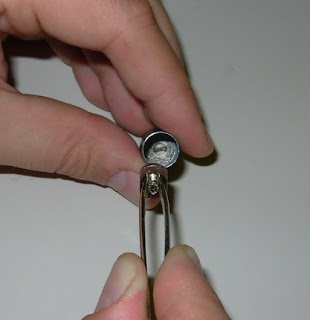
1. Take needle plate out of atomizers body. One approach is on Viki's video. I don't have that hemostat, so I use plain screwdriver: push it down the side of needle plate, then pull to its center.
To be precise, screwdriver head goes next to :

(where fingers are), then pull to needle plate center. Important notice: you should put your finger on top of atomizer and lay screwdriver on it - to avoid pressure on atomizers top circle(where tank goes).
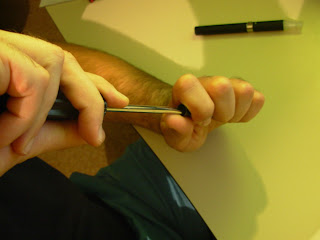
First time it'll probably be quite hard to pull the plate out, but eventually it will come out.
2. Take the wick out of needle plate. On Viki's video wick remained stucked on the heater, but sometimes it's impossible to split them without damaging heater. To avoid that, you should activate
your eGo-T atty 2-3 times before step 1 - then the wick will remain in needle plate when we pull it out.
You should always use pushing, not pulling to take wick out. So, you push it with some thin tool to come out.
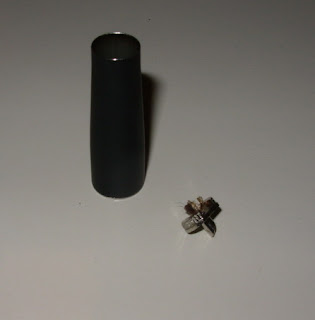
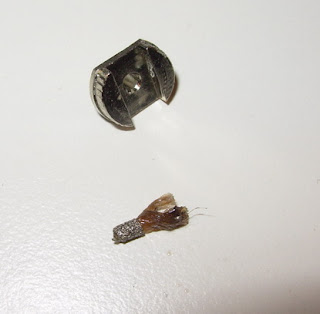
VERY IMPORTANT NOTICE: if your wick is much more burned or its fiber is much more stiff than one ot this picture/video, you should leave it for 24h in mixture of water and alcohol(votka, citric acid...) before continuing with this process!
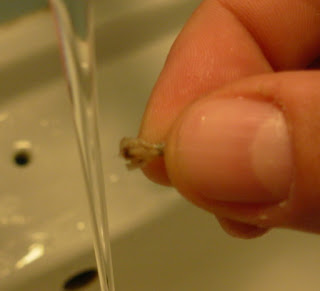
3. Rinse atomizer with warm(not hot) water, as seen on the video. Put whole connector into the water!
Connector has 2 holes for air flow: one visible(on it's top) and one on the side, below connector's screw thread. When you put your atomizer on battery, air goes trough that second, side hole. Therefore is very important to clean e-juice or any dirt from it.
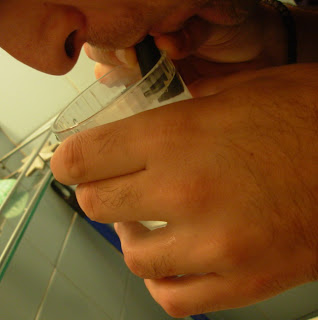
When you are finished, blow from both sides and wipe both inner ends of atomizer.
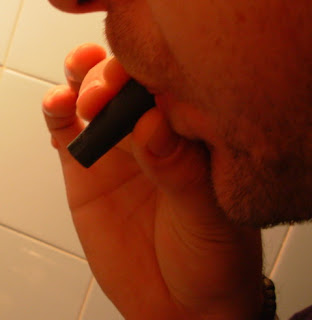
4. Put atomizer on battery and "dry burn" it, as described on video.
If the heater was very dirty before we started this method, I suggest you to repeat steps 3 and 4, to avoid getting burnt taste when we start using cleaned atomizer.
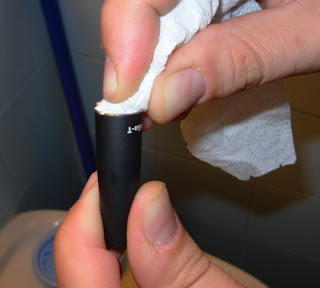
5. Carefully rinse wick with warm water, then dry it with paper towel.
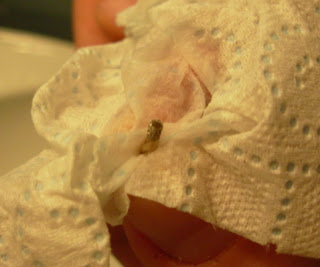
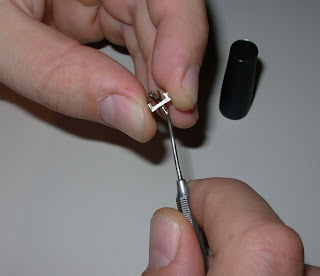
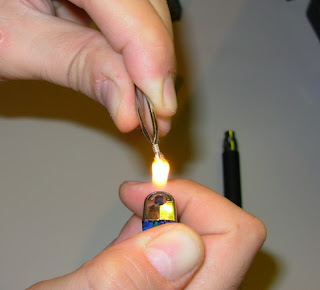
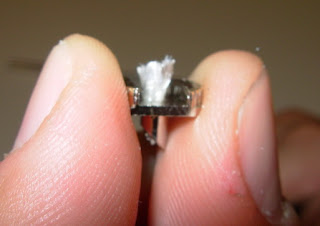
If there is black crust on fiber's threads, you should burn it: take the top end of wick(where metal mesh is) with your tweezers, then burn down end of wick with lighter. Entire process lasts 10-15 seconds, after that all e-juice leftovers are removed. Just be carefull not to grip your tweezers too hard, because it will compress top end of wick.
At the end of this step, your wick should look like this:
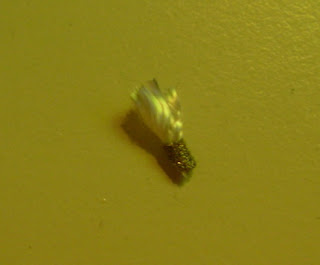
Notice the difference between this and wick from step 2! It's not always possible to get "brand new" wick, but it should always look much better than before you started cleaning. If you do this process often enough, your wick will maintain it's shape and volume for long time.
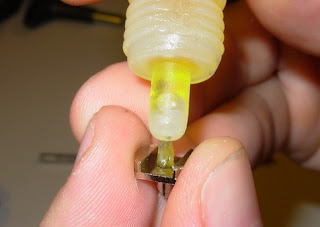
6. Push the wick back in the needle plate. You should adjust that top of metal mesh goes in line with beginning of needle plate hole. In reality it looks like this: push wick from down side of needle plate until whole metal mesh band goes in, then push just a little more, and it is done.
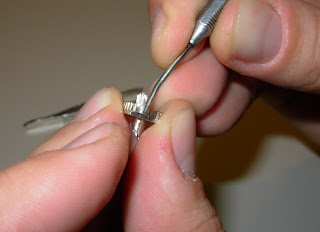
Metal mesh band is not always placed on the same position on the wick, so I prefer to measure my wick adjustment by it's down side - it is good positioned when wick looks like this:
After that I put one drop of e-juice on wick, then spread it a little.
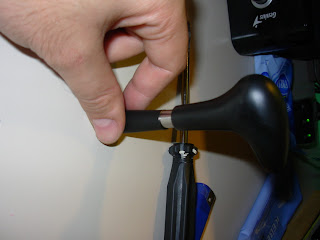
7. Put the needle plate back in atomizer. You should use tool described on video, or any other solid, hollow and smaller in diameter than the plate tool.
Very important part: to assure good air flow, needle plate should be perpendicular to heater. In other words: heater should go between needle plate feets.
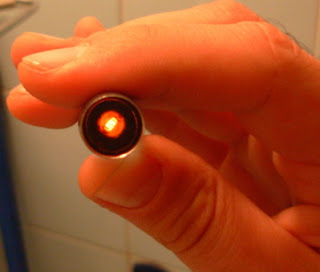
And that should be it. After completing of this process, your atomizer should at least work like this:
This process, or it's shortened versions, could be used to solve some other eGo-T problems.
For example:
- Your atomizer is leaking or gives hard draws/little vapour. It means that the wick is in bad position. You should just take the needle plate out and reposition the wick(steps 1,2 and 6)
- Sometimes it happens that brand new atomizers could not be drawn: you put your atty on the battery, activate it and you hear that it is burning liquid, but you can not draw - like there is vacuum. Take atty out of the battery, try to draw - air goes undisturbed. Wtf!? Problem lies in that side hole I mentioned in step 3. This hole is clogged. You could solve this problem by making letter L out of some thin wire, then try to locate that hole by going around connector. When you find it, push wire inside. If this method doesn't solve your problem, try repeating steps 1,2,3 but without activating atomizer.
That's all for now. I hope I helped someone with this topic.
Regards
I discussed about this issue on several e-cig forums, tried many different approaches. This method is probably most reliable and most generalized, so I would like to share it with you.
This method removes all dirt and leftovers from your wick and heater, making your aty almost new.
Therefore, you should use this method every 7-10 days(depending on your e-liquid usage) to maintain your eGo-T atties. I have 3 regular eGo-T aties type B, and they are now entering 4th month of very intensive usage(5+ml per day), working great as on day one.
This is not atomizer mod, readjusting... this is simple way to expand your regular atomizers lifespan.
First of all: watch this video, very carefully:
then follow this tutorial, step by step (I bolded parts that are not on this video, or not highlighted enough):
### TOOLS: ###
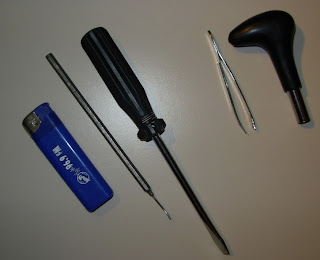
You don't have to use EXACTLY the same tools like that on this picture or video.
Feel free to use everything you have that can serve it's purpose.
List:
1. Screwdriver/hemostat
2. Tweezers
3. Lighter
4. Something thin: for pushing wick (but not too thin!)
5. Something for installing atty needle back (e.g metal pen body or screwdriver with detachable head)
1. Take needle plate out of atomizers body. One approach is on Viki's video. I don't have that hemostat, so I use plain screwdriver: push it down the side of needle plate, then pull to its center.
To be precise, screwdriver head goes next to :
(where fingers are), then pull to needle plate center. Important notice: you should put your finger on top of atomizer and lay screwdriver on it - to avoid pressure on atomizers top circle(where tank goes).
First time it'll probably be quite hard to pull the plate out, but eventually it will come out.
2. Take the wick out of needle plate. On Viki's video wick remained stucked on the heater, but sometimes it's impossible to split them without damaging heater. To avoid that, you should activate
your eGo-T atty 2-3 times before step 1 - then the wick will remain in needle plate when we pull it out.
You should always use pushing, not pulling to take wick out. So, you push it with some thin tool to come out.
VERY IMPORTANT NOTICE: if your wick is much more burned or its fiber is much more stiff than one ot this picture/video, you should leave it for 24h in mixture of water and alcohol(votka, citric acid...) before continuing with this process!
3. Rinse atomizer with warm(not hot) water, as seen on the video. Put whole connector into the water!
Connector has 2 holes for air flow: one visible(on it's top) and one on the side, below connector's screw thread. When you put your atomizer on battery, air goes trough that second, side hole. Therefore is very important to clean e-juice or any dirt from it.
When you are finished, blow from both sides and wipe both inner ends of atomizer.
4. Put atomizer on battery and "dry burn" it, as described on video.
If the heater was very dirty before we started this method, I suggest you to repeat steps 3 and 4, to avoid getting burnt taste when we start using cleaned atomizer.
5. Carefully rinse wick with warm water, then dry it with paper towel.
If there is black crust on fiber's threads, you should burn it: take the top end of wick(where metal mesh is) with your tweezers, then burn down end of wick with lighter. Entire process lasts 10-15 seconds, after that all e-juice leftovers are removed. Just be carefull not to grip your tweezers too hard, because it will compress top end of wick.
At the end of this step, your wick should look like this:
Notice the difference between this and wick from step 2! It's not always possible to get "brand new" wick, but it should always look much better than before you started cleaning. If you do this process often enough, your wick will maintain it's shape and volume for long time.
6. Push the wick back in the needle plate. You should adjust that top of metal mesh goes in line with beginning of needle plate hole. In reality it looks like this: push wick from down side of needle plate until whole metal mesh band goes in, then push just a little more, and it is done.
Metal mesh band is not always placed on the same position on the wick, so I prefer to measure my wick adjustment by it's down side - it is good positioned when wick looks like this:
After that I put one drop of e-juice on wick, then spread it a little.
7. Put the needle plate back in atomizer. You should use tool described on video, or any other solid, hollow and smaller in diameter than the plate tool.
Very important part: to assure good air flow, needle plate should be perpendicular to heater. In other words: heater should go between needle plate feets.
And that should be it. After completing of this process, your atomizer should at least work like this:
This process, or it's shortened versions, could be used to solve some other eGo-T problems.
For example:
- Your atomizer is leaking or gives hard draws/little vapour. It means that the wick is in bad position. You should just take the needle plate out and reposition the wick(steps 1,2 and 6)
- Sometimes it happens that brand new atomizers could not be drawn: you put your atty on the battery, activate it and you hear that it is burning liquid, but you can not draw - like there is vacuum. Take atty out of the battery, try to draw - air goes undisturbed. Wtf!? Problem lies in that side hole I mentioned in step 3. This hole is clogged. You could solve this problem by making letter L out of some thin wire, then try to locate that hole by going around connector. When you find it, push wire inside. If this method doesn't solve your problem, try repeating steps 1,2,3 but without activating atomizer.
That's all for now. I hope I helped someone with this topic.
Regards
Last edited:


