Smok Mag Solo Kit Review By Frenkyou
- By Frenkyou
- Device Reviews
- 5 Replies
Hi, today let's take a look at the SMOK Mag Solo Kit with T-Air Subtank sent to me by the online shop @sourcemore. In this Test I will examine each of the characteristics that distinguish this item. I hope that at the end of this reading you can understand this product, and therefore decide whether to invest in it or not. As always, my opinions are free and based on my personal experience.
• Enjoy the reading.
► SMOK Mag Solo Kit; Before starting, let's look together at some special features indicated by the manufacturer:
• 1. Consisting of Mag Solo Mod and T-Air Subtank
• 2. Supports 21700/18650 battery with 100W max
• 3. Designed with top airflow system
• 4. 5ml capacity, leak-proof top filling
• 5. Equipped with 0.2Ω/0.4Ω CT Coils
► SMOK Mag Solo Kit; Packaging:
The packaging shows the front; the image of the Mod, the writing of the model in question, the color of the device and a red writing that reminds us of the compatibility with 18650/21700 batteries. On the back there are warnings and the manufacturer's address. The other sides of the package read; the content, the holographic anti-counterfeiting logo, the scratch codes for checking authenticity, barcode, the main features in the form of icons.
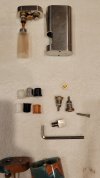
► SMOK Mag Solo Kit; Packing List:
• 1* Mod Mag Only
• 1* Subohm Tank T-Air (5ml)
• 1* 0.2Ω CT Coils (pre-installed)
• 1* 0.4Ω CT Coils
• 1* Replacement Glass Tube
• 1* 18650 battery adapter
• 1*Type-C cable
• 1* User Manual
► SMOK Mag Solo Kit; Specifications:
• Dimensions: 135*90*79mm
• Output power: 5W-100W
• Standby current: <120uA
• Input voltage: 3.3V-4.2V
• Output voltage: 1.0V-6.5V
• Resistance range: 0.10Ω-2.50Ω
• Charging type: Fast type C
• Charging voltage: 5V ± 0.2V
• Charging current: 1.5A (maximum)
• Display: 0.96 inch TFT
• Airflow: Superior
• Capacity: 5ml
• Filling: Top
• Threads: 510
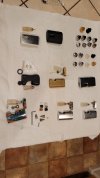
► SMOK Mag Solo Kit; Available colours:
• White Blue
• Black Red
• Carbon Fiber Splicing Leather
• Gray Splicing Leather
• Matte White
• Blue Haze
• Purple Haze
• Nano Chrome
• Cyan
• Black Gunmetal
• Gunmetal
• Pale Green
• Matte Black
• Prism Rainbow
• Pink Gold
• Blue Green
• Purple Pink
► SMOK Mag Solo Kit; First Impressions:
Smok Mag Solo Mod undoubtedly takes inspiration from the Aegis line which for me has one of the most beautiful and ergonomic designs that exist, so I'm not annoyed by this, in fact I really like the idea of having a new Mod with this style. For this kit, Smok introduces the new T-Air tank and new coils, the range of colors available is incredibly wide. For this test @Sourcemore sent me the white "Matte White" color with a mirror metallic T-Air tank. On the bottom of the Mod there is a door to access the battery/compartment.
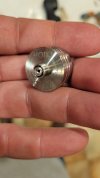
► SMOK Mag Solo Kit; 18650/21700 Compatible:
The door opening system uses a slider button which is equipped with a rather strong spring, the feeling is that of extreme safety and there are no games and everything appears perfect. The negative polarity symbol of the battery appears on the inside of the door, the positive polarity symbol is red and is located inside the battery tube. If you plan to use a 21700 battery you will need to remove the 18650 adapter found inside the Mod.