Status
Not open for further replies.

HBcorpse

Vaping Master
ECF Veteran
Verified Member
Jul 23, 2013
4,378
14,477
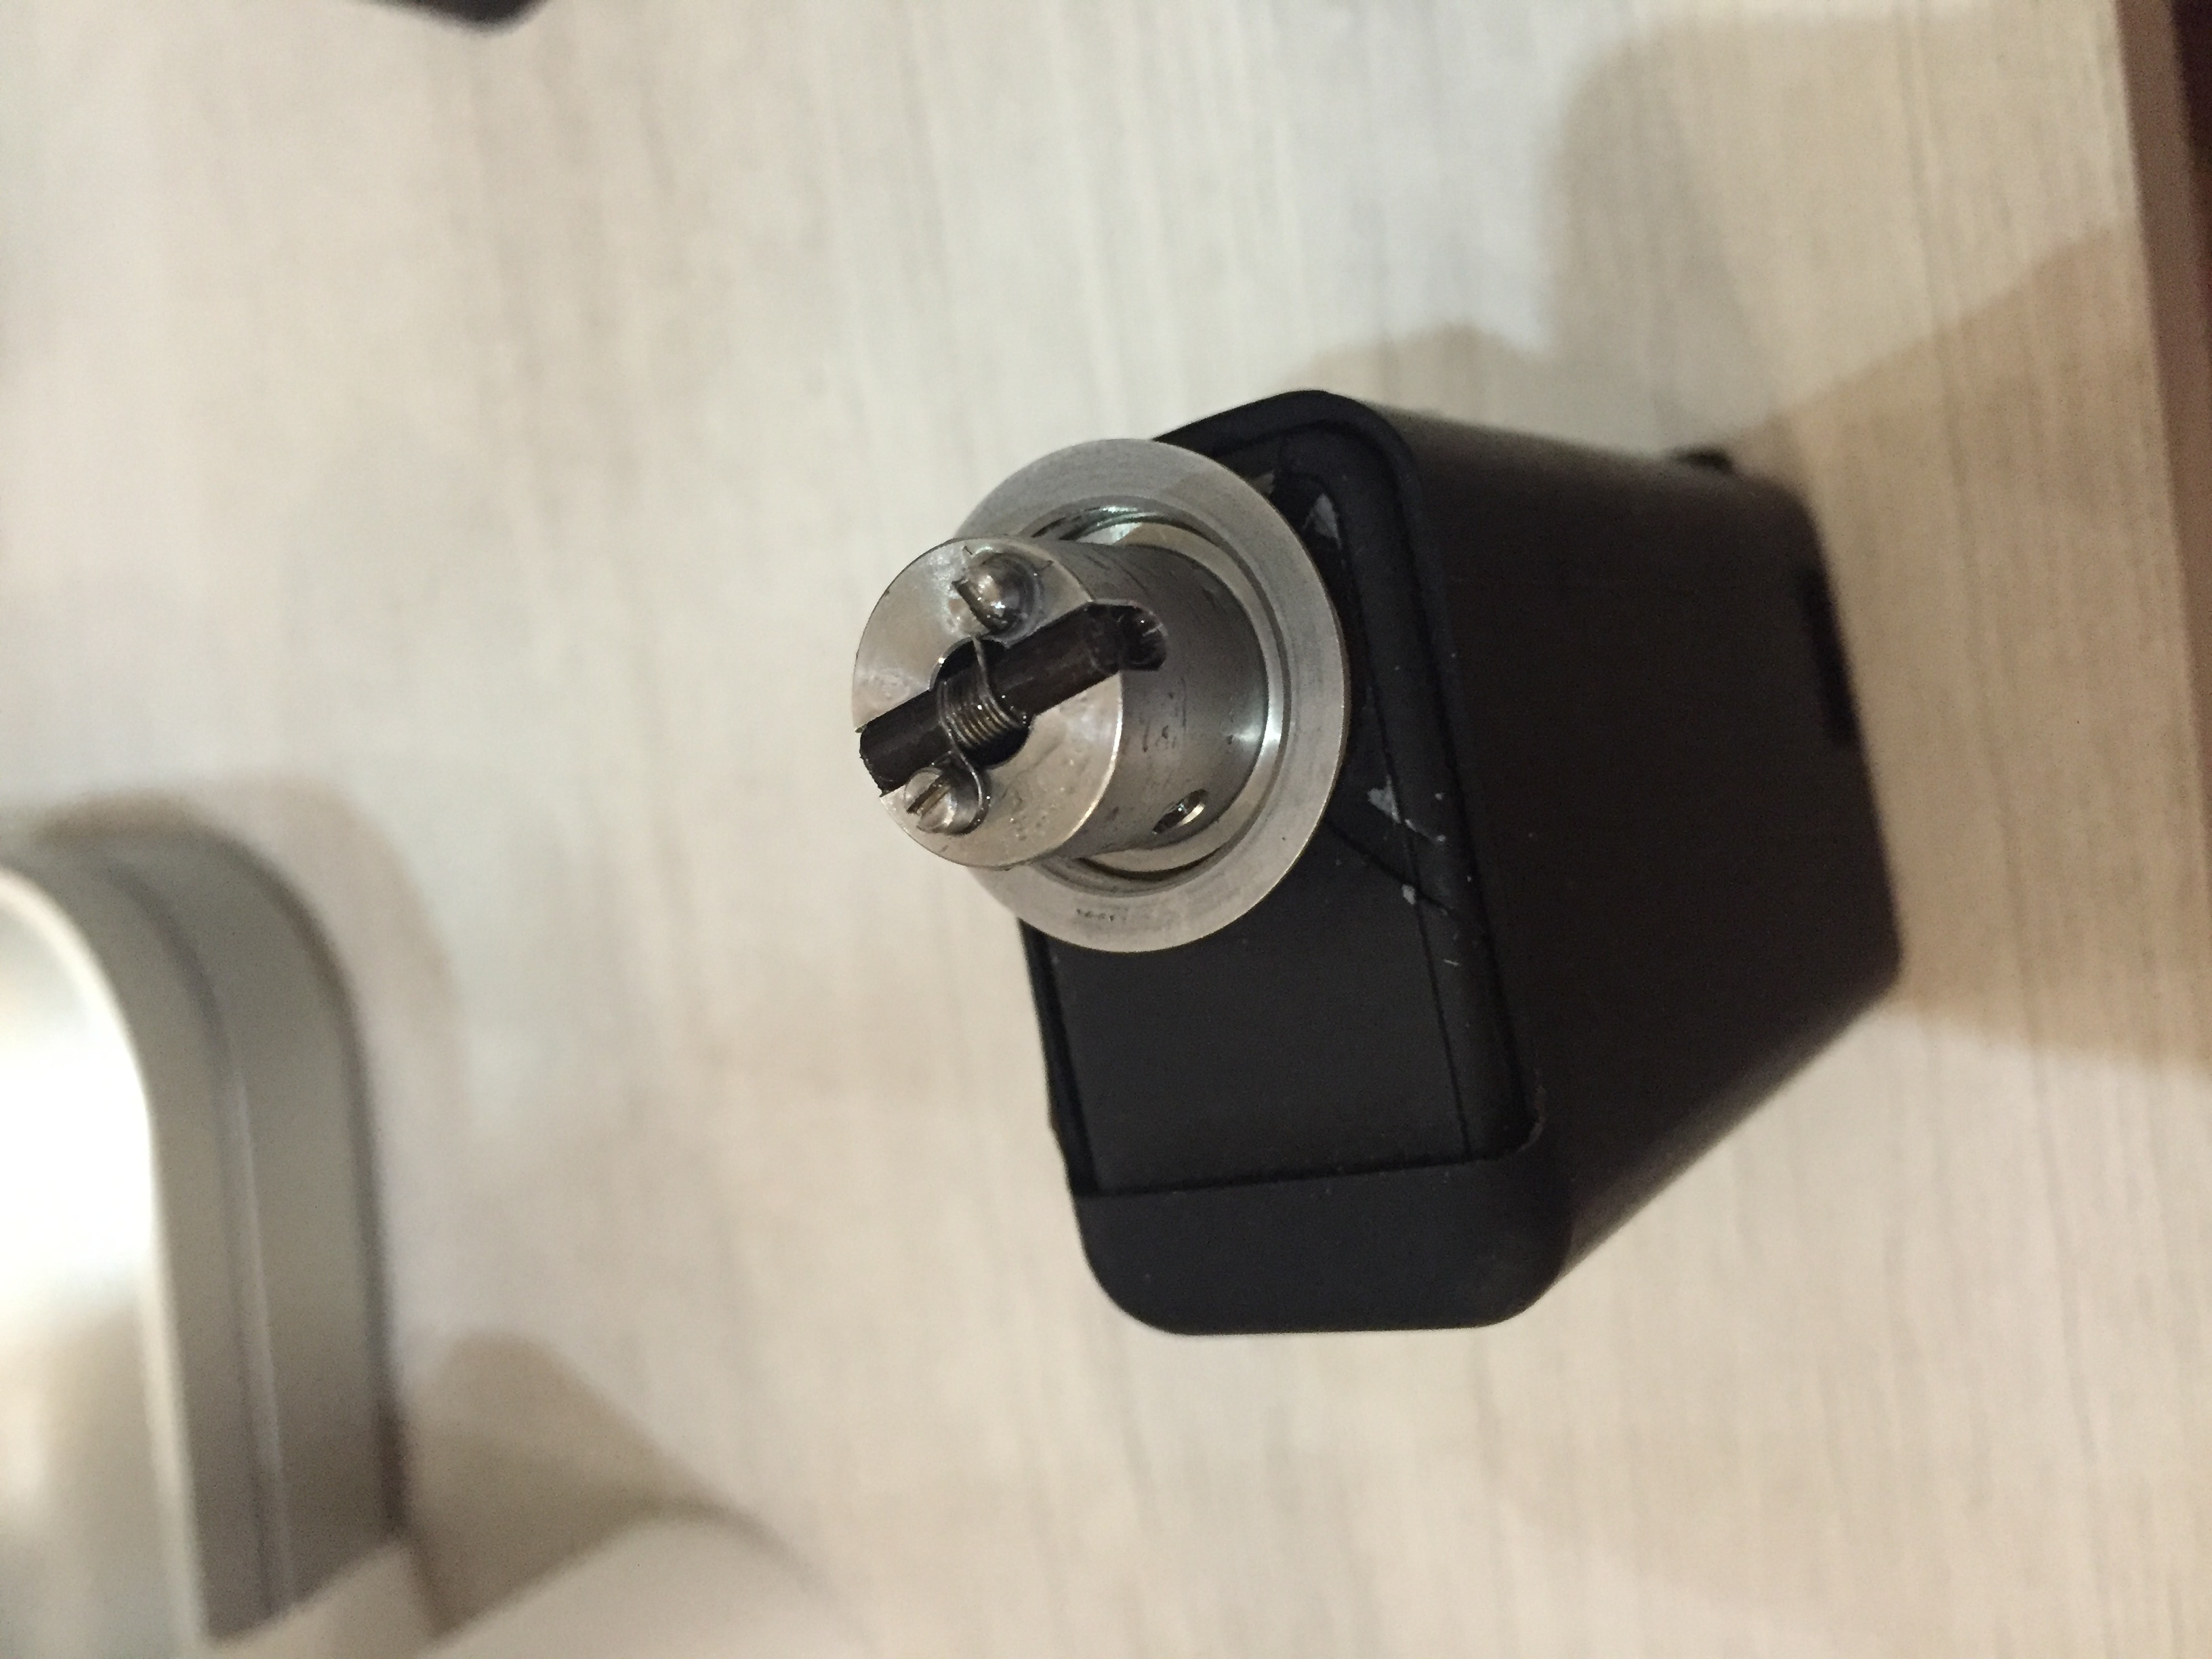
Need some help here: Been vaping my new Ti Gem on and off for about a day now. My first build was a mess so this is my second build (coil head down, legs up, per Qorax video) and I have re-filled/topped up the tank about 2 or three times. I'm getting leaking. I turn off the airflow each time before I fill. And then turn it on after I've remounted it on my P3. Or can I turn it on before I re-mount? And I didn't get the point of turning the tank upside down for a while after re-filling. Why? With airflow on or off? Is my problem related to wicking issues? I'm using 2 mm 28 gauge Kanthal and Cotton Bacon. I would appreciate some guidance. If the Guru Qorax is reading this......
Hey Bob!

The reason for turning the tank upside down before opening the airflow is:
When filling up, you've introduced atmospheric pressure into the tank.
If you pop the airflow open, with the tank right-ride up, the air that's inside the tank is pressurized and will push down on the juice, causing it to flood.

When you turn the tank upside down, that pressurized bubble of air pushes itself out of the air hole, instead of pushing the juice out.

Do all of this with the tank off the P3, for ease of use.

1. Close air flow
2. Open top
3. Fill juice
4. Close top
5. Turn tank upside down
6. Wait maybe 15-30 seconds
7. Open air flow
8. Wait maybe 15-30 seconds
9. Turn tank upright
10. Mount to P3

No more leaks!
Make sure you disassemble the entire deck/tank and clean it out from all your leaking first. Then, rebuild and use the steps above to enjoy leak-free filling!
 

Vaper Bob

Senior Member
Nov 27, 2015
191
375
London, UK
Hey Bob!

The reason for turning the tank upside down before opening the airflow is:
When filling up, you've introduced atmospheric pressure into the tank.
If you pop the airflow open, with the tank right-ride up, the air that's inside the tank is pressurized and will push down on the juice, causing it to flood.

When you turn the tank upside down, that pressurized bubble of air pushes itself out of the air hole, instead of pushing the juice out.

Do all of this with the tank off the P3, for ease of use.

1. Close air flow
2. Open top
3. Fill juice
4. Close top
5. Turn tank upside down
6. Wait maybe 15-30 seconds
7. Open air flow
8. Wait maybe 15-30 seconds
9. Turn tank upright
10. Mount to P3

No more leaks!
Make sure you disassemble the entire deck/tank and clean it out from all your leaking first. Then, rebuild and use the steps above to enjoy leak-free filling!
Always coming to my rescue HB! That answers all my questions. Very clear and entirely logical. Those instructions are perfect. Thank you and Happy New Year.
 

Vaper Bob

Senior Member
Nov 27, 2015
191
375
London, UK
HBcorpse's instructions are spot on.
But imho, no need to dismount the Gem from the PV.
To get rid of the excess juice, just invert the Gem with AFC open, cover the AFC with a towel and blow through the DT.
Well......... ok I'll try it. Seems easier than taking everything apart. But I might have to cover my face with a towel as well? :yawn:
 

qorax

ECF Guru
ECF Veteran
Verified Member
Mar 6, 2013
12,652
41,477
Brampton, Canada
www.facebook.com
Need some help here: Been vaping my new Ti Gem on and off for about a day now. My first build was a mess so this is my second build (coil head down, legs up, per Qorax video) and I have re-filled/topped up the tank about 2 or three times. I'm getting leaking through the air holes. I turn off the airflow each time before I fill. And then turn it on after I've remounted it on my P3. Or can I turn it on before I re-mount? And I didn't get the point of turning the tank upside down for a while after re-filling. Why? With airflow on or off? Is my problem related to wicking issues? I'm using 2 mm 28 gauge Kanthal and Cotton Bacon. I would appreciate some guidance. If the Guru Qorax is reading this......
HBC, CloudR et all have explained it well. Nonetheless pls do take care of your wicking as well. With cotton sometimes the adage "less is more" is taken a bit too far. Remember, the wick should never be "lightly fit" inside the coil. That is the cause of many a problems, which can be both dry-hits as well as flooding. As you pass the wick thru the coil there should always be some restriction. It shouldn't be free moving.
 

Vaper Bob

Senior Member
Nov 27, 2015
191
375
London, UK
HBcorpse's instructions are spot on.
But imho, no need to dismount the Gem from the PV.
To get rid of the excess juice, just invert the Gem with AFC open, cover the AFC with a towel and blow through the DT.
Ok I did that and there were spots of juice on the towel (and none on my face). It worked. Many thanks Cloudrider. And Happy New Year!
 

h00ligan

Ultra Member
ECF Veteran
Verified Member
Jan 2, 2015
2,729
6,453
London, UK
Ok i will try with contact coils next with 400 and 500 mesh. Was usinf 325 earlier. Does yours gurgle and pop?
I use an Origen as an everyday atty. Im used to that smooth vape. Hope the 400 and 500 can give me that and not flood and gurgle.
Done, got it to work with #500 mesh contact coils as suggested. Thanks h00ligan!
Mesh...bliss! And no tilt! Lol!
When I got my first one, it was just because it was just so cool looking, but after I had one I realized that the flavor quality with these tanks is fantastic. You have to use original kayfun bases or Russian 91%, for them to work right. I bought 4 of the medium sized ones, because they were all I could find, they hold about 2.5ml of liquid. The larger tanks hold about 6ml of liquid, I finally got 2 of them last month, but have not set it up yet. They are actually easy to keep clean, just soap and water. Here is a pic of one of mine on a polish mini, not a great pic but all I could find at the moment. :)


Sorry about going off topic.:oops:

KAS

Wow. I'm surprised to read the flavor is significantly different. I wonder if project sub ohm bases fit it? My issue with all kayfun aside from 4 is wicking thick liquid. 3.1 can do it but it's a bite to fill. Anyway maybe I'll take this to pm with you. It is definitely interesting. Seems like they're hard to get hold of. Interesting and unique Very cool although some shots made it look a bit "dirty" yours makes t look better than some I saw. I'm guessing the cleanliness has a lot tondo with how it looks in the device with something like this. Damn you bringing something neat to my attention!
Need some help here: Been vaping my new Ti Gem on and off for about a day now. My first build was a mess so this is my second build (coil head down, legs up, per Qorax video) and I have re-filled/topped up the tank about 2 or three times. I'm getting leaking through the air holes. I turn off the airflow each time before I fill. And then turn it on after I've remounted it on my P3. Or can I turn it on before I re-mount? And I didn't get the point of turning the tank upside down for a while after re-filling. Why? With airflow on or off? Is my problem related to wicking issues? I'm using 2 mm 28 gauge Kanthal and Cotton Bacon. I would appreciate some guidance. If the Guru Qorax is reading this......


If you're using cotton bacon and a ti I'm you're guy. Tell
You what I'll rewick just to take a picture of my current build dry and wet. I love cotton bacon (I know it's just rebranded something and if I can find the something I'll
Stop buying cotton bacon -whatever there rebranding works so well)

Cotton bacon in the ti germ needs to be wicked very tight to the wick. By and large I wick cotton bacon like Most wick rayon. Then if ii watched the qorax mesh material that's exactly how I cut my wick. I pull t through so it's a a mm inside the channel then put it back through too far and cut it again. The goal
Is to have a very very fluffy center and only a very small bit in the the sides. I'll get some
Pics with you. I think I'm the only one here regularly using cotton bacon. And he density and wicking aspects are much closer to rayon than a cotton pad or ball imo
Well......... ok I'll try it. Seems easier than taking everything apart. But I might have to cover my face with a towel as well? :yawn:

There's only one hole. Open it and go. If it floods again after fill then the cotton isn't set right . When you do
Fill Don't ever go beyond 90% to avoid flooding. Says so in the gem instructions on the Mark bugs site.
 

Vaper Bob

Senior Member
Nov 27, 2015
191
375
London, UK
HBC, CloudR et all have explained it well. Nonetheless pls do take care of your wicking as well. With cotton sometimes the adage "less is more" is taken a bit too far. Remember, the wick should never be "lightly fit" inside the coil. That is the cause of many a problems, which can be both dry-hits as well as flooding. As you pass the wick thru the coil there should always be some restriction. It shouldn't be free moving.
That's valuable information. Thank you. My wick might well be a bit light. Have you seen Vaping with Vic's video on a Gem clone and his comments on wicking? I wonder what you might think....
 
  • Like
Reactions: qorax

h00ligan

Ultra Member
ECF Veteran
Verified Member
Jan 2, 2015
2,729
6,453
London, UK
That's valuable information. Thank you. My wick might well be a bit light. Have you seen Vaping with Vic's video on a Gem clone and his comments on wicking? I wonder what you might think....
So here's something I do for titanium always and the regular gem for temp control. This wick doesn't work well with thinner liquid in the original gem but in the titanium with the bigger holes it works great.


Get it in as tight as you can then bend the wick up and cut it at the deck screw on each side. Center and bob's you're uncle. That requires very full wick I'll
Post better pics or scroll back a few pages and take a look for
My posts which detail the procedure. I can't find the same photos I used on my phone right now and due to surgery taking them is going to be a bit
Tough. So
If you can explore back it would help me help
You. From here after fluffing I'd take
Off a bit of the top You can see what I mean about shorter and thicker though. Try bending the wick into a u and cutting it just above the deck screws. That sort of
Makes itself perfect. Sorry I don't have good shots in order but I feel like you can get the point. And everything is posted a bit back. Not too far. Within 200 posts. If I can find them I'll
Link to the post number. I just awakened and I'm just past 30 hours which means the pain is coming. Never hurts right after ! Anyway. See if you get what I mean and I'll find a better example. Or
Like I
Said
Look
For my pics back a bit.

This is how tight in the middle
8fe693aaaaa8a7d10249ceb9928244ad.jpg


His is what the sides should look like dry
65dea150bcb36c7aa0bf2e12b49be5c8.jpg


This is too much in the channels I think I prefer thicker in the middle and less in the channels. This causes dry hits
0f60a6234ce8ff0e95812e13ee60ae79.jpg
 
Last edited:

Vaper Bob

Senior Member
Nov 27, 2015
191
375
London, UK
So here's something I do for titanium always and the regular gem for temp control. This wick doesn't work well with thinner liquid in the original gem but in the titanium with the bigger holes it works great.


Get it in as tight as you can then bend the wick up and cut it at the deck screw on each side. Center and bob's you're uncle. That requires very full wick I'll
Post better pics or scroll back a few pages and take a look for
My posts which detail the procedure. I can't find the same photos I used on my phone right now and due to surgery taking them is going to be a bit
Tough. So
If you can explore back it would help me help
You. From here after fluffing I'd take
Off a bit of the top


8fe693aaaaa8a7d10249ceb9928244ad.jpg


65dea150bcb36c7aa0bf2e12b49be5c8.jpg


0f60a6234ce8ff0e95812e13ee60ae79.jpg
This tells it all. Many many thanks for uploading these. I'll have these images on my screen when I next re-wick.
 

h00ligan

Ultra Member
ECF Veteran
Verified Member
Jan 2, 2015
2,729
6,453
London, UK
This tells it all. Many many thanks for uploading these. I'll have these images on my screen when I next re-wick.
I added some feedback to the pics if you reload the page shoot for 1/2. Wicking the third way I hunk causes dry hits. To
Me that bird pic was probably an example
Of
What doesn't work with cotton bacon it's should be translucent and take up only half the channel hickness. Effectively the trailing end of the thick bunch in the middle. The u cut does his automatically It takes about 5 draws to settle with a thick center wick. Also make sure you do the back and forth pull a bit to get a thick wick in there without too
Much cotton flavor

Hang in there. With the ti the wicking is very forgiving comparatively. Because you can go much much thicker. With the original
Gem and he smaller holes it was much more difficult. So I have no
Doubt you just didn't use enough wick. And from here on using cotton bacon just wick devices like people say they do wicking rayon. That works for me 99% of the time as cotton bacon is much more similar to rayon in wick characteristics than cotton pads like kgd
 
  • Like
Reactions: Vaper Bob

Vaper Bob

Senior Member
Nov 27, 2015
191
375
London, UK
I added some feedback to the pics if you reload the page shoot for 1/2. Wicking the third way I hunk causes dry hits. To
Me that bird pic was probably an example
Of
What doesn't work with cotton bacon it's should be translucent and take up only half the channel hickness. Effectively the trailing end of the thick bunch in the middle. The u cut does his automatically It takes about 5 draws to settle with a thick center wick. Also make sure you do the back and forth pull a bit to get a thick wick in there without too
Much cotton flavor

Hang in there. With the ti the wicking is very forgiving comparatively. Because you can go much much thicker. With the original
Gem and he smaller holes it was much more difficult. So I have no
Doubt you just didn't use enough wick. And from here on using cotton bacon just wick devices like people say they do wicking rayon. That works for me 99% of the time as cotton bacon is much more similar to rayon in wick characteristics than cotton pads like kgd
Got it. I've read your additions. Thx.
 

h00ligan

Ultra Member
ECF Veteran
Verified Member
Jan 2, 2015
2,729
6,453
London, UK
Got it. I've read your additions. Thx.
Here I just had to rewick due to a strong flavor previously so I snapped these to maybe help. This build works great on the ti or the stainless in temp control. Not so great on the ss gem with gunner liquid in VW. I typically wouldn't use this length as I'm familiar with the process but for illustrations on cutting the end I did it this way so you can replicate once or twice. On average it takes a tiny length to do this when you get a feel for how much should be in there thickness wise.

Here's an example of a big piece of cotton bacon which I then roll back and forth to shrink it down.

8c9c803715f95727dc8949abff3768b2.jpg


866f85baabe6397e5628b990aadeed9b.jpg


Once it's through the wick you can snip the ends and it quickly returns to its standard fluffy goodness. Here you cons see how tightly I wick with cotton bacon.

f5a0b2cebc4de35fc4267da2368bc414.jpg


After that I turn the legs up and I cut at or just above the screw

e1f7963c7fd2715a521a6fd557ae607c.jpg


It leaves you with two fluffy bundles on top
Of the deck canal

e4aa508ec86c157cbcdaf4c97c3ffd6e.jpg


After that I use a small
Screwdriver to distribute the trailing ends to the down turned channels. And with these two you can see the dry and then wet form of it when it settles.

2c0a2098cb8564ca2334b79a398b7df2.jpg


Top view dry

626f943170e30677ff27ab6cfb30348e.jpg


Eliquid on it is clear but this is the final package.

0e39230d48c8877460d95bfaee78032c.jpg


After a few draws this levels
Out nicely. Just make sure when you first place the cotton bacon in there you slide it back and forth a bit so the part covered by the coil isn't toooooo jam packed.

Please excuse the dimness and the sheets in the background. Best I can do right now. .

if You find you get slight leaking when it's on its side with the juice you predominantly use. Go up half a mm on the cuts from THe top of the screws. Also not one screw is higher than the other so center the wick when you finish cutting it you may wish to start with slightly higher cuts as I use 90% vg a lot. I wouldn't cut any higher than another half a mm at absolute most. Probably that's the most the deck Could accommodate more. And you want the short sides and thick middle. If you're getting semi dry hits on the ti or weak vapor in temp On the stainless it's a little too thick in the middle. You should be able
To remove a small Portion without rewicking entirely using tweezers. Once you do this a couple times you'll automatically nail it with almost no effort and wasting very little wick. Make sure to Give each new wick a fair Little break In before deciding


I hope that helps with ti gem Wicking with cotton bacon. It also works wel in the stainless gem but only with temp Control. For those who haven't tried cotton bacon (yes they're rebranding something) . It's a very good wick. I can't wick cotton padding like this. It would have to be less voluminous. This kind Of wick gives me a very very dense vape
 
Last edited:

RichardA

Full Member
Oct 31, 2015
49
75
56
Got my shipment. Incurred a hefty tax on these. Wasn't expecting it, UPS quite useless.

First built on a 304 SS wire. Didn't go to well. The resistance kept jumping around from 1.2 to 2.2 ohms. Built it 3 times, still no luck with these wires.

Resorted to good old Kanthal and now am at least getting a vape on. Juice is 80VG/20PG. I still wished I could have done it one TC. Really unable to tell if its really great yet, as I am used to vaping with temperature control.

Let me try another build later on. I don't know what could be happening.
 
  • Like
Reactions: qorax

raitizz

Vaping Master
ECF Veteran
Verified Member
Dec 11, 2014
3,309
9,406
Riga, Latvia
Got my shipment. Incurred a hefty tax on these. Wasn't expecting it, UPS quite useless.

Well, the MB page states this right there, under the product description:

IMPORTANT NOTICE FOR ALL NON-EU CUSTOMERS:

Please be advised that, upon shipment, in order to abide all laws and regulations, we must declare the true value of the package we are sending you. Therefore, depending on your country of residence, local customs and other taxes may apply when you receive your package.
We cannot influence such legal local matters in any way. What we can do however from our part, is to offer all our non-EU customers an extra token of appreciation for their purchase. Hence, we have decided to ship all orders via courier service, namely UPS (we are offering free shipping anyway), which means delivery should take place within 5 working days, irrespective of your location.
All orders will be processed and shipped within 5 working days from placement.

GEM Titanium Limited Edition

R
 
Status
Not open for further replies.

Users who are viewing this thread