Man you should really blog this, very helpful, thanks!
@Imfallen_Angel Right? See fallen (sorry, not sure which one to call you, but I liked fallen) SEE?!
Honestly, I was just driving home, thinking about random things and realized one other thing. Your posts are very intelligently and well written.
Well thanks, I just try to assist best I can...
For the wick thing, yeah, I know that you were joking but it's still a valid point.
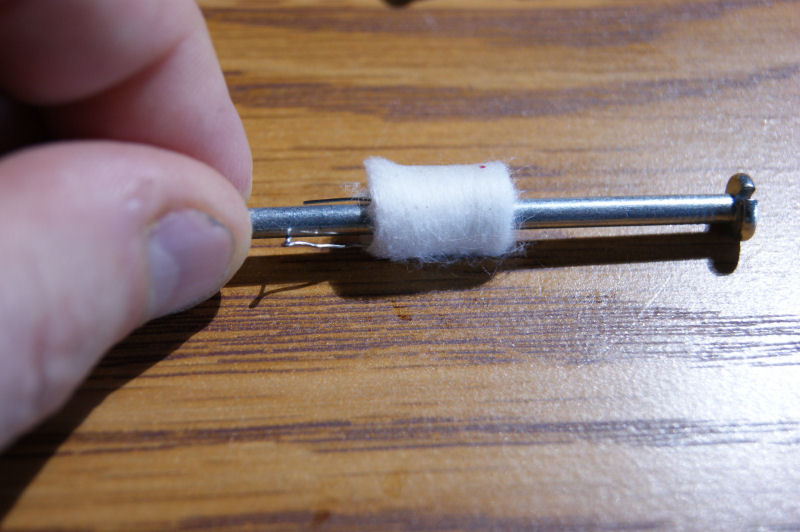
As per my previous posts about wicking, here's what I can offer as some guidance.
To measure how much, try to go for a thickness that would be about the same size as the outside diameter to the coil while being as fluffy as possible. The goal is that you want it to fill the coil well so that once it expands once wet (as cotton swells up a bit) so that you do not have gaps, but you don't want to sticking out through the wraps. You want to get it to be in contact with the coil for the full length.
One thing I consider a mistake that I see on many videos is that the person pulls the wick down at the ends, creating such a gap and can cause the legs and tips of the coils to be warmer as they aren't cooled by the flowing liquid through the wick.
My technique consist of taking the amount (thickness), working it with the tip of my fingers to stretch it out, evening out the fibers, similar to hand rolling a cigarette and rolling the paper. I then give the whole length a twist so that it's slightly compressed and squeeze the tip to have the needle/threading thing going.... I keep twisting as I insert it through, measure how much I need, cut and continue and thread the second coil. The amount of wick, if correct, should be firm, but should fit well, aka it you tug on it and it was to rip/break off, then it's too much, if it just slides out really easily, then not enough. It needs to be able to slide out but with some fair amount of resistance (once untwisted).
Once the cotton is threaded, I untwist and work it slightly until I can see that it's firm against the inner wall of the coil.
For the length.... this completely depends on your deck. You need to judge how long you need for it to make it to the feed holes then add a bit.
The extra should be used as your "reserve" on the ends of the coil by having a bit of it going upward a tiny bit before going down towards the feed holes. This also acts as a "padding" to have between the coil and the walls of the bell.
Note: the wick needs to be such that you do not block the airflow whatsoever.
At the feed holes, you can trim the edges so that your wick is clean and straight, with a bit of an angle cut if needed.. your wick can be "cone shaped" (trimmed to be a bit pointy) at the tips if your deck so requires it. Your goal is you want to fill the feed hole, so that all liquid present will get "sucked in" by the wick's tip and none passes by it (leak out). But you don't want to clog it, so while "full", the feed isn't blocked off.
While this is one of my RDAs, the principle is the same:
View media item 430319You can see that the wick is full (inside the coil) and the ends (while not as high as I'd do with my RTAs) are also full and straight out and don't go down until away from the coil. (and this is even after a few months, it doesn't go down, it stays "firm" in position)
Hope this helps a bit... wicking can be a bit of a challenge at first.
Last edited: