-
Locked
VAPORESSO TARGET 100 KIT REVIEWED BY BIGBOB2322
- By Bigbob2322
- Device Reviews
- 2 Replies
Once again I say hello and welcome back for another review. Todays review is on 1 of a series of 3 new Target kits from Vaporesso, the Target 80 is the baby brother of the 3 having a built in 3000mAh battery and the Target 200 is a dual 18650 device that I reviewed already, and that leaves the Target 100 that is a single 21700 or 18650 when using the included adaptor with maximum wattage output of 100 watts using either type of battery. All three in the series use the new iTANK with new GTI coils that really perform well. Lets have a look at the features of this kit before my review later on.

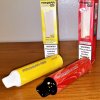
COLOR CHOICES

INCLUDED WITH THE KIT

SPECIFICATIONS AND PARAMETERS


FEATURES
RUGGED BUILD YET VERY COMFORTABLE

COMPACT SIZE

EASY TO OPERATE

NEW TANK

NEW GTI COILS

LEAK RESISTANT

SMOOTH AIRFLOW


EXPLODED VIEW

UNBOXING AND FIRST IMPRESSIONS
One thing that Vaporsesso usually does with their kits is make the first impression of the device look great and they continued with the Target 100 Kit, the device, tank with a protective shipping cover ( not shown ) incidentally Target 100 uses straight glass instead of the bubble glass used on the Target 200 , spare straight glass tube with extra O-rings inside it, 2nd 0.4Ω mesh coil and the braided type-c charge cord all tucked in their own compartment within the box, all your paper documents are tucked in a nice cardboard envelope. The 18650 battery adaptor is pre-installed inside the device.
The first thing that I noticed was the fabric on the device that is hard to describe, it's a braided fabric that has a comfortable feel to it and wraps around to the back of the device on both sides to the middle portion where they are separated by a metal bar that runs from top to bottom with Vaporesso engraved on it. The 2nd thing that stood out to me was how compact it is, it's also very lightweight, and the 3rd thing I noticed was the 510 platform on top of the top plate, I really wish that Vaporesso would stop using this platform on devices for 2 reasons # 1 it limits the size of your atomizer to the size of the 510 platform , # 2 it detracts from the style on the device. A flush fit would have been a better choice to use, maybe the internals of the device prevented it from being a flush fit.


Getting back to the fabric that wraps the device I have a hard time trying to describe it for you, it's soft but grippy because of the braids within, there is some cushion feel to it but very little. I was sent the gunmetal and Red color and really like the way both colors contrast with each other and pull together a winning look for the device. Vaporesso really did a fantastic on the attractive look of the Target 100, even the back of the device looks great with Vaporesso deep engraving on the metal bar that separates the fabric.


The battery is loaded into the device via a bottom battery door that is very flimsy when the device has no battery inside but once a battery is installed it is rock solid, you actually push up a bit when closing the door then slide it shut for a secure closure. Axon chip as well as Target 100 is branded on the door.

Battery polarity is only marked with a minus symbol on the door, no positive marking or symbol inside the battery tube, if using a 21700 battery pull the 18650 adaptor out of the tube before installing the battery.


iTANK
We now come to the new iTank that has a new coil lineup as well, 0.2Ω mesh, 0.4Ω mesh and coming soon 0.15Ω mesh and others. This is a 5ml tank with straight glass, I am glad that Vaporesso decided against using the bubble glass that's in the Target 200 kit , coils are a push & pull type with no flat spots that need to be lined up.


The iTank is a top fill tank that uses a swivel out top cap that is very secure when put back in place for vaping, it actually clicks into place when closed , I have not had any unwanted openings while it was in my pocket. If using a 100ml bottle to fill the tank you will have to remove the drip tip in order to get the bottle stem fully inside the self sealing fill membrane. You will notice a arrow underneath the Vaporesso name that is where the top cap needs to be pushed in to open for filling. Always prime your coil and let sit for 5 min before first vaping it. This is a very simple easy Sub-Tank with no mess or fuss. By the way this is a 510 drip tip and it's comfortable to use. The iTank has 3 airflow intake slots and that makes it very airy fully open but closing the slots halfway restricts the airflow to a very nice DL vape that's half as airy, closing down to a 1/4 gives a great RDL vape. Airflow is smooth at any setting that's used.

The iTaste Tank ships with the GTI 0.2Ω mesh coil that's rated for 60-75 watts pre-installed, the 2nd GTI coil is a 0.4Ω mesh rated for 50-60 watts. I will say that the mod is usually the star of the show with kits but this iTank is really very good and the GTI coils perform great giving great flavor with thick clouds of vapor also.
As many of you know I like a warmer vape and the 0.2 is more my speed but using the 0.4 was a treat as well, I must be gravitating to liking a cooler vape as well as my normal warm one because I really enjoy both coils.

The Target 100 device has no settings for TC use but does have many power modes to choose from and they are Vaporesso's F(t) mode, PUL - pulse mode, VW- variable wattage, Bypass, in the DIY section of the second sub-menu there is a further way to tweek VW with 3 more choices of Soft, Normal or Hard setting for wattage mode. There is a Smart setting as well.
There are pre-set display screen colors for different power modes when activated. Power mode colors are listed below, the smart feature when activated will appear above ohms. The display screen is very bright and vivid with easy to read fonts, the wattage font is very large but I would have liked it shrunk down a bit while increasing the size of the other fonts.
POWER MODE COLORS
* F(t) - Green
* Pulse - Red
* Wattage - ( Soft ) - Red
* Wattage - ( Normal ) - Blue
* Wattage - ( Hard ) - Red
* Bypass - ( Red )

MAIN MENU
* ON/OFF - 5 Presses Of The Fire Button
* LOCK/UNLOCK WATTAGE - 3 Quick Presses Of The Fire Button
* CHANGE POWER MODES - Long Press The Middle bottom Menu Button
Once Flashing Press Either Adjustment Button to Move
* SUB-MENU - 3 Quick Presses Of The Menu Button Brings You To The Sub-Menu
Once There Either Adjustment Button Moves You Along To Your Desired Setting
PROS - TARGET 100 MOD
* Attractive
* Compact Size For A SINGLE 21700 Device
* Comfortable
* No Sharp Edges
* Easy Menu System To Navigate
* Multi-Colored Display Screen
* Flawless Performance
* Fast Response Time
* Solid Build Quality
* Type-C With 2A Charging
* Axon Chip
CONS - TARGET 100 MOD
* Raised 510 Platform
* Font Size Should Be Larger / Wattage Size Font Should Be Smaller
( EQUAL FONT SIZE )
PROS - iTANK
* 5mm Capacity
* Top Fill
* Comfortable Drip Tip
* Great performing GTI Coils
* Great Flavor
* Thick Vapor Production
* Smooth Airflow On Any Setting
CONS - iTANK
* Using 100ml Bottles Drip Tip Must Be Removed When Filling
USING THE VAPORESSO 200 KIT
First thing that I want to mention is the compact size of this device, I am in the construction industry and started using a single 18650 mod from another manufacturer that I reviewed a few years back that was built to be abused and take a beating, I wont mention the device or manufacturer but I'm sure you know which one I'm talking about, when I took the Target 100 out of the box and set it down on my desk the mod I just mentioned was next to it and the Target 100 with a 21700 battery is actually smaller in size.
I really like the looks of the device that was sent to me with the Red and Grey contrasting colors coming together nicely, I really like the deep engraving down the back of the device, it gives it a bold look.
After my first look over I set the device down on the desk and heard something that clang like it wasn't closed completely, the noise came from the battery door. With no battery inside the device the door has a lot of play to it and that worried me but it's like that for a reason, once a battery is installed you have to push up with the door to slide it over to latch shut, once the door is shut it's rock solid.
Vaporesso is using a braided fabric on the mod that is hard to describe, it's soft and grippy while feeling tough at the same time and it's water resistant according to Vaporesso.
I really like the Axon chip inside the device because of smooth power delivery, power mode choices and easy menu to navigate through. One thing I wish will be changed in the next mod is the size difference of the fonts, the wattage font should be scaled down and the other fonts scaled up, sometimes it's a little hard to see the smaller fonts with aging eyes.
Having reviewed many Vaporesso devices I am familiar with their F(t) mode and really like it and I can taste a difference using it over wattage mode, some people can't tell a difference but I can and prefer it over straight wattage mode.
There are 5 different power modes to choose from but no TC modes, I know some people do use TC but I don't know of any personally.
I really hope that Vaporesso stops using the raised 510 platform on any new devices because it's really the only thing that I dislike with the device.
The new iTank is a very nice tank with a 5ml capacity with the straight glass, as far as the new GTI coils goes I think they are great coils and definite winners in my book, both have performed very well giving a saturated vape with a abundance of vapor.
I think Vaporesso did a fantastic job with both the device and tank. Battery management is really good as well especially when using the 0.4Ω coil.
I would like to thank Sue and Healthcabin for providing the Target 200 kit for the purpose of my review and I hope all your questions were answered concerning the Target 100 Kit.
THANK YOU
BIGBOB2322
COLOR CHOICES
INCLUDED WITH THE KIT
SPECIFICATIONS AND PARAMETERS
FEATURES
- Wattage Range: 5 - 100W
- Resistance Range: 0.03 - 5.0ohm
- Output Mode: VW / Pulse / F(t)
- Compact yet Versatile Box Mod
- Single 18650/20700/21700 Battery (Sold Separately)
- Advanced AXON Chipset
- Intuitive Firing Button
- 0.96 Inch TFT Color Screen
- Water-Resistant Braid
- Durable Zinc-Alloy Construction
- Bottom Hinged Battery Door
- 510 Connection
- Type-C Fast Charging
- Short Circuit Protection
- Burn Protection
- No Load Protection
- Overtime Protection
- Low Resistance Protection
- Low Power Protection
- Overcharge Protection
- ESD Circuit Protection
- Pass Through Protection
RUGGED BUILD YET VERY COMFORTABLE
COMPACT SIZE
EASY TO OPERATE
NEW TANK
NEW GTI COILS
LEAK RESISTANT
SMOOTH AIRFLOW
EXPLODED VIEW
UNBOXING AND FIRST IMPRESSIONS
One thing that Vaporsesso usually does with their kits is make the first impression of the device look great and they continued with the Target 100 Kit, the device, tank with a protective shipping cover ( not shown ) incidentally Target 100 uses straight glass instead of the bubble glass used on the Target 200 , spare straight glass tube with extra O-rings inside it, 2nd 0.4Ω mesh coil and the braided type-c charge cord all tucked in their own compartment within the box, all your paper documents are tucked in a nice cardboard envelope. The 18650 battery adaptor is pre-installed inside the device.
The first thing that I noticed was the fabric on the device that is hard to describe, it's a braided fabric that has a comfortable feel to it and wraps around to the back of the device on both sides to the middle portion where they are separated by a metal bar that runs from top to bottom with Vaporesso engraved on it. The 2nd thing that stood out to me was how compact it is, it's also very lightweight, and the 3rd thing I noticed was the 510 platform on top of the top plate, I really wish that Vaporesso would stop using this platform on devices for 2 reasons # 1 it limits the size of your atomizer to the size of the 510 platform , # 2 it detracts from the style on the device. A flush fit would have been a better choice to use, maybe the internals of the device prevented it from being a flush fit.
Getting back to the fabric that wraps the device I have a hard time trying to describe it for you, it's soft but grippy because of the braids within, there is some cushion feel to it but very little. I was sent the gunmetal and Red color and really like the way both colors contrast with each other and pull together a winning look for the device. Vaporesso really did a fantastic on the attractive look of the Target 100, even the back of the device looks great with Vaporesso deep engraving on the metal bar that separates the fabric.
The battery is loaded into the device via a bottom battery door that is very flimsy when the device has no battery inside but once a battery is installed it is rock solid, you actually push up a bit when closing the door then slide it shut for a secure closure. Axon chip as well as Target 100 is branded on the door.
Battery polarity is only marked with a minus symbol on the door, no positive marking or symbol inside the battery tube, if using a 21700 battery pull the 18650 adaptor out of the tube before installing the battery.
iTANK
We now come to the new iTank that has a new coil lineup as well, 0.2Ω mesh, 0.4Ω mesh and coming soon 0.15Ω mesh and others. This is a 5ml tank with straight glass, I am glad that Vaporesso decided against using the bubble glass that's in the Target 200 kit , coils are a push & pull type with no flat spots that need to be lined up.
The iTank is a top fill tank that uses a swivel out top cap that is very secure when put back in place for vaping, it actually clicks into place when closed , I have not had any unwanted openings while it was in my pocket. If using a 100ml bottle to fill the tank you will have to remove the drip tip in order to get the bottle stem fully inside the self sealing fill membrane. You will notice a arrow underneath the Vaporesso name that is where the top cap needs to be pushed in to open for filling. Always prime your coil and let sit for 5 min before first vaping it. This is a very simple easy Sub-Tank with no mess or fuss. By the way this is a 510 drip tip and it's comfortable to use. The iTank has 3 airflow intake slots and that makes it very airy fully open but closing the slots halfway restricts the airflow to a very nice DL vape that's half as airy, closing down to a 1/4 gives a great RDL vape. Airflow is smooth at any setting that's used.
The iTaste Tank ships with the GTI 0.2Ω mesh coil that's rated for 60-75 watts pre-installed, the 2nd GTI coil is a 0.4Ω mesh rated for 50-60 watts. I will say that the mod is usually the star of the show with kits but this iTank is really very good and the GTI coils perform great giving great flavor with thick clouds of vapor also.
As many of you know I like a warmer vape and the 0.2 is more my speed but using the 0.4 was a treat as well, I must be gravitating to liking a cooler vape as well as my normal warm one because I really enjoy both coils.
The Target 100 device has no settings for TC use but does have many power modes to choose from and they are Vaporesso's F(t) mode, PUL - pulse mode, VW- variable wattage, Bypass, in the DIY section of the second sub-menu there is a further way to tweek VW with 3 more choices of Soft, Normal or Hard setting for wattage mode. There is a Smart setting as well.
There are pre-set display screen colors for different power modes when activated. Power mode colors are listed below, the smart feature when activated will appear above ohms. The display screen is very bright and vivid with easy to read fonts, the wattage font is very large but I would have liked it shrunk down a bit while increasing the size of the other fonts.
POWER MODE COLORS
* F(t) - Green
* Pulse - Red
* Wattage - ( Soft ) - Red
* Wattage - ( Normal ) - Blue
* Wattage - ( Hard ) - Red
* Bypass - ( Red )
MAIN MENU
* ON/OFF - 5 Presses Of The Fire Button
* LOCK/UNLOCK WATTAGE - 3 Quick Presses Of The Fire Button
* CHANGE POWER MODES - Long Press The Middle bottom Menu Button
Once Flashing Press Either Adjustment Button to Move
* SUB-MENU - 3 Quick Presses Of The Menu Button Brings You To The Sub-Menu
Once There Either Adjustment Button Moves You Along To Your Desired Setting
PROS - TARGET 100 MOD
* Attractive
* Compact Size For A SINGLE 21700 Device
* Comfortable
* No Sharp Edges
* Easy Menu System To Navigate
* Multi-Colored Display Screen
* Flawless Performance
* Fast Response Time
* Solid Build Quality
* Type-C With 2A Charging
* Axon Chip
CONS - TARGET 100 MOD
* Raised 510 Platform
* Font Size Should Be Larger / Wattage Size Font Should Be Smaller
( EQUAL FONT SIZE )
PROS - iTANK
* 5mm Capacity
* Top Fill
* Comfortable Drip Tip
* Great performing GTI Coils
* Great Flavor
* Thick Vapor Production
* Smooth Airflow On Any Setting
CONS - iTANK
* Using 100ml Bottles Drip Tip Must Be Removed When Filling
USING THE VAPORESSO 200 KIT
First thing that I want to mention is the compact size of this device, I am in the construction industry and started using a single 18650 mod from another manufacturer that I reviewed a few years back that was built to be abused and take a beating, I wont mention the device or manufacturer but I'm sure you know which one I'm talking about, when I took the Target 100 out of the box and set it down on my desk the mod I just mentioned was next to it and the Target 100 with a 21700 battery is actually smaller in size.
I really like the looks of the device that was sent to me with the Red and Grey contrasting colors coming together nicely, I really like the deep engraving down the back of the device, it gives it a bold look.
After my first look over I set the device down on the desk and heard something that clang like it wasn't closed completely, the noise came from the battery door. With no battery inside the device the door has a lot of play to it and that worried me but it's like that for a reason, once a battery is installed you have to push up with the door to slide it over to latch shut, once the door is shut it's rock solid.
Vaporesso is using a braided fabric on the mod that is hard to describe, it's soft and grippy while feeling tough at the same time and it's water resistant according to Vaporesso.
I really like the Axon chip inside the device because of smooth power delivery, power mode choices and easy menu to navigate through. One thing I wish will be changed in the next mod is the size difference of the fonts, the wattage font should be scaled down and the other fonts scaled up, sometimes it's a little hard to see the smaller fonts with aging eyes.
Having reviewed many Vaporesso devices I am familiar with their F(t) mode and really like it and I can taste a difference using it over wattage mode, some people can't tell a difference but I can and prefer it over straight wattage mode.
There are 5 different power modes to choose from but no TC modes, I know some people do use TC but I don't know of any personally.
I really hope that Vaporesso stops using the raised 510 platform on any new devices because it's really the only thing that I dislike with the device.
The new iTank is a very nice tank with a 5ml capacity with the straight glass, as far as the new GTI coils goes I think they are great coils and definite winners in my book, both have performed very well giving a saturated vape with a abundance of vapor.
I think Vaporesso did a fantastic job with both the device and tank. Battery management is really good as well especially when using the 0.4Ω coil.
I would like to thank Sue and Healthcabin for providing the Target 200 kit for the purpose of my review and I hope all your questions were answered concerning the Target 100 Kit.
THANK YOU
BIGBOB2322