Good morning crew, Russ. A fly reel drag is definitely one possible alternative. And no you're not. You're one savvy vaper dude.
Look, I started working out concepts and prototypes in the first few months after I quit before I started posting on ECF Aug 2-13. But all of these proved too complicated to just get folks quickly up and running, past the misery to success. There had to be a simpler way to apply the principles of tension and there were. I was just avoiding the obvious.
The cheap Shakespeare reel was one of the options I suggested to Bill's Magic Vapor sometime just after Feb 3 of last year as he was putting together his prototype for this
outstanding mechanized tensioned jig
.the one that
Sedge was talking about here. It was suggested as a possible solution to account for variations in tension and how important this was to uniform performance.
And I did mention it to you with my post
Of fly reels and tension coils
responding to
mnementh666, a new poster who apparently learned to do an advanced search
perhaps realizing that...
To give credit to perhaps the
first posting of a t.m.c. jig concept we need to go back to the previous Dec '13. To a fella long gone and missed on the ProtankMicro thread,
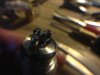
Jellyfish. He and I were talkin' off-channel about about this very issue of keeping tension constant and
variable and static drag as I mentioned alternatives to pinning the wire in a vise as per his sketch.
I was kinda leading him when I answered him overnight...
The gist of it is, I didn't want to build a jig, or puck or any device to do it. There's plenty of us around to make
applications of tension. My goal has been to get people to a proper electrical wind and a dependable vape
A.S.A.P. If for some that means a jig, I'm down.
But the uniformity of tension is just as important as the geometrical symmetry
whether we realize we're using these two principles or not each and every time we make a coil, any kind of coil.
The issue is whether we use these principles effectively and successfully.
Good luck all.
")