Possible Solution to 901 fitting to avoid battery destruction

Status
Not open for further replies.

benjamin

Full Member
ECF Veteran
Dec 1, 2008
40
0
North Carolina
i'm curious about that. it says w/switch....
guessing the switch part means that it diverts power when it's male counterpart is plugged in. i.e. the device is running on battery until plugged in then power is diverted to that power source.

as long as the outer threaded part is thin enough that is does not come in contact w/ the center part of the atomizer connection and the pin in the center (i'm assuming there is inside?) does contact said center part, it looks like it would work nicely.

ack! someone help clarify, i'm throwing out guesses....
 

nicowolf

Ultra Member
ECF Veteran
Nov 9, 2008
1,370
15
52
near Akron, OH, USA
Their pic is a lot prettier than mine, but mine has a little more detail of the important parts, so here goes

View attachment 563

View attachment 564

View attachment 565

The first photo is the end that would go to the atomizer.
The second is opposite the side shown in the link.
The third is the end where the wires would go.

The dark spot in the center of the third photo is some strange membrane. I can stick a wire in it, but the wire won't go through to the center pin. It is blocked almost immediately. When I pull the wire out, it reseals itself. I have found that if I hook up the atomizer, then connect a battery pack with the negative connected to the contact you can see in photo 2 - the one without a soldering tab - and the positive to the shortest of the soldering tabs adjacent, my battery pack gets real hot real quick. Nothing happens with any other combination I have tried, even reversing this.
 

benjamin

Full Member
ECF Veteran
Dec 1, 2008
40
0
North Carolina
ok, did a search. i imagine it looks something like this. if so it may be easy to use if the atomizer sets properly. in that case just need to check continuity of the leads to know which two to use..
 

Attachments

  • 2112.jpg
    2112.jpg
    15.6 KB · Views: 374

nicowolf

Ultra Member
ECF Veteran
Nov 9, 2008
1,370
15
52
near Akron, OH, USA
ok, did a search. i imagine it looks something like this. if so it may be easy to use if the atomizer sets properly. in that case just need to check continuity of the leads to know which two to use..


Ok, this is where I get lost:confused::p. Which leads do I use? The ones that fry my batteries or the ones that do nothing?:confused:
 

Bastage

Super Member
ECF Veteran
Oct 2, 2008
427
1
Houston, TX
Ok, this is where I get lost:confused::p. Which leads do I use? The ones that fry my batteries or the ones that do nothing?:confused:

ack! be careful with that. you need to ohm out the center contact on the connector and see which lead it goes to on the bottom of the connector, then see which lead is ground. Make sure the center pin isn't shorted to the ground pin. The center pin needs to be connected to 3.7-5v positive and the outer casing needs to go to negative lead on the battery. hook it up like that then measure the voltage from the center pin to the outside casing. If you have 3.7-5v the connector is working. That doesn't ensure the atomizer will fit properly onto the + and - pins though. Once you screw in the aromizer quickly test for 3-5 seconds then unscrew it otherwise you may burn the atomizer up. If your battery got really hot something is likely shorted and that battery could be a goner.
 

nicowolf

Ultra Member
ECF Veteran
Nov 9, 2008
1,370
15
52
near Akron, OH, USA
ack! be careful with that. you need to ohm out the center contact on the connector and see which lead it goes to on the bottom of the connector, then see which lead is ground. Make sure the center pin isn't shorted to the ground pin. The center pin needs to be connected to 3.7-5v positive and the outer casing needs to go to negative lead on the battery. hook it up like that then measure the voltage from the center pin to the outside casing. If you have 3.7-5v the connector is working. That doesn't ensure the atomizer will fit properly onto the + and - pins though. Once you screw in the aromizer quickly test for 3-5 seconds then unscrew it otherwise you may burn the atomizer up. If your battery got really hot something is likely shorted and that battery could be a goner.

Yeah, I am soooooo outta my league here. I have nothing in my toolbox to test electric - except maybe enough stupidity play with electric to begin with (yep, that was painful, musta been a connection there somewhere)

Well, if any of you guys who know this stuff get the urge, at least there is something out there that will fit physically - electrically, I dunno.

I gotta get some sleep now, maybe I'll be inclined to endure some more pain tomorrow.
 

nicowolf

Ultra Member
ECF Veteran
Nov 9, 2008
1,370
15
52
near Akron, OH, USA
you need to ohm out the center contact on the connector and see which lead it goes to on the bottom of the connector, then see which lead is ground.

Ok, Bastage. I will calmly sit and say a few ohms to my screw in connector thingy. I know this will leave me grounded and centered, but what will it do for my connector thingy?
 

MitchV4

Full Member
Dec 31, 2008
12
0
New England, USA
Picked one up today to play around with. It does fit the 901 atm perfectly, thread-wise. Couple of observations, so far:


  • The threaded portion is none too long, so if you were going to use the supplied washer/nut to secure it through a cover-plate (as in the "Magnum"), you wouldn't have a lot of threading sticking out to attach the atm to.
  • In addition, the center pole is recessed within the outer body. It will contact the center of the atm if you remove the nut and washer, but doesn't appear to if the washer/nut is in place....that could be a more significant problem if you wanted to use the nut/washer to mount it.
  • The rounded "nose" of the center pole effectively blocks the center hole of the atm if everything is snugged up. I think the hole in the atm is to allow airflow through the battery in a regular e-cig to activate the air-pressure sensitive switching that's contained in the battery (there's a corresponding hole in a regular battery), so that may be a non-issue for a flashlight-based mod. You could probably get around this by bending the center pole slightly to the side if you wanted to. I didn't notice any significant reduction in air-flow with the atm threaded in place on the connector, btw.
This could be a very nice component to use, with a little 'tweaking'. Rather that use the supplied washer/nut, I'm thinking that an oversize hole through the cover plate which would allow the atm to fully seat on the center pole would be a good approach. Since the connector has a larger diameter base plate (to allow panel mounting), a healthy fillet of 'J-B Weld' on the back side of the connector/cover plate might do to keep everything together. If the threaded section was a bit longer and the center pole was flush with the top, this would be perfect....oh well! :)

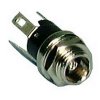
Oh, almost forgot. The lead diagram is on the back of the little card-pack it was packaged in. If you take the nut off, you can see which lead is connected to the casing. The other two leads are to the center pole. One is insulated from the case, the other is not. Use the insulated one for your center connection - it's the one attached to the plate all the way on the back end of the connector.

Thanks for pointing this one out, Nico!
 
Status
Not open for further replies.

Users who are viewing this thread